_____________________________________________________Hi I Am Momma readers! I am thrilled to be here today.
Cheri’s blog is full of wonderful creative inspiration for crafting, for motherhood, and for life. So I’m pretty honored to be her guest today!
but this is my version of a:
7. Last step! 🙂 You can just leave it as is, or add buttons. Remember what I said about increasing your stitch length? Well…I should have done it with my button holer too. I didn’t with this yellow cardigan and the button holer kept breaking my thread, stretching my fabric and ended up giving me less than desirable results.
I increased my stitch length as much as I could with this purple cardigan and achieved MUCH better results. This is also a thick knit shirt, instead of a sweater knit, so that might have helped too.
Don’t know how to use a button holer? This tutorial from MADE or this one from Grosgrain can help you. I learned from the Grosgrain one because I have a Brother sewing machine like Kathleen.
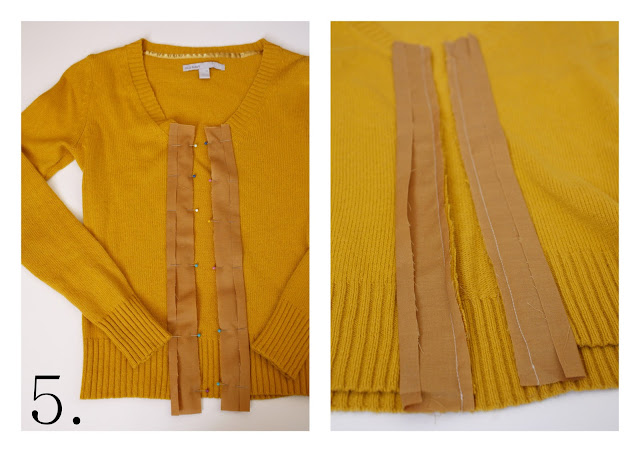
At step 5, just sandwich the elastic in between the fabric strip and sweater and sew it in. Make sure to go back and forth over it a few times to strengthen the seam where the toggles are. It can be fussy to get the elastic sewn in initially, but with a little patience it turns out quite nicely.
…instead of of three sweaters/shirts I was going to give away.
Bonus…I don’t have to worry about them fitting over my ever growing belly either. 🙂
Thanks for having me over Cheri!
Happy Re-fashioning!


What a great tutorial — thank you so much for sharing. This may have to be a project for me this weekend!
You are so creative! Thanks for posting this cool tutorial.
what a fantastic idea, love it! Can't wait to try it!
you look fantastic! these are amazing. i just cleaned out my closet, and saved a few sweaters just to do this. thanks so much for the inspiration!!!
Love these so much! You look great in them!
Each one is great with in its self! I especially like the white one with toggled buttons.
These are really cute. I loved wearing my cardigans like that when I was pregnant too 🙂
Great idea! I love all the versions, and have some perfect sweaters in my closet to make my own – yay!
I love this!! Thanks for helping me give new life to old sweaters…and an outfit to wear to thanksgiving!! http://buzzmills.typepad.com/blog/2011/11/giving-thanks-to-clothing-redos.html
I’m so doing this!
I just wish I found this before making a stuffed animal out of a too small cashmere sweater:(
can you tell i'm super behind on blogs? :). I love this post. I remember being wowed when I saw it on I am Momma. Very creative and you look totally adorable.
Thanks for this tutorial! I needed a cardigan, and now I have one fewer sweater I never wear. (And I like the new cardigan better than any I've found in the store so far!) Thanks again!
Hi Delia,
I have just been inspired by this blog post and have done a similar thing with one of my v-neck jumpers…such an incredible change! It was destined for the charity shop, now has a new lease of life!
I was in a motorcycle accident last week and have been trawling the internet for cheap ways to keep myself occupied in my sewing room whilst I'm off work. This was
Hi Delia,
Thank you so much for your tutorial. I have thought about doing this with my sweaters but didnt know how to go about doing it. Thank you so much for the help!
We love the cardigans and also would like to know how to make the navy blue dress that you wear with the yellow cardigan please?
Thank you
WSP
hi! Sorry, I made that a long time ago and just sort of winged it. Wish I made a tutorial, but unfortunately did not.