

Today I’m going to share a project that I wasn’t really expecting to make in the first place. I was sewing, I think my 7th pair of leggings – I want to get a few pairs done for each size through 9 months – when this idea struck me.

It renewed my motivation to sew, which was waning with my legging sewing marathon.
I call them…

They are heavily inspired by some of my favorite fruits.


Now…this was a “let me take pictures as I go and see what happens” kind of project. Actually, half of my projects are, to be honest. 🙂
So I don’t have a pattern, but I’ll share what I did and some things I might do differently next time.

I grabbed some old T-shirts…I seriously have two bins full of just old knit T-shirts stored under our bed. I almost never throw a T-shirt away because it is almost always useful! 🙂
Then I made up this hat pattern using a Gerber baby beanie. You cut it on the fold.It measures 3 1/2 inches wide, 7 inches total as shown on my pattern {ignore the 6 inches bit – I’ll explain in a minute}, and about 7 1/2 inches tall.
Make sure you cut a triangular notch at the top about an inch or so down and just 1/8-1/4 inch at the widest part.

I also put cut two on there…no no, cut four! It’s going to be lined.
So this should fit a little bit older baby, maybe few weeks old to about 3 months. I intended it for a newborn but messed up on my math.
If you want a newborn hat, make the half pattern 3 1/4 inches wide, or 6 1/2 inches total { with a 12 inch finished circumference after it’s sewn and of course adjust depending on the stretch of your knit}.

My belly keeps getting in pictures lately. 🙂

Sew the notch closed.

Cut some fruit stems and leaves if you desire.
Sew the leaves together if you are using knit or it will curl up too much.

Pin your hat pieces together, sandwiching the stem and leaves in, and sew. I use a 3.5 stitch length with knits. It sews much nicer and more evenly.

For the inside liner pieces, you want to leave a little space open and unsewn.

Now with right sides facing pin the two hats together.

Turn it right side out through that hole you left open in the liner. Sew the liner’s hole closed by folding in the raw edges and sewing it close to the edge with a straight stitch.

Push the liner up into the outer shell and you’re done! If you want more of a cuff, make your pieces a bit longer….probably more like 9 inches.

I made my strawberry hat a bit longer…

I also cut the leaves with pinking shears because the leaves on my strawberry inspiration had leaves with bumpy-ish edges.

I free-hand painted the seeds on with fabric paint. It’s got a messy look to it, but it was faster than embroidering the seeds on, or freezer paper stenciling them on.

And now…my favorite and probably the quirkiest…the pineapple.
I made this hat differently because I wanted the leaves to stand up more.

First…I focused on creating the pineapple texture for the body of my hat:


I cut two rectangles of fabric 14 inches by 8 inches. One yellow and one brown/tan.

I quilted the two pieces together with a cross hatch design. This does not have to be perfect. Any imperfections will go nicely with the texture step we do next, which is to snip the yellow layer with an X. Every box needs to be snipped. Be careful not to catch the brown layer with your scissors.

Then wash it and dry it. The jersey knit curls up and gives you the cool pineapple rind effect.
Now get another brown fabric rectangle that is 14 x 8 inches. This will be your liner piece.

Fold both pieces in half, right sides together. Sew up the short sides with a 1/2 inch seam allowance.
I use a half inch seam allowance for pretty much all my seams for this hat because of the fussy nature of the bumpy fabric I created. I just wanted to be sure to catch all layers and such.
Turn the liner piece RIGHT side out and slide it into the outer piece {which is still wrong side out}…so you have right sides facing.

Pin around one end, I used a 1/2 inch seam allowance, and sew. Pull it all right sides out.
Push the liner into the main hat piece.

Now for the leaves. Cut the sleeve off a green t-shirt…about 4-5 inches long. I like to use the existing sleeve because the thread on the inside matches the shirt and won’t be as noticeable than if I sewed it up one side with a thread that just kind of matches.
You also need a one inch strip of sleeve that you will use in a minute.
Slide the green sleeve leaves piece over the main hat body piece, with right sides facing.

Pin and sew all the way around with a 1/2 inch seam allowance. Pull it right side out.
Cut out some triangles about 1 1/2 inches above the seam line where the leaves and main hat body meet.
Then take that one inch strip of sleeve you cut and set aside earlier. Tie it close to the base of the “leaves” with a square knot, leaving about an inch of green fabric as part of the hat. Cut off the excess at an angle so it looks like one of the other leaves.
The leaves will curl up a bit in the wash. If you don’t want that, use a material other than knit or lay it flat to dry instead of putting it in the dryer after each wash.

And you’re done! Cute right?
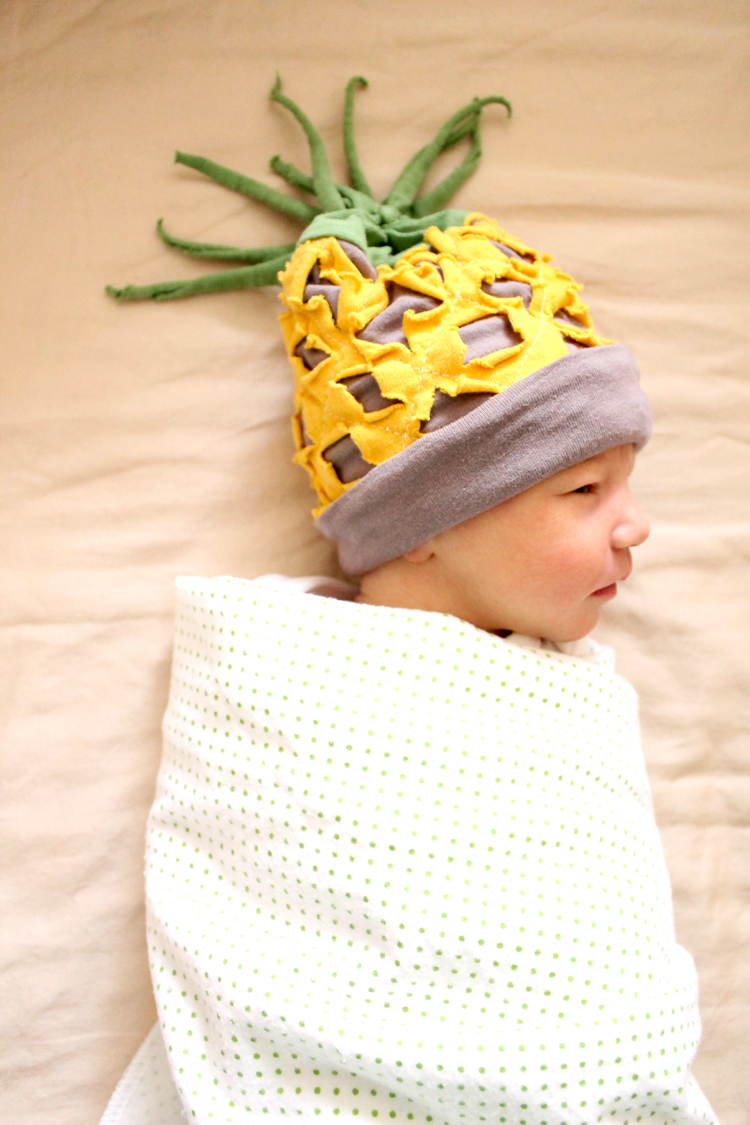
Edited to add a cute pic of my baby wearing the pineapple hat:
um…I giggled when I saw these! I love the pineapple especially. How fun. We grow a garden, and it would be fun to make a butternut squash or something else that we grow! 🙂 A tomato would be cute, especially on red-faced angry days. 🙂 Thanks so much for sharing, these made my day!
You are a genius! They are so ridiculously cute. This one is definitely going to make the Pinterest rounds.
Love these hats! So creative! The pineapple hat is my fav…love the texture.
Love these. The pineapple texture is genius.
These are so sweet. Already pinned. It's a good thing my baby's not due until June; I need time to get through all of these cute projects!
You are so creative! Great ideas!
These are adorable Delia. I second everyone's comment about the pineapple one. I LOVE that texture. Very clever thinking lady!
Cheri
Aw. These are so cute! However did you think of the pineapple texture idea? Inspiring. I can't wait to see these on a little baby. 🙂
I love these hats! Ingenious. Thanks for sharing your creativity!
What fun!! Pineapple hat = amazing.
That pineapple hat is so cute! I made hats very similar to these before my Eloise was born, here's my version I called Fruit Salad Baby hats: http://smashedpeasandcarrots.blogspot.com/2010/06/fruit-salad-baby-hats-tutorial.html
Love these! I need to make some for my 5 month old. he would look so cute : ) thanks for sharing!
loving these!
Wow!!! these are Adorable!!!!! And soooo creative! Love them!!!
Ahh! These are inspired! Love. So pinning this project for the day one of my siblings make me an auntie 🙂
Oh my word. Those are the sweetest hats ever! The pineapple hat almost did me in. Ooooo the cuteness. I need to score me some thrifted t-shirts!
These are just too cute! You are incredibly talented!!!
the cuteness factor is off the charts. wow. what sweet hats. love them. 🙂
Oh my goodness Delia, these hats are adorable!! I heart that pineapple hat especially 🙂
So fun! You are brilliant!
Aaaahhh! The cuteness is killing me!
Are you kidding me?! I would wear those….and I’m 36! Fantastic!………c.
These are too cute for words!!
i’m so glad this idea struck you!! these are soooooooo adorable!!!
These hats are wonderful! Will be adding to my pinterest :).
I think they turned out really cute 🙂
Super cute hats!!
I was given the Versatile Blogger Award and I would like to pass the Award on to you. There are details on my blog that explain it all. http://shellesplayschool.wordpress.com/ I hope you will play along!
Happy blogging!
Those are so super cute! So creative and fun. Your little girl is going to be so cute in those hats!
very clever and sweet!
Oh how cute! I love them! Very creative, Delia!
I just love those hats – you are so creative! 🙂 Wonderful!
These are amazing!!!! I may try these out for my girls, who are older. Great job 🙂
Very cute! Such a fun idea! I did a pumpkin one for my son in the fall and it was adorable!
too cute! you are so creative 🙂
that pineapple is awesome!! so creative, as usual!
oh, wow!!!you outdid yourself! they are so cute and fun, these hats!
Thanks for these, they are utterly fab and so easy. xx
Lovelly lovelly, kisses from Brazil! Tati.
SUCH a clever idea!! I can never manage to get any sewing done while I'm pregnant. Bravo!
I'm a new follower from little-loves.com. I love these hats and I'm going to a baby shower in March so I will definitely be trying the apple hat.
I loved these hats so much that I immediately set to work making some (http://sweetenedinspirations.wordpress.com/2012/02/02/fruity-hats/)! I've been needing last minute projects to stay busy until our baby arrives so I've been loving your nesting series so thanks a lot for all the great posts!!
Great!!! That will be one of my next projects!
These are TOO adorable. I want one..for me.
i featured these adorable little hats at my blog today!
http://www.kimboscrafts.blogspot.com
Wonderful! Your so creative! Thanks for sharing..
NO SE CUAL ME GUSTA MAS …
SON PRECIOSOS.
PERO EL ANANA ME ENCANTA.
SALUDITOS
IMPRESSIVE!!! What an awesome set of hats! I love the technique for the pineapple hat!
p.s. Love the baby bump sneaking into the photographs 🙂 That made me smile!
Thanks for sharing this awesome idea and tutorial! I was looking for some fabric hat tutorials for children to make for Craft Hope. Featured your tutorial on my blog just now: http://www.sillypearl.com/2012/02/five-fabric-hat-tutorials-for-kids.html
Thanks again! And congrats on your pregnancy!
Delia, how many times do I need to tell you that you are a serious GENIUS?!?!? These are, well, almost heart-stopping. How do you do it? Pinterest, here we come! I can’t wait for all of my friends to see what a genius you are. :o)
Hello Delia,
that’s what i made of your pineapple idea:
http://creation-fada.blogspot.com/2012/02/bilderratsel-zu-karneval.html
thank you for this!
kate
I can't believe how simple this seems. The first time I read it over, it seemed a LITTLE complicated. But then I read it a second time and it's so easy! I'm totally making this!
p.s. I've never really sewed anything in my life.
I just made two of the hats and they turned out really good. Your tutorial is great for beginner people like me.
I'm crazy over these! Wonderful tutorial. Can't wait to try these!
HI! I once made my Daughter an aviator-type hat that was pastel plaid -hence, my email name, lol- it was cute. But not as cute as these!! You are very talented, Delia!! Verrry cute!! -Stacey.
Thank you Stacey. I’m a plaid lover too. Who isn’t? 🙂