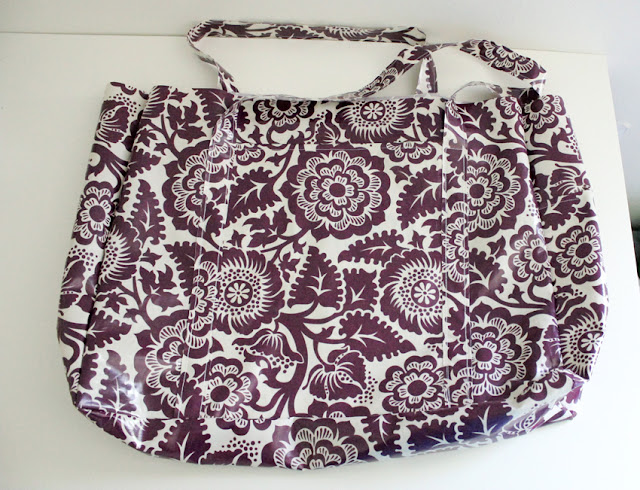
Okay…so it’s more of a tote than a purse but I couldn’t help alliterating.
Today, we’re sewing with laminated cotton.
Laminated cotton is much like it’s cousin, oil cloth, but it’s more pliable, thinner, and is only water proof on one side. It is what it’s name says it is. Cotton cloth with one side laminated.
This tote is made very much like my Let’s Go to the Park Bag. It has a liner, the bag is constructed pretty much in the same manner, but it has it’s big pockets on the outside.
I’ll show you why in a minute.
Materials
1 yard of laminated cotton; it should come in at least 58 inches wide, as you can see I used this pretty plum floral print from Joel Dewberry
3/4 yard of cotton fabric – this is the liner fabric.
Matching or coordinating thread
masking tape or scotch tape
Optional: fabric glue
Note: You can use more laminated cotton for the liner to make the bag completely waterproof. I didn’t because of the cost. Laminated cotton is pretty pricey.
1. Cut out your pieces.
Laminated cotton –
2 -21 x 16 inch rectangles (main bag pieces)
2 – 6 x 16 inch rectangles (short sides of the bag)
1 – 6 x 21 inch rectangle (base of the bag)
2 – 3 x 58 inch strips (straps)
*Use leftover pieces for pockets – one 11×28 inch pocket and one 6×26 inch pocket ***adjust this to what fabric you have leftover after you cut the bag pieces.
Cotton liner –
2 -21 x 16 inch rectangles (main bag pieces)
2 – 6 x 16 inch rectangles (short sides of the bag)
1 – 6 x 21 inch rectangle (base of the bag)
*Optional, cut a small pocket if desired.
2. Get out the tape.
Pinning laminated cotton can leave permanent holes. Instead, consider reaching for some masking tape to keep your pieces together.
You may also want to keep that tape handy for your presser foot. Laminated cotton can stick to your presser foot and make sewing tricky.
I watched this segment on a local Utah show about sewing with laminated cotton. Go here to check it out.
The DIY Dish girls featured in the segment suggest either buying a teflon presser foot, sewing with tissue paper on top, or adding some tape to the bottom of your existing presser foot. All great ideas.
I tried the tape method and it worked pretty well. I used masking tape which was fine. I might try scotch tape next time because it is smoother.
You also want to lengthen your stitch… I used a 4.5…and sew slow.
Try your best to sew it right the first time. Remember that once the needle goes into the laminated cotton, you will have permanent holes.
3. Let’s start with the straps.
Fold them in half and sew with a 1/4 inch seam allowance on both sides.
Trim off sides so you have a finished 1/8 inch seam allowance. It is easier to make the straps this way, than trying to sew an 1/8 inch seam allowance from the get go. It will also allow you to correct any flaws from shifting that make occur.
*One thing I wish I had done at this step is add a layer of interfacing to the straps. They are strong enough by themselves, but extra strength and stiffness from some interfacing would have been a nice touch.
4. Sew your pockets.
Fold your pockets in half, wrong sides together. Sew a line across the folded top.
Repeat this for the smaller pocket as well.
5. Sew the larger pocket and straps onto the main bag pieces.
Line your pocket up in the middle of one of the main bag pieces.
Lay one of the strap pieces on top of the pocket sides, encasing the raw edges into the straps. Tape everything in place.
Sew up the the straps following the original stitching from when you created them. Don’t worry about sewing right over the tape and stop about 3 inches from the top of the main bag piece.
Make sure you sew up both sides of the straps.
Remove the tape when you’re done.
Sew on the straps for the other main bag piece as well, but without the pocket.
6. Assemble the outer bag.
Sew on the side pieces. Remember to tape in the smaller side pocket before sewing.
Now install the base or bottom piece.
The corners can get tricky. Just try to keep everything as flat and even as possible.
Your outer bag is made! Turn it right side out. Almost done.
7. Assemble the liner.
Sew in a small pocket if desired.
Then sew it all together like you did the outer bag, sans straps and such.
8. Bring the outer bag and liner together.
*Optional: I like to add beads of fabric glue to the inside of the bottom and sides before inserting the liner. This helps keep the liner from shifting around.
 Fold the tops of the liner and outer bag into each other about 1 inch. Tape around the top perimeter of the bag.
Then sew close to the edge.
I experienced some stretching and shifting which I corrected with a small pleat at a corner seam in the bag. If the same thing happens to you, don’t worry. I can hardly tell it’s there when I use it.
After taking the bag for a test spin, I decided it also needed one more row of stitching which is a must. But you won’t see it in the following pictures.
Although the inside of the bag isn’t waterproof, you can be sure that this bag will keep water out. So when you set it down on the wet pool deck everything inside will be safe.
Still need a place to put wet stuff?
That’s what that pockets on the outside are for! Because you doubled them up, they are waterproof!
The side pocket is perfect little spot for a water bottle or maybe some sunscreen. And you don’t have to worry if it leaks!
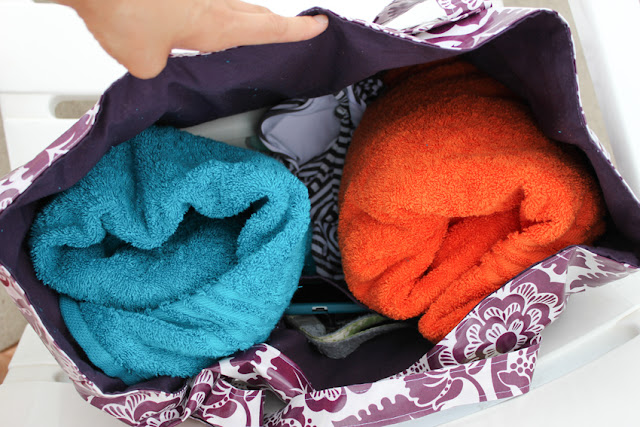
This bag is BIG. There is definitely room for at least one or two more towels in there.
That little inside pocket is great for keeping your phone and keys from getting lost in the abyss.
And now you have a bag all ready for the pool.
I hope you get to enjoy some sunshine today!
And be sure to swing by Kojodesigns for this adorable Indigo romper.


Great tutorial, thanks! I also love your phone case, where did you get it???
I've heard of oilcloth, but not laminated cotton, good to know! Great tutorial
I love it!!! I want to make one for me!!! 🙂 Thanks for sharing, Delia!!
i love that! good job!
Love! Great use of the laminated cotton!
Very nice. I like this bag. My sister likes purple so maybe if I find this fabric in the store I can make her one.
I'm not usually a bit fan of purple, but I LOVE this shade and that pattern! Fabulous tutorial!
This is perfect for the pool/beach! Where did you find the laminated cotton? We just have a Hobby Lobby in town and I have never seen this.
Thank-you for ANOTHER great tutorial!
X,
Kelly
I am totally loving your fabric!! Did you get at the quilt shop down the street from your house?
That bag is awesome! I love the waterproof pockets. Genius.
I was just thinking I needed a bigger bag for our swimming gear. I love it – especially the fabric.
This comment has been removed by the author.
We loved your tut so much we shared it with your readers at http://oilclothaddict.blogspot.com/2012/06/great-idea-pool-purse.html
Kelly
LOVE LOVE LOVE laminated cotton!Great tutorial; thanks for sharing!
I love all the details, like the phone/keys pocket, and the outer waterproof pockets. Lovely tote!
Love the bag! Where do you find laminated cotton? Online?
I love it! But me and my sewing machine don't get along too well, 🙂 do you have an etsy shop?