

I seriously love the fruit trend right now. It’s been all the rage this summer, but why not let it spill over into Fall in the costume arena?
 It would be a crime not to. Don’t you think? 😉
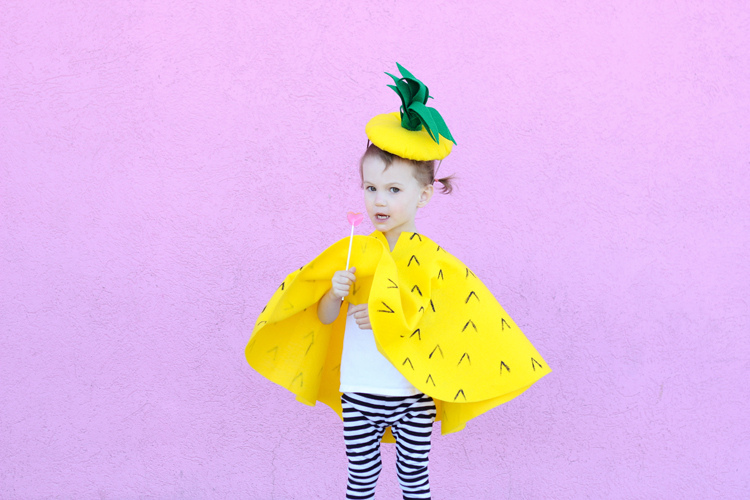
 I whipped up a couple of fruit-a-licious costumes for my daughter and get this…they are NO SEW!
 Well…the hat is mostly. Let me show you what I mean.
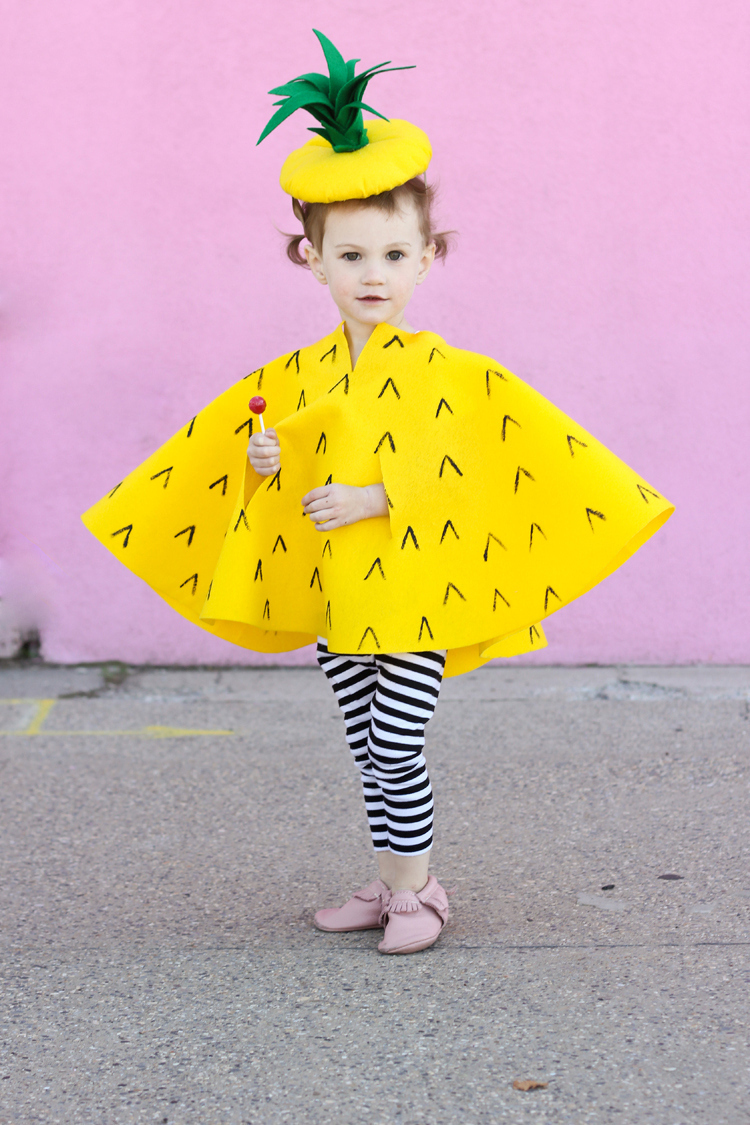
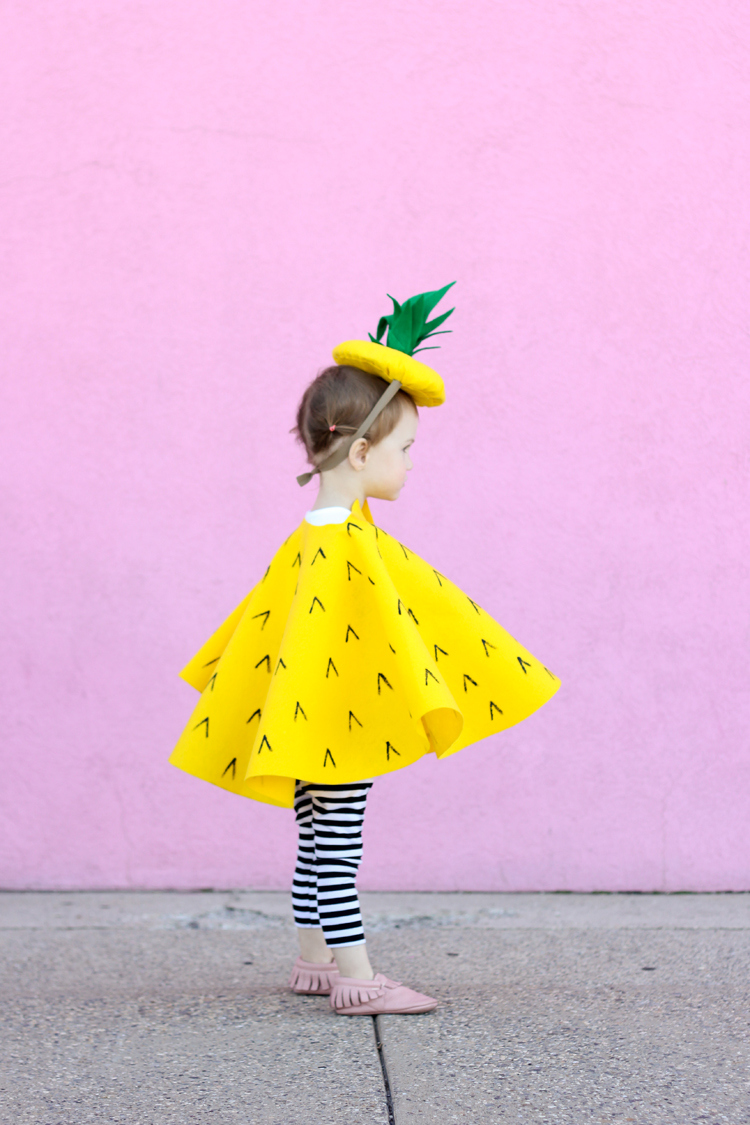
First, let’s talk capes.
MATERIALS
1- 1 1/2 yards of felt (depending on the side of your recipient this range will fit most sizes children to adult) scissors ruler existing t-shirt optional: craft paint and brush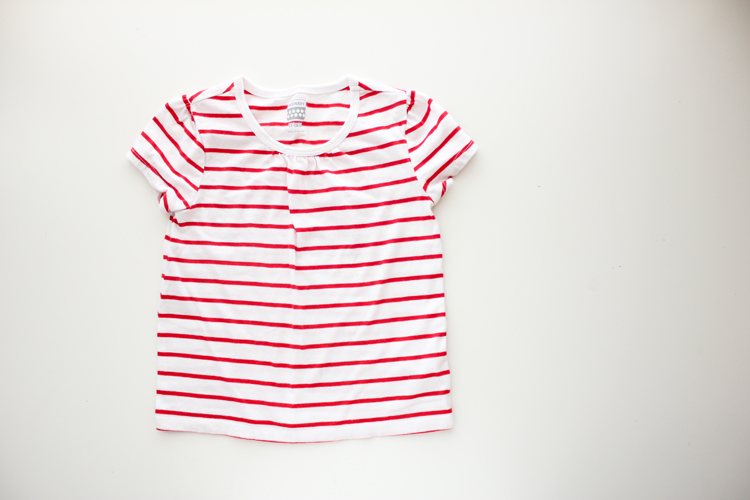 MEASURING
-Grab a T-shirt that fits the recipient.
-Measure how long the shirt is from shoulder to hem.
– Add a couple of inches. This is your radius.
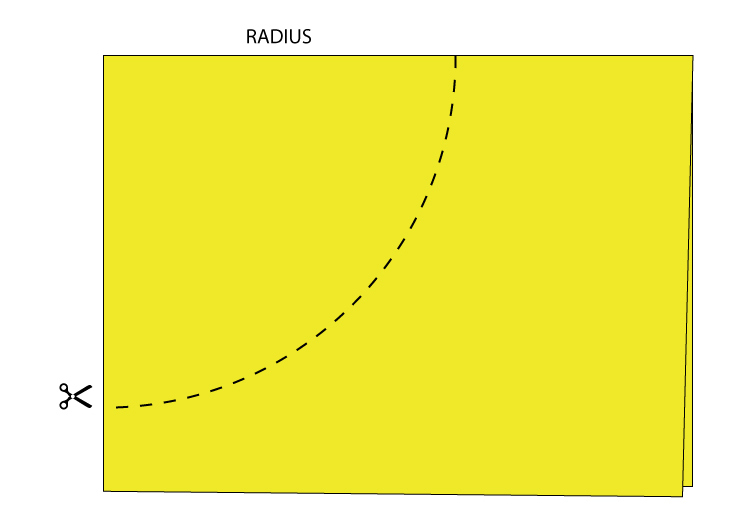
-Fold your felt into fourths. Starting from the folded corner, measure out a circle using your radius measurement and cut it out.
 CUTTING
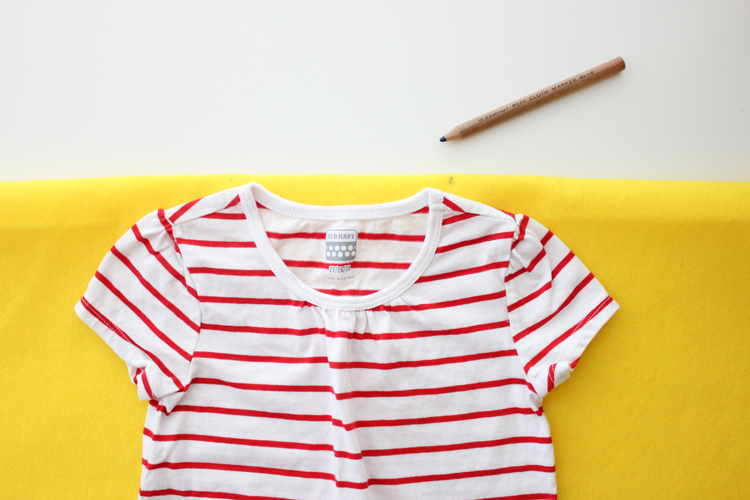
– Open up your felt circle so it is now just folded in half. Mark the center.
– Lay your T-shirt on top of your felt centering it as best as you can.
– Use the T-shirt to measure how wide to cut the neck whole.
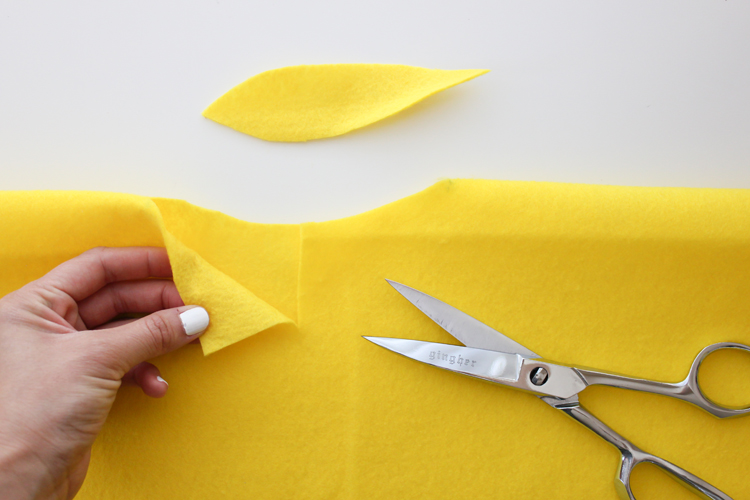
– Cut the neck hole just slightly wider than what you marked. Cut it out in a shallow leaf shape.
– Then cut a slit down the front about 2 inches.
 OPTIONAL
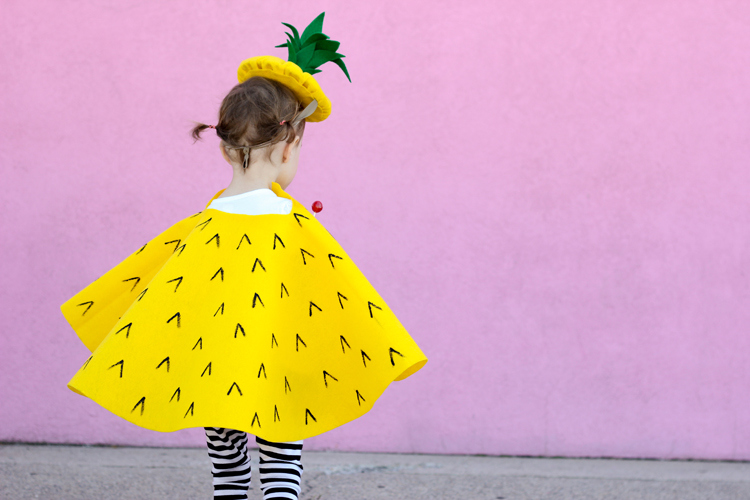
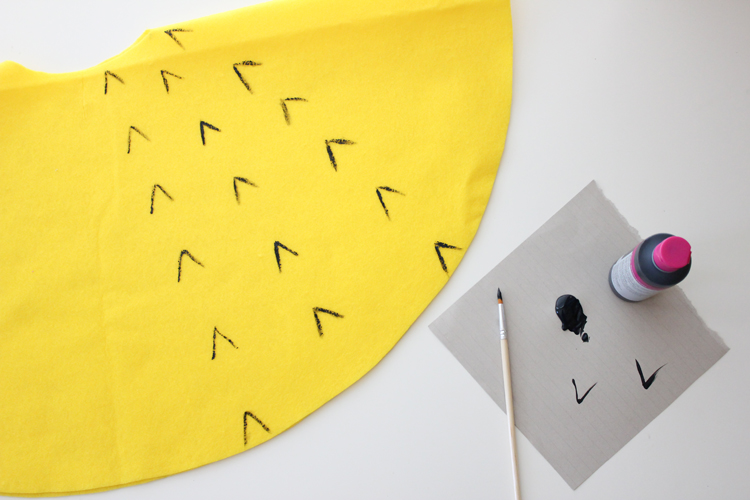
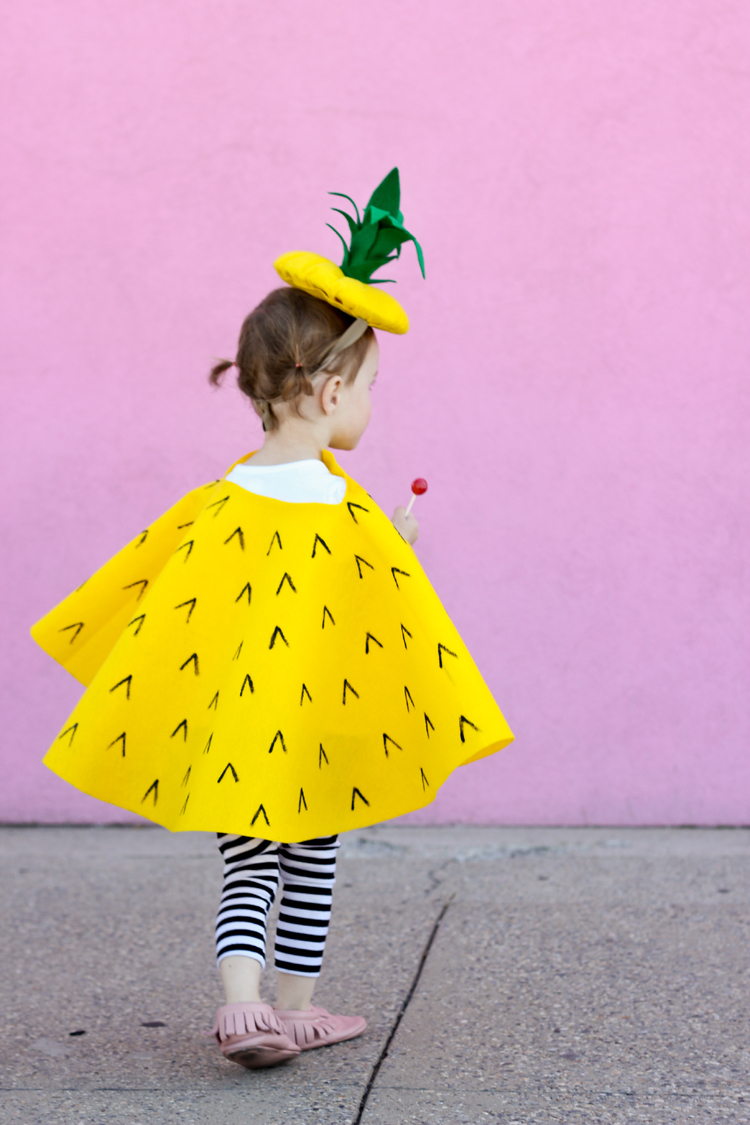
Paint on details to match the fruit.
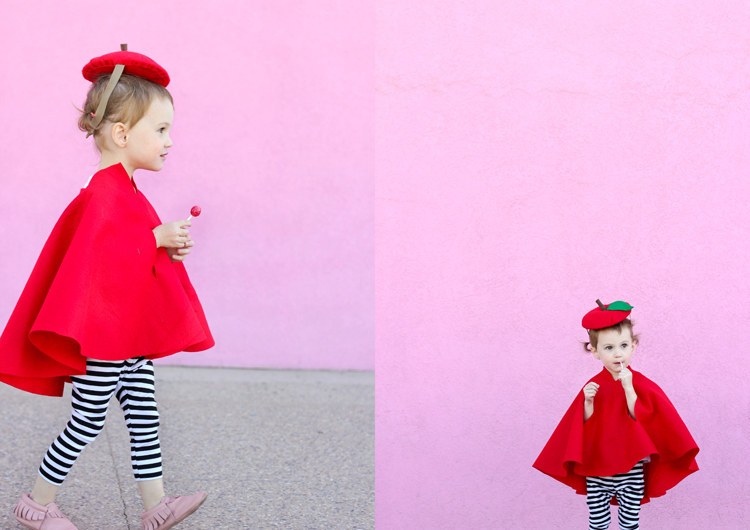
I did this for the pineapple but not the apple.
I started out trying to be orderly but found after a few rows that random eye-balling was better.
 Let it dry and then try it on!
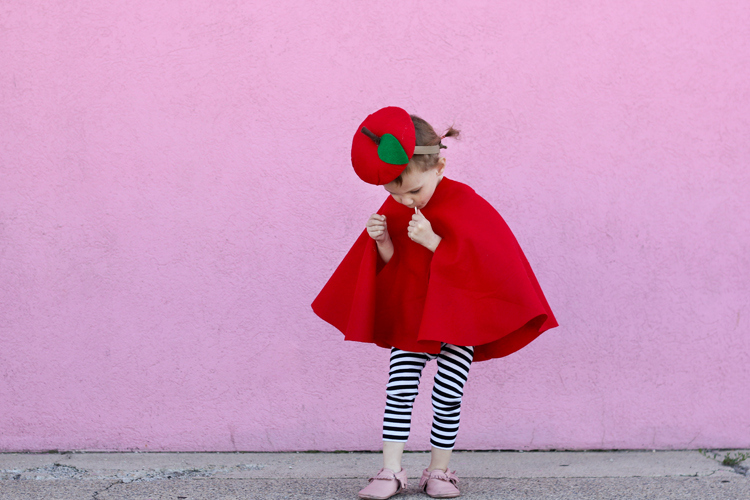
ARM SLITS
You can leave the cape as is or cut arm slits. I wasn’t sure how it would play out with Natalie. I wondered if she would even use the arm slits, but it turns out that they came in handy!
The placement of arm slits is personal preference and can be a little tricky. I kept them centered/ a little low so that she could hold her trick or treat bag and such. As I found in this photo shoot though, is that she constantly held candy in her mouth, which kept shifting the cape backwards…not a problem, but I might have cut the slits higher had I known she would do that.

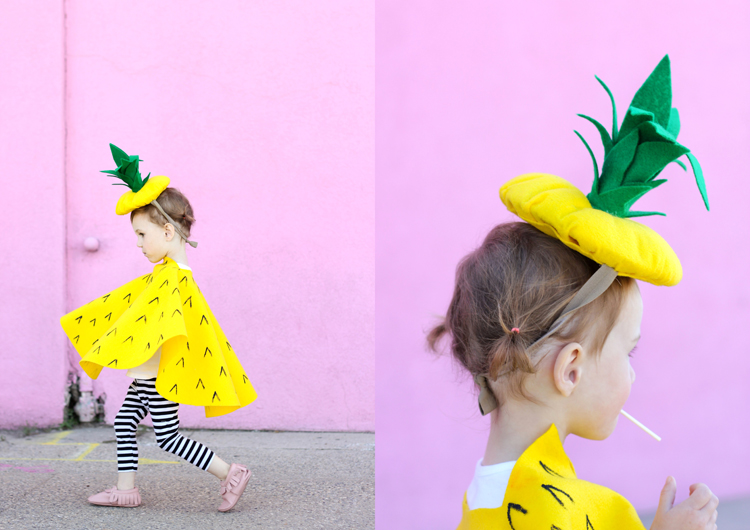
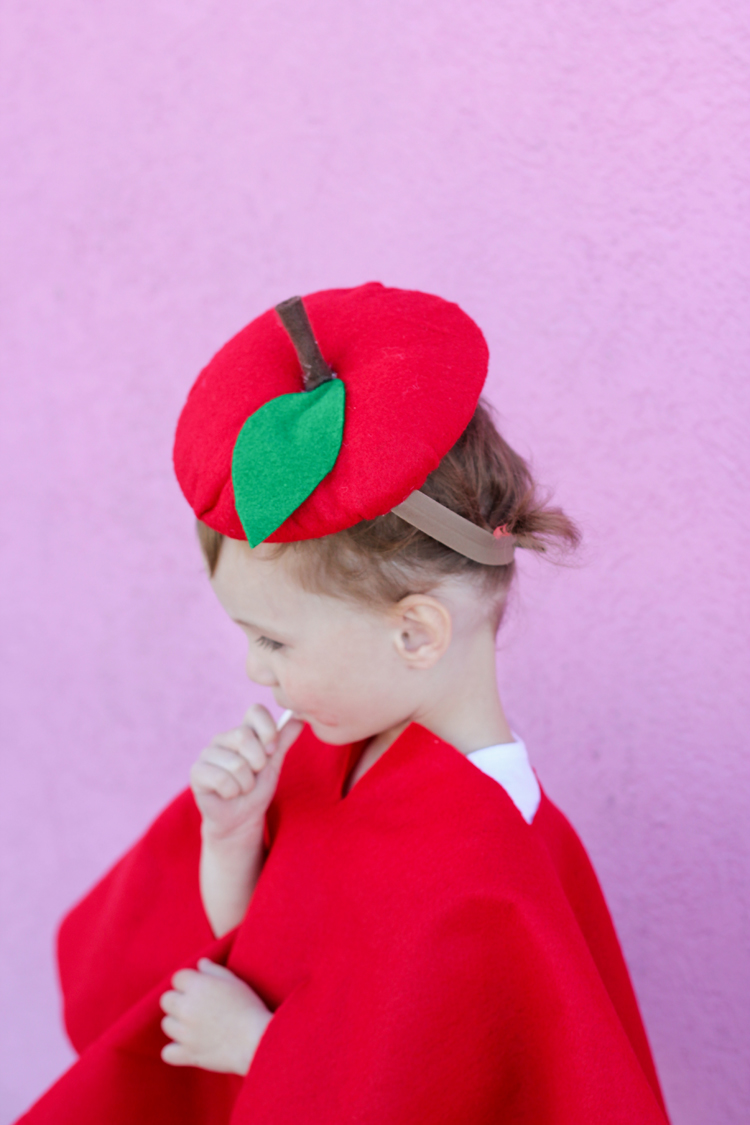
 Ready for the hat?
It’s actually kind of a big fascinator. If you are a long time reader, you’ll recognize it as a hat-ette which I made HERE.
The process is almost completely the same. The only difference is that I did a bit of hand sewing for these hats. For the complete no sew version, check out the original tutorial.
MATERIALS
Scraps or two page size pieces of felt for each color needed (depending on how big you are making your hat) scissors ruler hot glue tapestry or yarn needle thread yarn handful of polyester batting ribbon or fold over elastic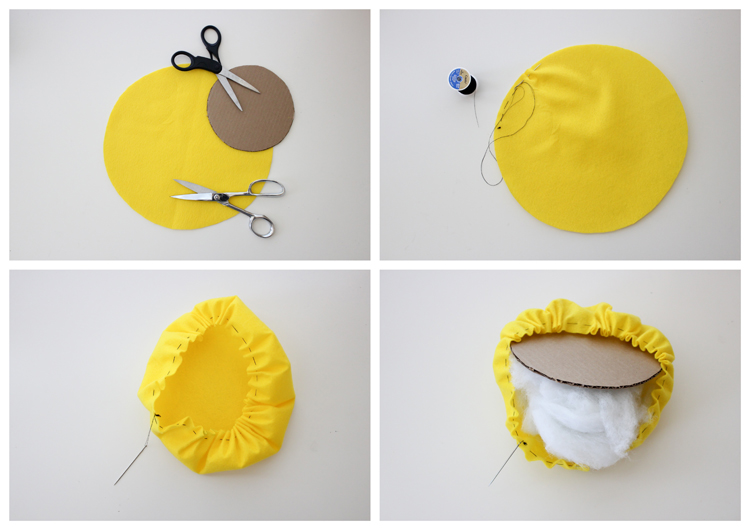 CUTTING
– Decide how big you want your hat and cut a circle of cardboard out that size. I made my hat six inches wide, but a cute mini hat would be a.dor.able.
– Cut a piece of felt about twice the size of your cardboard piece.
GATHERING
– Thread your needle with a pretty long piece of thread, double up the thread, and knot off the end. Sew a running stitch around the perimeter of the felt circle.
– When you get to the end of the circle, lay down your handful of batting, and then the piece of cardboard on top.
– Pull your thread tight, gathering and closing the felt circle around the cardboard and batting.
-Sew back and forth between the gathered edges until it feels secure. Knot off your thread and remove the needle.
NO-SEW variation – pleat the edges of the felt in place and hot glue it together. See a step by step how to HERE.
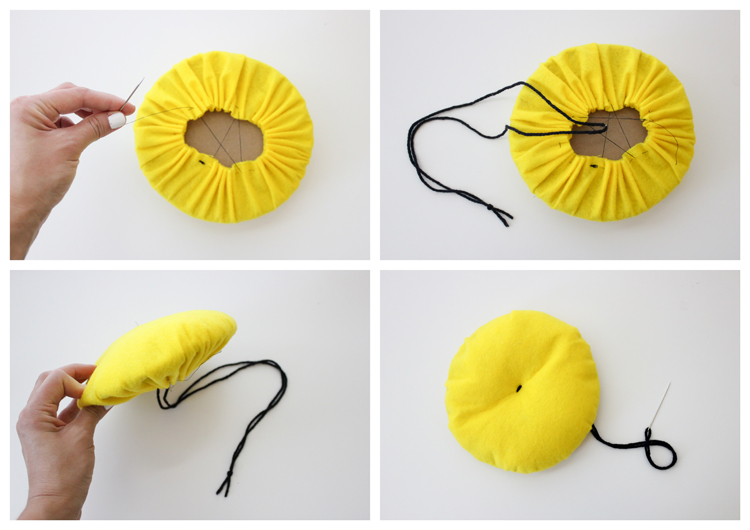 TUFTING
– To tuft the middle of the hat, thread your needle with a piece of yarn.
– Insert it into the middle of the cardboard and sew a small stitch in the center. Keep sewing back and forth until the stitched spot is nice and secure. Knot it off and remove the needle.
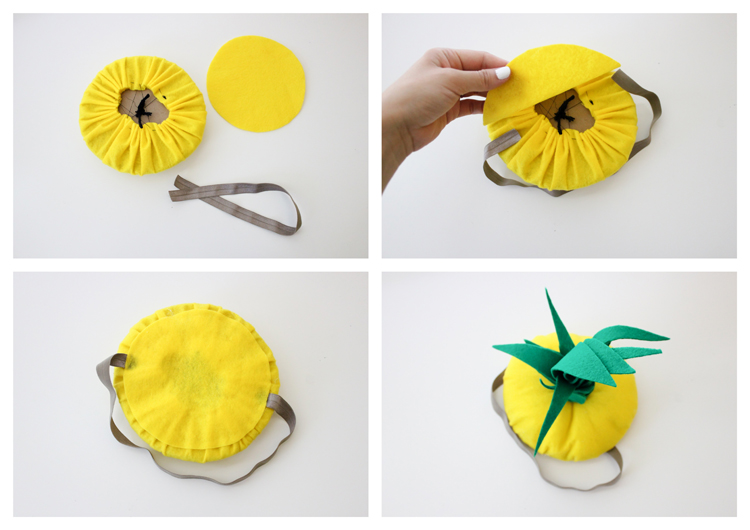 ASSEMBLING HAT
– Cut another circle of felt just smaller than your hat, and cut a piece of ribbon or elastic .
– Lay the elastic in place with the raw ends on top of the underside of the hat. If using ribbon assemble it in the same way as THIS tutorial.
– Hot glue the felt circle on the underside of the hat, encasing the raw edges of the elastic and the messy gathered part.
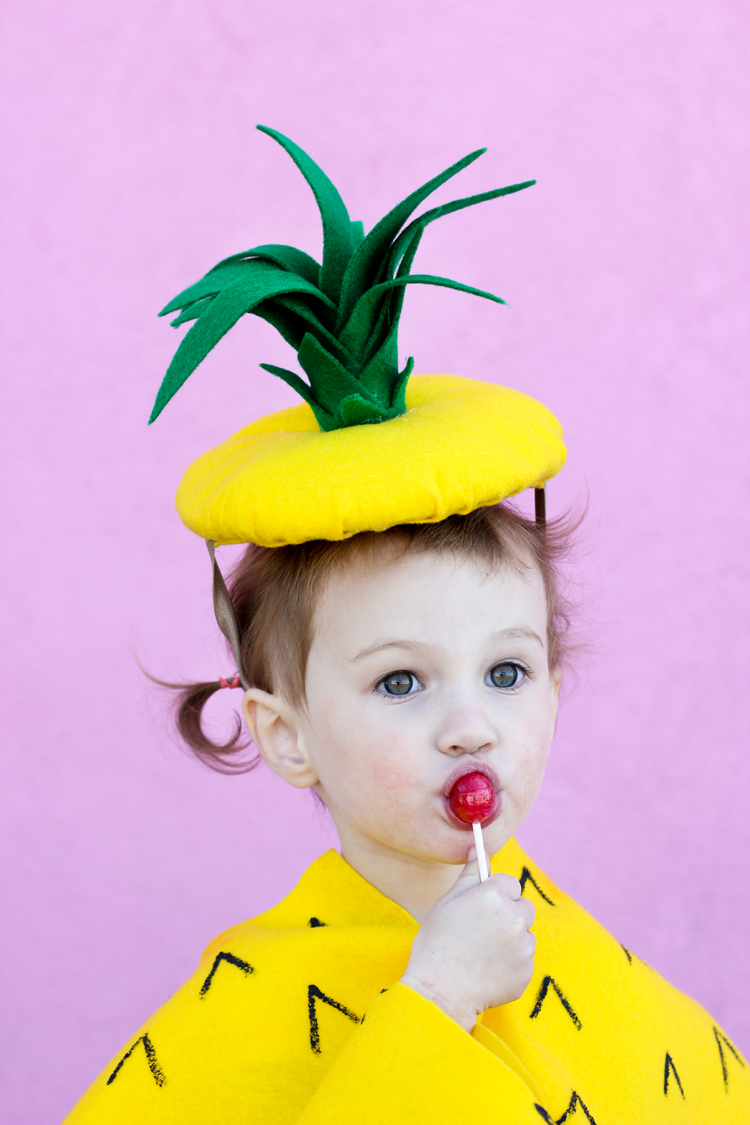
LEAVES
For pineapple leaves,
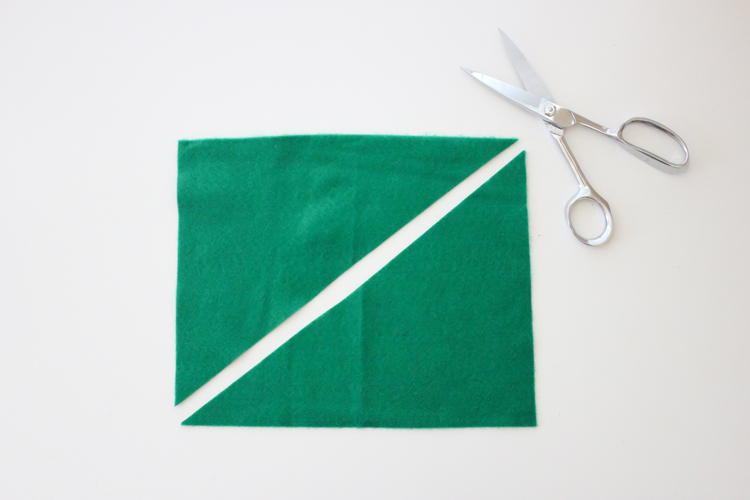

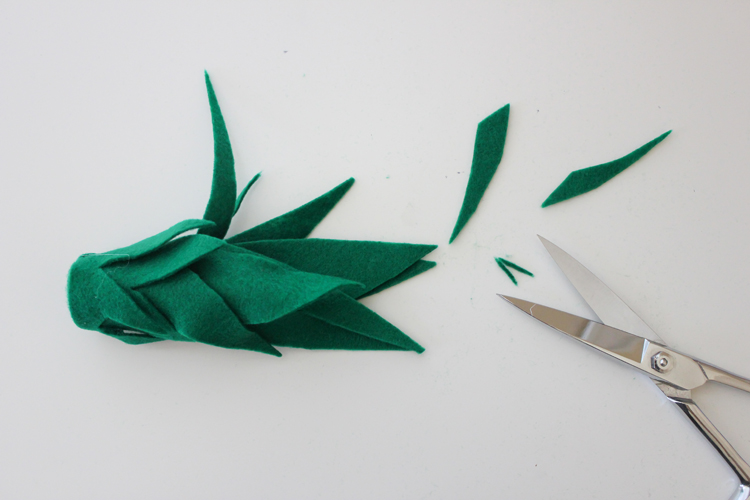 – Cut a page size piece of felt into two triangles.
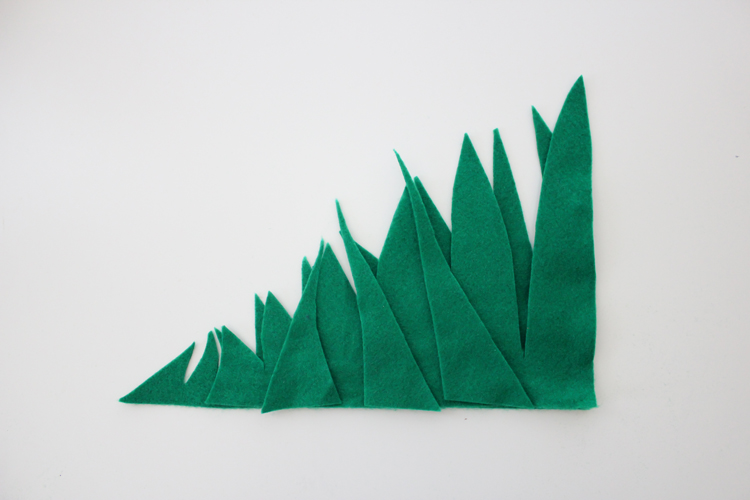
– Cut leaf like triangles out of those pieces.
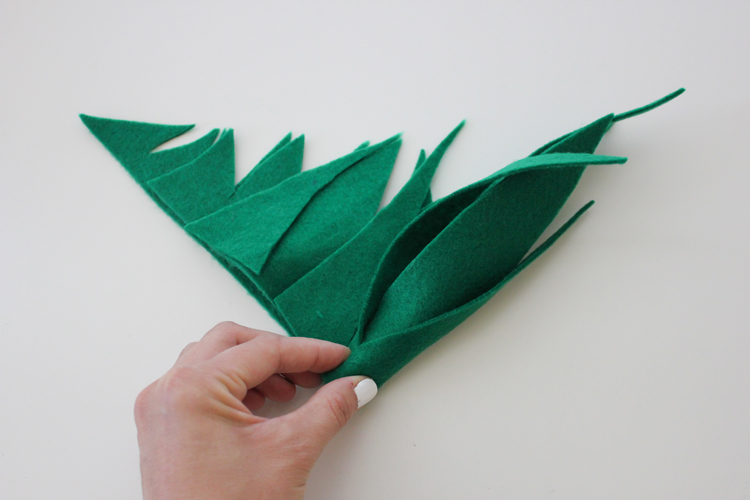
– Save any scraps that look leafy. Lay both shredded triangle pieces on top of each other, along with the extra leafy scraps.
-Starting from the longer side, roll the leafy triangles up, hot gluing them in place as you go.
– Give the leaves a final trim as needed.
-Glue to the tufted part of the hat, and you’re done!
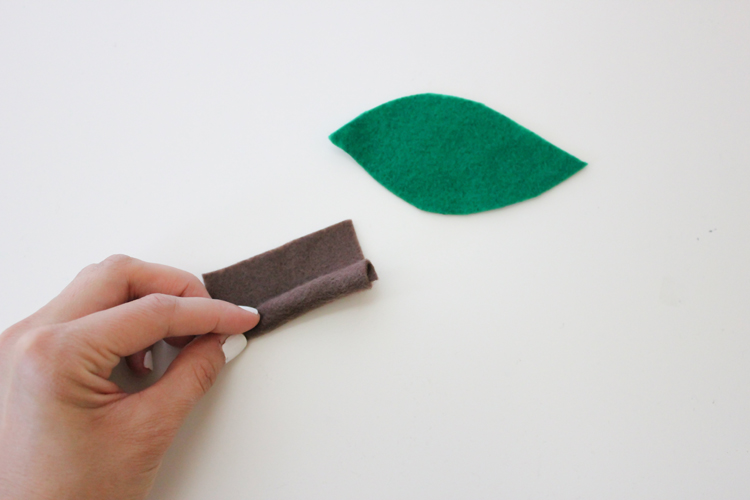
 For the apple hat, the leaf and stem were made the same way THIS pumpkin hat was made.
 Q: When is an apple not an apple?
A: When it’s a pineapple!
 Q: What do you get when you an apple crosses a Christmas tree?
A. A pineapple!
 Naturally. 😉
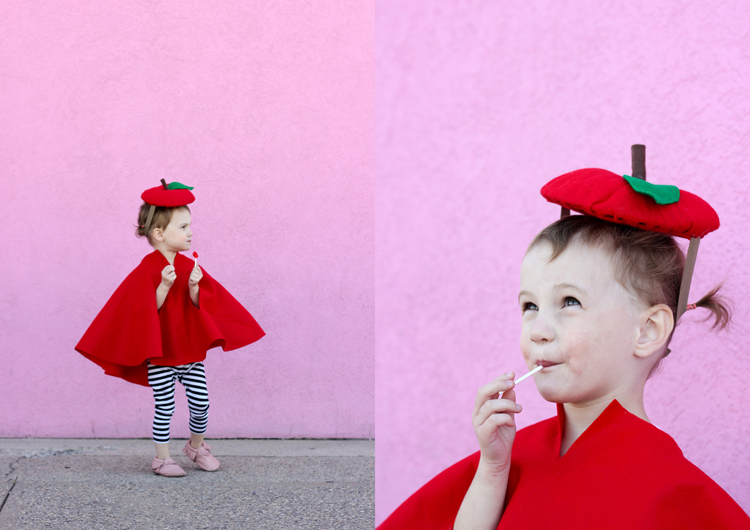
I made this for my daughter but I think this would make a super cute idea for any age. If I were a teacher I would totally be an apple!

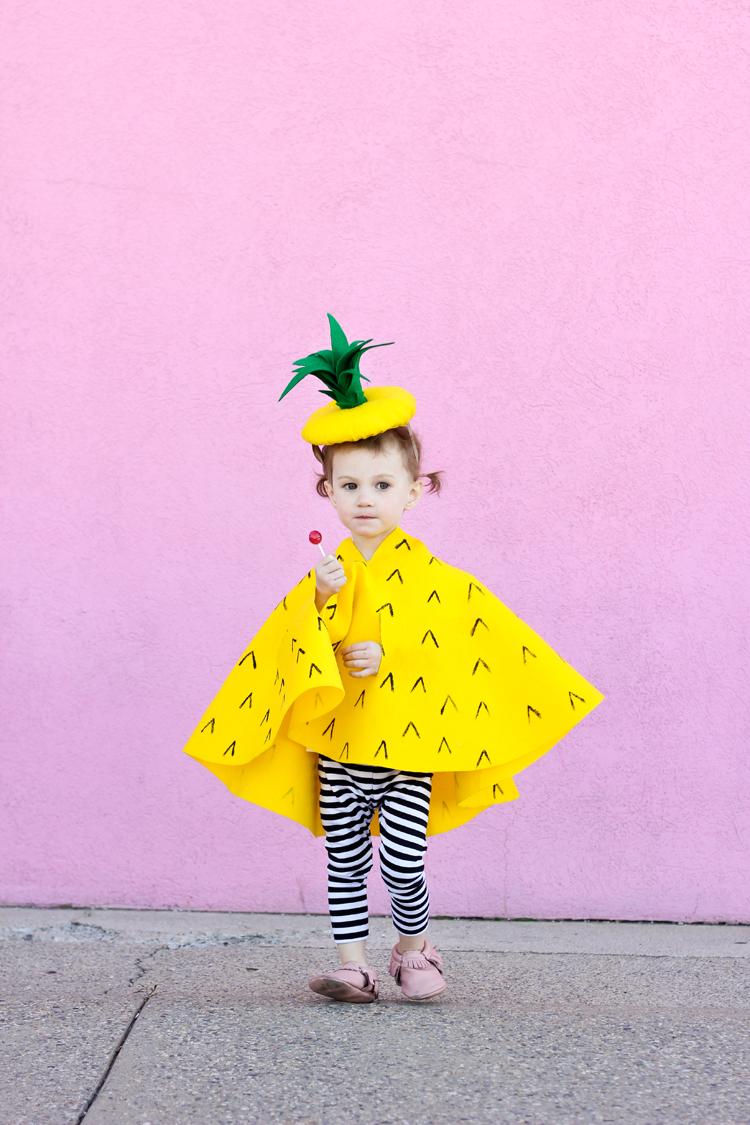 SOURCES: Felt from Jo-Ann || Leggings sewn using Girl Charlee Ponte de Roma using Go To Leggings pattern || Moccasins from Freshly Picked
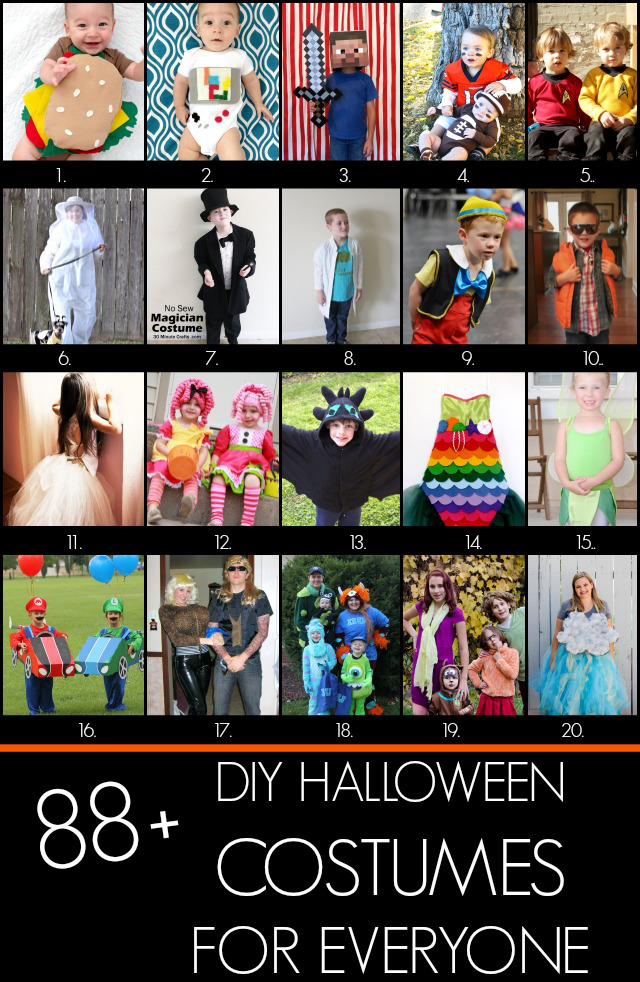
Looking for more Halloween inspiration?
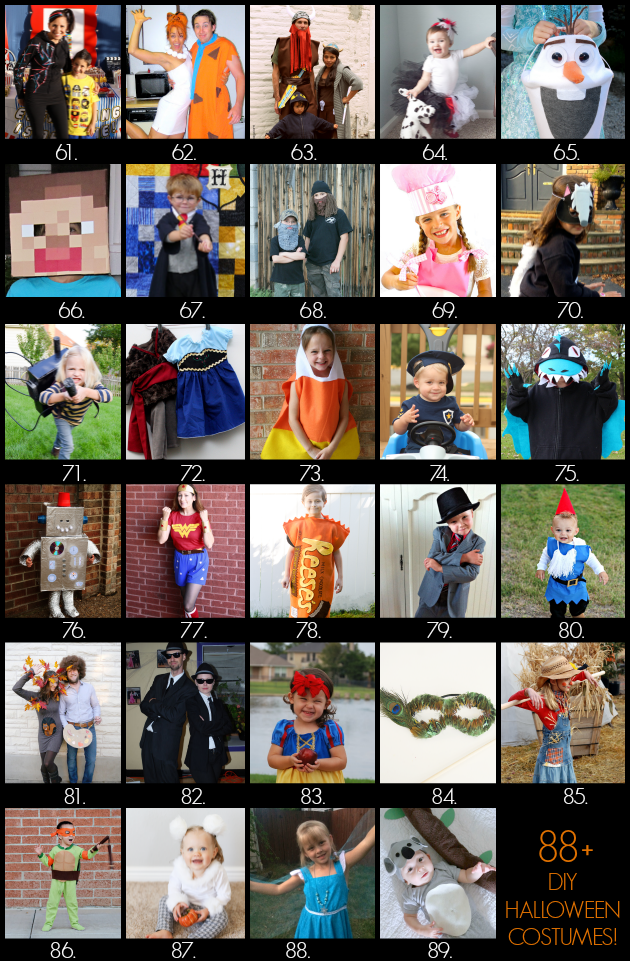
Me and 80+ blog buddies are all sharing tons of easy ideas to craft up DIY Halloween costumes for everyone including your pets, family costumes, and even a trunk or treat idea! A big thank you to Jamie Dorobek and her handmade Halloween costume site, Really Awesome Costumes for organizing us into a mother load of Halloween inspiration.
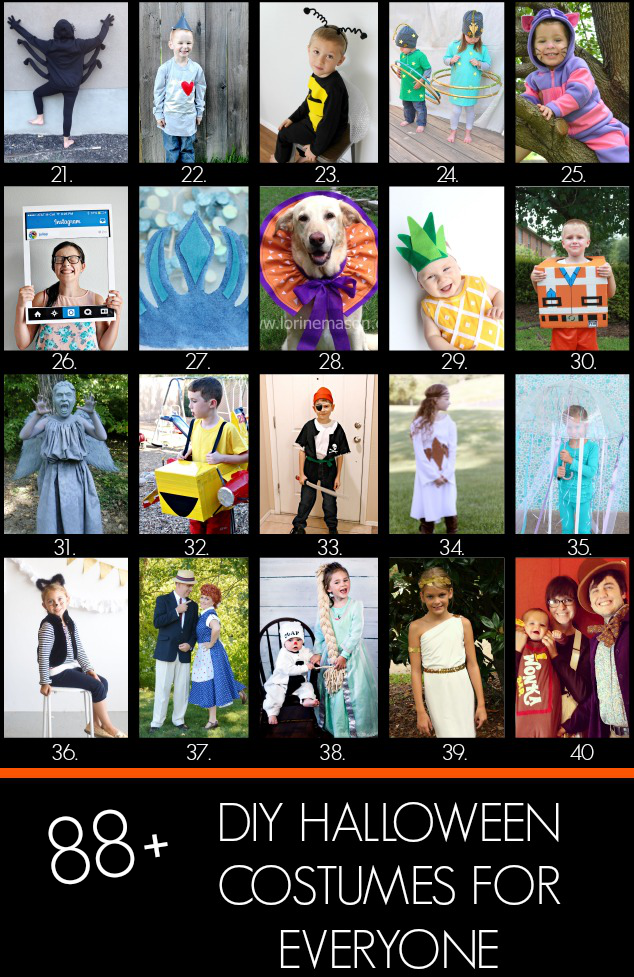
Simply click on the links below each collage to get the detailed instructions about how to make the costume pictured, just like mine above. Don’t forget to follow the Handamde Halloween Costumes Pinterest Board for even more DIY costume greatness!
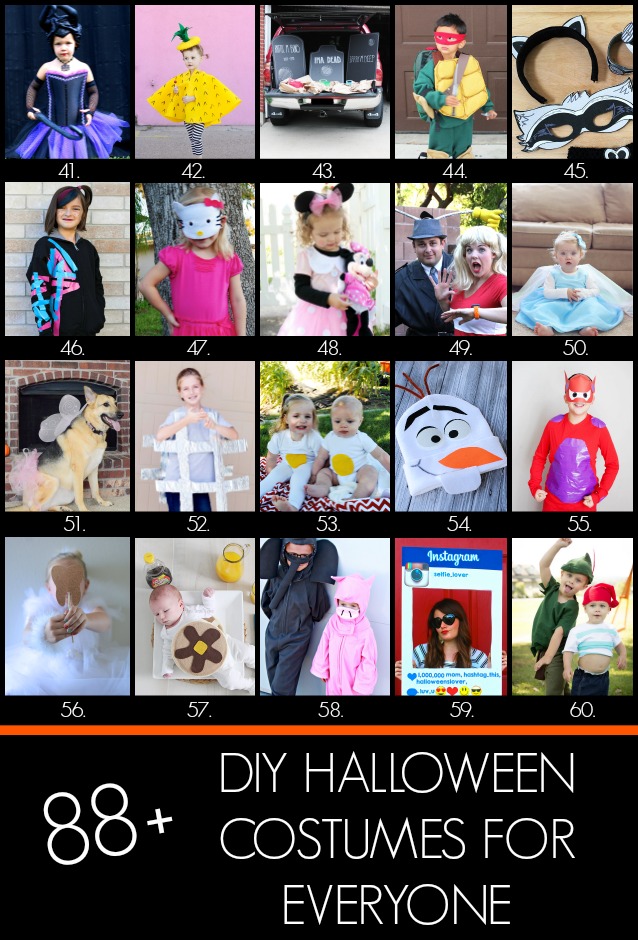 41. DIY No Sew Maleficent Costume
42. No Sew Pineapple Halloween Costume
43. Graveyard Bean Bag Toss: Trunk or Treat Car Costume
44. DIY Teenage Mutant Ninja Turtles Costumes
45. DIY Raccoon Costume with Printable Mask
46. Easy WildStyle Lego Movie Costume
47. Simple Hello Kitty Costume
48. No Sew Minnie Mouse Costume
49. DIY Inspector Gadget and Penny Costumes
50. DIY Frozen Elsa Dress Baby Edition
51. Fairy Princess Dog Costume
52. DIY Hashtag Halloween Costume
53. Toddler or Baby Egg Costume
54. Easy No Sew Olaf Costume
55. DIY Baymax Costume
56. DIY Tooth Fairy Costume
57. Baby Short Stack Pancake Costume
58. Elephant and Piggie Halloween Costumes
59. Instagram Halloween Costume
60. Peter Pan & Mr. Smee Halloween Costume
41. DIY No Sew Maleficent Costume
42. No Sew Pineapple Halloween Costume
43. Graveyard Bean Bag Toss: Trunk or Treat Car Costume
44. DIY Teenage Mutant Ninja Turtles Costumes
45. DIY Raccoon Costume with Printable Mask
46. Easy WildStyle Lego Movie Costume
47. Simple Hello Kitty Costume
48. No Sew Minnie Mouse Costume
49. DIY Inspector Gadget and Penny Costumes
50. DIY Frozen Elsa Dress Baby Edition
51. Fairy Princess Dog Costume
52. DIY Hashtag Halloween Costume
53. Toddler or Baby Egg Costume
54. Easy No Sew Olaf Costume
55. DIY Baymax Costume
56. DIY Tooth Fairy Costume
57. Baby Short Stack Pancake Costume
58. Elephant and Piggie Halloween Costumes
59. Instagram Halloween Costume
60. Peter Pan & Mr. Smee Halloween Costume
OMG Nat looks so much like you now , Delia !
haha…thanks!
Okay, you just saved my Halloween! I have been trying to think of something easy to make my daughter, who is due in the middle of October. Seeing this reminded me of the fruit hats you made Natalie in your nesting series. I can just make a pineapple hat, stick on a yellow onesie from big brother, and call it good! 🙂 And brother will just be a fix-it man and carry around his tools and wear a hard hat this year! 🙂
In my excitement, I forgot to say how cute these costumes are too! I love that they are mostly no-sew. 🙂 The hat part is so fun, and those leggings under the pineapple make it so fun!
No worries. Thank you Lynette! I am so glad you remembered those hats! That sounds perfect for a little baby!
Those are super-cute! I love the apple version, but those pineapple leaves are pretty much perfect. Natalie is adorable!
These are absolutely adorable!! What a great idea!
Thank you Amelia!
This is to cute!!
Thanks Amy!
I love the apple! I was looking for a costume that would be bike safe since I am heading to a couple different gatherings and this certainly fits the bill. I am thrilled for the simplicity and boldness of the red!
These make me smile!! Bravo!
So simple! Love both fruity ideas!
Thank you Veronica!
Thank you so much for this great tutorial !!! Super cute and fast to make !
I never got soo many compliments on Halloween like I did tonight about my niece’s pineapple costume!! Thanks soo much for this post & tutorial (:
I am so glad to hear that! You are most welcome!
Hi Delia!
Love these costumes. Very much my vibe! I couldn’t figure out how to leave my own comment so I’m replying to yours. Is there something you did different with the pineapple cape? I like how it looks wider than the apple one, less cape/poncho like. or is it just the posing? Please let me know! I’d love to make it look like the pineapple cape.
Anne,
I’m terribly sorry for just now seeing your comment. It erroneously got lumped in with spam comments which I am cleaning out right now. I didn’t do anything differently with the pineapple cape. It must just be the posing. I hope that helps!
Delia
Oh my goodness, just when I think he can’t get any cuter, you go and put him in a pineapple costume. Cuteness overload!
Thank you very much for hat tutorial 😉
You are most welcome! <3
Oh my… this Halloween costume is so pretty.