I wanted a good simple tree skirt, so I came up with this one.
I took this project in pieces so you will notice in the pictures below that my project moved from my bed, to the kitchen counter, then to the kitchen table over a matter of a couple of days. The sewing part is fast but the painting took a bit of time. All part of the fun. 🙂
So here we go. This is what I did:
Materials:
2 small bottles of white acrylic craft paint
foam paint brushes
2 pieces of fabric, I used cotton and tan muslin, at least 44×44 inches
freezer paper, enough to create a piece as large as your fabric
scotch tape
yarn
a fabric pencil/pen
a quilter’s ruler or ruler at least 24 inches long
scissors, pins, sewing machine
1. I took two pieces of fabric at least 44 inches x 44 inches each way and folded them into quarters. I was using what I had on hand so I had to piece my white cotton fabric and I used some tan muslin for the second piece.
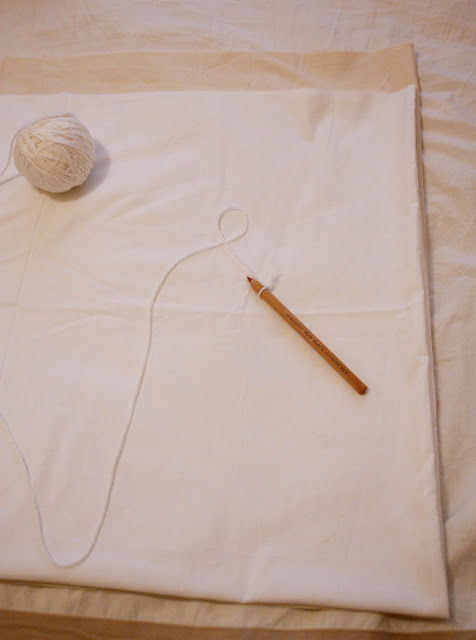
2. I then tied yarn to a fabric pencil.
3. I pinched the yarn at the corner of the two folded fabrics stacked on top of each other, and drew a a circular line as far out as I could go. In my case it was 21 inches {radius}. I then cut along the line and unfolded the pieces of fabric to reveal two large fabric circles. {sorry about the lack of pictures here}
4. I took the tan muslin circle only {this will be the top piece} and drew a circle in the middle where the tree will go. I know it looks white. The tan is pretty light and the lighting made it look different in every picture. I apologize for that. Just trust me. 🙂 This is tan.
5. I then took my fabric pencil and yarn and drew circles every 2.5 inches out. The last ring was about 3.5 inches or so from the edge which was fine. It doesn’t have to be perfect. It just has to look about right. This will help you place the freezer paper rings on later. You also want some extra space in the last ring for seam allowance.
6. Speaking of freezer paper.
I then taped some freezer paper together to get a piece about the same size as my fabric pieces. I had to do more piecing than was shown here but you get the idea.
7. Next, I folded the paper in quarters {shiny side in, matte side out} and drew rings to match the fabric ones I just made. These need to be more precise and in turn are a little easier to make precise because the paper is smooth.
8. Cut your rings out and select the ones you want to use on your tree skirt. You want to choose the rings that will be opposite of the stripes you will paint.
9. Iron the rings on. Yes…the tape was tricky at this stage. I just used plain old scotch tape. It melted a little but didn’t impede the fabric paper adhering to the fabric too much and didn’t ruin my iron or anything. Don’t be afraid to press over the tape so you don’t end up with gaps in your freezer paper.
10. And paint your stripes in between the freezer paper. I didn’t successfully cut a paper ring for the very outside, so I used a quartered piece of freezer paper to stencil it in. It actually worked quite well.
As for paint. I really just used acrylic craft paint. It worked fine even after hand washing, drying and ironing. It is just a bit stiffer than fabric paint.
11. Let it dry. I let it dry overnight but I don’t think that is necessary. A couple of hours should do okay. Hand wash it and dry it to get the fabric pencil out. Then press it with a hot iron {and bonus…you can press the seam of your other piece if you had to piece it together like me while you’re at it}.
12. Cut a matching hole in your white cotton circle and lay it evenly on top of the muslin piece {right sides facing each other}.
13. Pin all the way around the outside and inside circles.
14. Measure a straight line from the inner circle to the outer circle and cut.
15. Then pin up the cut sides.
16. Now you are ready to sew. Sew around the inner and outer circles and up the cut sides except for a small whole on one of the cut edges. You will be turning the skirt inside out through this hole in a minute.
17. Once that is done. Snip the hem along every circular edge, being careful not to snip through the stitches. This will ensure the fabric won’t pucker when you turned it right side out. You don’t need to worry about the straight cut edges.
18. Now turn your tree skirt right side out.
And you are almost done.
19. Press your tree skirt.
20. And sew up the hole. The best way would be to hand stitch it but this portion is mostly hidden when in use, so a machine stitch works just fine and is fast.
Tip: Don’t worry if the circles aren’t exactly perfect. I think my last tan stripe is about 1/2 inch thicker than the others and the middle one is slightly narrower. Can you tell? Nah. Just get it close and it will look great.


i love that you are still posting christmas crafts! i feel like i have a chance to do some of them now that i don’t have christmas looming over my head :)!
that is BEAUTIFUL!!!!
~selina
I love it!!
I love the stripes! Using freezer paper was a great idea! 🙂