I’m bringing home this tutorial I shared on I Am Momma Hear Me Roar a couple months ago.

As you may know Cheri has decided to leave blogland, so I wanted to take a minute to give her a proper farewell. Having met her in person, I can tell you that she is completely genuine, stunningly beautiful, and a wonderful, fabulous mom. I think it’s safe to say we have all been touched for the better in both creative ways and personal ways by the wonderful goodness she let radiate in everything she did. I wish her the best on this next chapter in her life and look forward to continue to be inspired by her on instagram (@mommaroars). 🙂 Hugs to you friend.
___________________________________________
I’m thrilled to be here hanging with Cheri for Refashionista 3!
My project today is for all those string bean kids that grow tall rather than out…like my kids.
My 8 year old can still fit into 4T pants in the waist. ha. My five year old’s relative waistline discrepancy is less dramatic, but he can easily wear 3T or 4T pants as well, if only they weren’t too short.
Instead of tossing those pants that fit them so well in the waist, I’ve come up with a trendy way to make those pants last for just a little bit longer.
This idea sparked from A Little Gray, who has a great tutorial on making color blocked pants from scratch. She based her pants off the color blocked Tommy Ton pants that created buzz at New York Fashion Week earlier this year. I opted to go with neutrals rather than the blue contrast because I really like the neutral on neutral look.
Let’s get to it. Shall we?
MATERIALS
1/4 – 1/3 yard of contrasting twill or bottom weight fabric (depending on how tall you need your colorblocked portion to be)
matching or contrasting thread
ruler, sewing scissors, etc.
pants to upcycle!
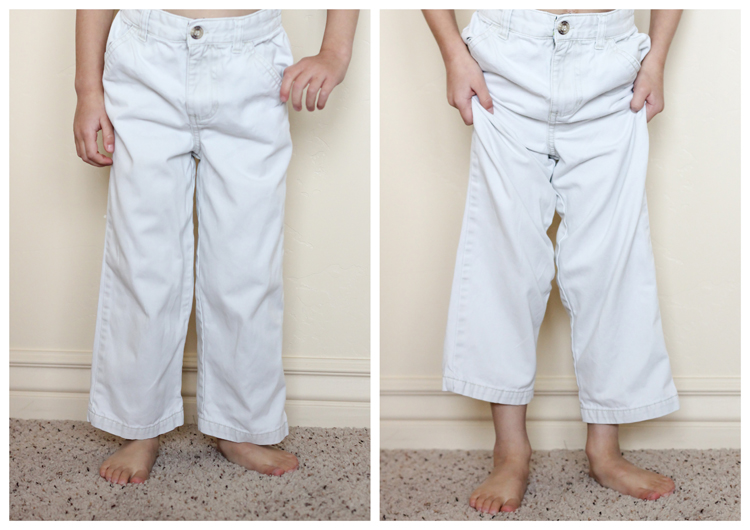
I started with this pair. They actually are not terribly too short, compared to some others we had, but I donated those before I thought of this! (forehead slap)
HOW TO
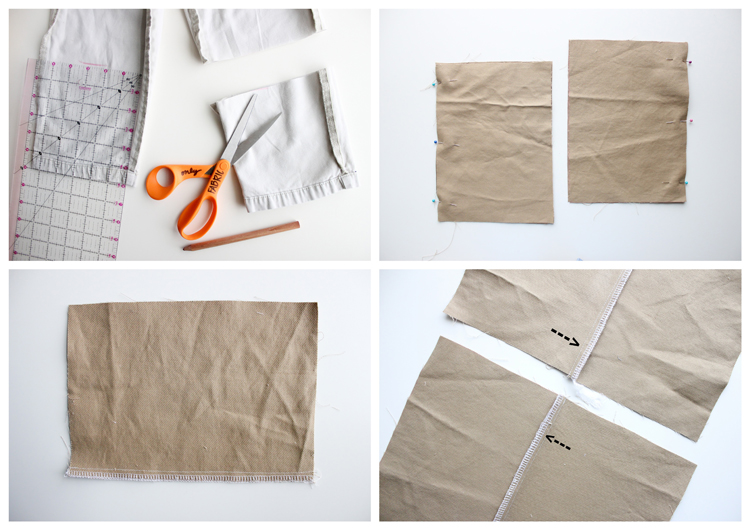
1. Measure the width of the pants and add 1/2 inch to each side to determine how wide you need to cut the contrasting twill. To determine length, measure the pants on your child. Factor how much of the original pants you will be cutting off ( you will need to at least cut off the hem), the seam allowance (add 1/2 inch), and the new hem (add at least 1 inch for this).
*TIP: Make sure to cut your contrasting twill with the grain going up and down the pant leg. So…the direction of greatest stretch is from side to side. If you cut it the other way, the pants may not hang or move as nicely.
2. Cut four pieces, two for each leg.
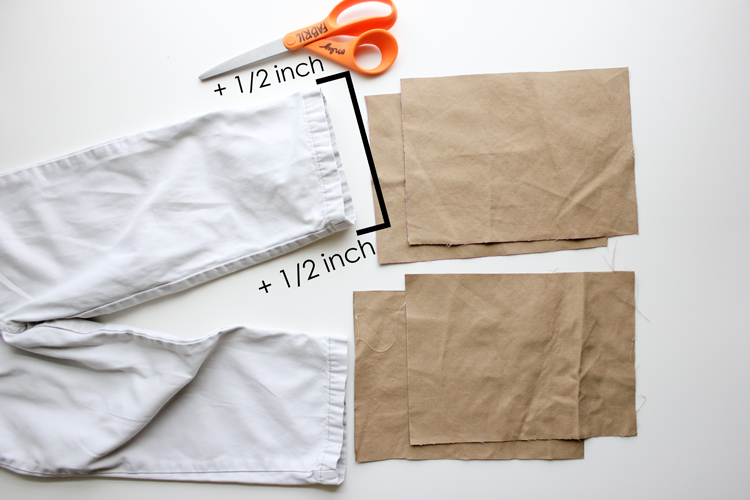 3. Cut the pant hems off. You may want to cut off more for a taller color block. I admit that I went a tad too tall, but it still works. 😉
4. Pin your pieces of twill right sides together and sew up the outside edges. Finish the raw edge of the seam allowance with a zig zag stitch or your serger. Press the seams down to one side. I pressed them so they would lay toward the back of the pants when worn.
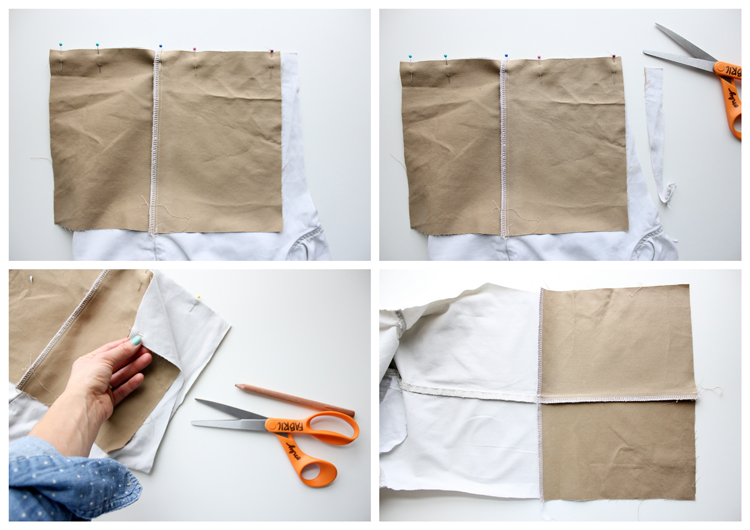
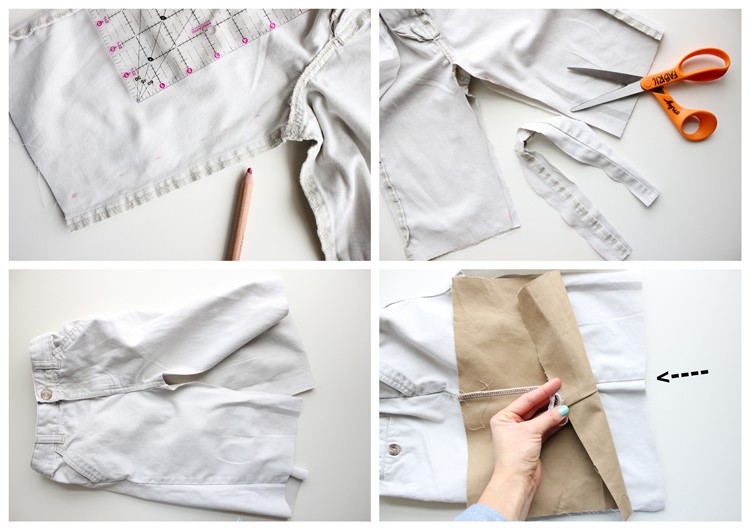 5. Now you need to open up the pant legs. If you liked the fit of the pants before, you will want to use a seam ripper and carefully undo the inside seam of the pants.
I wanted to make these pants skinny pants and I also felt that they were a little too generous in the rise of the pants. So I cut the seam off plus a little more. I narrowed my trim a lot at the rise so I wouldn’t cut off too much, but cut a good portion off of the thigh areas.
*I DO NOT recommend this for all pants. Be careful when cutting the rise (crotch area). You don’t want to cut too much off or the pants won’t fit well.
6. With right sides facing, pin each twill piece to each open pant leg. Make sure that the side seams match up properly.
*You may need to trim the back leg (which is usually wider) to fit the size of the contrasting pant piece. OR, you can cut your contrasting twill pieces so the the back piece is wider. Up to you. If you trim it down, try to avoid cutting into that rise as much as possible. You also want to make sure you cut both pants legs the same way.
7. Sew. Finish the raw edge with a zig zag stitch or a serger. Press the seam upward toward the waistband.
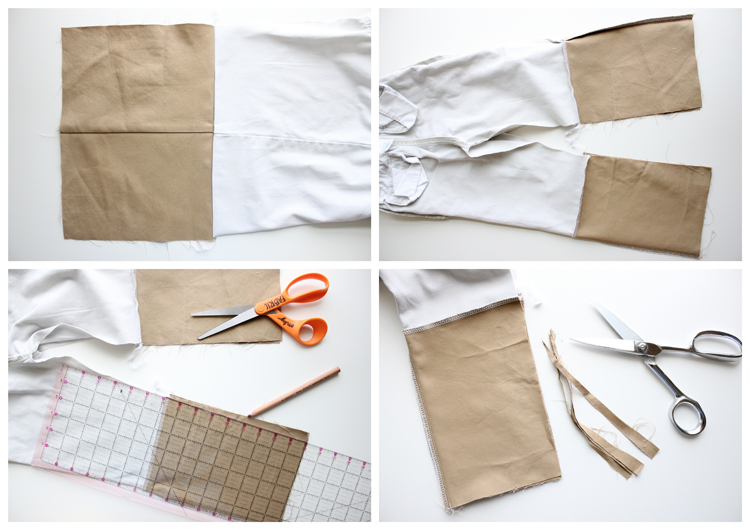 8. Now, we’re almost ready to sew the pant inseam back together. Turn the pants inside out. To get a nice skinny jean shape to the pants, I measured and cut in about 3/4 an inch at the bottom and gradually tapered out to the width of the upper part of the pants.
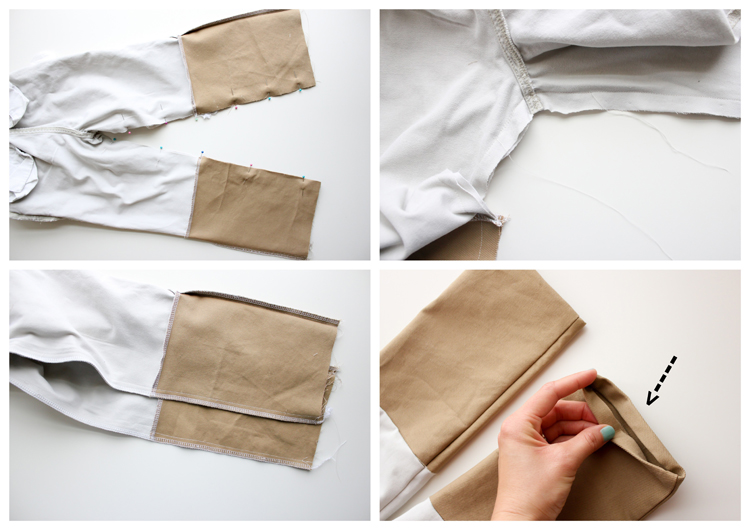 9. Matching seams, pin up the inseam of the pants. Sew together with a 1/2 inch seam allowance. Finish raw edges with a zig-zag stitch or a serger. (Note: Traditionally, you are supposed to sew with a 5/8 inch seam allowance for garment sewing. I use 1/2 inch most of the time because it’s easier and quicker to do the math when adding seam allowances).
*TIP: Sew another line of stitching over the rise of the pants twice to ensure durability.
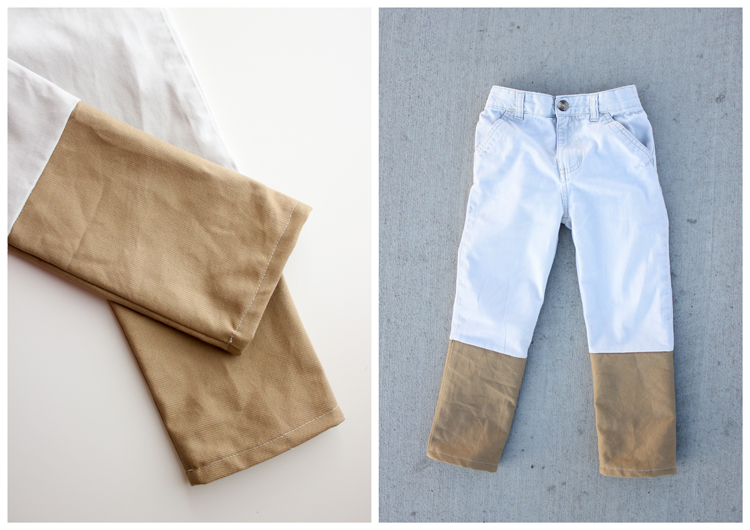
10. Fold and iron under the hem 1/2 inch and then 1/2 inch again. Top stitch around close to the inner fold of the hem.
*TIP: Lengthen your stitch just slightly and use a denim needle if you can, to get a nice clean finish.
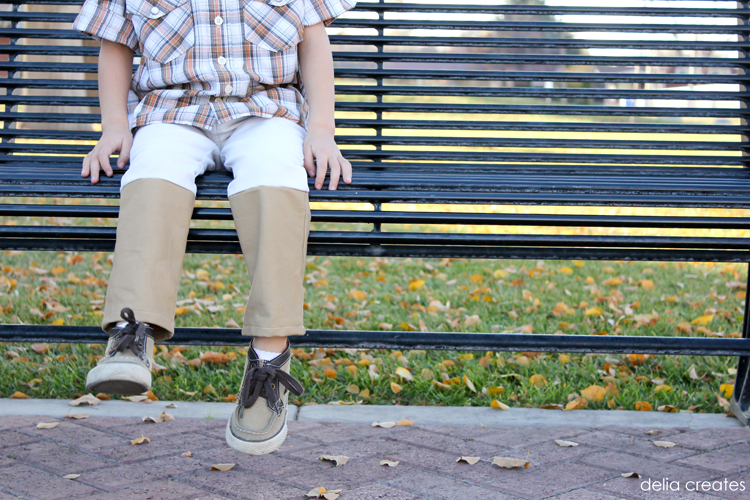 I almost wish I had cut off less of the pants and made them a little bit longer. Maybe long enough to cuff so that it could last even longer! Next time for sure.

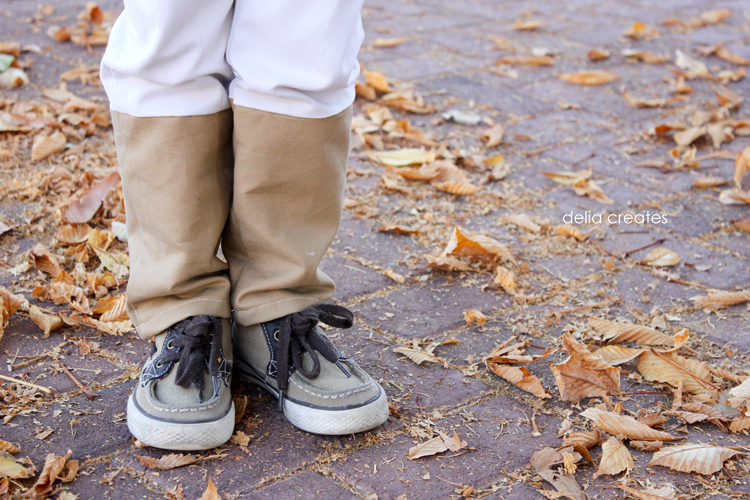
 If you are not used to this look, it might take you awhile to appreciate it. I made other color blocked pants for my oldest boy earlier this year. It took me a while to warm up to the color blocking but now I love it. The same happened with these pants. It has taken me a couple wears to love it. But now I do!
 For Reid though…it was love at first wear. No kidding. He has worn these pants about 7 or 8 times since I made them a couple weeks ago. He keeps pulling them out of the dirty laundry to wear again. Ick right? I try to hide them from him after he wears them and put them through the laundry rotation more often. 🙂
I don’t blame him for like them though. They are one of the few pants he owns that aren’t super bulky at the waist, because I had to pull the adjustable elastic to the max.
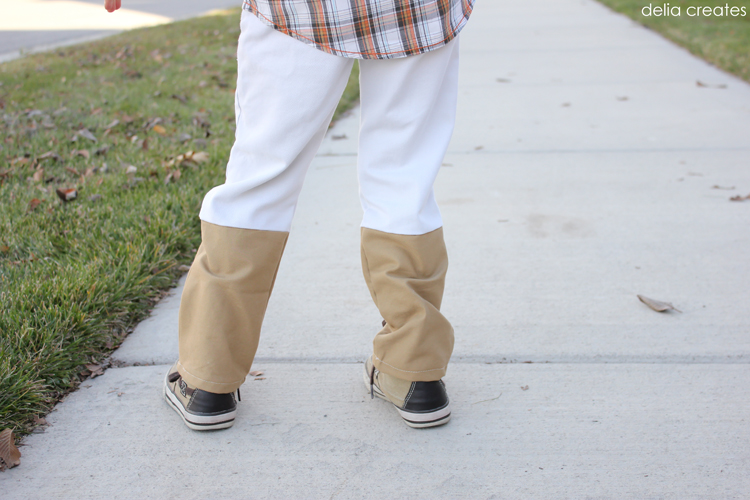 It also makes me super happy to see him love something that I -sort of- 😉 made for him.



[…] 1. color blocked small fry skinny jeans by sewing like mad 2. color blocked fancy pants leggings by girl like the sea 3. too short pants to color blocked pants by delia creates […]