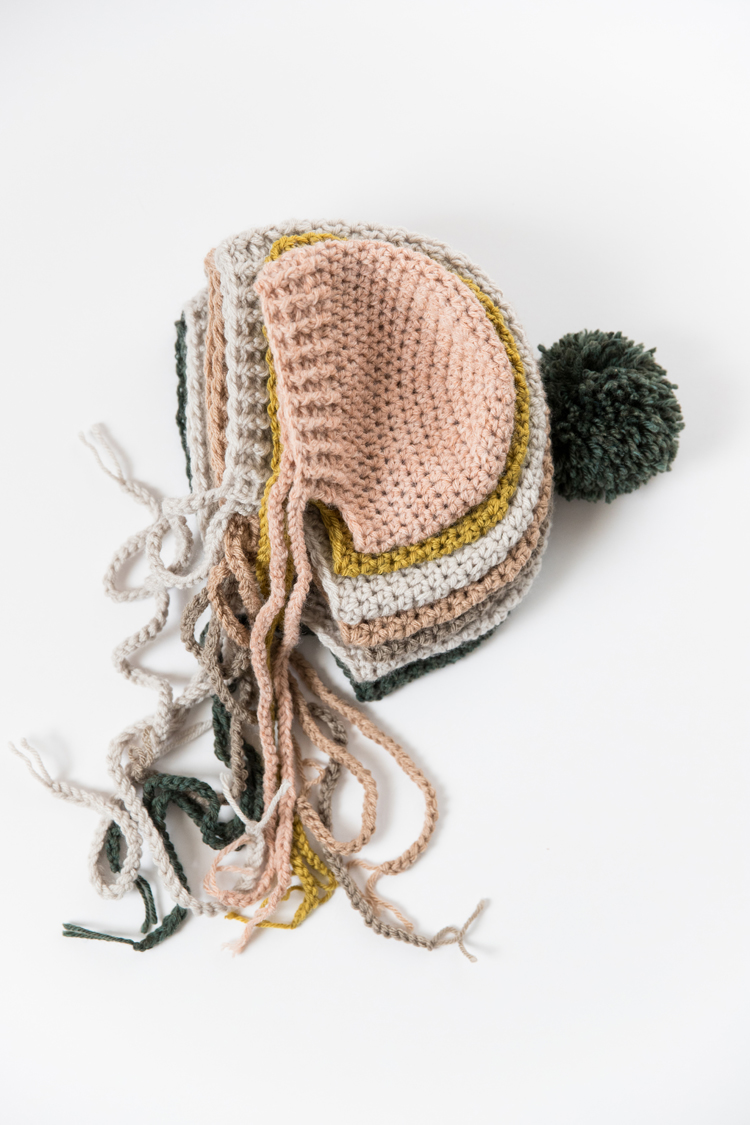
Is it a bonnet…a beanie? Well, both!

It’s a beanie with a brim that doesn’t go all the way around the head so that it fits like a bonnet.
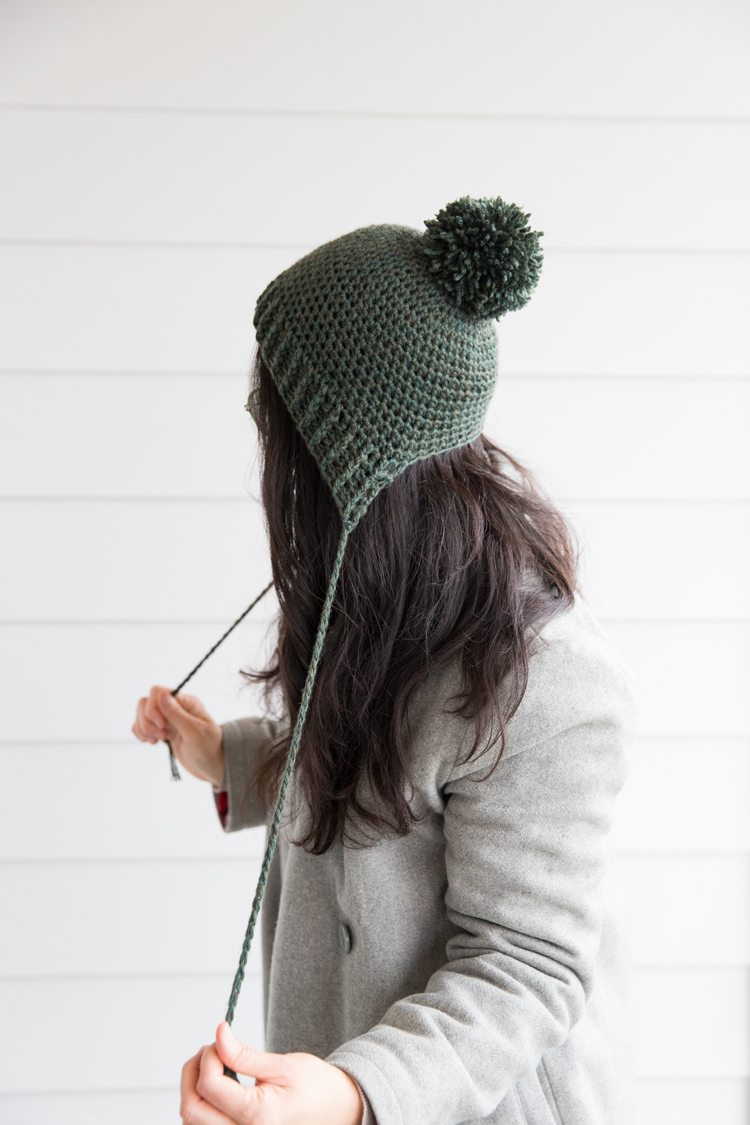
About five years ago I actually designed this pattern for my daughter and offered it in 3 baby/child sizes. I have loved seeing so many people make the pattern, and I’ve also received really helpful feedback that the sizing needed to be improved. I apologize that it’s taken me so long, but I’m excited to share this new updated version which includes 7 sizes up to Adult L, plus sizing adjustment notes, and a video tutorial geared toward beginners.
And it truly is beginner friendly. If you know how to crochet in the round from my Crochet Basics Series, then you can tackle this. The only extra stitches I add are front post double crochet and back post double crochet which I also use in this Easy Rectangle Cardigan pattern.
I no longer have a child or a baby to model the itty bitty sizes, but honestly I think that’s where this pattern really shines. A bonnet on a baby is about the cutest thing!
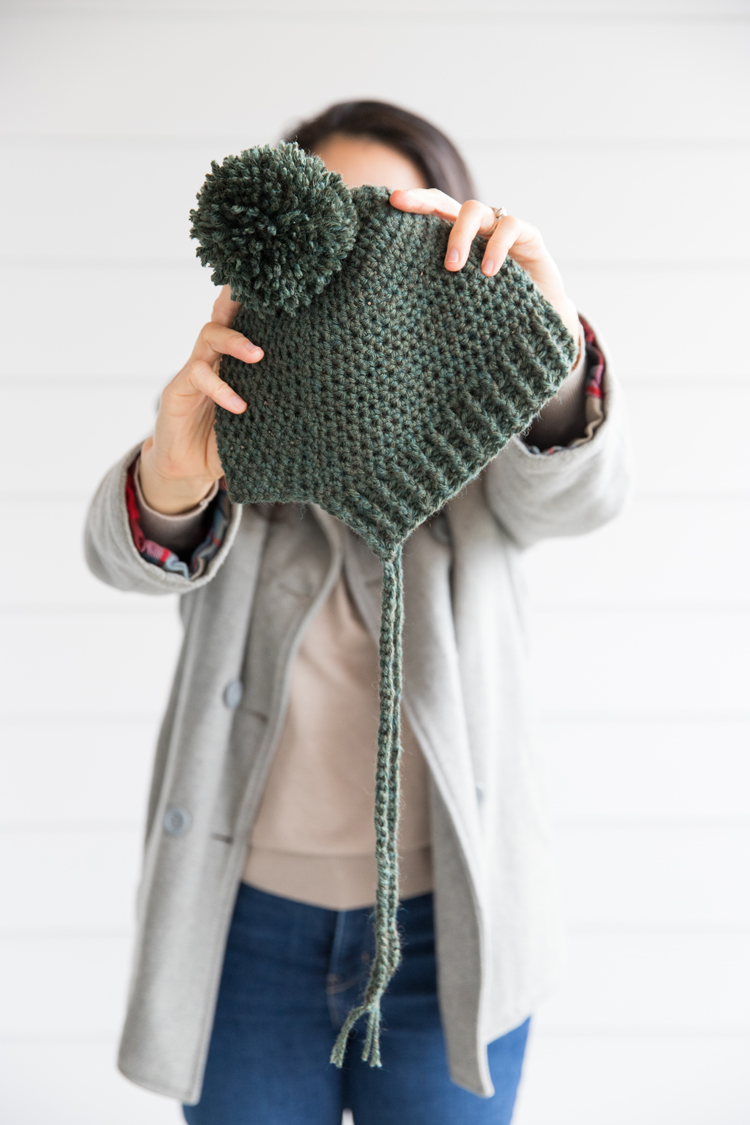
For youth and adult sizes, unless you are going for an 1800s inspired look (no shade), I highly recommend adding a pom on the back to give it some balance.

Click below you want to buy the ad free PDF version this pattern.
MATERIALS
- Worsted weight or size 4 yarn*
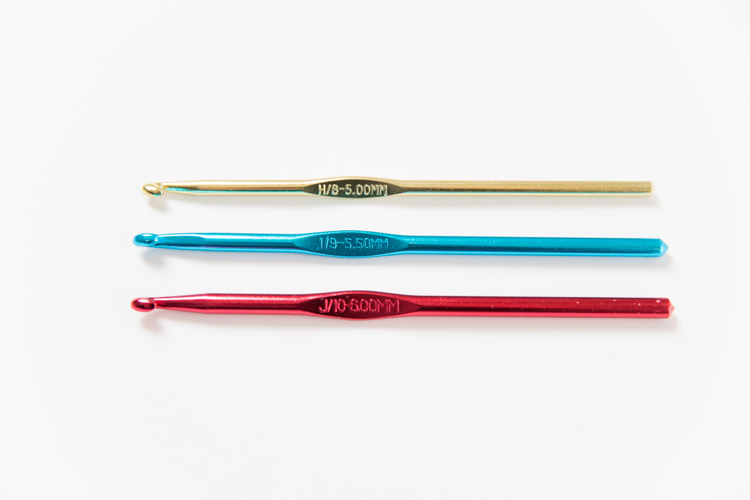
- Crochet hooks in sizes: H/5.00 mm, I/5.50 mm, or J/6.00 mm **
- Scissors
- Yarn needle
- Measuring tape
Material Notes
*For my beanie (size L) I used a fine super wash merino wool yarn called “Swish” in Lost Lake Heather from Knit Picks. This yarn is so soft and warm to wear. It does seem to run thin though but also has more stretch than just an acrylic yarn. I discuss this more in the sizing section below.
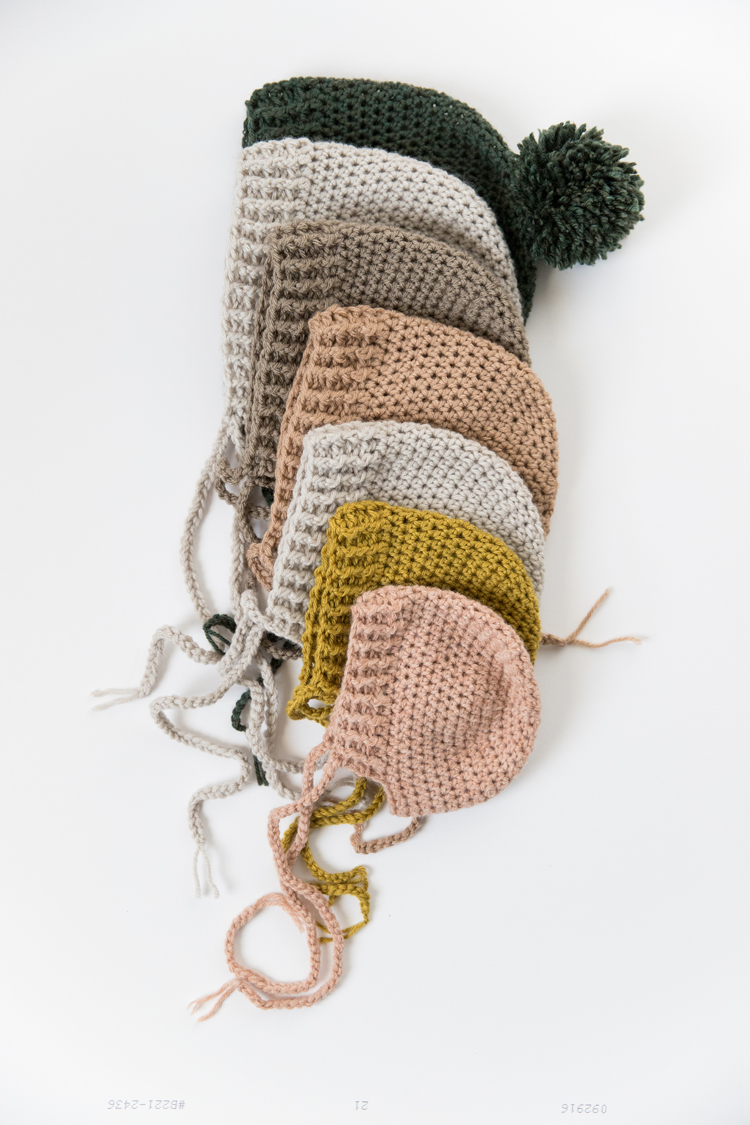
For the other sizes, I used Wool-Ease in Canyon Sunset, Knit Picks Swish in Haystack Heather, and Impeccable Loops and Threads yarns in Putty, Soft Taupe, and True Gray.
*Important: This hat is designed for acrylic and wool yarns. Just like in sewing, the type of material you use can make a big difference in how it turns out and how it fits. If you use cotton yarn, it will affect the sizing and likely make it too big. If you really want to try it with cotton yarn, go down a hook size (or maybe even 2) and manage your expectations that it may not work out. Check your gauge to see if it matches the pattern for your best chance at success.
**Which hook you choose will depend on the size you want to make. You may also adjust your hook size if your tension is tighter or looser than mine. If you’re unsure, I recommend working up a gauge swatch to help you decide.

SIZING
PLEASE NOTE: These are approximates. For best fit, measure the head of the wearer. If you’re uncertain or if the wearer is in the upper measurement range, size up.
Yarn Amounts: This does not include yarn needed for a pom. I suggest adding around 30 yards if you want to make a big pom.
I rounded up and tacked on another 5 yards to the suggested amounts because it is always better to have a little too much yarn than not enough. You also want to make sure you get enough yarn at the same time so that the dye lots are the same and the color is consistent. Depending on the fiber type, it can vary in how much you use even when making the same size with a different kind of yarn. I found that the rougher acrylic yarns tend to eat up a little more yarn than the stretchier merino wool ones. You may produce a little waste in the tails and in the chained ties, so that has to be accounted for as well.
| SIZE | Approx. Head Circumference | Approx. Yarn Amount |
| NEWBORN | 14-15.5 inches/35.6-39.4 cm | 75 yards |
| BABY | 16-17.5 inches/40.6-44.5 cm | 80 yards |
| TODDLER | 18-19 inches/45.7-48.3 cm | 110 yards |
| CHILD | 19.5-21 inches/49.5-53.3 cm | 115 yards |
| YOUTH/ADULT SMALL | 21.5-22.5 inches/54.6-57.2 cm | 133 yards |
| ADULT MEDIUM | 23-24 inches/58.4-61 cm | 134 yards |
| ADULT LARGE | 24-25 inches/61-63.5 cm | 135 yards |
PLEASE NOTE: This pattern is not tested by a testing pool. To keep it free, I am sharing it as a blog post so that I can update it as I receive feedback. If you have any feedback or questions, please email me: [email protected] or direct message me on Instagram, I’m @deliacreates (I usually respond faster via Instagram).
SIZING ADJUSTMENTS:
In general, sizing can be a little bit more flexible with this hat because the brim doesn’t go all the way around, giving it a little more stretch. It also sits at the back of the head, so that if it’s a little big, it still fits fine without looking too bulky. For example, my head size best fits an Adult medium, but the green bonnet beanie I’m wearing is size large. That’s why I suggest sizing up when in doubt.
You can customize the size of the hat by going up or down a hook size and by your yarn choice. Choose a thinner merino wool yarn for a more stretchy yet snug fit that would be a good choice if you are sizing up…it should fit pretty well now and stretch a little with them as they grow. Or stick with a thicker acrylic blend for one with less stretch and a more true to size fit.
I know, I know…Even though both kinds and brands of yarn are listed as “worsted weight” or size 4, they can still vary a little in thickness and results.
VIDEO TUTORIAL
The full pattern and photo tutorial is below, but if video instruction is more your speed the video should have already popped to the top or side of your screen. It will play after some initial ads.
I show you how I made the size adult large hat. The smaller hat sizes are made very similarly. The only changes are that you may use a different hook, you’ll work less increasing rounds and/or less rows at the brim.
Other suggested videos to support this one:
This video is geared toward beginners, but if you’re completely new to crochet, I suggest starting with my Crochet Basics Series first.
Here is a link to the magic knot tutorial I mentioned in the video.
If you want another tutorial that shows how to work fpdc and bpdc stitches in more detail, this easy rectangle cardigan pattern covers those stitches starting at the 4:27 mark of the video.
GAUGE
This is super important if you want the sizing to be correct, so don’t skip it. I have a post about it here (scroll closer to the end of the post).
Note: When testing the gauge of merino wool or a softer, stretchier yarn, press (and sort of stretch) your swatch a little with your hands to relax the stitches before measuring…OR… you can block it first (wet it, press it flat on a towel, and let it dry, this is the equivalent to ironing in sewing) before measuring the gauge. For an acrylic yarn, you most likely don’t need to do this.
H/5.00 mm hook: 4×4 inch square = 12 rows of hdc x 14 hdc stitches
I/5.50 mm hook: 4×4 inch square = 12 rows of hdc x 13 hdc stitches
J/6.00 mm hook: 4×4 inch square = 11 rows of hdc x 12 hdc stitches
ABBREVIATIONS
- ch = chain
- sl st= slip stitch
- hdc = half double crochet
- dc = double crochet
- fpdc = front post double crochet
- bpdc = back post double crochet
- fphdc = front post half double crochet*
- bphdc = back post half double crochet*
*These stitches are only used for the newborn, child, and adult small/youth sizes.
WRITTEN PATTERN & TUTORIAL
For greater explanation on how to make a magic ring, increase, and work each stitch, see the video tutorial above.
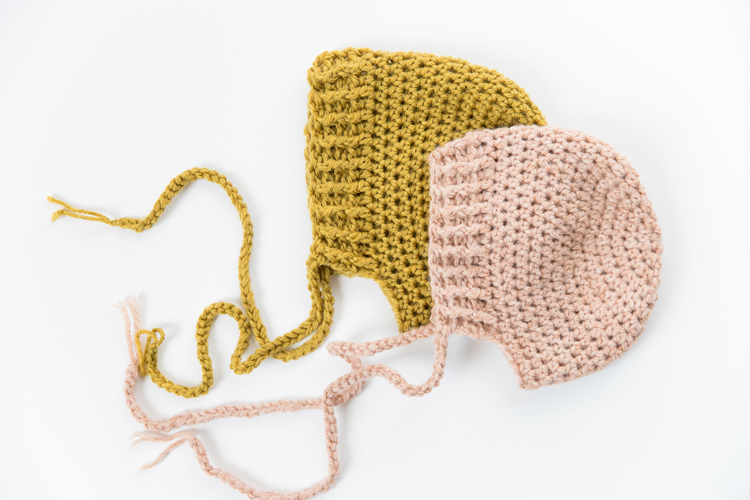
NEWBORN
Use H/5.00 mm hook.
Create magic ring. (See the video for how to do this if you are unfamiliar)
ROUND 1: Ch 2, hdc into the magic ring 7 times. Pull the tail to cinch up the stitches. Slip stitch into the top of the ch 2 from the beginning of the round to form a circle.(Total stitch count = 8, including the ch 2 which is the equivalent of 1 hdc and will always count as a stitch for the rest of this pattern)
ROUND 2: Ch 2, hdc into same stitch. Work 2 hdc into each stitch for the rest of the round. Sl st. to the top of ch 2 from beginning of the round. (Total =16)
ROUND 3: Ch 2, hdc into same stitch. Work 1 hdc into the next. *Work 2 hdc into the next stitch. Work 1 hdc into the next.* Repeat from * to * six more times. Sl st to top of ch 2. (24)
ROUND 4: Ch 2, 1 hdc into the next stitch. Work 2 hdc into the next. *Work 1 hdc into the next 2 stitches. Work 2 hdc into the next.* Repeat from * to * six more times. Sl st to top of ch 2. (32)
ROUND 5: Ch 2, 1 hdc into the next 2 stitches. Work 2 hdc into the next. *Work 1 hdc into the next 3 stitches. Work 2 hdc into the next.* Repeat from * to * six more times. Sl st to top of ch 2. (40)
ROUND 6: Ch 2, 1 hdc into the next 3 stitches. Work 2 hdc into the next. *Work 1 hdc into the next 4 stitches. Work 2 hdc into the next.* Repeat from * to * six more times. Sl st to top of ch 2. (48)
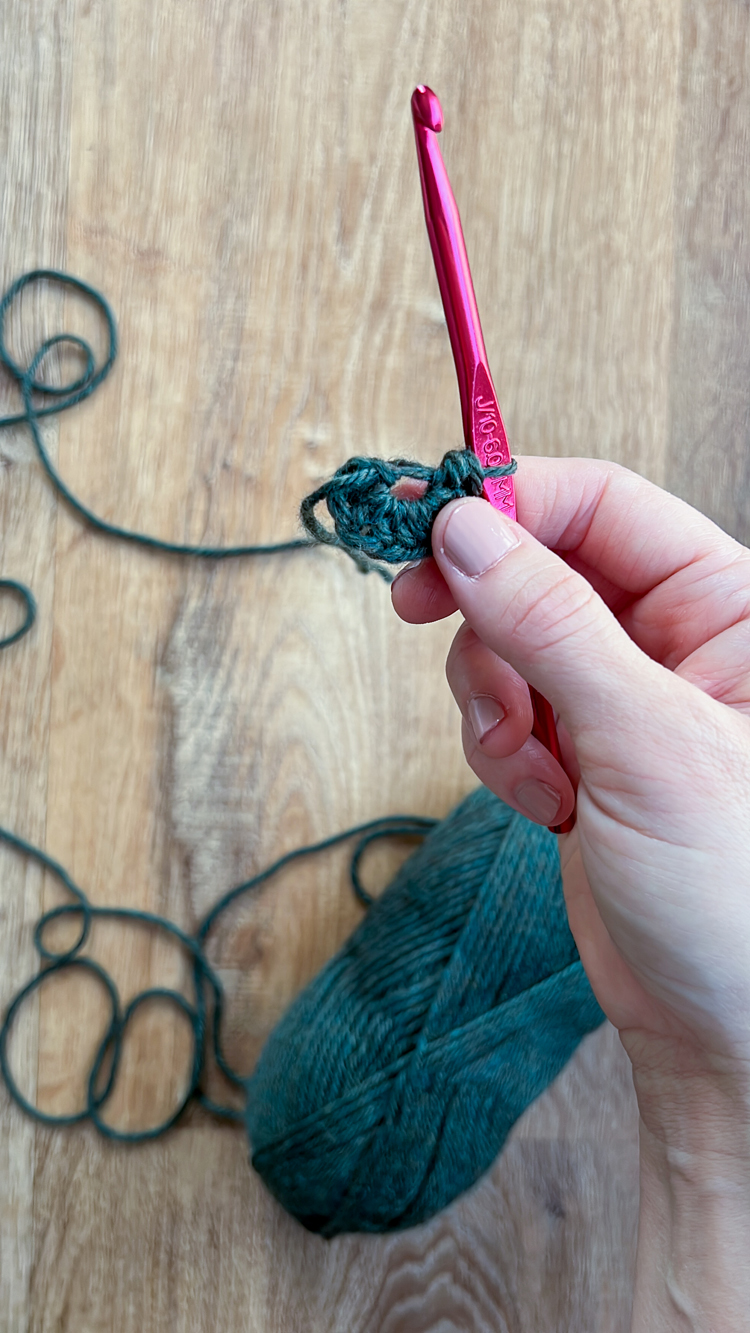
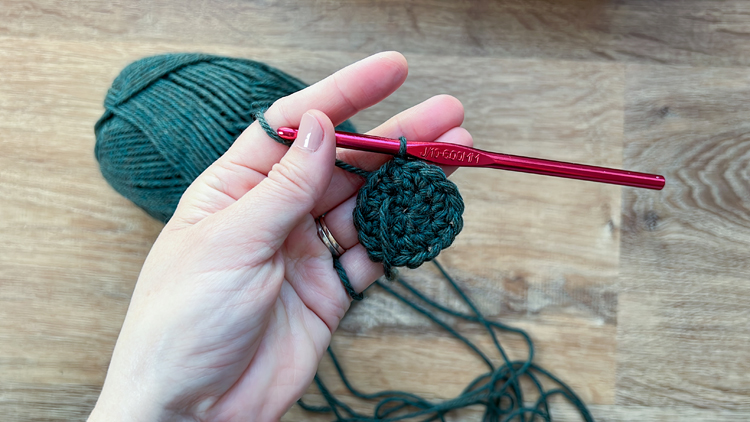
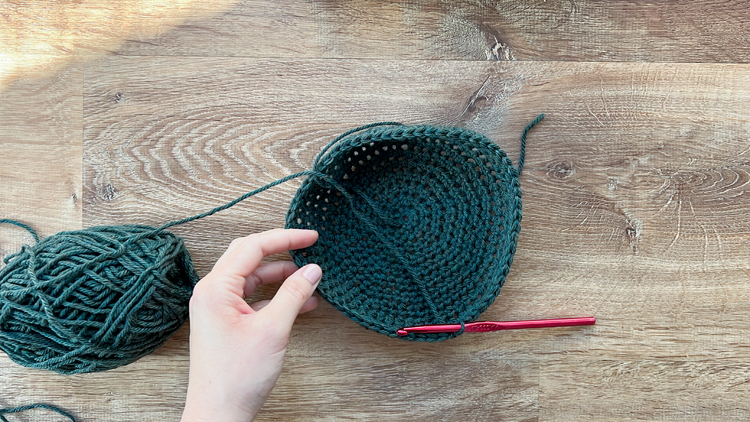
ROUND 7: Ch 2. Work 1 hdc into each stitch. Sl st to top of ch 2. (48)
ROUNDS 8-14: Repeat round 7.
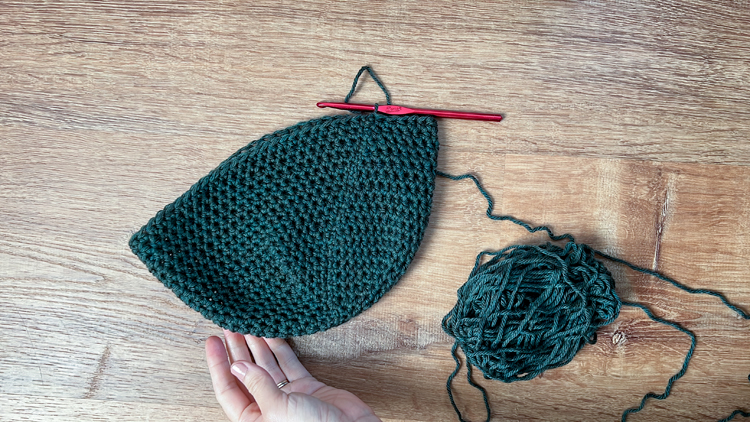
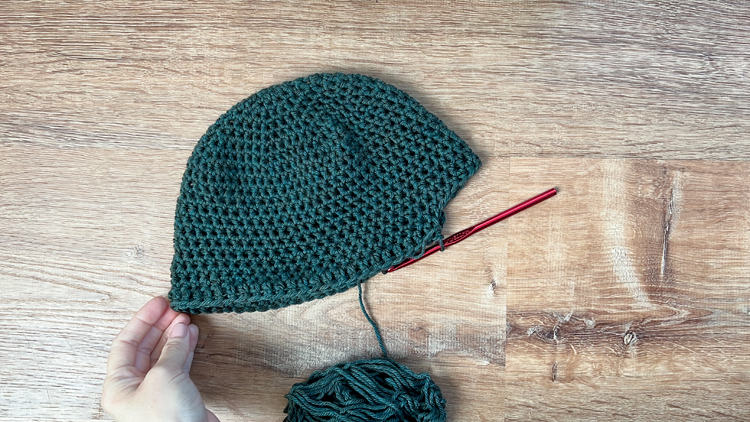
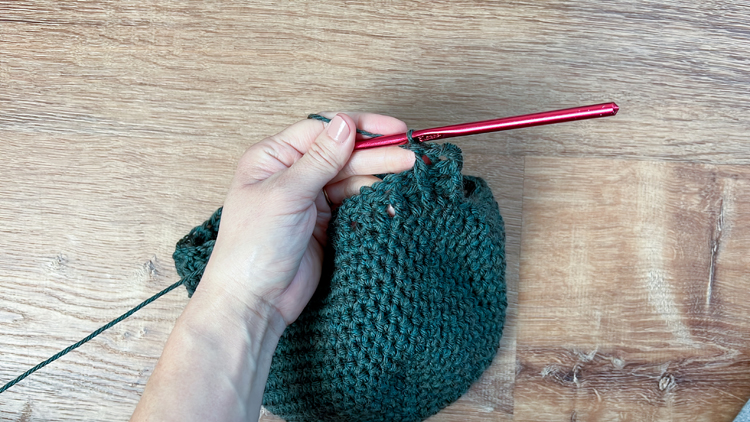
BRIM ROW 1: Ch 2. Dc into each of the next 37 stitches. (38)
BRIM ROW 2: Turn, ch 2. Work alternating fpdc and bpdc for the next 36 stitches. Work a regular dc in the last stitch. (38)
BRIM ROW 3: Turn, ch 2. Work alternating bpdc and fpdc, continuing the pattern established by the previous row. Work a regular dc. (38)
BRIM ROW 4: Turn, ch 2. Work alternating fphdc and bphdc this time, following the pattern and textured established by previous rows. Work a regular hdc in the last stitch. (38)
Tie off and weave in the tails. Add ties (see the end for instructions).
BABY
Use J/6.00 mm hook.
Create magic ring. (See the video for how to do this if you are unfamiliar)
ROUND 1: Ch 2, hdc into the magic ring 7 times. Pull the tail to cinch up the stitches. Slip stitch into the top of the ch 2 from the beginning of the round to form a circle.(Total stitch count = 8, including the ch 2 which is the equivalent of 1 hdc and will always count as a stitch for the rest of this pattern)
ROUND 2: Ch 2, hdc into same stitch. Work 2 hdc into each stitch for the rest of the round. Sl st. to the top of ch 2 from beginning of the round. (Total =16)
ROUND 3: Ch 2, hdc into same stitch. Work 1 hdc into the next. *Work 2 hdc into the next stitch. Work 1 hdc into the next.* Repeat from * to * six more times. Sl st to top of ch 2. (24)
ROUND 4: Ch 2, 1 hdc into the next stitch. Work 2 hdc into the next. *Work 1 hdc into the next 2 stitches. Work 2 hdc into the next.* Repeat from * to * six more times. Sl st to top of ch 2. (32)
ROUND 5: Ch 2, 1 hdc into the next 2 stitches. Work 2 hdc into the next. *Work 1 hdc into the next 3 stitches. Work 2 hdc into the next.* Repeat from * to * six more times. Sl st to top of ch 2. (40)
ROUND 6: Ch 2, 1 hdc into the next 3 stitches. Work 2 hdc into the next. *Work 1 hdc into the next 4 stitches. Work 2 hdc into the next.* Repeat from * to * six more times. Sl st to top of ch 2. (48)
ROUND 7: Ch 2. Work 1 hdc into each stitch. Sl st to top of ch 2. (48)
ROUNDS 8-15: Repeat round 7.
BRIM ROW 1: Ch 2. Dc into each of the next 37 stitches. (38)
BRIM ROW 2: Turn, ch 2. Work alternating fpdc and bpdc for the next 36 stitches. Work a regular dc in the last stitch. (38)
BRIM ROW 3: Turn, ch 2. Work alternating bpdc and fpdc, continuing the pattern established by the previous row. Work a regular dc in the last stitch. (38)
BRIM ROW 4: Turn, ch 2. Work alternating fpdc and bpdc following the pattern from previous rows. Work a regular dc in the last.(38)
Tie off and weave in the tails. Add ties (see the end for instructions).
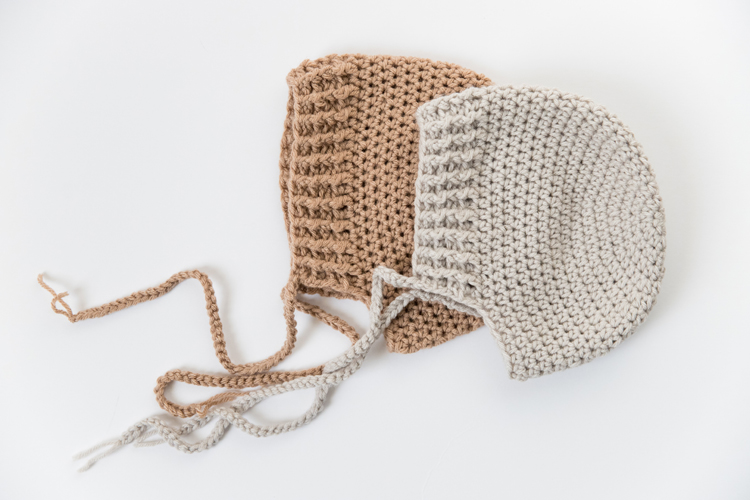
TODDLER
Use H/5.00 mm hook.
Create magic ring. (See the video for how to do this if you are unfamiliar)
ROUND 1: Ch 2, hdc into the magic ring 7 times. Pull the tail to cinch up the stitches. Slip stitch into the top of the ch 2 from the beginning of the round to form a circle.(Total stitch count = 8, including the ch 2 which is the equivalent of 1 hdc and will always count as a stitch for the rest of this pattern)
ROUND 2: Ch 2, hdc into same stitch. Work 2 hdc into each stitch for the rest of the round. Sl st. to the top of ch 2 from beginning of the round. (Total =16)
ROUND 3: Ch 2, hdc into same stitch. Work 1 hdc into the next. *Work 2 hdc into the next stitch. Work 1 hdc into the next.* Repeat from * to * six more times. Sl st to top of ch 2. (24)
ROUND 4: Ch 2, 1 hdc into the next stitch. Work 2 hdc into the next. *Work 1 hdc into the next 2 stitches. Work 2 hdc into the next.* Repeat from * to * six more times. Sl st to top of ch 2. (32)
ROUND 5: Ch 2, 1 hdc into the next 2 stitches. Work 2 hdc into the next. *Work 1 hdc into the next 3 stitches. Work 2 hdc into the next.* Repeat from * to * six more times. Sl st to top of ch 2. (40)
ROUND 6: Ch 2, 1 hdc into the next 3 stitches. Work 2 hdc into the next. *Work 1 hdc into the next 4 stitches. Work 2 hdc into the next.* Repeat from * to * six more times. Sl st to top of ch 2. (48)
ROUND 7: Ch 2, 1 hdc into the next 4 stitches. Work 2 hdc into the next. *Work 1 hdc into the next 5 stitches. Work 2 hdc into the next.* Repeat from * to * six more times. Sl st to top of ch 2. (56)
ROUND 8: Ch 2. Work 1 hdc into each stitch. Sl st to top of ch 2. (56)
ROUNDS 9-16: Repeat round 8.
BRIM ROW 1: Ch 2. Dc into each of the next 43 stitches. (44)
BRIM ROW 2: Turn, ch 2. Work alternating fpdc and bpdc for the next 42 stitches. Work a regular dc in the last stitch. (44)
BRIM ROW 3: Turn, ch 2. Work alternating bpdc and fpdc, continuing the pattern established by the previous row. Work a regular dc in the last stitch. (44)
BRIM ROW 4: Turn, ch 2. Work alternating fpdc and bpdc following the pattern from previous rows. Work a regular dc in the last.(44)
Tie off and weave in the tails. Add ties (see the end for instructions).
CHILD
Use J/6.00 mm hook.
Create magic ring. (See the video for how to do this if you are unfamiliar)
ROUND 1: Ch 2, hdc into the magic ring 7 times. Pull the tail to cinch up the stitches. Slip stitch into the top of the ch 2 from the beginning of the round to form a circle.(Total stitch count = 8, including the ch 2 which is the equivalent of 1 hdc and will always count as a stitch for the rest of this pattern)
ROUND 2: Ch 2, hdc into same stitch. Work 2 hdc into each stitch for the rest of the round. Sl st. to the top of ch 2 from beginning of the round. (Total =16)
ROUND 3: Ch 2, hdc into same stitch. Work 1 hdc into the next. *Work 2 hdc into the next stitch. Work 1 hdc into the next.* Repeat from * to * six more times. Sl st to top of ch 2. (24)
ROUND 4: Ch 2, 1 hdc into the next stitch. Work 2 hdc into the next. *Work 1 hdc into the next 2 stitches. Work 2 hdc into the next.* Repeat from * to * six more times. Sl st to top of ch 2. (32)
ROUND 5: Ch 2, 1 hdc into the next 2 stitches. Work 2 hdc into the next. *Work 1 hdc into the next 3 stitches. Work 2 hdc into the next.* Repeat from * to * six more times. Sl st to top of ch 2. (40)
ROUND 6: Ch 2, 1 hdc into the next 3 stitches. Work 2 hdc into the next. *Work 1 hdc into the next 4 stitches. Work 2 hdc into the next.* Repeat from * to * six more times. Sl st to top of ch 2. (48)
ROUND 7: Ch 2, 1 hdc into the next 4 stitches. Work 2 hdc into the next. *Work 1 hdc into the next 5 stitches. Work 2 hdc into the next.* Repeat from * to * six more times. Sl st to top of ch 2. (56)
ROUND 8: Ch 2. Work 1 hdc into each stitch. Sl st to top of ch 2. (56)
ROUNDS 9-17: Repeat round 8.
BRIM ROW 1: Ch 2. Dc into each of the next 43 stitches. (44)
BRIM ROW 2: Turn, ch 2. Work alternating fpdc and bpdc for the next 42 stitches. Work a regular dc in the last stitch. (44)
BRIM ROW 3: Turn, ch 2. Work alternating bpdc and fpdc, continuing the pattern established by the previous row. Work a regular dc in the last stitch. (44)
BRIM ROW 4: Turn, ch 2. Work alternating fpdc and bpdc following the pattern from previous rows. Work a regular dc in the last.(44)
BRIM ROW 5: Turn, ch 2. Work alternating bphdc and fphdc this time. Work a regular hdc in the last. (44)
Tie off and weave in the tails. Add ties (see the end for instructions).
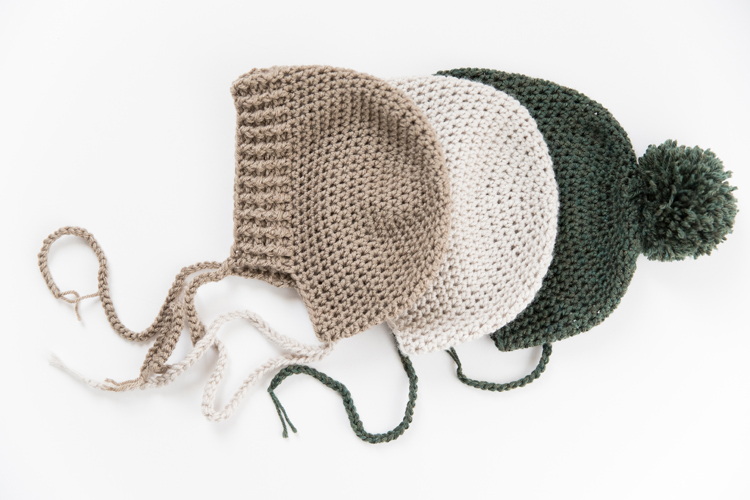
YOUTH/ADULT SMALL
Use H/5.00 mm hook.
Create magic ring. (See the video for how to do this if you are unfamiliar)
ROUND 1: Ch 2, hdc into the magic ring 7 times. Pull the tail to cinch up the stitches. Slip stitch into the top of the ch 2 from the beginning of the round to form a circle.(Total stitch count = 8, including the ch 2 which is the equivalent of 1 hdc and will always count as a stitch for the rest of this pattern)
ROUND 2: Ch 2, hdc into same stitch. Work 2 hdc into each stitch for the rest of the round. Sl st. to the top of ch 2 from beginning of the round. (Total =16)
ROUND 3: Ch 2, hdc into same stitch. Work 1 hdc into the next. *Work 2 hdc into the next stitch. Work 1 hdc into the next.* Repeat from * to * six more times. Sl st to top of ch 2. (24)
ROUND 4: Ch 2, 1 hdc into the next stitch. Work 2 hdc into the next. *Work 1 hdc into the next 2 stitches. Work 2 hdc into the next.* Repeat from * to * six more times. Sl st to top of ch 2. (32)
ROUND 5: Ch 2, 1 hdc into the next 2 stitches. Work 2 hdc into the next. *Work 1 hdc into the next 3 stitches. Work 2 hdc into the next.* Repeat from * to * six more times. Sl st to top of ch 2. (40)
ROUND 6: Ch 2, 1 hdc into the next 3 stitches. Work 2 hdc into the next. *Work 1 hdc into the next 4 stitches. Work 2 hdc into the next.* Repeat from * to * six more times. Sl st to top of ch 2. (48)
ROUND 7: Ch 2, 1 hdc into the next 4 stitches. Work 2 hdc into the next. *Work 1 hdc into the next 5 stitches. Work 2 hdc into the next.* Repeat from * to * six more times. Sl st to top of ch 2. (56)
ROUND 8: Ch 2, 1 hdc into the next 5 stitches. Work 2 hdc into the next. *Work 1 hdc into the next 6 stitches. Work 2 hdc into the next.* Repeat from * to * six more times. Sl st to top of ch 2. (64)
ROUND 9: Ch 2. Work 1 hdc into each stitch. Sl st to top of ch 2. (64)
ROUNDS 10-18: Repeat round 9.
BRIM ROW 1: Ch 2. Dc into each of the next 51 stitches. (52)
BRIM ROW 2: Turn, ch 2. Work alternating fpdc and bpdc for the next 50 stitches. Work a regular dc in the last stitch. (52)
BRIM ROW 3: Turn, ch 2. Work alternating bpdc and fpdc, continuing the pattern established by the previous row. Work a regular dc in the last stitch. (52)
BRIM ROW 4: Turn, ch 2. Work alternating fpdc and bpdc following the pattern from previous rows. Work a regular dc in the last.(52)
BRIM ROW 5: Turn, ch 2. Work alternating bphdc and fphdc this time. Work a regular hdc in the last. (52)
Tie off and weave in the tails. Add ties (see the end for instructions).
ADULT MEDIUM
Use I/5.50 mm hook.
Create magic ring. (See the video for how to do this if you are unfamiliar)
ROUND 1: Ch 2, hdc into the magic ring 7 times. Pull the tail to cinch up the stitches. Slip stitch into the top of the ch 2 from the beginning of the round to form a circle.(Total stitch count = 8, including the ch 2 which is the equivalent of 1 hdc and will always count as a stitch for the rest of this pattern)
ROUND 2: Ch 2, hdc into same stitch. Work 2 hdc into each stitch for the rest of the round. Sl st. to the top of ch 2 from beginning of the round. (Total =16)
ROUND 3: Ch 2, hdc into same stitch. Work 1 hdc into the next. *Work 2 hdc into the next stitch. Work 1 hdc into the next.* Repeat from * to * six more times. Sl st to top of ch 2. (24)
ROUND 4: Ch 2, 1 hdc into the next stitch. Work 2 hdc into the next. *Work 1 hdc into the next 2 stitches. Work 2 hdc into the next.* Repeat from * to * six more times. Sl st to top of ch 2. (32)
ROUND 5: Ch 2, 1 hdc into the next 2 stitches. Work 2 hdc into the next. *Work 1 hdc into the next 3 stitches. Work 2 hdc into the next.* Repeat from * to * six more times. Sl st to top of ch 2. (40)
ROUND 6: Ch 2, 1 hdc into the next 3 stitches. Work 2 hdc into the next. *Work 1 hdc into the next 4 stitches. Work 2 hdc into the next.* Repeat from * to * six more times. Sl st to top of ch 2. (48)
ROUND 7: Ch 2, 1 hdc into the next 4 stitches. Work 2 hdc into the next. *Work 1 hdc into the next 5 stitches. Work 2 hdc into the next.* Repeat from * to * six more times. Sl st to top of ch 2. (56)
ROUND 8: Ch 2, 1 hdc into the next 5 stitches. Work 2 hdc into the next. *Work 1 hdc into the next 6 stitches. Work 2 hdc into the next.* Repeat from * to * six more times. Sl st to top of ch 2. (64)
ROUND 9: Ch 2. Work 1 hdc into each stitch. Sl st to top of ch 2. (64)
ROUNDS 10-19: Repeat round 9.
BRIM ROW 1: Ch 2. Dc into each of the next 51 stitches. (52)
BRIM ROW 2: Turn, ch 2. Work alternating fpdc and bpdc for the next 50 stitches. Work a regular dc in the last stitch. (52)
BRIM ROW 3: Turn, ch 2. Work alternating bpdc and fpdc, continuing the pattern established by the previous row. Work a regular dc in the last stitch. (52)
BRIM ROW 4: Turn, ch 2. Work alternating fpdc and bpdc following the pattern from previous rows. Work a regular dc in the last.(52)
BRIM ROW 5: Turn, ch 2. Work alternating bpdc and fpdc. Work a regular dc in the last. (52)
Tie off and weave in the tails. Add ties (see the end for instructions).
ADULT LARGE
Use J/6.00 mm hook.
Create magic ring. (See the video for how to do this if you are unfamiliar)
ROUND 1: Ch 2, hdc into the magic ring 7 times. Pull the tail to cinch up the stitches. Slip stitch into the top of the ch 2 from the beginning of the round to form a circle.(Total stitch count = 8, including the ch 2 which is the equivalent of 1 hdc and will always count as a stitch for the rest of this pattern)
ROUND 2: Ch 2, hdc into same stitch. Work 2 hdc into each stitch for the rest of the round. Sl st. to the top of ch 2 from beginning of the round. (Total =16)
ROUND 3: Ch 2, hdc into same stitch. Work 1 hdc into the next. *Work 2 hdc into the next stitch. Work 1 hdc into the next.* Repeat from * to * six more times. Sl st to top of ch 2. (24)
ROUND 4: Ch 2, 1 hdc into the next stitch. Work 2 hdc into the next. *Work 1 hdc into the next 2 stitches. Work 2 hdc into the next.* Repeat from * to * six more times. Sl st to top of ch 2. (32)
ROUND 5: Ch 2, 1 hdc into the next 2 stitches. Work 2 hdc into the next. *Work 1 hdc into the next 3 stitches. Work 2 hdc into the next.* Repeat from * to * six more times. Sl st to top of ch 2. (40)
ROUND 6: Ch 2, 1 hdc into the next 3 stitches. Work 2 hdc into the next. *Work 1 hdc into the next 4 stitches. Work 2 hdc into the next.* Repeat from * to * six more times. Sl st to top of ch 2. (48)
ROUND 7: Ch 2, 1 hdc into the next 4 stitches. Work 2 hdc into the next. *Work 1 hdc into the next 5 stitches. Work 2 hdc into the next.* Repeat from * to * six more times. Sl st to top of ch 2. (56)
ROUND 8: Ch 2, 1 hdc into the next 5 stitches. Work 2 hdc into the next. *Work 1 hdc into the next 6 stitches. Work 2 hdc into the next.* Repeat from * to * six more times. Sl st to top of ch 2. (64)
ROUND 9: Ch 2. Work 1 hdc into each stitch. Sl st to top of ch 2. (64)
ROUNDS 10-19: Repeat round 9.
BRIM ROW 1: Ch 2. Dc into each of the next 51 stitches. (52)
BRIM ROW 2: Turn, ch 2. Work alternating fpdc and bpdc for the next 50 stitches. Work a regular dc in the last stitch. (52)
BRIM ROW 3: Turn, ch 2. Work alternating bpdc and fpdc, continuing the pattern established by the previous row. Work a regular dc in the last stitch. (52)
BRIM ROW 4: Turn, ch 2. Work alternating fpdc and bpdc following the pattern from previous rows. Work a regular dc in the last.(52)
BRIM ROW 5: Turn, ch 2. Work alternating bpdc and fpdc. Work a regular dc in the last. (52)
Tie off and weave in the tails. Add ties (see the below for instructions).
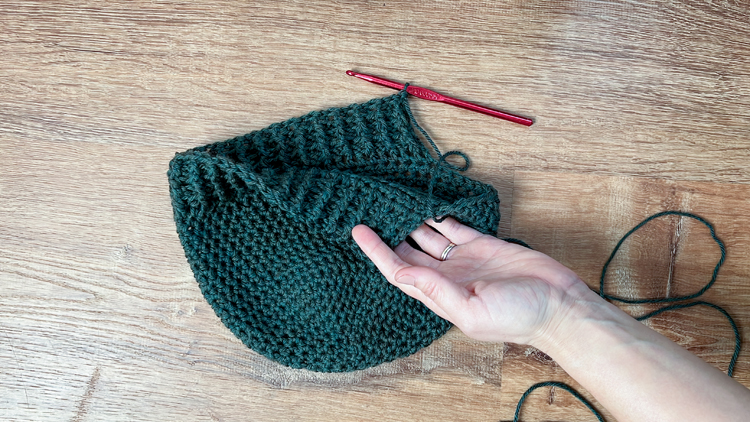
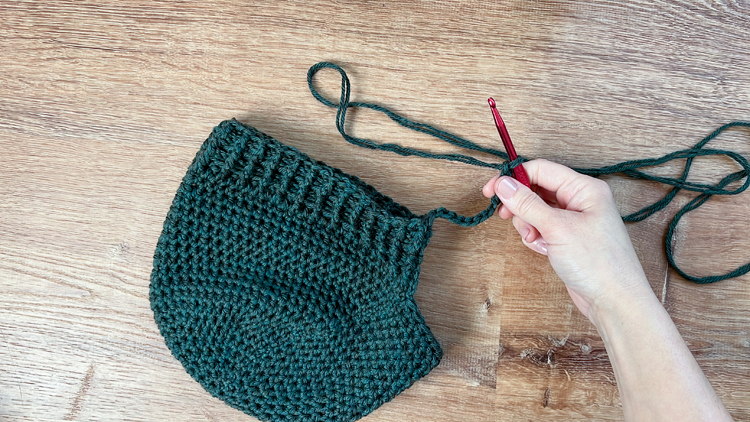
TIES: For all sizes.
Measure out two pieces of yarn 10-12 feet long (12 ft. for the adult sizes).
Thread each one through the bottom corners of the brim so that each piece of yarn is folded exactly in half and doubled up.
Insert the hook into the corner, yarn over and just start chaining tightly until you reach the end of the yarn or until they are the length you prefer. Tie off. Trim the excess.
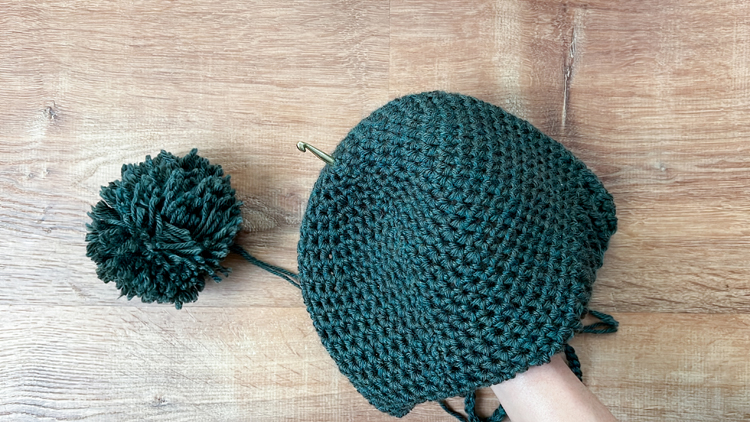
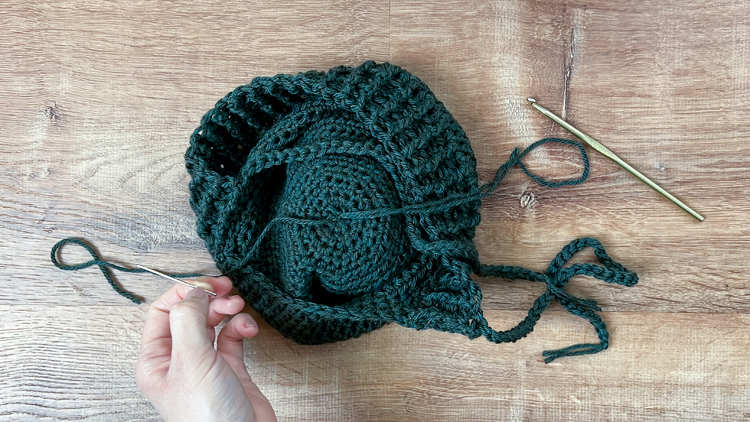
Add a pom if you like.
TIP: If you do, I leave the tail at the top of the hat unwoven, so I can use it to help secure the pom in place.
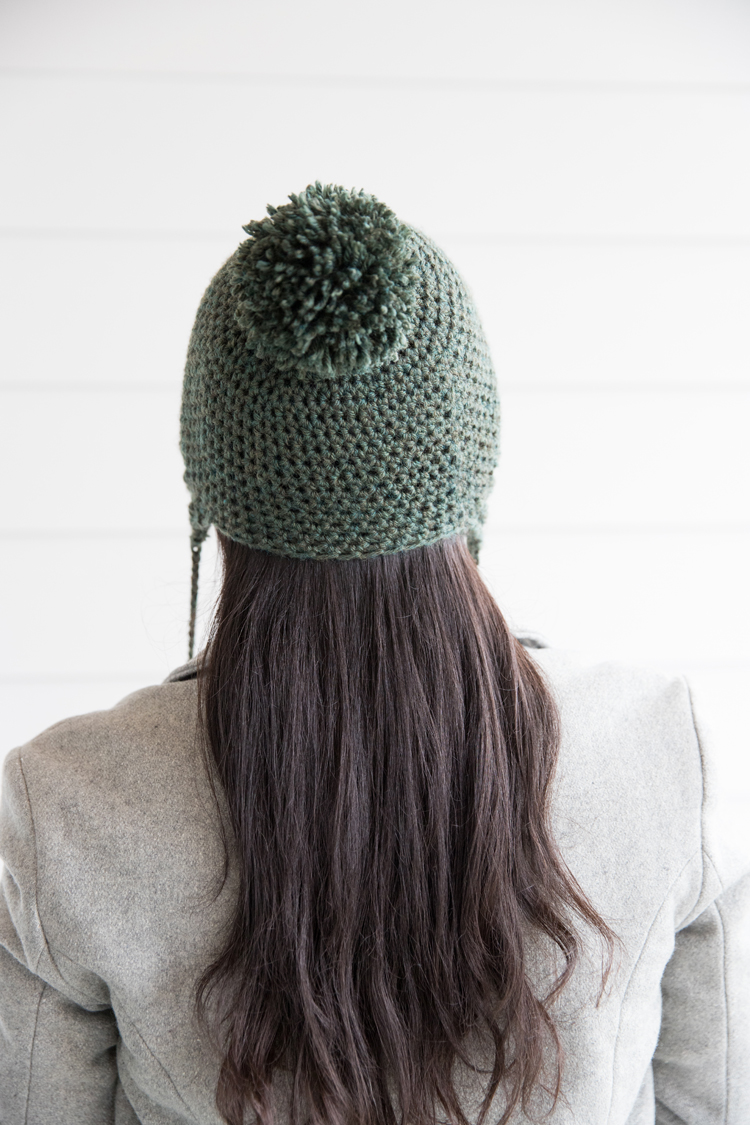
All done! You have a cozy bonnet beanie.

If you want this buy the ad free PDF version of this pattern, click below to my shop listing:


This is my favorite hat to make, it works up so quickly and evenly. I have given to my nieces twice now (as they grow) and they love them.
That makes me so happy to hear that my pattern has been a reliable go to for you. Really…the best compliment. Thank you for commenting!
This pattern was really written for me I have been searching and searching for the perfect hat pattern for sewing one, but never knew it would end up being a crocheting one. Thank you, thank you, thank you!
So glad it will be of help to you!