

Today we’re taking a little detour from my crochet basics series, and putting the skills we’ve already learned to make these fun bubble puff crochet garlands!
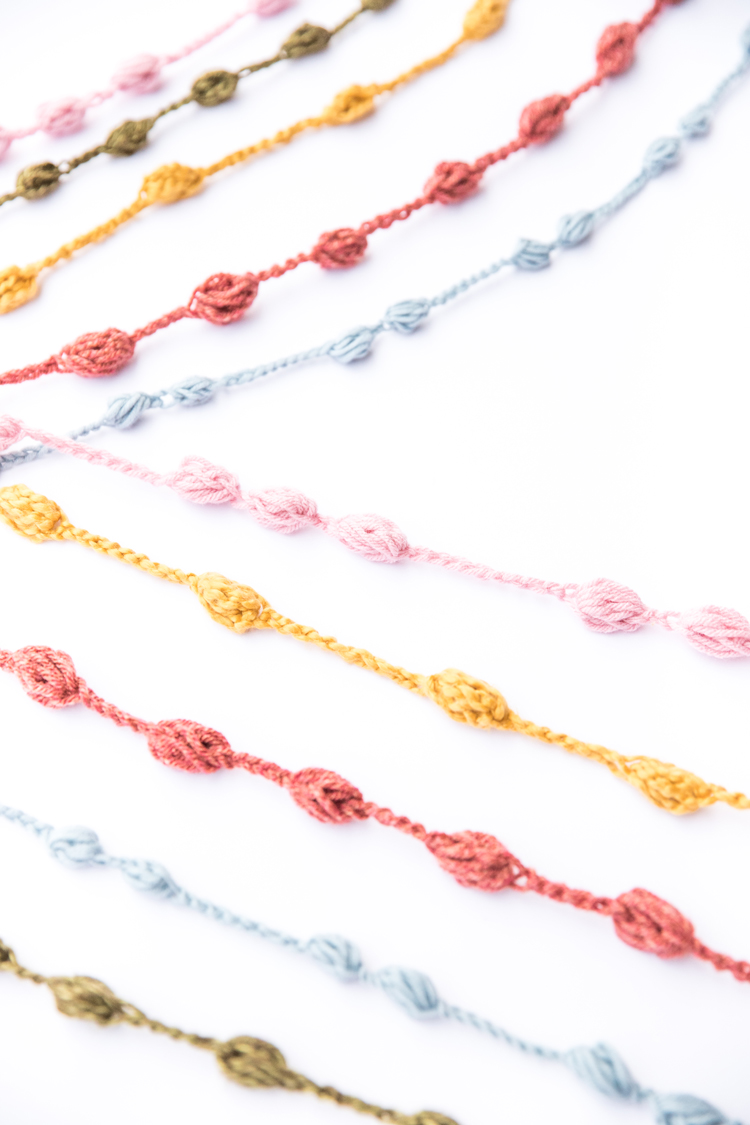
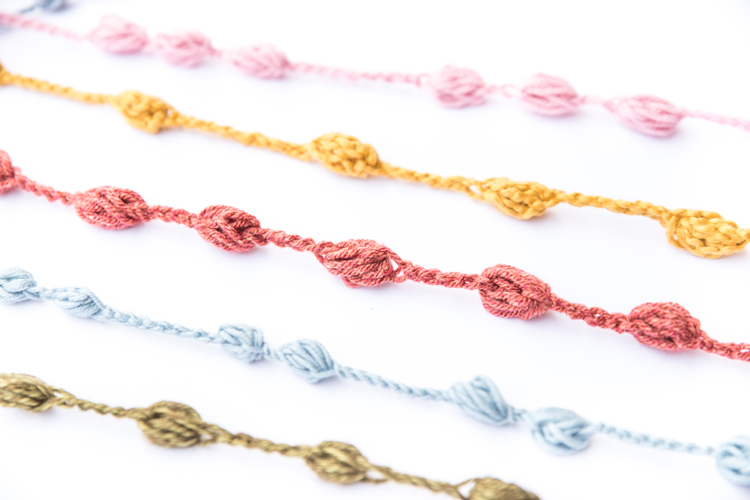
You can make them in any size, in any chain to bubble puff ratio you want!
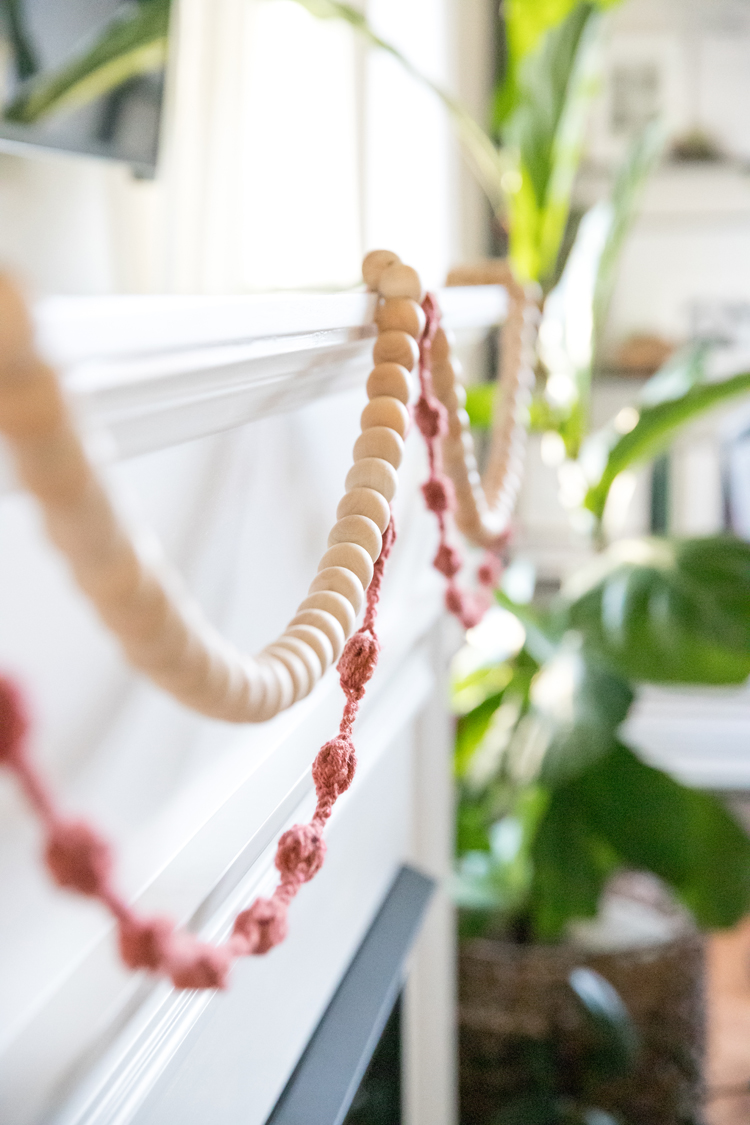
They’re great for different occasions, and they can use up scraps of yarn that are too small to make anything else.
These garlands are a great project for a beginner to branch out into a more difficult stitch. You don’t have to fuss over gauge and it’s really simple…just a long line of chains and bubble puff stitches.

The bubble puff stitch can sound intimidating, it’s a tongue twister for sure – ha!, but it’s just like a double crochet stitch with six extra loops that are stretched out.
I’m sharing the stitch tutorial in the video (below). I also have some key tips for how to yarn over and how to secure your loops, which makes nailing this stitch much much easier.
Let’s get started!
Materials
- Any yarn 🙂
- Smallest hook appropriate for that yarn
No really, this works for ANY yarn you want…chunky, lacy, it’s up to you. For your first attempt, I do recommend choosing an easy to manage worsted weight yarn.
As for the hook, it works best and looks best to use a hook that is at the smaller end of the range of appropriate hooks for that yarn. I used an H/8 or 5.00 mm hook for worsted weight or category 4 yarn.
If you need a refresher on yarn and hook sizes, I have more information in THIS POST.
Skills Needed
You will need to know:
Video Tutorial
Click play and let’s make a garland!
Vary the number of chains to puff stitches to make fun patterns. It’s a really easy project that you can play around with.
You could even get really fancy and work two colors together for a multi-toned garland.
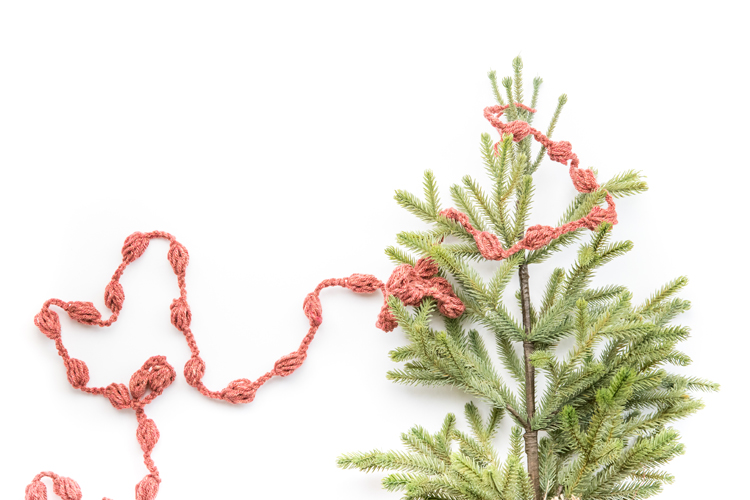
I made several colors to go beyond the holidays….for birthdays, Valentine’s Day, etc. I didn’t make one long enough for our big tree, but they do fit our mantle and the little Christmas trees I put in my kids’ rooms.
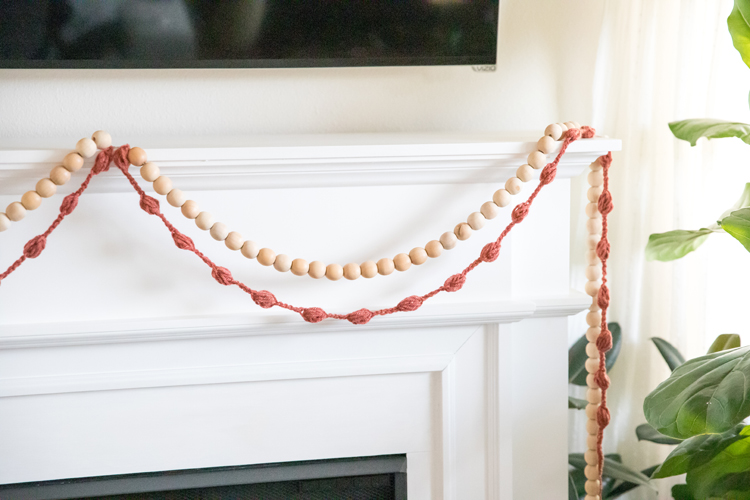
It’s inexpensive decor and a great way to reduce waste!
Happy Holiday hooking!
Music Source: Pleasant Pictures Studios, Egg Nog and Sprite
I love it! Can’t wait to try!
Thanks Carrie!
I wish you talked us through this and went a bit
slower. I have had to watch the video a number of times and find the music very distracting.
I understand your frustrations. I have it on YouTube as well which allows you to slow down the playback speed in settings (click on the gear icon on the right bottom corner of the video). This was meant to be a quick tutorial. For my more detailed ones where I explain each step and slow things down check out my crochet basics posts. These bubble puff stitches are a lot like a double crochet stitch (I have a crochet basics video for this too) but pulled out larger and repeated in the same spot. I hope that helps! <3
What a great idea for a garland!. Your pictures are fantastic. Forgive me, but I cannot locate the video tutorial nor the play button to click. Please point me in the right direction. Many thanks.
It should be under the heading “Video Tutorial.” If you can’t see it right away, it might be a slow connection? So sorry. Let me know if you still can’t see it and I’ll reach out to my host.
Thank you, Delia. I still don’t see it. I really appreciate you helping me out with this.
I have been trouble shooting this and haven’t been able to recreate the problem of a missing video player. It could be a few things: there is an ad that often pops up just before the video player. It should be right under it. Slow internet connection may make loading the video slower? Your server may block ad content which may block my video from playing, because an ad plays right before it. Although, I have tried this on a server that blocks ads, and my videos still play. Those are just guesses. Have you tried viewing it on a phone or on a computer?
Thanks so much. I viewed the tutorial on my phone with no problems. Thank you!
That is so cool. Very easy, but at the same time a bit hard because you have to train your mind to go the wrong way with your stitch. I can’t wait to try this.
I’m going to do this today! Thanks for the inspiration and tutorial : )
Looks very pretty, but there is no video in the post. I’ll keep checking back for one! Hopefully it gets fixed
Thanks!
I have been trouble shooting this and haven’t been able to recreate the problem of a missing video player. It could be a few things: there is an ad that often pops up just before the video player. It should be right under it. Slow internet connection may make loading the video slower? Your server may block ad content which may block my video from playing, because an ad plays right before it. Although, I have tried this on a server that blocks ads, and my videos still play. Those are just guesses. Have you tried viewing it on a phone or on a computer?
I turned off my ad-blocker and it’s working totally fine. Thanks!
Oh good. I’m so glad it’s working now. Sorry for the trouble!
Very straight forward instructions, these are fabulous, I can’t stop making them! The house will be a cornucopia of crochet! Thank you, x
Oh I love it! I’m so glad you’re enjoying the tutorial. xo, Delia
This is exactly what I was looking for, shame I cant seem to get the video to play all the way through.
I dont like that I had to turn off my ad blocker for a start, and then the video gets as far as ch 10 and then jumps to the next video.
Most frustrating and not conducive to encouraging visitors to return.
Hi Tina,
Thank you for the feedback on the video. My videos are hosted through my ad provider to ensure ads can run seamlessly with the video and not bog down the content delivery. If you turn on an ad blocker, this will prevent the video from being played properly. Ads are what enable me to pay the bills and provide this “free” content to you. If you remove the ad blocker and still experience issues with playing the video, please let me know. I will put in a service ticket and make sure it’s fixed for you asap. From what I can see from my end though, without an ad blocker the video plays through correctly.
Delia
This is exactly what I was looking for! Thanks for a great and easy continuous garland pattern!
I made six garlands from yarn I had on hand, thinking of connecting side by side to create a scarf…. Any idea how I could make that happen?
I apologize for my super delayed response. Your comment erroneously got lumped with spam comments. I suppose you could work rows of stitches in between each bubble puff rows and slip stitch them in from the side as you go. That’s my best guess. I personally wouldn’t do that though. I would instead choose another pattern that uses rows of bubble puff stitches. I’m sorry I don’t have a better answer for you.
I made six garland strands (my first project ever) and would like to connect side by side to create a scarf but not sure how to proceed. Any thoughts? Help!
Good question! In the future, you will want to join the yarn first so that you can create one continuous strand. Since they are already created, you maybe want to use the magic knot (I have a tutorial for this on instagram and here on my site) to join the tails together. Try to join them as close as you can to minimize length between the strands. I hope that helps.
Love your puff stitch garlands you have made. I am going to make me some. Thanks a lot.