I loved the stitch from my Basic SC Beanie pattern so much, I decided to use it to make a new cardigan pattern!
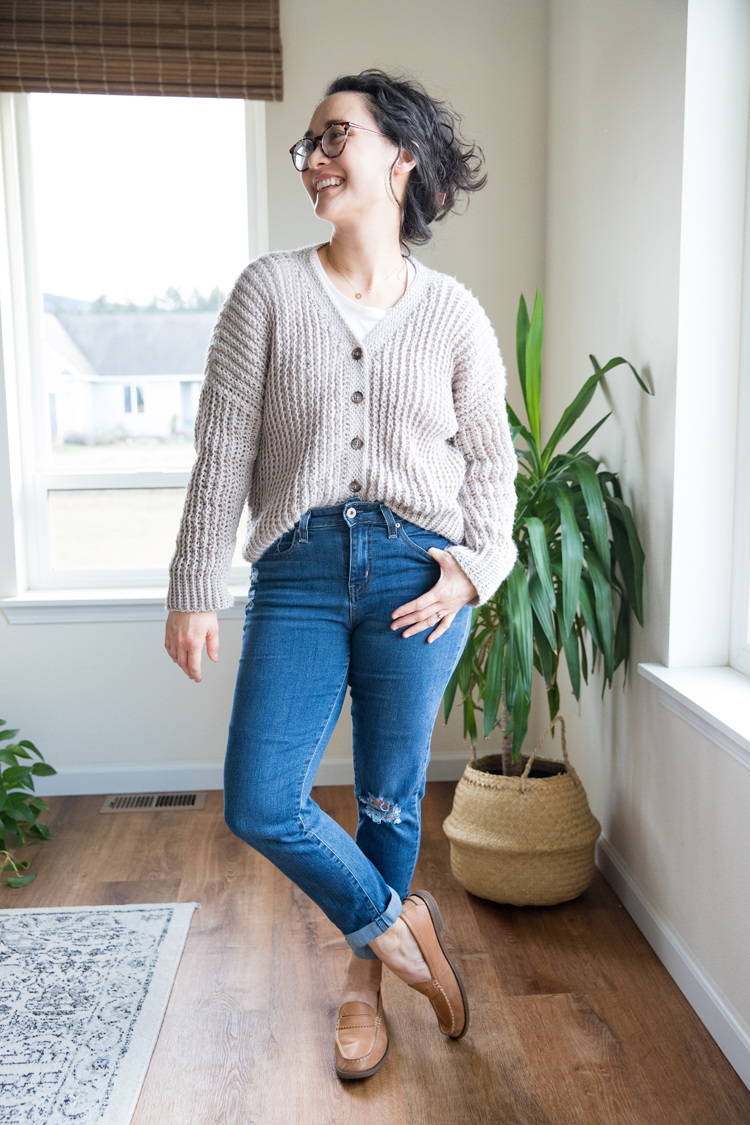
I call it the Button Up Cardigan Sweater, because although you can wear it open, I designed it with the intent to wear it mostly as just a sweater.
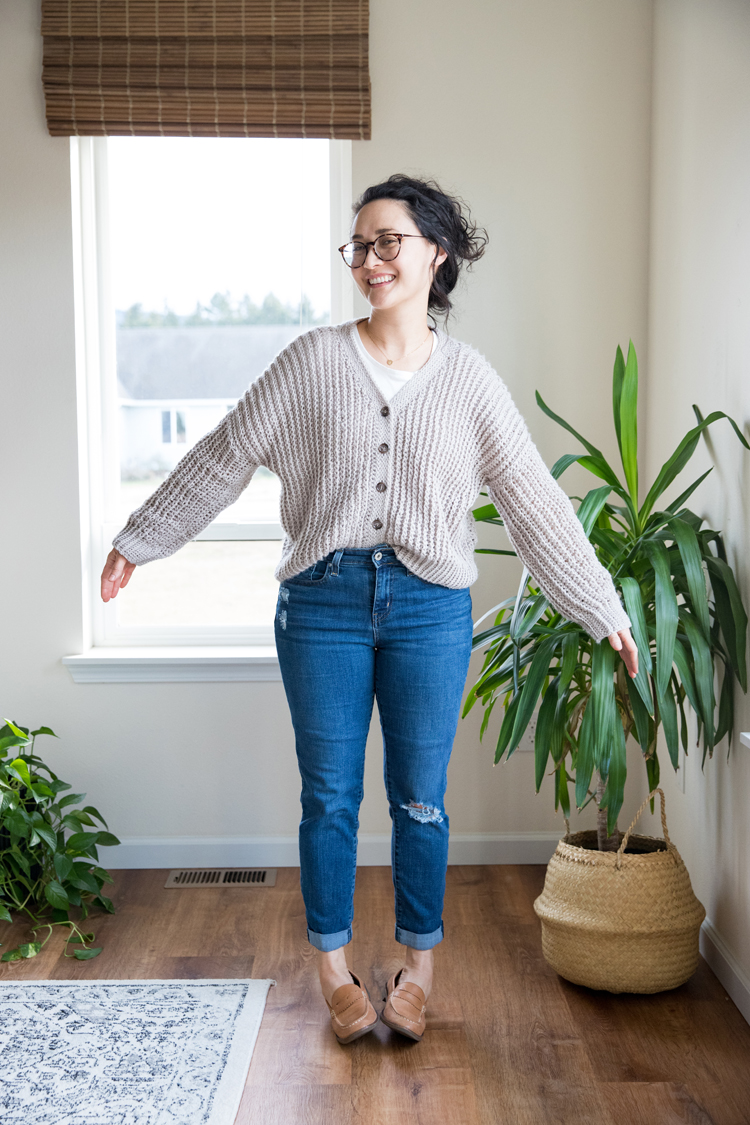
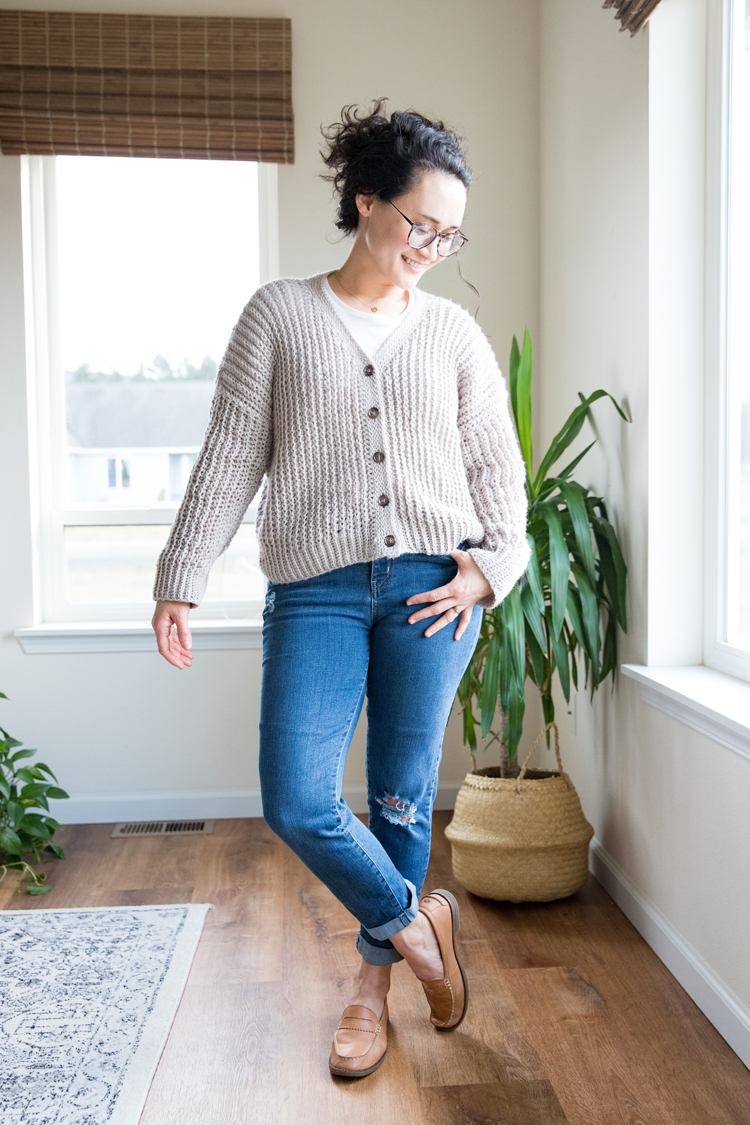
It’s a little slouchy, short-ish, but not “cropped,” and a great layer for our chilly, spring weather that we’ll have, let’s be honest, probably through June here in the PNW.
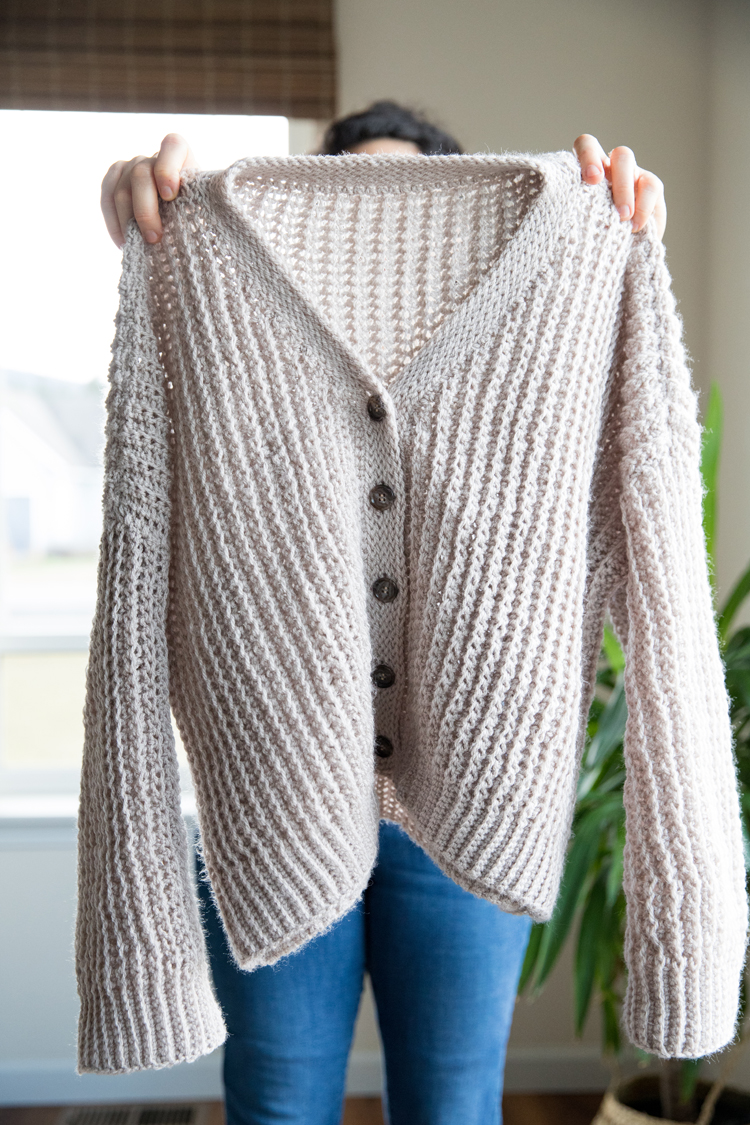
I consider it a little bit more advanced than my rectangle cardigan, because there is some decreasing in the front and button holes in the placket, but it’s still very beginner friendly. It’s made with only single crochet and slip stitches in back or front loops, and that’s it. Really basic stitches. No front post or back post stitches.
(BTW: If you are brand new to crochet and want to start at the very basics, I have a Crochet Basics Series with lots of easy projects and videos – HERE.)
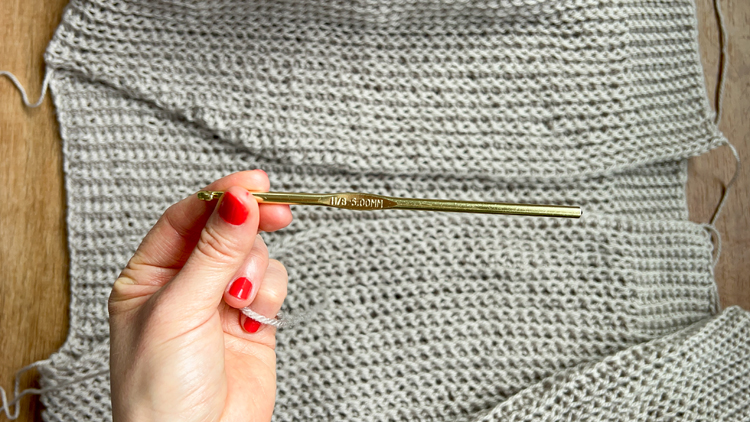
The ribbed hem band is created simply by switching to a smaller hook:
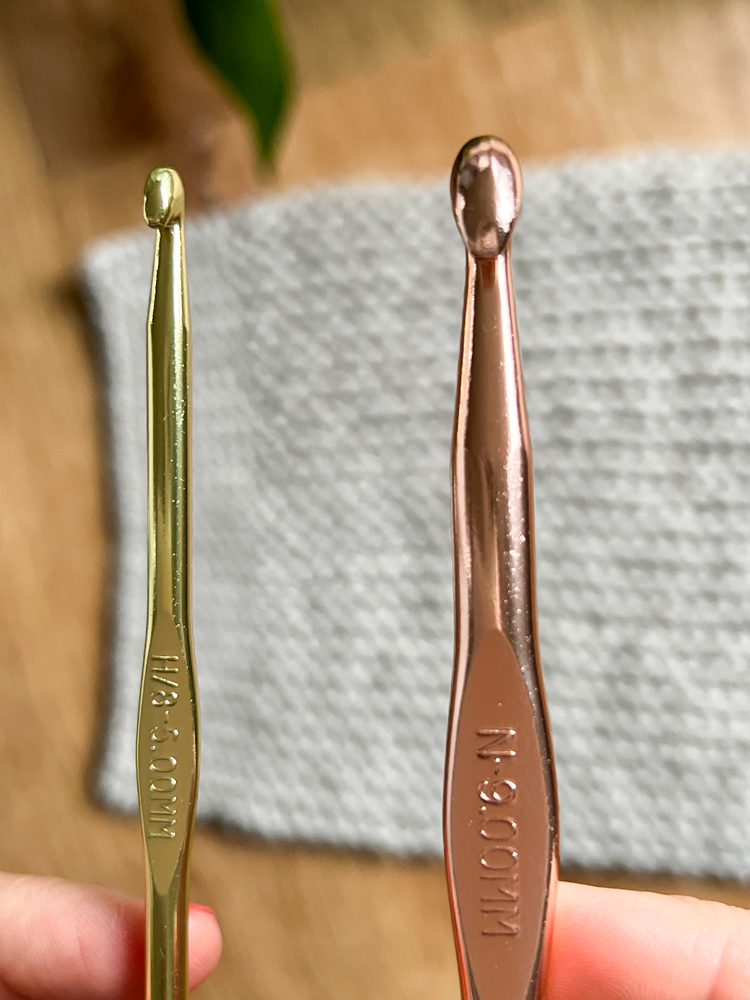
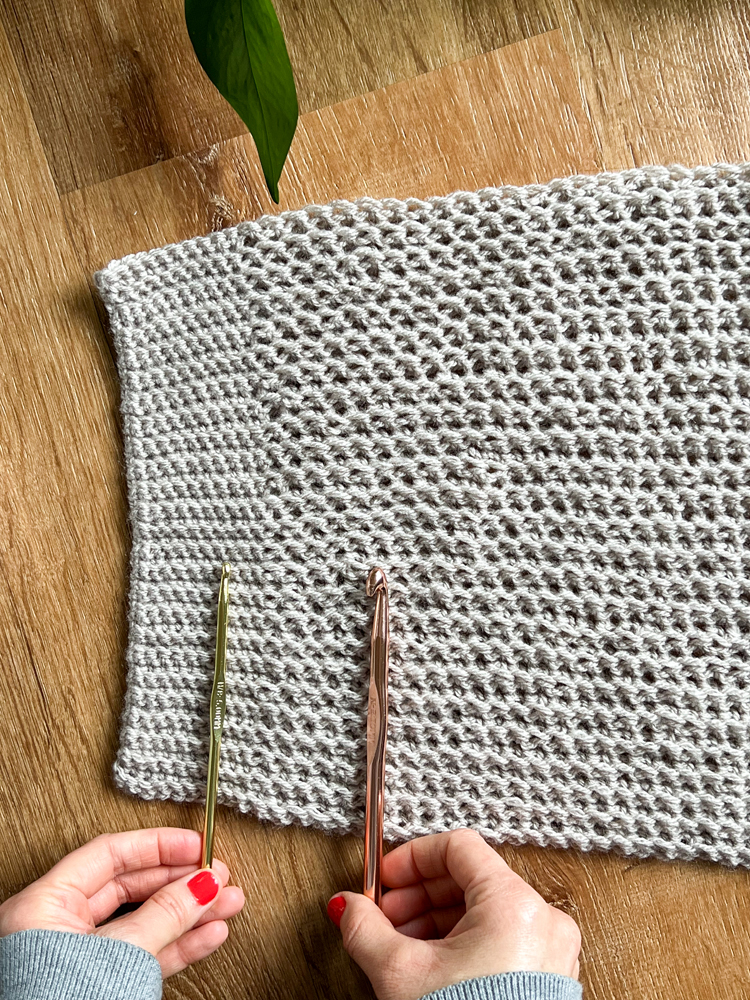
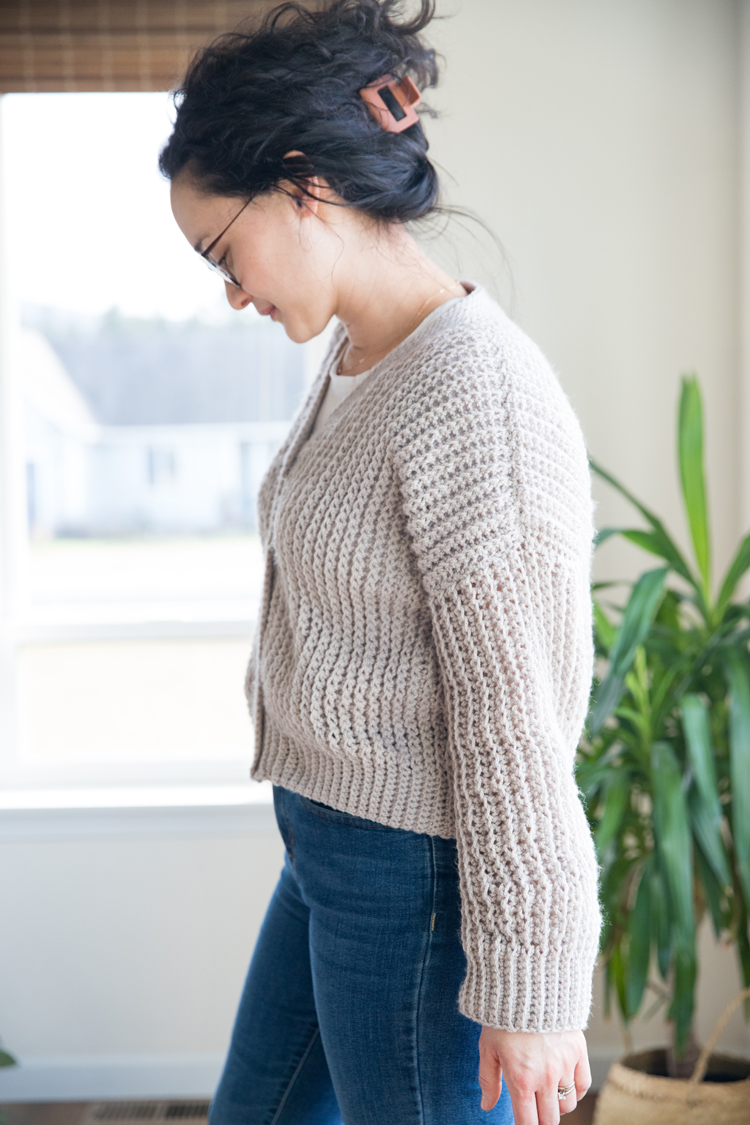
It’s honestly simpler than it looks. Plus, I walk you through each step in the video tutorial and in the free written pattern below. Let’s go!
MATERIALS
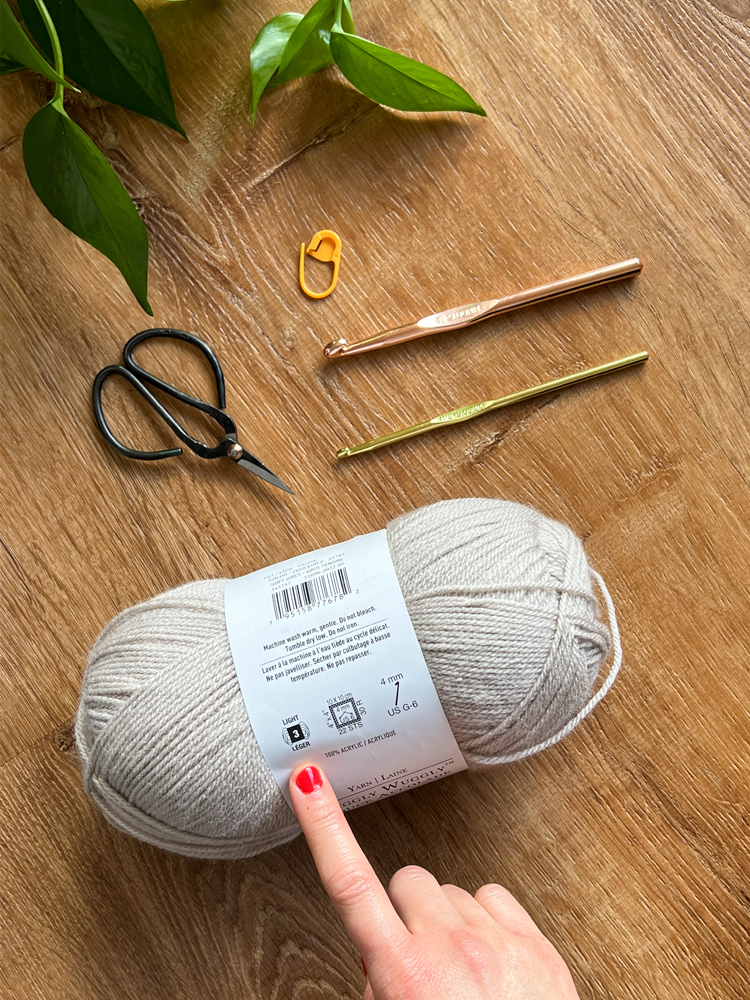
- DK, lightweight, or size 3 yarn about 1000-1,300 yards*
- 9 mm hook**
- 5 mm hook**
- Scissors, stitch markers, yarn needle
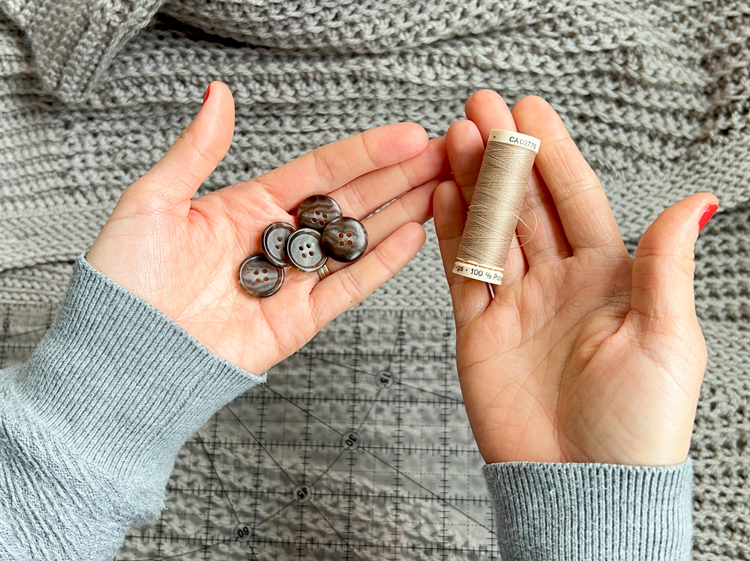
- 5, 1″ inch buttons
- Matching sewing thread and sewing needle
Material Notes:
*The amount of yarn you will need will depend on the size you make. I used inexpensive, Snuggly Wuggly yarn from Loops & Threads from Michaels in “soft grey.” It comes in balls/skeins that are 446 yards. For any of the sizes, you’d need just three balls, which on sale can come out to about $6-7 a ball. It’s not the highest quality yarn, but it’s soft, and a good choice on a budget. I also like how long each ball is, so there is little to no joining within a piece.
*Be mindful of fiber content. The yarn I used is 100% acrylic. Wool will probably behave similarly, but cotton will likely stretch more. If you use cotton yarn, the gauge will most likely be off.
**I listed the mm size for the hooks because the other size indicators can vary. For some reason a 9 mm hook can be an M or an N depending on who makes the hook. The metric size is always accurate though, so I listed only that to limit confusion.
DISCLAIMER
This FREE pattern has not been tested in all sizes. Instead of hiring a pool of testers and putting this out as a paid pattern, I’ve decided to put it out for free and update it as needed.
Please read over the sizing section carefully for best results. I am also open to feedback, so please email me any mistakes you notice or report any fit suggestions ([email protected]) so that I can update and improve the pattern over time. Thank you!
SIZING
IMPORTANT. PLEASE READ. This portion is lengthy but it is very important for getting best results.
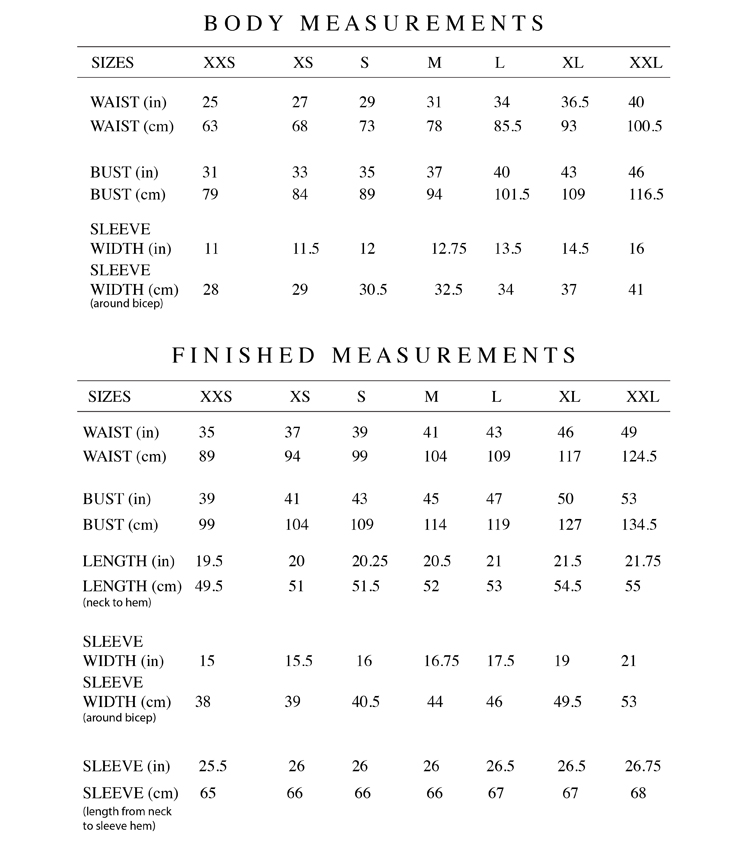
Below is a measurement chart that includes body measurements compared to the finished garment size. Measurements are approximate.
DETERMINING SIZE AND FIT
This cardigan is meant to fit a little loosely around the bust, waist, and arms, but not be voluminous or truly “oversized”. I am just below 5’4″ and a size 4-6 in RTW/brand clothing. I am wearing a size small in the finished photos, but I did make some slight fit adjustments to the final pattern in the bust and waist so that it’s slightly narrower than pictured.

The “bust” is the widest part of the cardigan and made up of the bigger sc stitches. It also accounts for some of the upper sleeve. The waist is the hem band measurement and made of up of the smaller sc stitches.
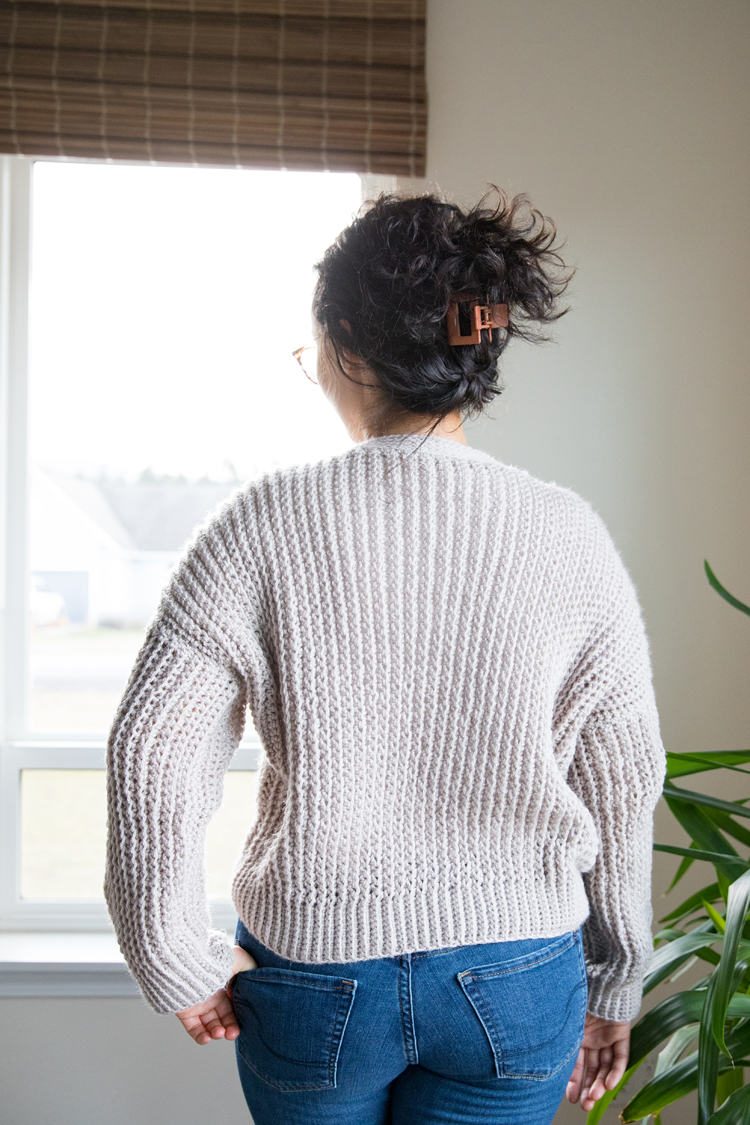
If your bust and waist fall under different sizes, keep in mind that the bigger stitches/ the main body of the cardigan has more stretch than the tighter hem band. So if you have a larger bust and smaller waist, I would (most likely) make the size that your waist falls under. If you have a larger waist and smaller bust, I would most likely prioritize your waist measurement. You can also compromise with a size in between which will make a tighter fit on one or the other, or customize the fit (see the fit adjustment section).
NOTE: For sizes L-XXL I added slightly less slouch or ease to the finished garment to reduce excess material or bulk at the waist. There is still plenty of slouch though. About 8 and 10 inches (bust and waist respectively) of ease are added to XXS-M, and 7 and 9 inches added to L-XXL.
FIT ADJUSTMENTS
Add or remove width to the cardigan by adding or removing rows. Just remember that the width of the cardigan also accounts for the upper sleeve, so you may need to make adjustments to the length of the sleeve pieces as well.
For lengthening and shortening from neck to hem, this is trickier. You would need to add stitches to the front and back pieces but only in the sections that use the 9mm hook (unless you want a wider hem band). You would also have to play around with button hole and button placement as that will change with any change in length.
Sleeve width adjustments can be made by adding or removing rows and making the arm hole narrower or wider.
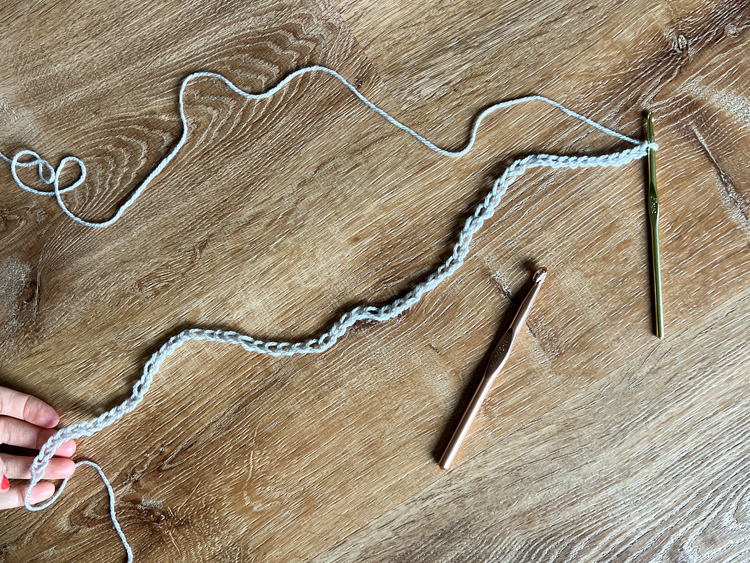
KEEP IN MIND: Single crochet in back loops only is a very stretchy stitch, which essentially gathers up yarn and condenses it. So when you chain, this will not be an accurate picture of how long the finished piece will be. The more rows you work, the more it will shrink in length. This is true up to about 20 rows or so, and then it hits a limit and the shrinking tapers off. It will also stretch some when worn, so you need to work several rows before draping it vertically to see how it will wear.
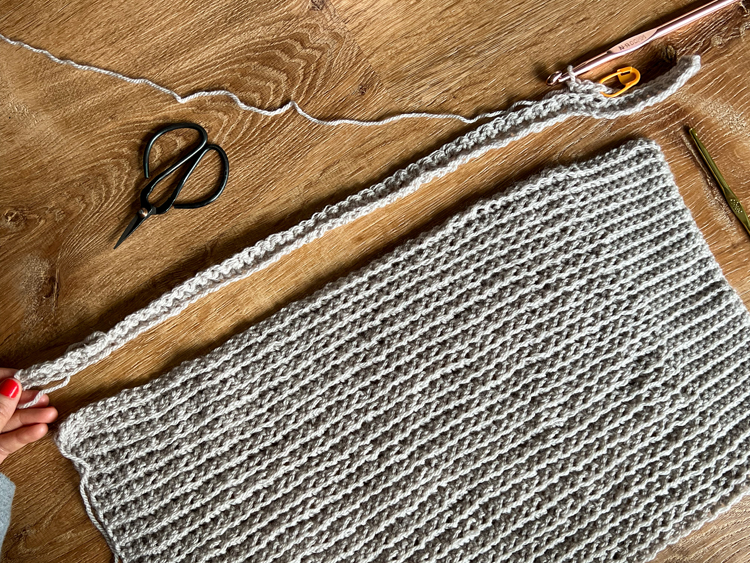
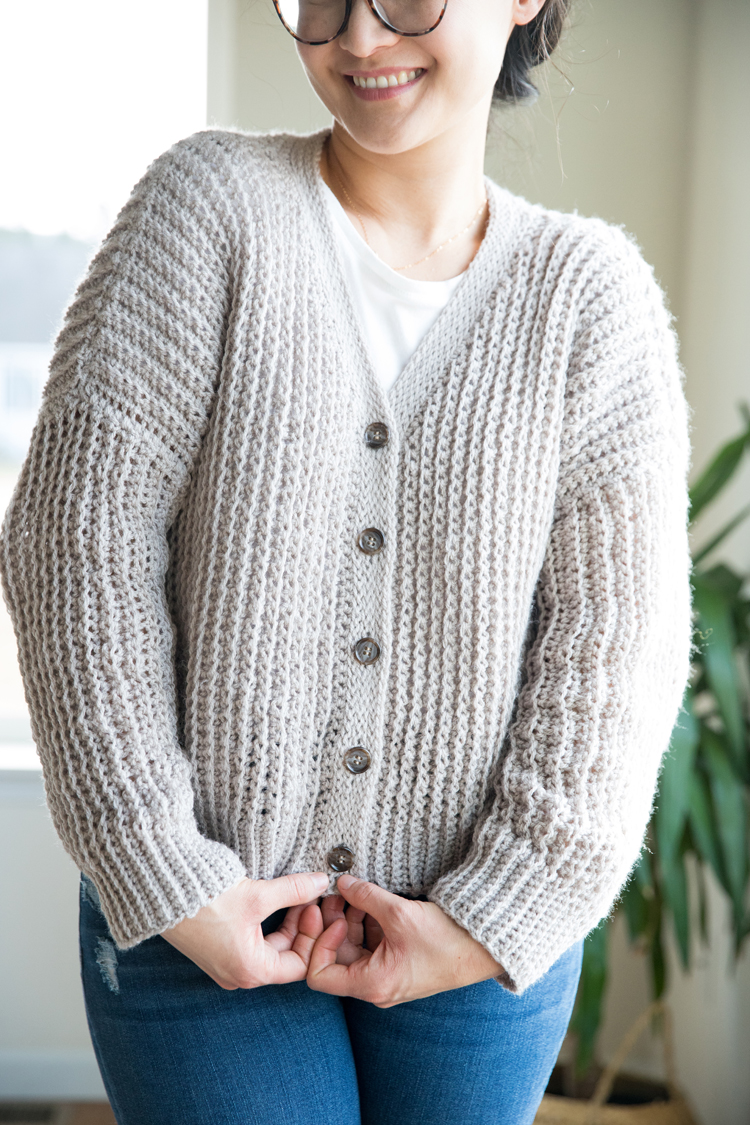
THEREFORE: The resulting stretchy fabric means sizing can be somewhat forgiving. It all comes down to how you want the garment to fit: tight or loose. To a seamstress, I would liken this to working with a four way stretch, knit fabric with semi-decent recovery.
And of course, be mindful of fiber content. Wool, acrylic, and similar yarns should behave similarly. I used 100% acrylic yarn here. Cotton yarn will likely throw off your gauge, sizing, and fit.
GAUGE
- 4 x 4 inch square = 11 sc x 16 rows with the 9 mm hook
- 2 x 2 inch square = 9 sc x 9 rows with the 5 mm hook
Because this is a larger project and sizing matters, I recommend working up a test swatch to see if your gauge matches. If you are pretty close, but not exact, that is okay. The stitches stretch some as they are worn, so being within a half stitch or so is fine. If you are significantly too tight, you may want to try using a larger hook and if you’re too loose try a smaller hook.
ABBREVIATIONS
- ch = chain
- sl st = slip stitch
- sc = single crochet
- blo = back loops only
- flo = front loops only
VIDEO TUTORIAL
The video will play here, if it hasn’t already popped to the top or side of your screen, and will play after the initial ads.
I recommend watching the tutorial and reading the written pattern/tutorial, especially if you are a beginner. The video about 10 minutes long, but I tried to keep it condensed with important information for each step.
WRITTEN PATTERN & TUTORIAL
- You will make: 1 back piece, 2 sleeves, and 2 front pieces.
- Then you will seam all the pieces together.
- Add a neck band/ collar/ button placket and button holes.
- Lastly, add buttons and weave in the ends.
Sizes are listed as follows: XXS (XS, S, M, L, XL, XXL). Follow the number indicated in the same position as your size. So if you are a size L, you would use the starred number: 1(2, 3, 4, 5*, 6, 7). Sometimes it helps to copy and paste the pattern into a word document so you can print it and highlight the number for your size.
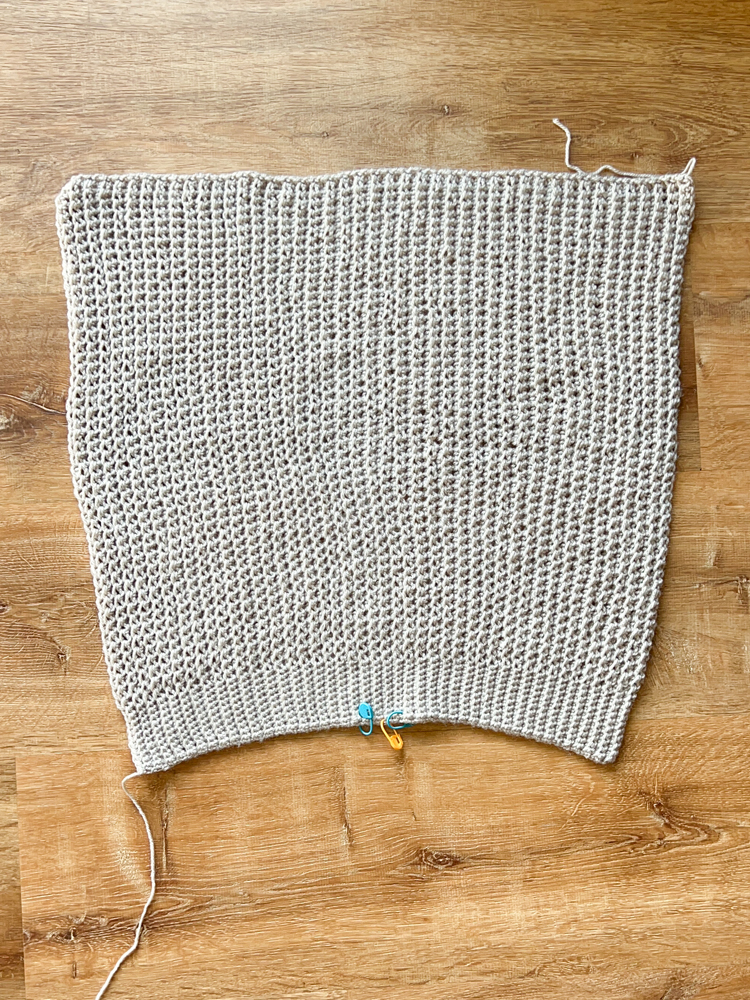
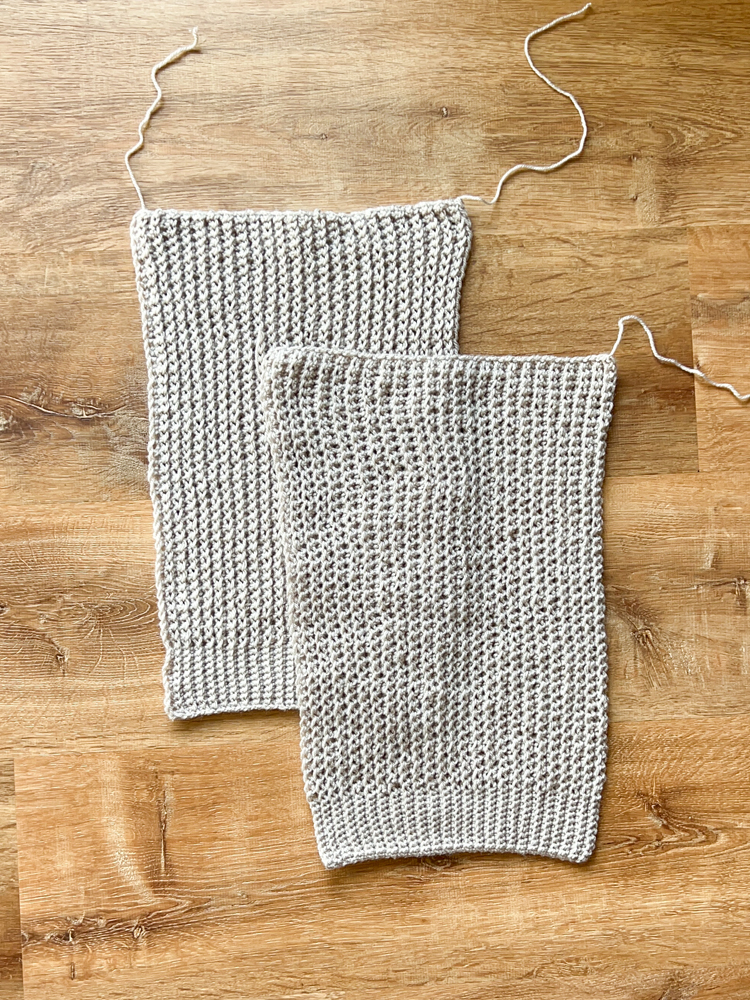
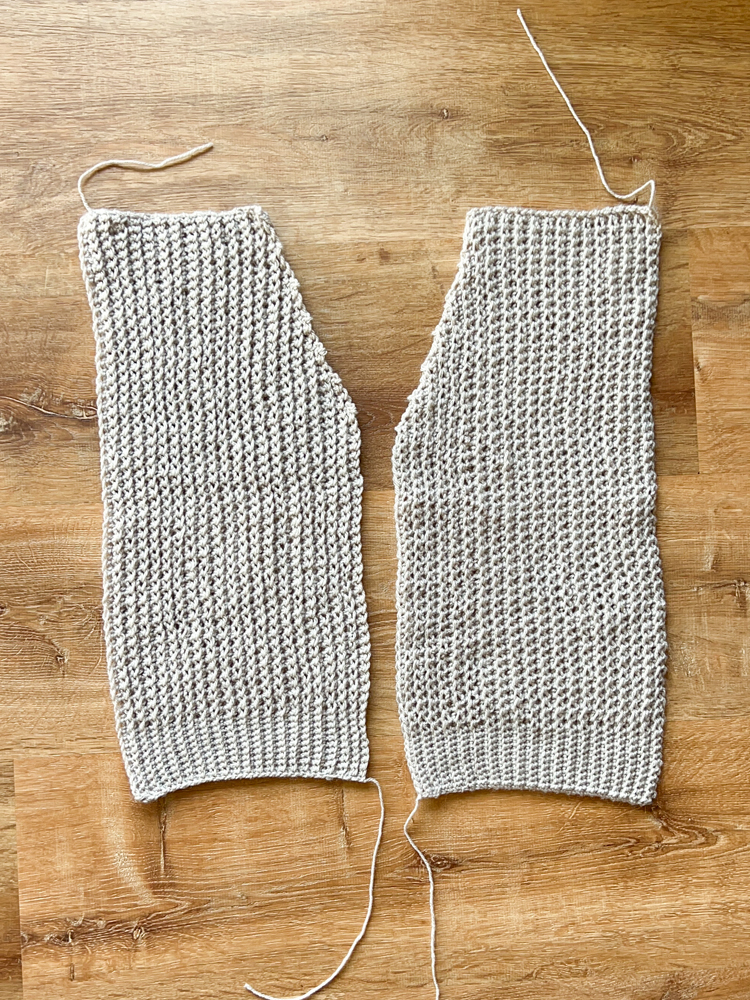
STEP ONE: Make 1 back piece, 2 sleeves, and 2 front pieces
BACK – make 1
XXS (XS, S, M, L, XL, XXL)
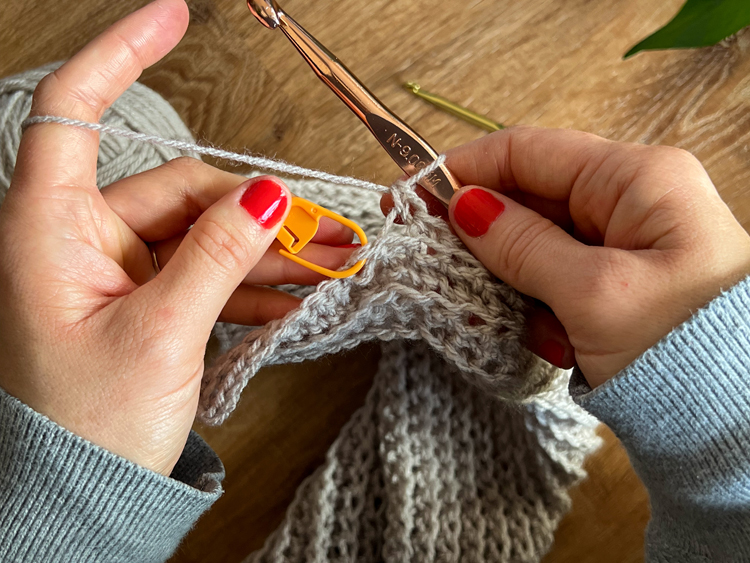
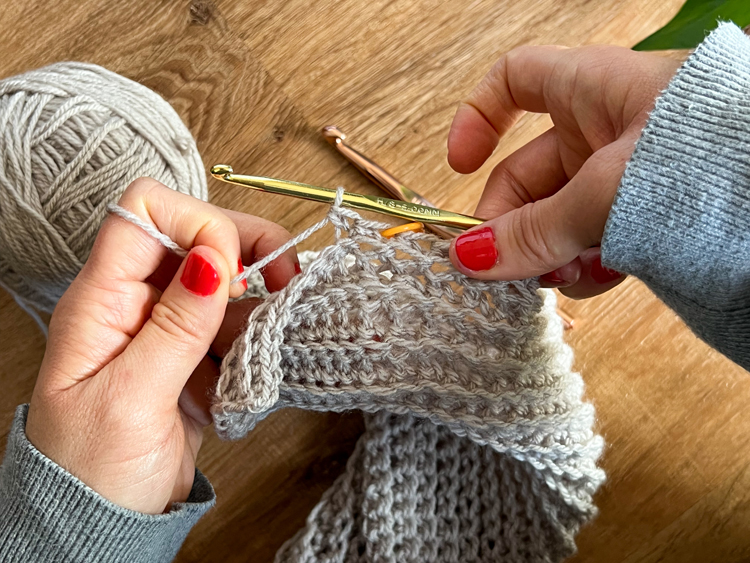
Starting with 9 mm hook, chain 45 (48, 50, 52, 54, 56, 58). Switch to 5 mm hook and chain 11.
ROW 1: Starting with second ch from the hook, single crochet (sc) in back loops only (blo) 10 times. Switch to 9 mm hook and sc in blo 45 (48, 50, 52, 54, 56, 58) times.
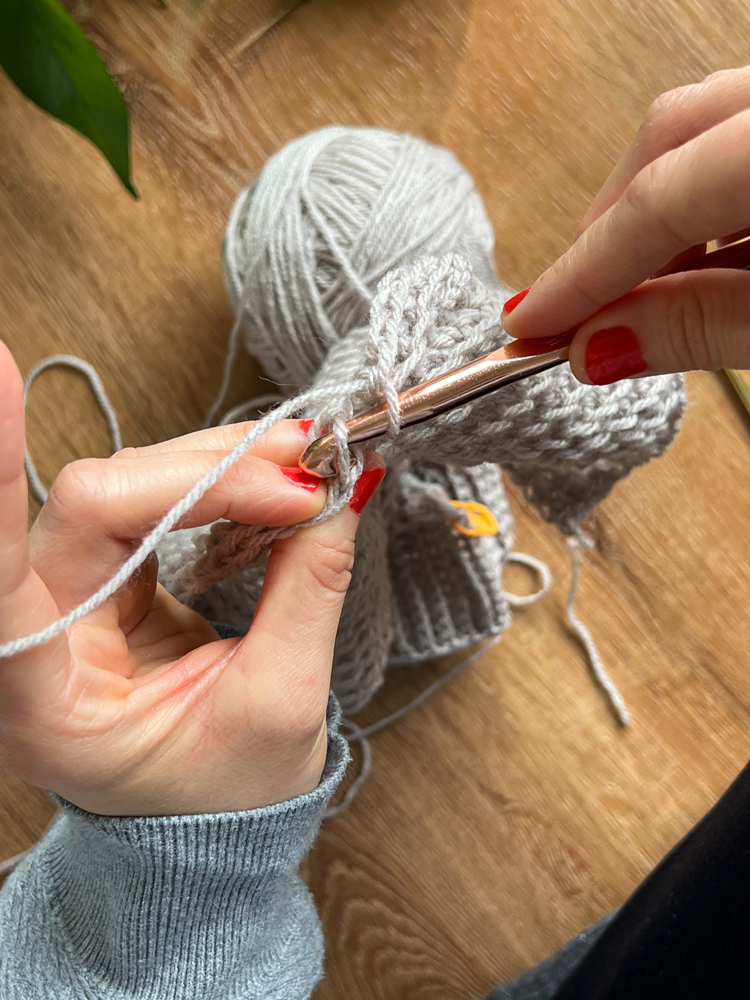
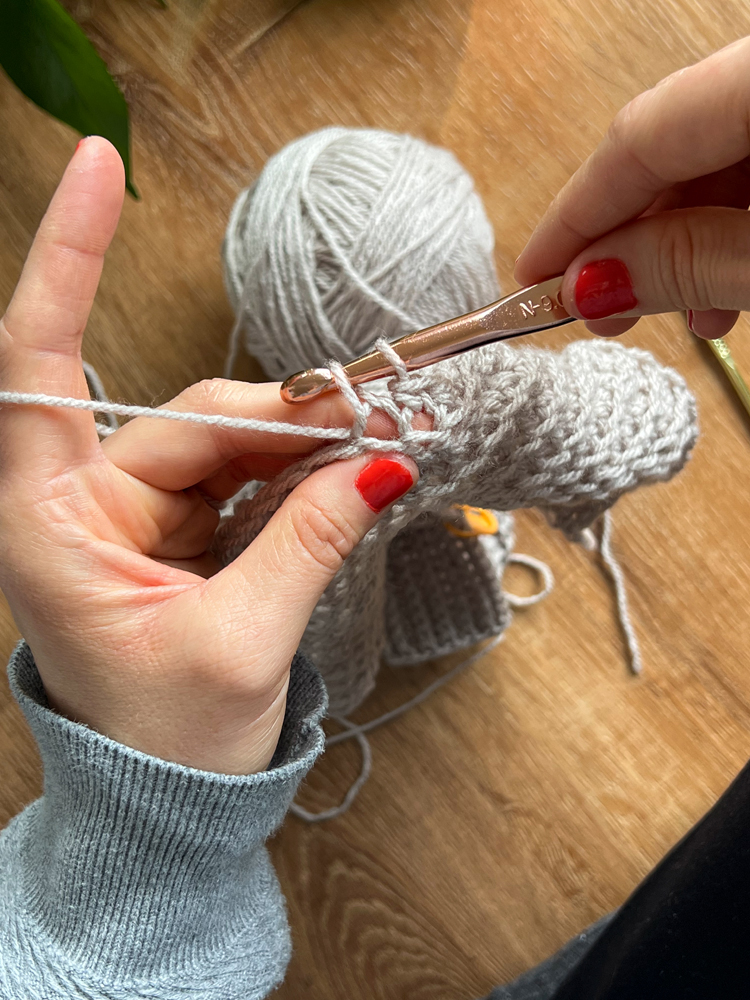
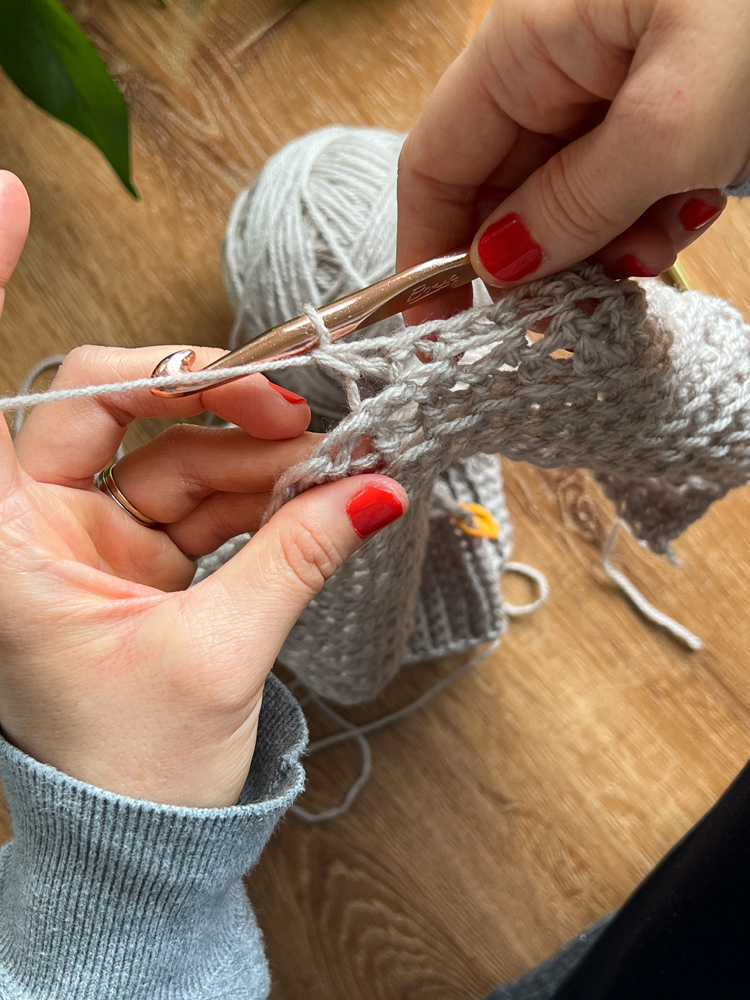
ROW 2: Turn, ch 1. Sc blo 45 (48, 50, 52, 54, 56, 58) times. Switch to 5 mm hook and sc in blo 10 times.
ROW 3: Turn, ch 1. Sc blo 10 times. Switch to 9 mm hook and sc in blo 45 (48, 50, 52, 54, 56, 58) times.
Repeat ROWS 2 and 3, alternating, 36 (38, 40, 42, 44, 48, 50) times.
Then repeat Row 2 one more time and tie off end with a 6-8 inch tail.
Total rows = 76 (80, 84, 88, 92, 98, 104)
SLEEVES – make 2
XXS (XS, S, M, L, XL, XXL)
Starting with 9 mm hook, chain 39 (39, 38, 37, 36, 35, 35). Switch to 5 mm hook and chain 11.
ROW 1; Starting in second ch from the hook, sc in blo 10 times. Switch to 9 mm hook and sc in blo 39 (39, 38, 37, 36, 35, 35) times.
ROW 2: Turn, ch 1. Sc blo 39 (39, 38, 37, 36, 35, 35) times. Switch to 5 mm hook and sc in blo 10 times.
ROW 3: Turn, ch 1. Sc blo 10 times. Switch to 9 mm hook and sc in blo 39 (39, 38, 37, 36, 35, 35) times.
Repeat ROWS 2 and 3, alternating, 20 (21, 22, 24, 26, 28, 31) times.
Total rows = 43 (45, 47, 51, 55, 59, 65)
FRONT – make 2 (Pieces are reversible so one will flip to mirror the other.)
XXS (XS, S, M, L, XL, XXL)
Starting with 9 mm hook, chain 45 (48, 50, 52, 54, 56, 58). Switch to 5 mm hook and chain 11.
ROW 1: Starting with second ch from the hook, sc in blo 10 times. Switch to 9 mm hook and sc in blo 45 (48, 50, 52, 54, 56, 58) times.
ROW 2: Turn, ch 1. Sc blo 45 (48, 50, 52, 54, 56, 58) times. Switch to 5 mm hook and sc in blo 10 times.
ROW 3: Turn, ch 1. Sc blo 10 times. Switch to 9 mm hook and sc in blo 45 (48, 50, 52, 54, 56, 58) times.
Repeat ROWS 2 and 3 until you get to row 24 (25, 26, 27, 28, 30, 32).
Then begin decreasing.
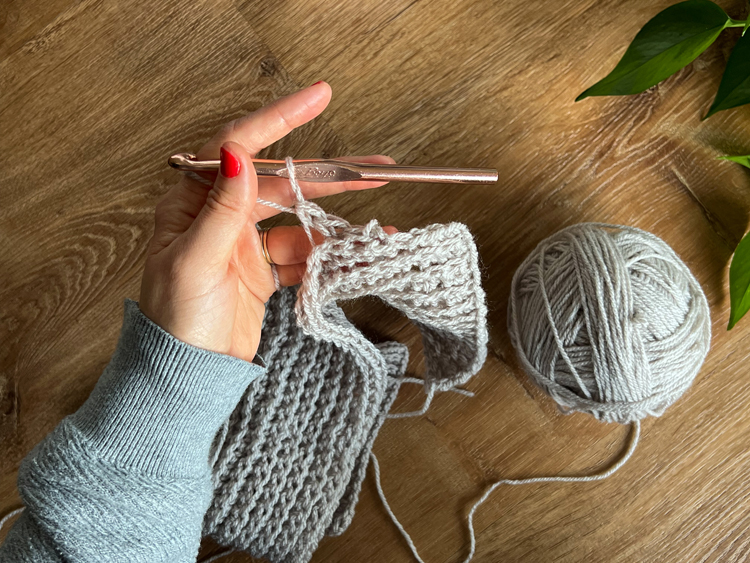
SIZES XXS (S, L, XXL) only
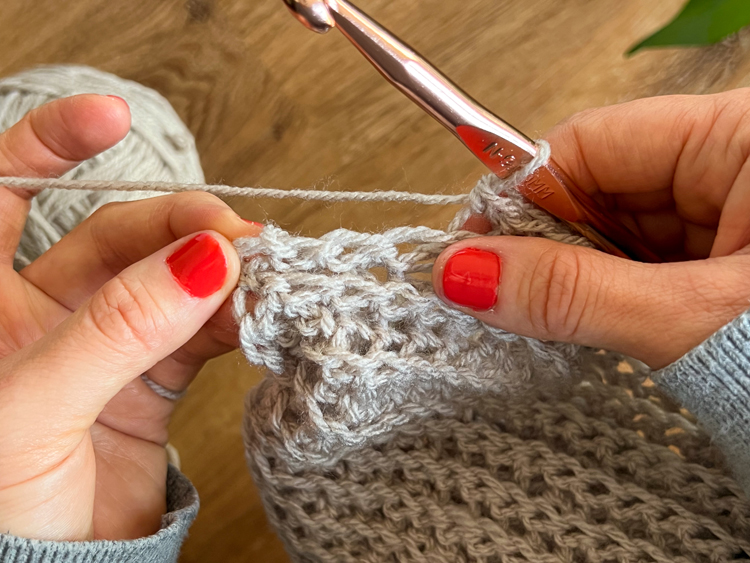
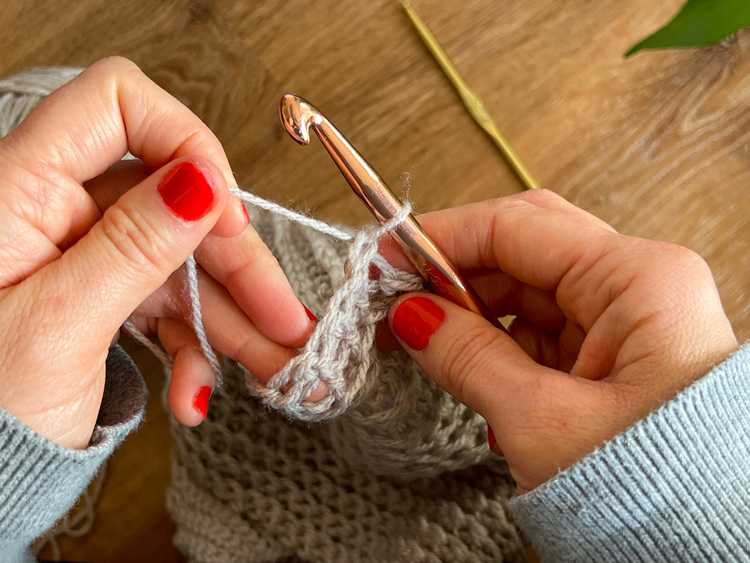
Decreasing Row 1: Turn, ch 1. Sc blo 10 times. Switch to 9 mm hook and sc blo 41 (46, 50, 54) times. Work a regular sc in both loops for the next stitch, ending the row three stitches from the end.
Decreasing Row 2: Turn, making sure working yarn is behind your work and not in front of it. Slip stitch into the blo. Sc blo in the next 41 (46, 50, 54). Switch to a 5 mm hook and sc blo 10 times.
Decreasing Row 3: Turn, ch 1. Sc blo 10 times. Switch to 9 mm hook and sc blo 38 (43, 47, 51) times. Work a regular sc in both loops for the next stitch, ending the row three stitches from the end. Be sure to count the sl st from the previous row which will look different.
Decreasing Row 4: Turn, making sure working yarn is behind your work and not in front of it. Slip stitch into the blo. Sc blo in the next 38 (43, 47, 51). Switch to a 5 mm hook and sc blo 10 times.
Decreasing Row 5: Turn, ch 1. Sc blo 10 times. Switch to 9 mm hook and sc blo 35 (40, 44, 48) times. Work a regular sc in both loops for the next stitch, ending the row three stitches from the end. Be sure to count the sl st from the previous row as a stitch, because it will look different and almost like it’s not a stitch (see the video).
Decreasing Row 6: Turn, making sure working yarn is behind your work and not in front of it. Slip stitch into the blo. Sc blo in the next 35 (40, 44, 48). Switch to a 5 mm hook and sc blo 10 times.
Decreasing Row 7: Turn, ch 1. Sc blo 10 times. Switch to 9 mm hook and sc blo 32 (37, 41, 45) times. Work a regular sc in both loops for the next stitch, ending the row three stitches from the end.
Decreasing Row 8: Turn, making sure working yarn is behind your work and not in front of it. Slip stitch into the blo. Sc blo in the next 32 (37, 41, 45). Switch to a 5 mm hook and sc blo 10 times.
Decreasing Row 9: Turn, ch 1. Sc blo 10 times. Switch to 9 mm hook and sc blo 29 (34, 38, 42) times. Work a regular sc in both loops for the next stitch, ending the row three stitches from the end.
Decreasing Row 10: Turn, making sure working yarn is behind your work and not in front of it. Slip stitch into the blo. Sc blo in the next 29 (34, 38, 42). Switch to a 5 mm hook and sc blo 10 times. ***SIZE XXS STOPS HERE.***
Decreasing Row 11: Turn, ch 1. Sc blo 10 times. Switch to 9 mm hook and sc blo X (31, 35, 39) times. Work a regular sc in both loops for the next stitch, ending the row three stitches from the end.
Decreasing Row 12: Turn, making sure working yarn is behind your work and not in front of it. Slip stitch into the blo. Sc blo in the next X (31, 35, 39). Switch to a 5 mm hook and sc blo 10 times. ***SIZE S STOPS HERE.***
Decreasing Row 13: Turn, ch 1. Sc blo 10 times. Switch to 9 mm hook and sc blo X (X, 32, 36) times. Work a regular sc in both loops for the next stitch, ending the row three stitches from the end.
Decreasing Row 14: Turn, making sure working yarn is behind your work and not in front of it. Slip stitch into the blo. Sc blo in the next X (X, 32, 36). Switch to a 5 mm hook and sc blo 10 times. ***SIZE L STOPS HERE.***
Decreasing Row 15: Turn, ch 1. Sc blo 10 times. Switch to 9 mm hook and sc blo X (X, X, 33) times. Work a regular sc in both loops for the next stitch, ending the row three stitches from the end.
Decreasing Row 16: Turn, making sure working yarn is behind your work and not in front of it. Slip stitch into the blo. Sc blo in the next X (X, X, 33). Switch to a 5 mm hook and sc blo 10 times. ***SIZE XXL STOPS HERE.***
Tie off end and leave a 6-8 inch tail.
SIZES XS (M, XL) only
Decreasing Row 1: Turn, ch 1. Sc blo 10 times. Switch to 9 mm hook and sc blo 44 (48, 52) times. Work a regular sc in both loops for the next stitch, ending the row three stitches from the end.
Decreasing Row 2: Turn, making sure working yarn is behind your work and not in front of it. Slip stitch into the blo. Sc blo in the next 44 (48, 52). Switch to a 5 mm hook and sc blo 10 times.
Decreasing Row 3: Turn, ch 1. Sc blo 10 times. Switch to 9 mm hook and sc blo 41 (45, 49) times. Work a regular sc in both loops for the next stitch, ending the row three stitches from the end. Be sure to count the sl st from the previous row as a stitch, because it will look different and almost like it’s not a stitch (see the video).
Decreasing Row 4: Turn, making sure working yarn is behind your work and not in front of it. Slip stitch into the blo. Sc blo in the next 41 (45, 49). Switch to a 5 mm hook and sc blo 10 times.
Decreasing Row 5: Turn, ch 1. Sc blo 10 times. Switch to 9 mm hook and sc blo 38 (42, 46) times. Work a regular sc in both loops for the next stitch, ending the row three stitches from the end.
Decreasing Row 6: Turn, making sure working yarn is behind your work and not in front of it. Slip stitch into the blo. Sc blo in the next 38 (42, 46). Switch to a 5 mm hook and sc blo 10 times.
Decreasing Row 7: Turn, ch 1. Sc blo 10 times. Switch to 9 mm hook and sc blo 35 (39, 43) times. Work a regular sc in both loops for the next stitch, ending the row three stitches from the end.
Decreasing Row 8: Turn, making sure working yarn is behind your work and not in front of it. Slip stitch into the blo. Sc blo in the next 35 (39, 43). Switch to a 5 mm hook and sc blo 10 times.
Decreasing Row 9: Turn, ch 1. Sc blo 10 times. Switch to 9 mm hook and sc blo 32 (36, 40) times. Work a regular sc in both loops for the next stitch, ending the row three stitches from the end.
Decreasing Row 10: Turn, making sure working yarn is behind your work and not in front of it. Slip stitch into the blo. Sc blo in the next 32 (36, 40). Switch to a 5 mm hook and sc blo 10 times.
Decreasing Row 11: Turn, ch 1. Sc blo 10 times. Switch to 9 mm hook and sc blo 29 (33, 37) times. Work a regular sc in both loops for the next stitch, ending the row three stitches from the end. ***SIZE XS STOPS HERE.***
Decreasing Row 12: Turn, making sure working yarn is behind your work and not in front of it. Slip stitch into the blo. Sc blo in the next X (33, 37). Switch to a 5 mm hook and sc blo 10 times.
Decreasing Row 13: Turn, ch 1. Sc blo 10 times. Switch to 9 mm hook and sc blo X (30, 34) times. Work a regular sc in both loops for the next stitch, ending the row three stitches from the end. ***SIZE M STOPS HERE.***
Decreasing Row 14: Turn, making sure working yarn is behind your work and not in front of it. Slip stitch into the blo. Sc blo in the next X (X 34). Switch to a 5 mm hook and sc blo 10 times.
Decreasing Row 15: Turn, ch 1. Sc blo 10 times. Switch to 9 mm hook and sc blo X (X, 31) times. Work a regular sc in both loops for the next stitch, ending the row three stitches from the end. ***SIZE XL STOPS HERE.***
Tie off end and leave a 6-8 inch tail.
STEP TWO: Seam together front, back, and sleeve pieces.
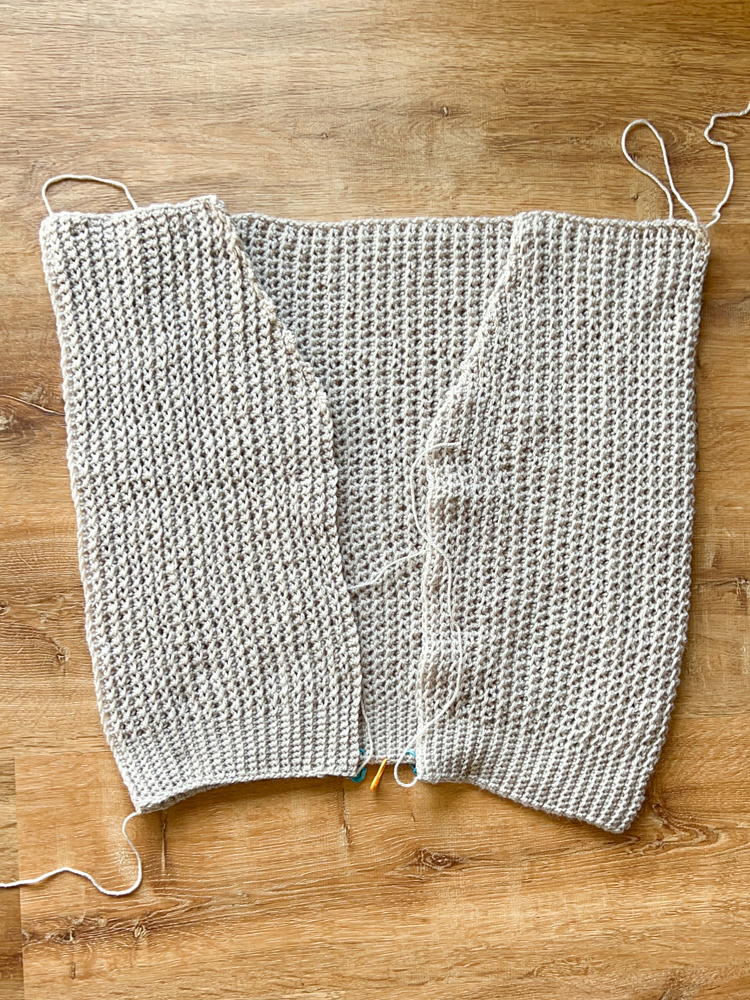
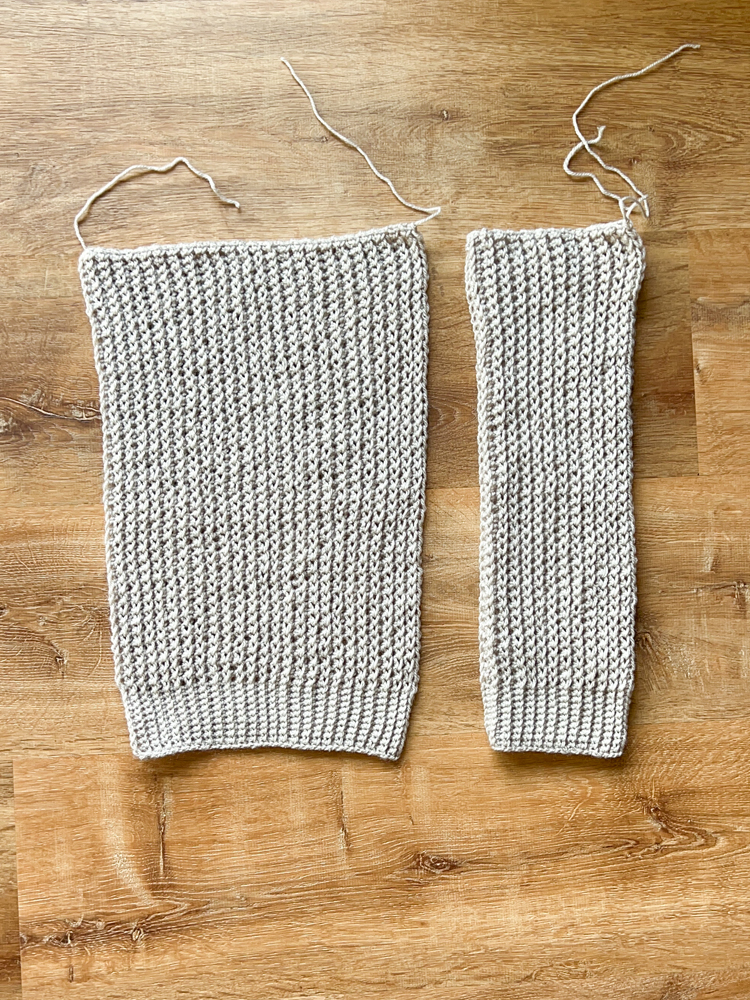
SHOULDERS: Place the front pieces on the back piece. Using the 5mm hook and a loose tension (!), seam together the shoulders with sc, matching row to row. Tie off the end and leave a 6-8 inch tail. Repeat for the other side.
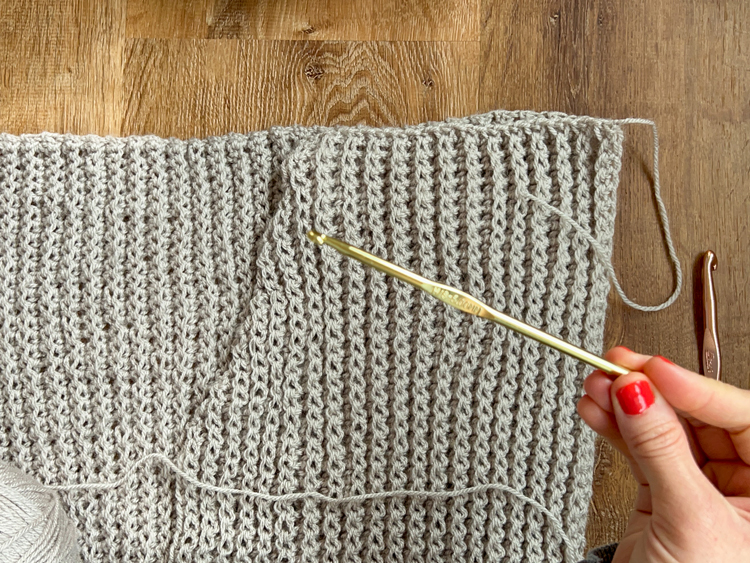
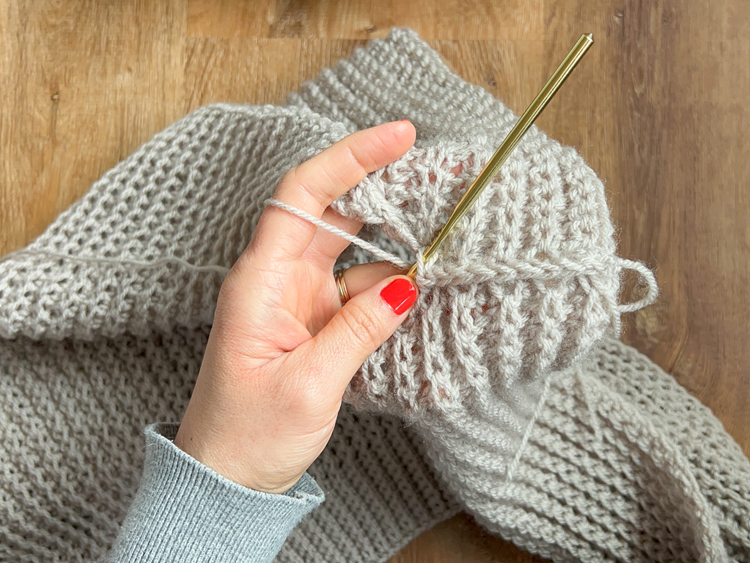
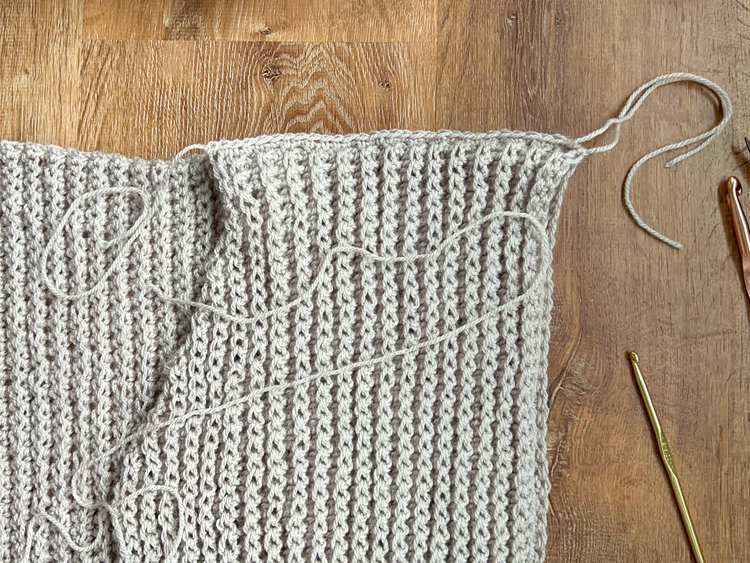
SIDES: count down the sides from the shoulder seam 19 (20, 21, 22, 23, 24, 26) stitches on the front piece and back piece and mark with a stitch marker. This leaves a space for the arm hole where the sleeves will be attached and marks the stopping place of the side seam.
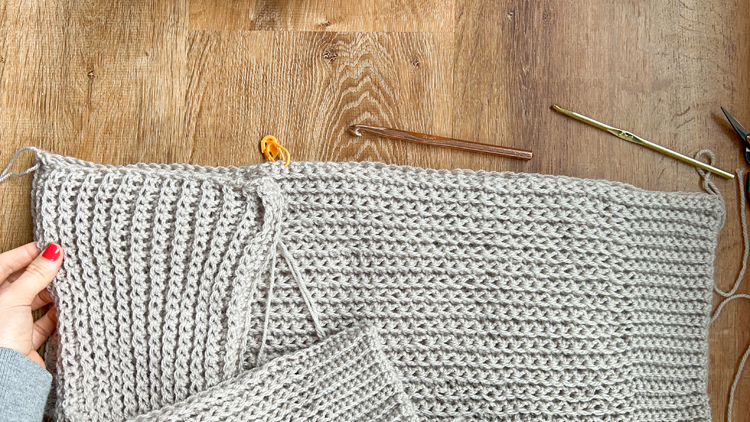
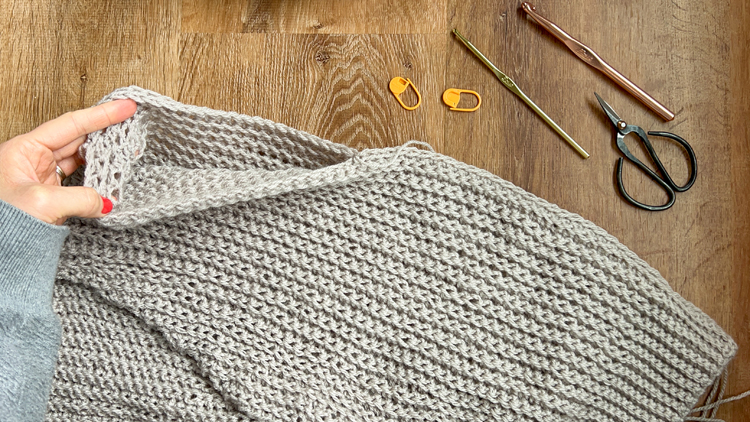
Starting at the hem band and using the 5mm hook, insert your hook through both layers at the bottom, outside corner. Secure with a slip stitch. Then seam the front and back layers together with 10 sc, joining stitch to stitch. Switch to the 9mm hook and complete the rest of the seam to the stitch markers. Tie off the end and leave a 6-8 inch tail. Repeat for the other side.
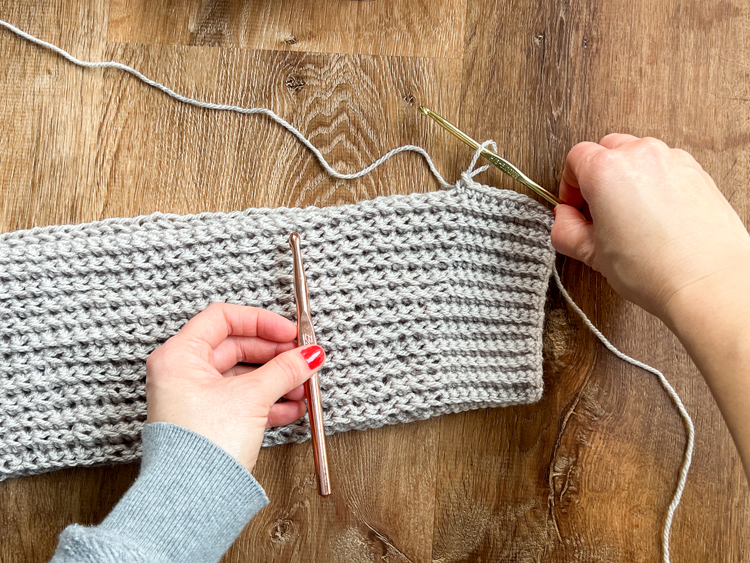
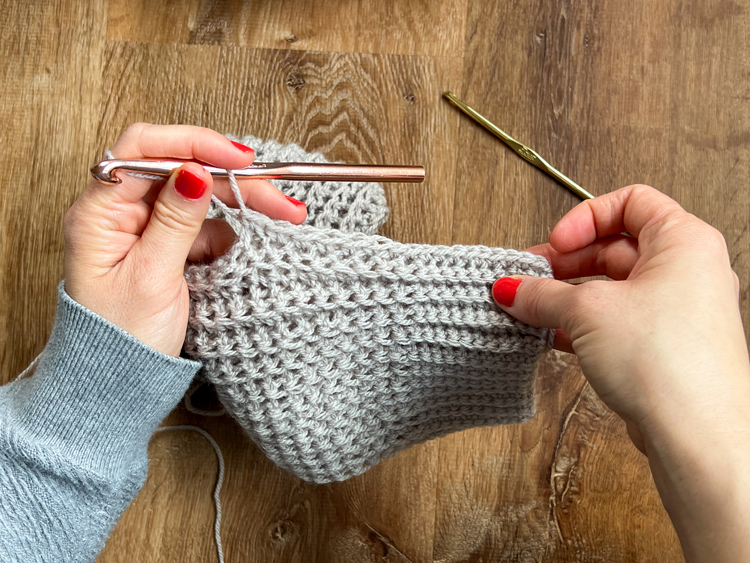
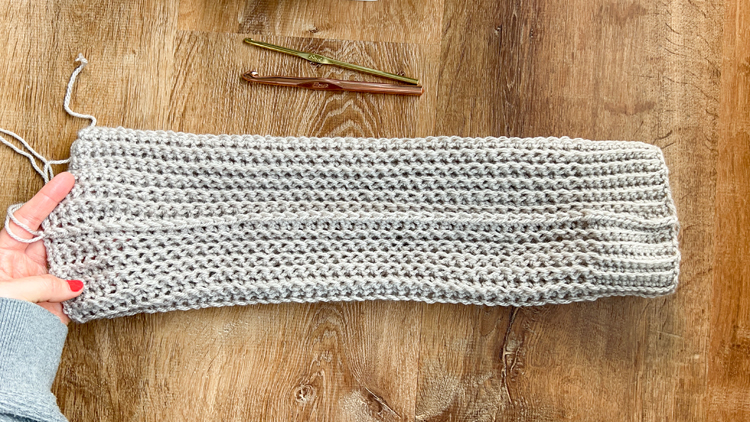
SLEEVES: Fold the sleeve piece in half, width-wise, and seam them into a tube in similar fashion to the cardigan sides. Use the 5mm hook for the cuff/hem portion and the 9 mm hook for the body of the sleeve.
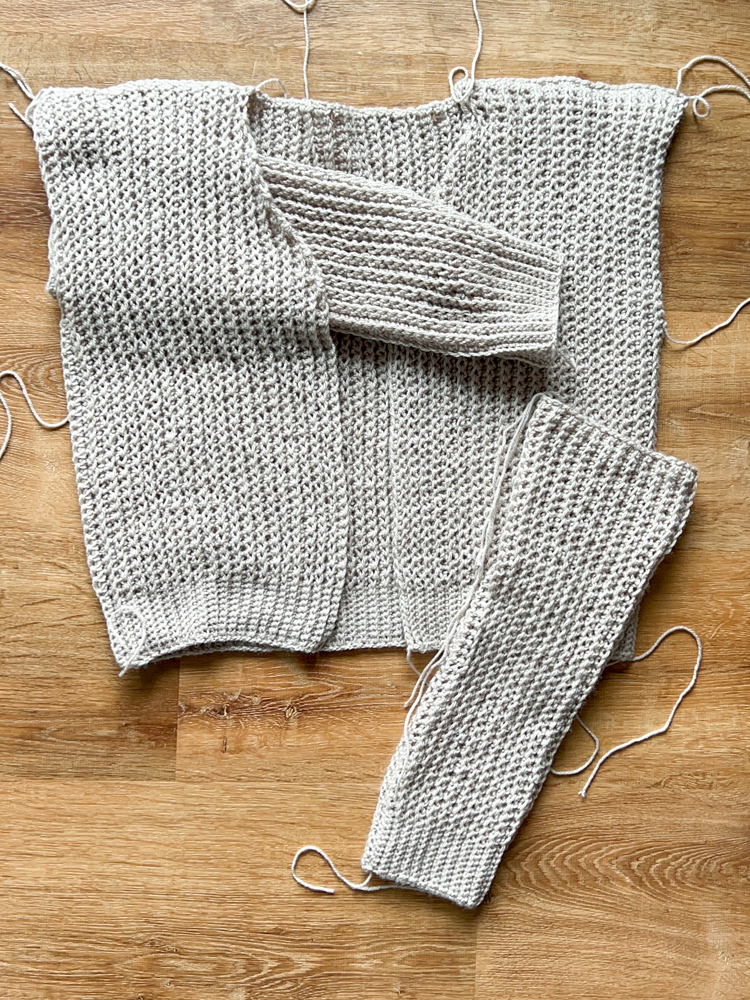
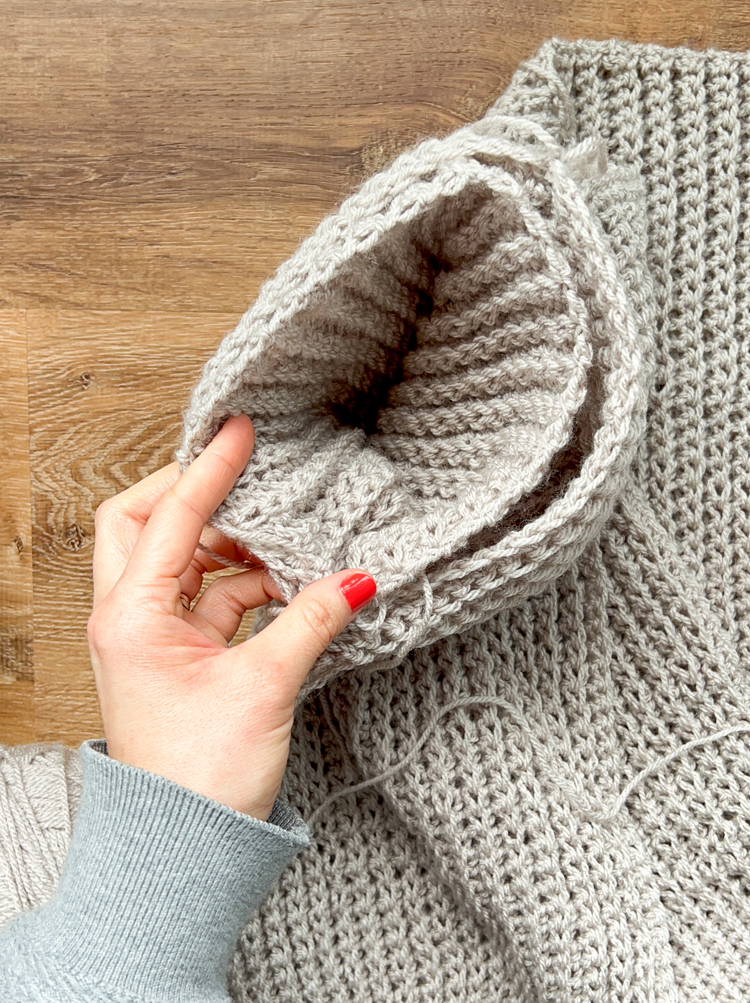
ATTACH SLEEVES: With the sleeve turned RIGHT side out, and the main cardigan body turned WRONG side out, place the sleeve on the inside (right side) of the cardigan. Line up the sleeve opening with the arm hole, making sure the sleeve seam aligns with the side seam. Stretch the sleeve opening to fit the arm holes and clip or pin in place to ensure it is attached evenly.
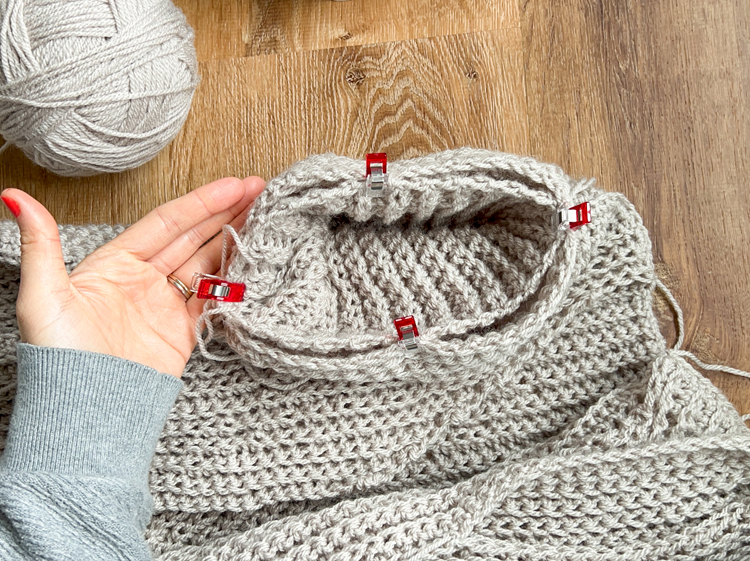
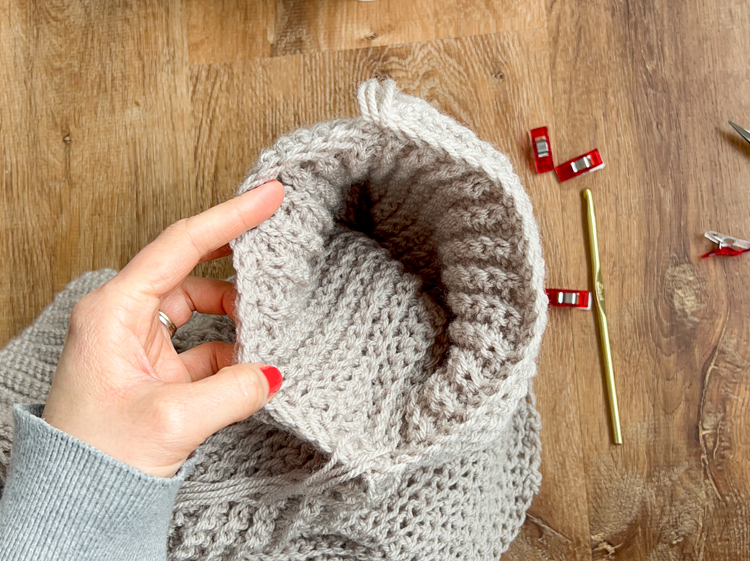
Using the 5 mm hook and starting at the side seam/sleeve seam, insert your hook and secure with a slip stitch. Sc around the sleeve opening. Don’t worry about matching stitch for stitch or counting, as there will be a mix of matching rows and stitches at times. Just try to keep stitches even and not too tight. Tie of the end and leave a 6-8 tail. Repeat for the other sleeve.
STEP THREE: Add Button Placket/Neck Band
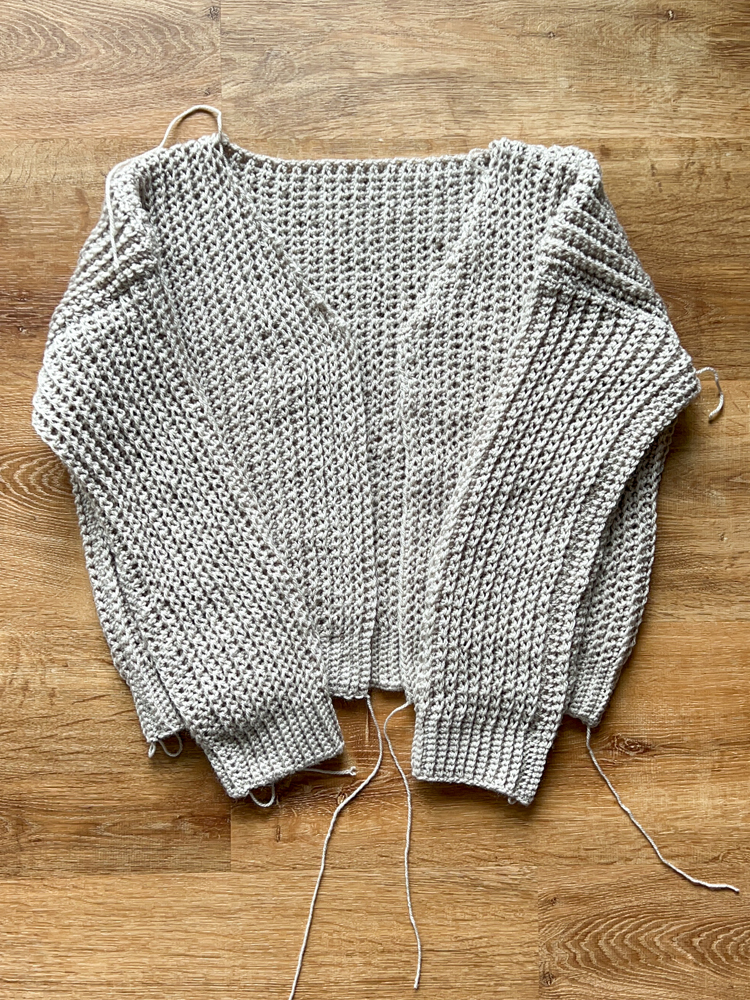
NOTE: It’s VERY important to keep tension loose because we are using the 5 mm hook but also because slip stitches naturally constrict and tighten things up. I chose to use slip stitches for this portion because it keeps the cardigan from stretching out of shape and creates a sturdy placket for the buttons. But it can get too tight, too quickly if you aren’t mindful.
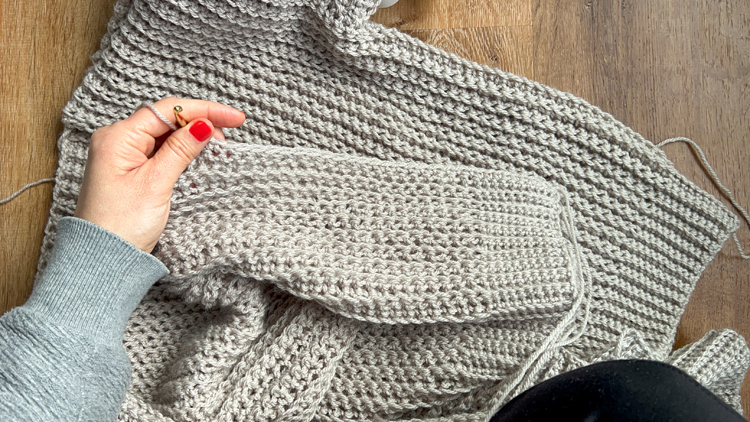
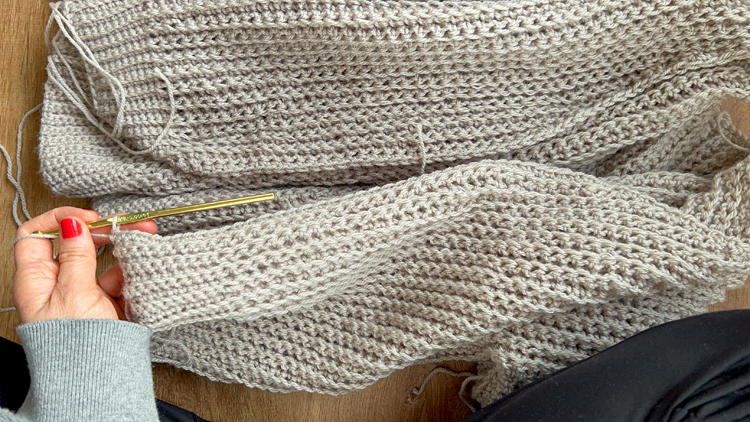
ROW 1: Using the 5mm hook, attach yarn to inside of bottom right side corner (when turned right sides out) with a sl st and ch 1. Sc in each stitch as follows 39 (39, 41, 40, 42, 41, 43) times up to where front piece curves into slanted portion. Then work 20 (22, 24, 26, 28, 30, 32) sc to the shoulder seam. You may be working into shoulder seam during the slanted stitch count or in the this next portion for the neck/back. Or you may be decreasing/connecting a couple stitches together to make the stitch count correct. Along the neck opening portion work 28 (30, 32, 34, 36, 38, 40) sc. Now descend down the slanted portion on the left side in symmetry with the right side by working 20 (22, 24, 26, 28, 30, 32) sc. Work 39 (39, 41, 40, 42, 41, 43) sc to the end.
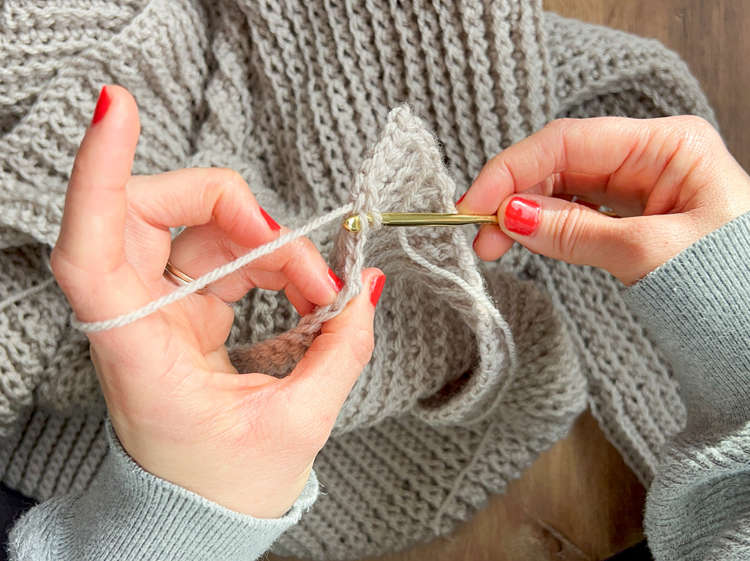
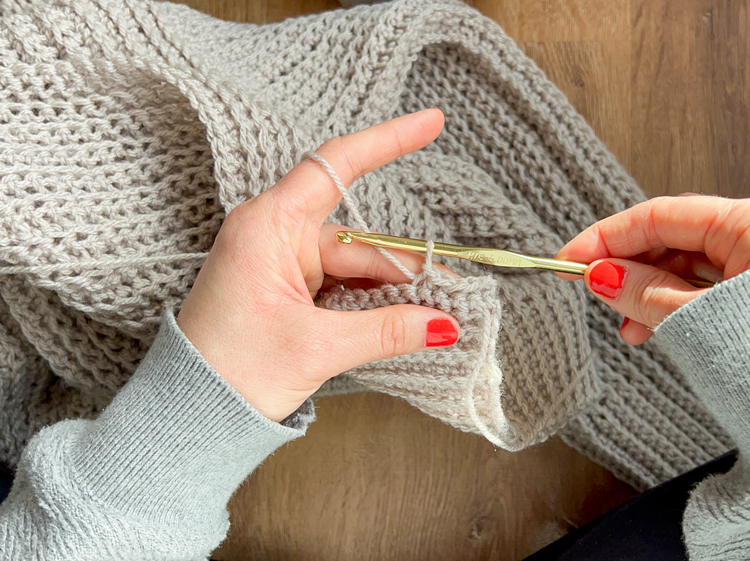
ROW 2: Turn, ch 1. Work sl st in flo in each stitch in the row. REMEMBER TO KEEP YOUR TENSION LOOSE. The slip stitches will naturally shrink up of the front of your cardigan, which is by design but you don’t want it to be too tight and cause puckering. Total stitch count: 146 (152, 162, 166, 176, 180, 190). (The starting ch doesn’t count).
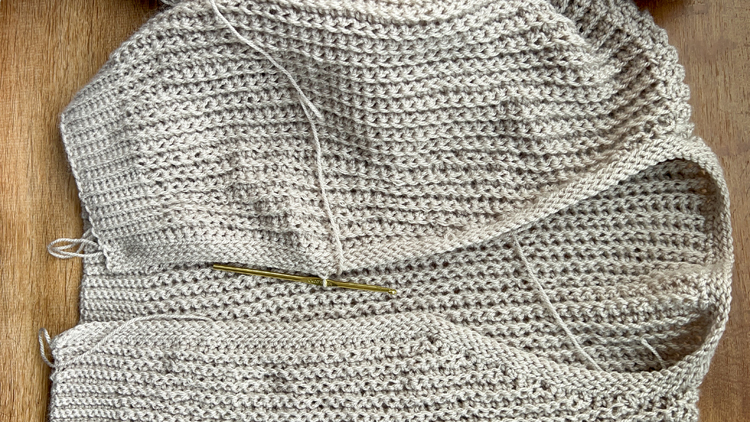
Rows 3-4: Repeat Row 2.
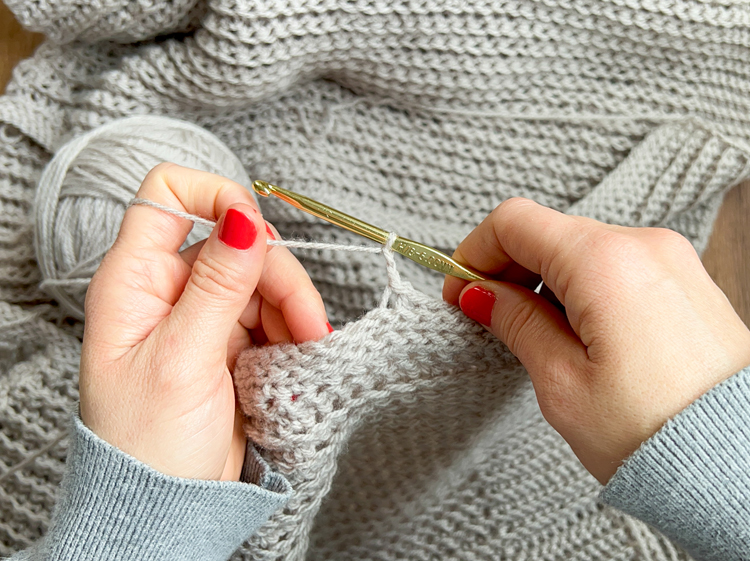
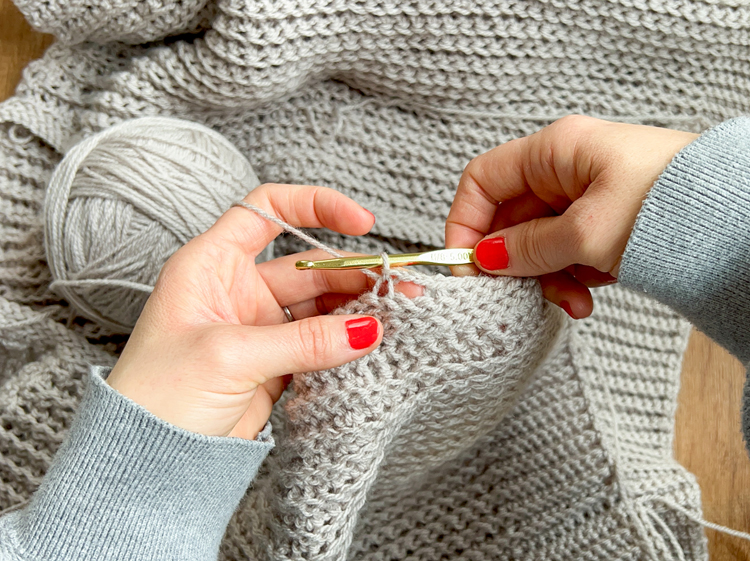
Row 5: Begin button holes. Turn, ch 1. Sl st flo 3 (3, 3, 3, 3, 3, 4) times. *Ch 2 and skip 2 stitches. Sl St in flo for next 6 (6, 7, 7, 7, 7, 7).* Repeat * to * three more times. Ch 2 and skip 2. Then sl st in flo for the rest of the row. (See the video for more explanation.)
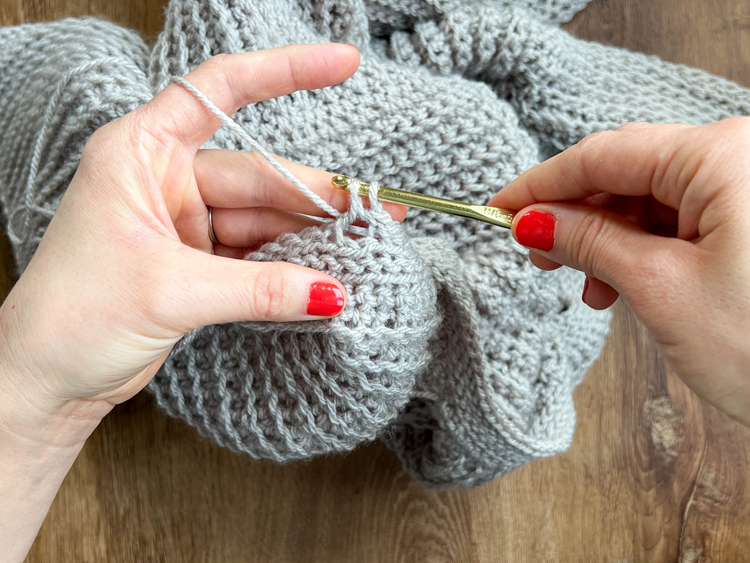
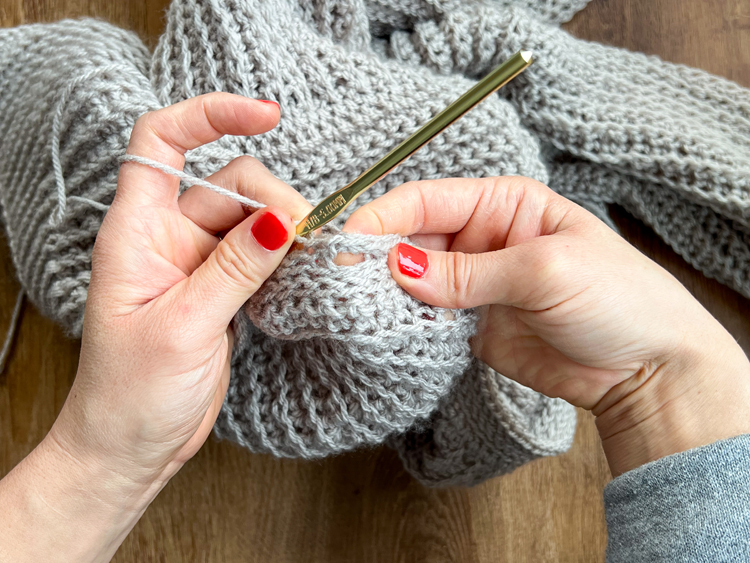
Row 6: Turn, ch 1, sl st in each stitch in the row. When you get to the 2 chain button holes, work 2 sl st into each.
Rows 7-9: Repeat Row 2.
Tie off end and leave a 6-8 inch tail.
NOTE: The pattern makes it so that the button holes are on the right hand side of the garment, which is traditional for women’s clothing. If you want to have buttonholes on the left hand side, start “Row 1” on the left side, instead of the right side and then follow the pattern as written.
STEP FOUR: Add buttons and weave in ends.
You can use yarn instead of thread, but I find thread to be more secure and cleaner looking.
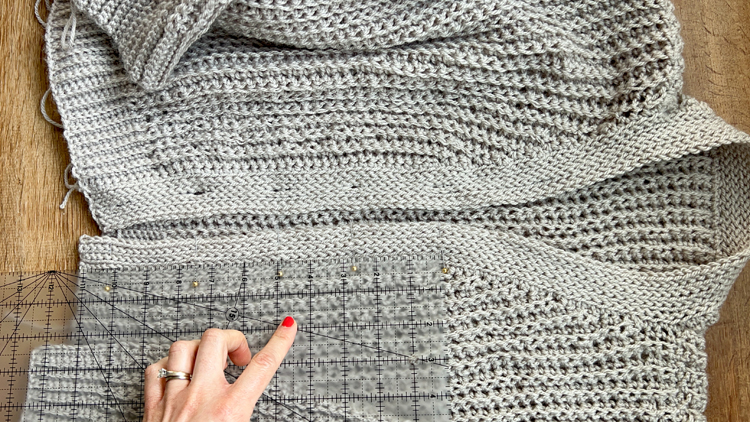
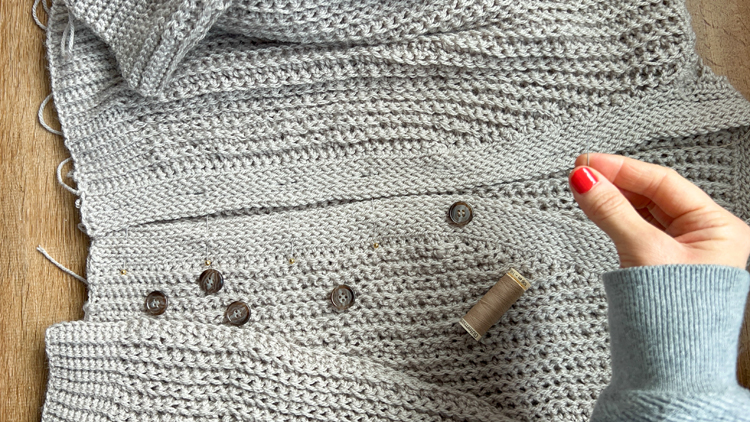
Mark button placement on the opposite side of the button placket from the button holes. I like to use pins and a ruler to ensure the buttons are spaced evenly and centered in the middle of the placket. Then sew in place. The video gives a brief tutorial on how to hand sew buttons, if you are interested.
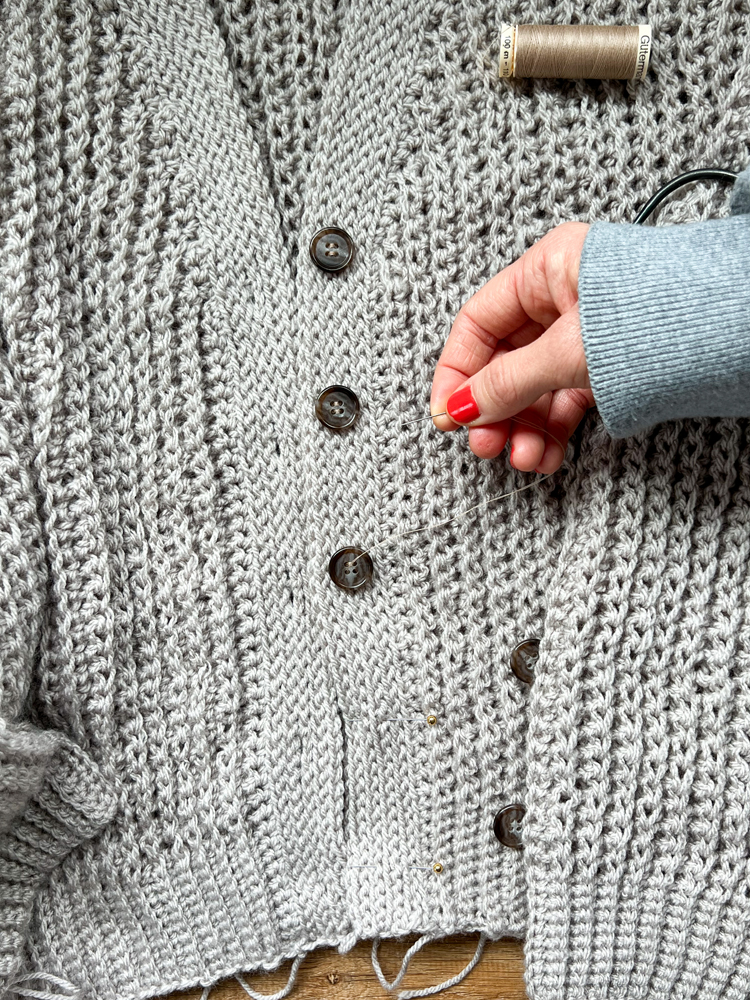
Then weave in all the ends. Because of all the seaming, there are a lot. If you need more instruction on weaving in ends, see the very end of my Rectangle Cardigan video.
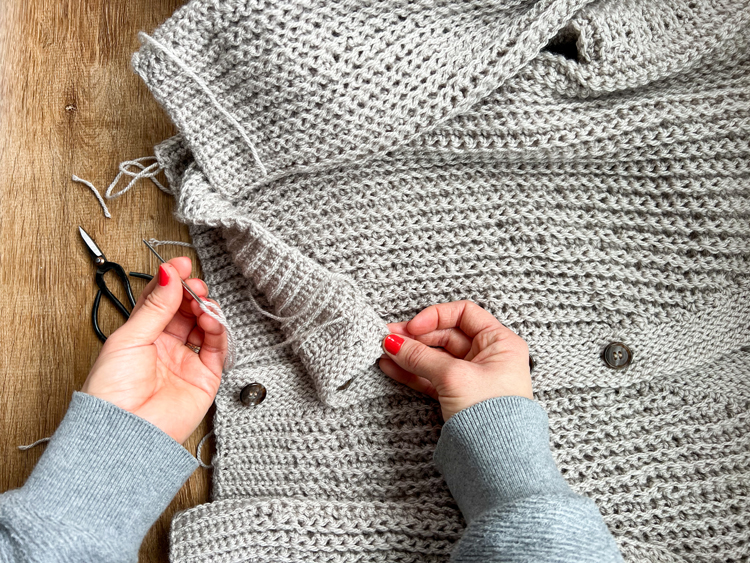
You’re done!

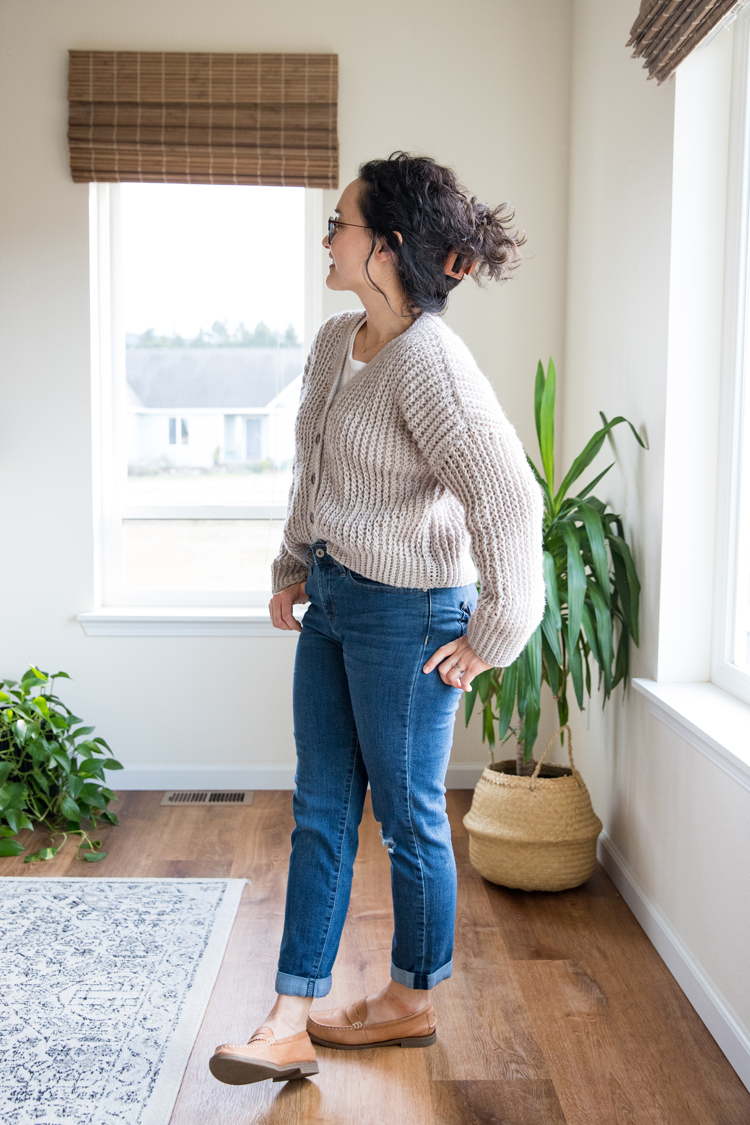
If you make one, I would love to see it …and share it! Tag me or message me on instagram. I’m @deliacreates. If you have questions, that’s also the best place to reach me.


Hi Delia,
Where may I find a copy of the written pattern? I would love to see your other patterns to purchase.
I don’t have this one available on ad free pdf as of yet, but it’s one of my goals in 2025 to start adding more of those to my shop. I am actually revamping my site a little right now and my shop is part of that. I’m sorry I don’t have a better answer for you right now. You can see all of my paid patterns under the shop tab (menu at the top of the page) though in the meantime.
Hello! Can’t wait to try this pattern out! You say that you have a video tutorial? I’m wondering where I can find that? Thanks!
Sure! It should have popped to the top or side of your screen in a mini window/video player. It plays after an initial ad, so if you x out of it, you have to refresh the page to get it back. Likewise, if you have an ad blocker, the video will not play. I hope this helps. If you have more questions, I’m able to answer faster via email: [email protected]