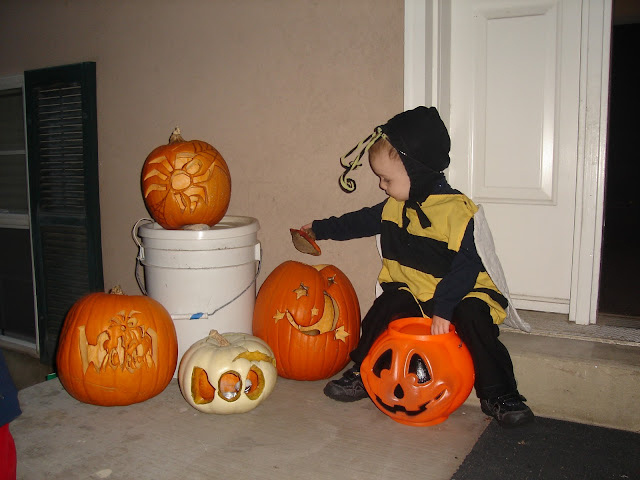
Happy October 1st!
We have been busy getting Halloween costumes figured out for my boys. For my youngest it was decided from the get go. He gets the bee suit.
It is kind of perfect because he is semi-obsessed with “bee bugs.” Owen, my oldest was a bee at around this age…
…so now it’s Reid’s turn. This bee suit was passed down from some older cousins, so it is kind of a tradition that around your 2nd birthday you get to be a bee!
As you can see from Owen’s picture that his antennae were kind of thrown together and didn’t hold up past that night. So…I made a new set for Reid.
It was fun and easy and super cheap…like a lot of things I do. 🙂
Here is the how to:
1. You need:
fleece {or any fabric but I think fleece is best for this project}
2 sticks of thick floral wire…I wish I could give you a gauge but this is from my stash of stuff my mom gave me years ago which she bought years ago…just a thick wire will do – but stronger than pipe cleaners.
a headband – I got a three pack from the dollar store. It doesn’t matter what it looks like really because you will be covering it up.
scissors or a rotary cutter, a hot glue gun, a sewing machine and coordinating or matching thread.
2. Cut your pieces:
Measure the length of your headband and cut a piece that length by about 1.5 inches {depending on the width of your headband}.
Then cut some pieces of fleece about the same length of your wire and an inch wid.
3. Fold everything in half long ways {hot dog fold! :)} and sew. For the head band piece sew along the folded side as well. Try to sew as close to the edge as you can. My pieces curled up a bit which was great for the antennae pieces.
4. Slide the headband through the fleece. Sew the ends closed and trim any excess off. Fleece will stretch a bit if you need it to. 🙂
5. Now move onto your antennae pieces. Slide the wire in.
6. Sew all the ends closed. I do it one right after the other to save thread.
7. Bust out your hot glue gun…and glue the antennae on, wrapping as you go. I wrapped it 1 1/2 times to secure it.
8. Shape the antennae pieces. You are done!
This makes a sturdy, nice looking set of antennae for about $1 or less {in my case free since I had all of the materials on hand}.
You can have them wear it with a bonnet when it gets cold {if you want a tutorial on this I can do one…just ask}:
 Or without when it’s warm or if they are inside:
Either way…
it looks cute!
I also made his pants. It is basically pajama pants made out of an old jersey knit skirt and cut a little bit tighter. I used some Old Navy pajama pants as my guide.
And then used the stitch you see circled here since I don’t have a serger.
When I was done I added a quick cuff.
Pretty easy.
Now…*sigh* for Owen’s costume. He has made about 10-15 costume idea changes and I haven’t helped his decision making any. I think that I have been as wishy-washy as he has been. 🙂 We finally decided on a skeleton but then I saw this tutorial from Sabra who was guest posting at Ucreate with a muscle man costume.
Now he is going to be a muscle man ninja. 🙂 Let’s hope this one sticks.


LOVE the antennas! So stinkin cute.
This comment has been removed by the author.
This comment has been removed by the author.
Aww look how cute both your boys are in the bee costume! Great job on the antennae! Super cute 🙂
this is great! and i think the muscle man pattern will be perfect! good luck with that!
Bellissimo il vestitino,e molto bello anche il tuo bimbo.
This is so adorable!! I'm including this in a mega Handmade Halloween costume post on my blog this week : )
Jaimee @ craft-interrupted.blogspot.com