

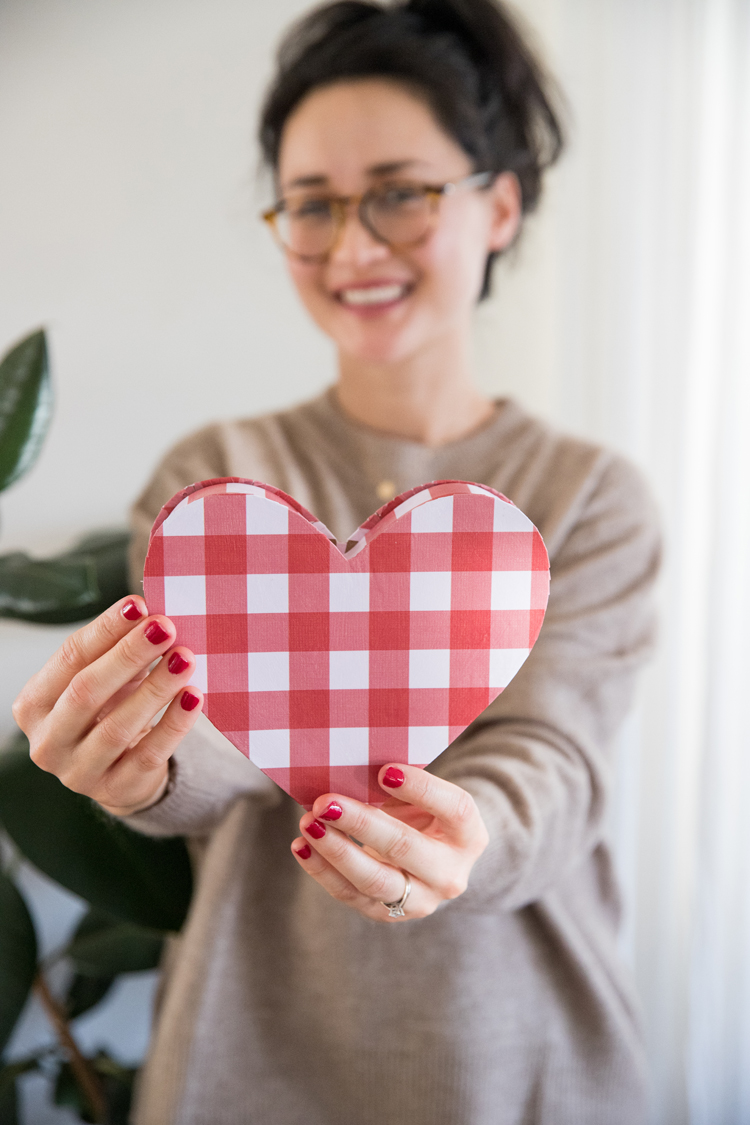
Skip the waxy chocolates and make your own candy heart box! Then fill it with the treats you really want to eat. 😉
You can also save a cereal box from the waste/recycle bin and save money on craft supplies while you’re at it!
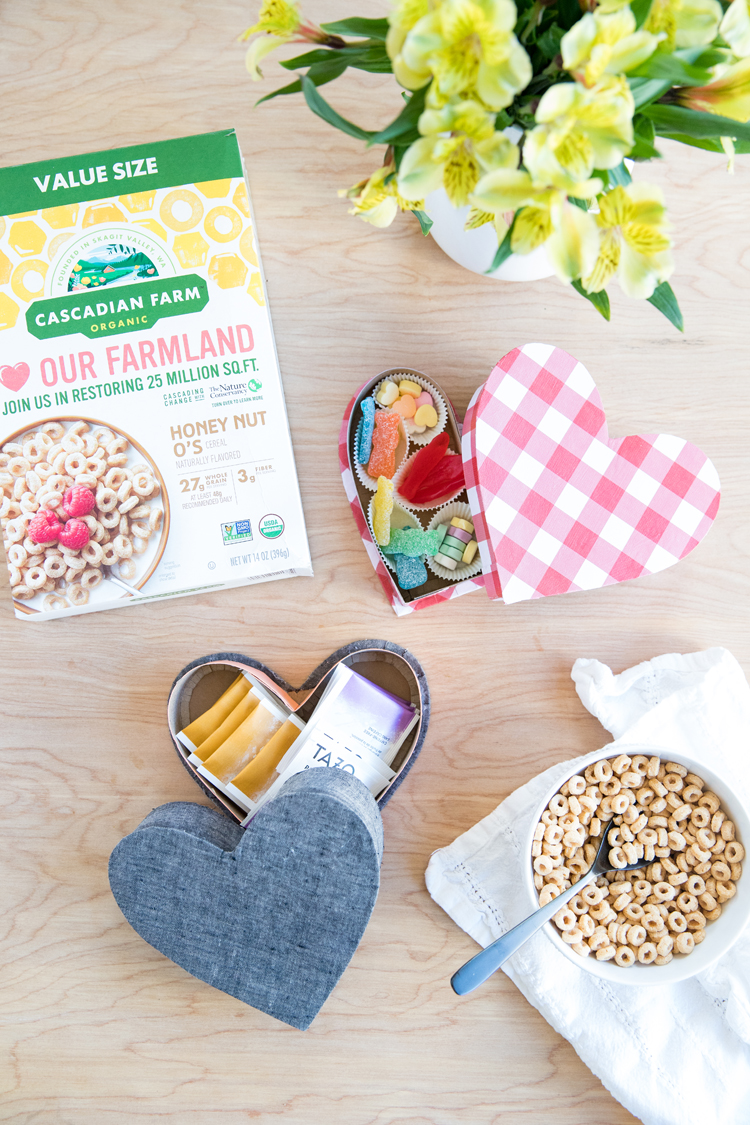
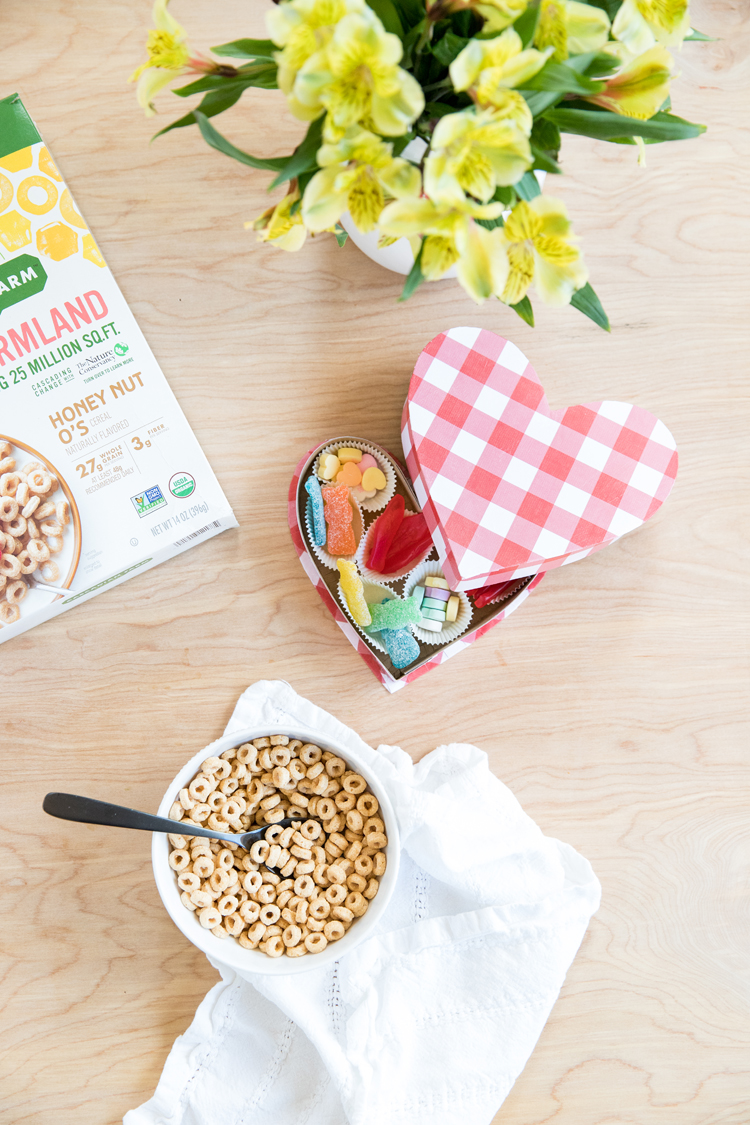
Despite what this picture shows, I do love good chocolate, but this particular 8 year old valentine does not. 😉 Even then though, I would totally opt for the box full of tea if given the option.

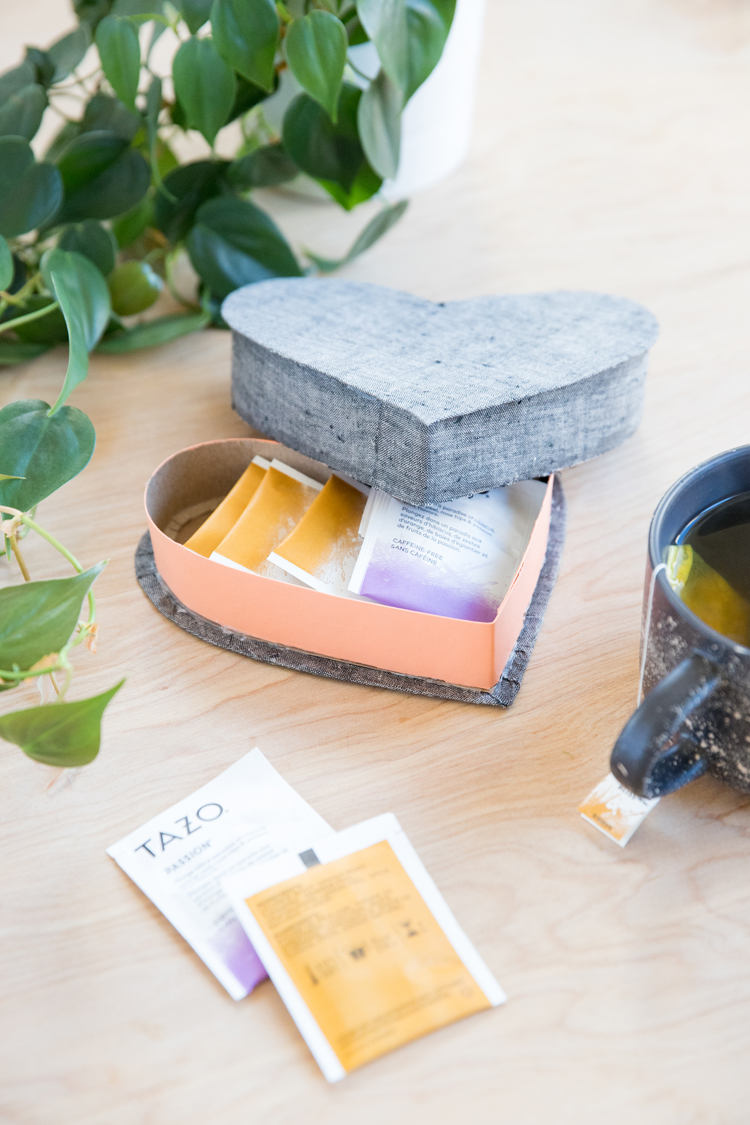
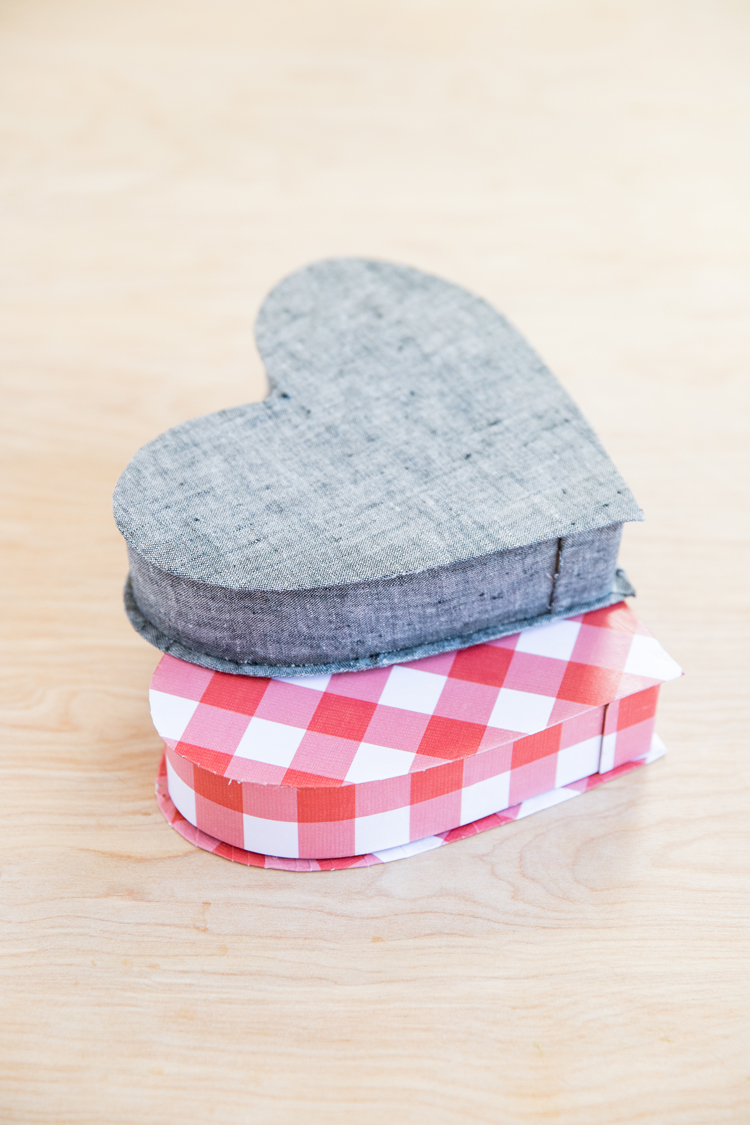
Isn’t the linen fabric box so pretty? That’s what I love about this project. You can customize it to use whatever you have on hand and whatever look you want. Use fabric, scrapbook paper, paint…or a mix of all of them!
I painted the bottom sides of the fabric box for a surprise pop of color.

I’ll walk you through the process with both a video tutorial and a written tutorial with pictures. Let’s get started!
Note: If you have a cutting machine, I also have cut files for a similar box HERE.
MATERIALS
- Large cereal box
- Scissors
- Mod Podge
- Ruler
- Pencil
- Hot glue
- 1 piece of 8.5×11 inch card stock
- 1-2 pieces of scrapbook paper or scrap fabric, and or craft paint
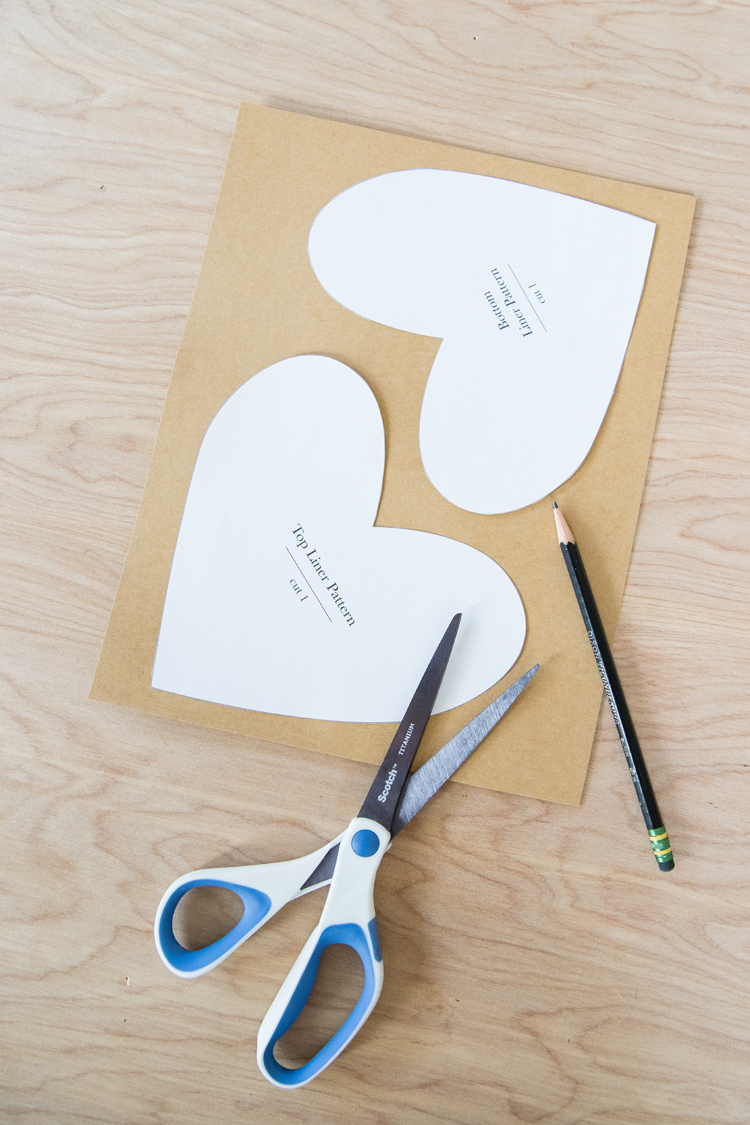
TEMPLATE
Download and print this candy box template. It is designed to fit 8.5 x 11 inch paper. Print at “actual size” or scaled to 100% to get the correct proportions.
VIDEO TUTORIAL
This video tutorial walks you through how the box comes together. The written tutorial below will hopefully add clarification to the process as well. If you scroll past the video it will pop to the side or top of the screen so that you can read as you watch.
WRITTEN TUTORIAL
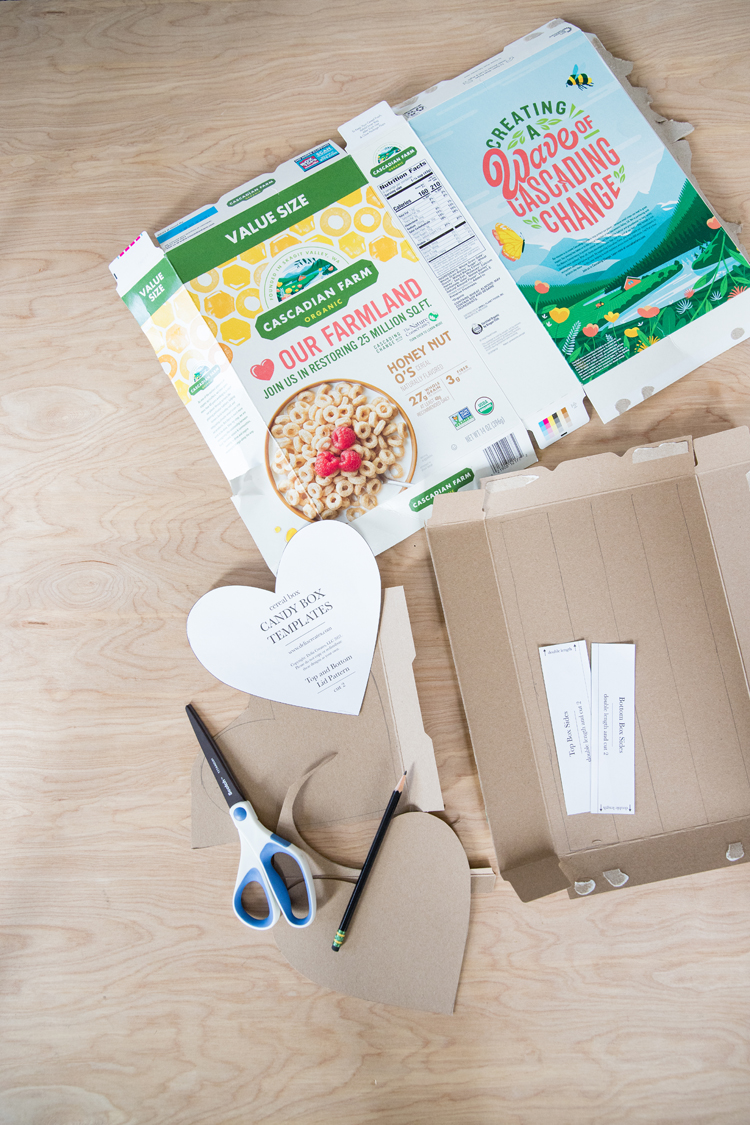
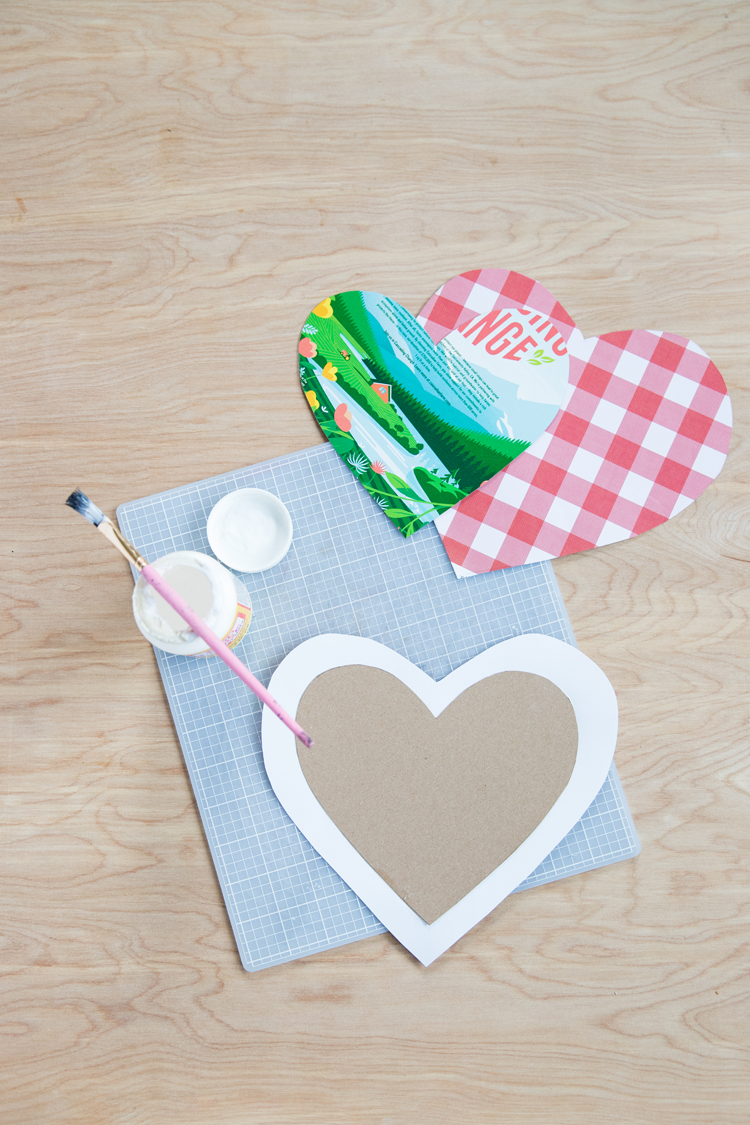
1- Disassemble the cereal box so that it lies flat.
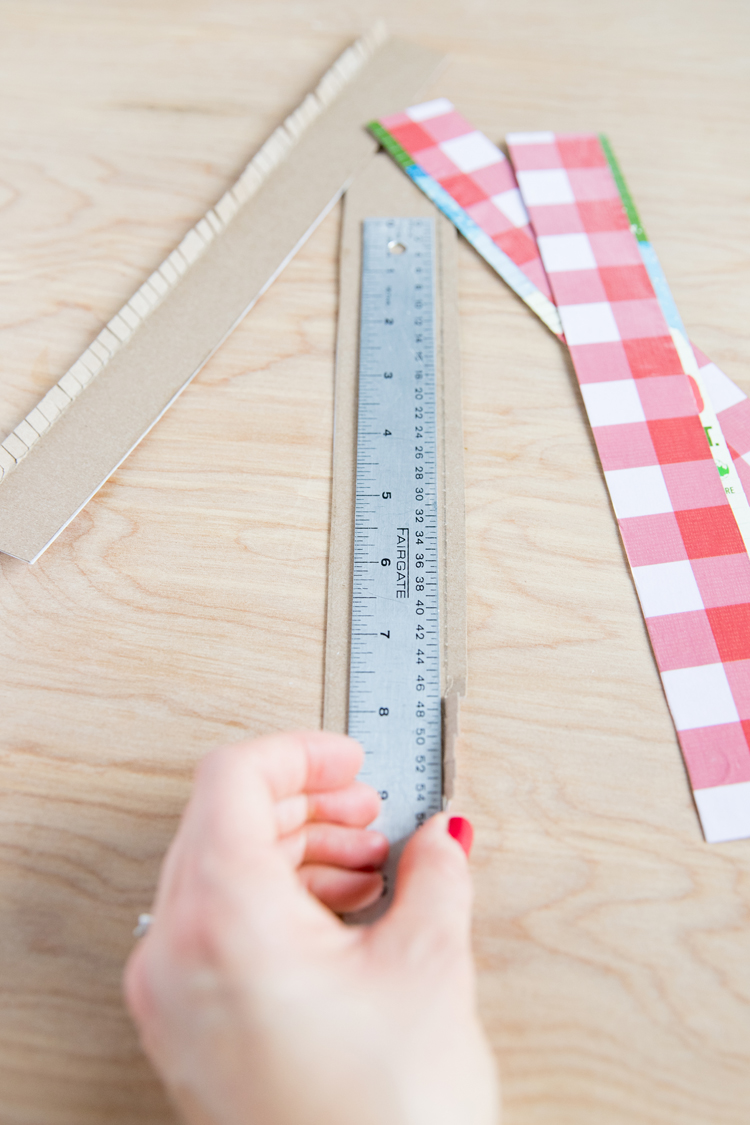
2- Trace two of the candy box top/bottom template. Trace two each of the top sides and bottom sides. The side templates should be doubled in length for each side piece. Note: The top side piece is slightly wider than the bottom side piece on purpose.
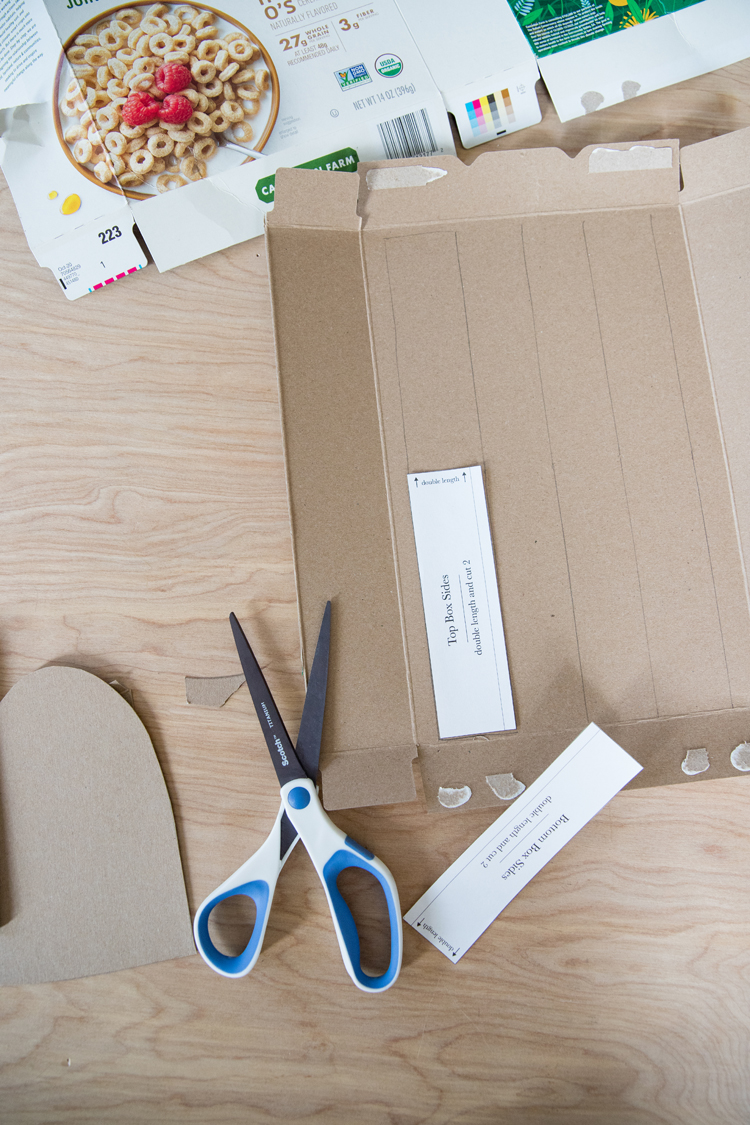
3- Cut sides, top, and bottom pieces out as smoothly as possible.
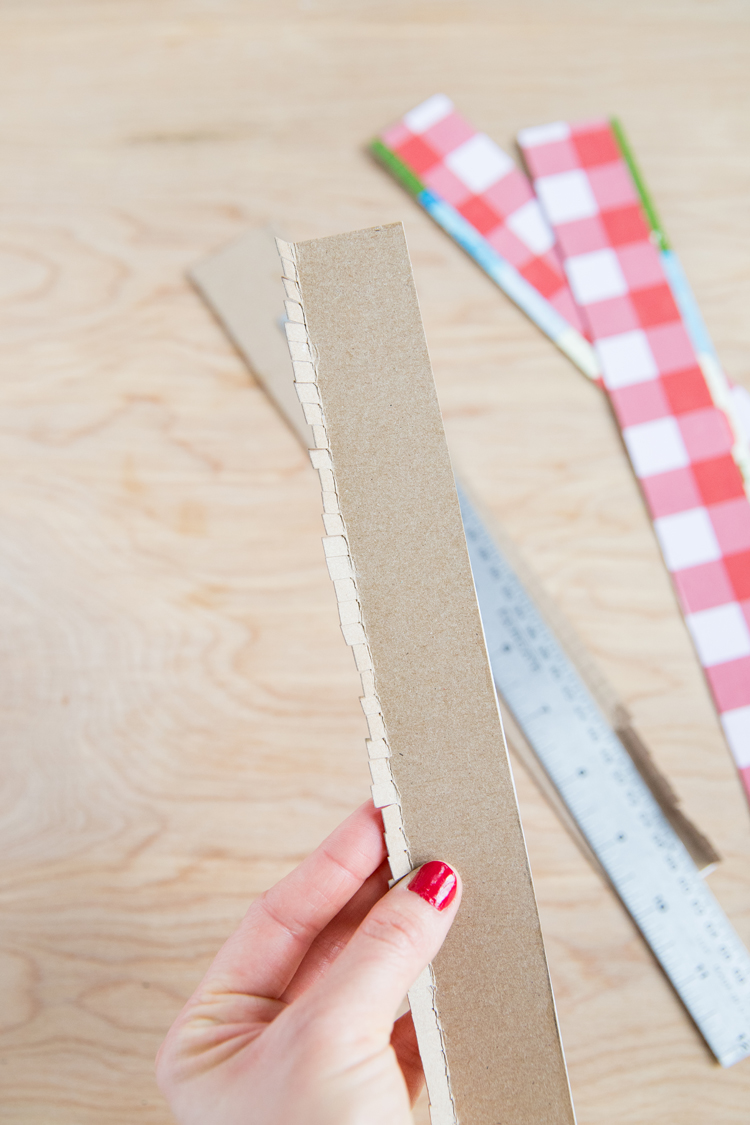
4- There is a bold line at the bottom edge of each side template. Fold along this line and use it as a guide to mark a line on the coordinating side pieces. Cut small, short slits along the length of each side piece up to this marked line. (The video illustrates this better.)
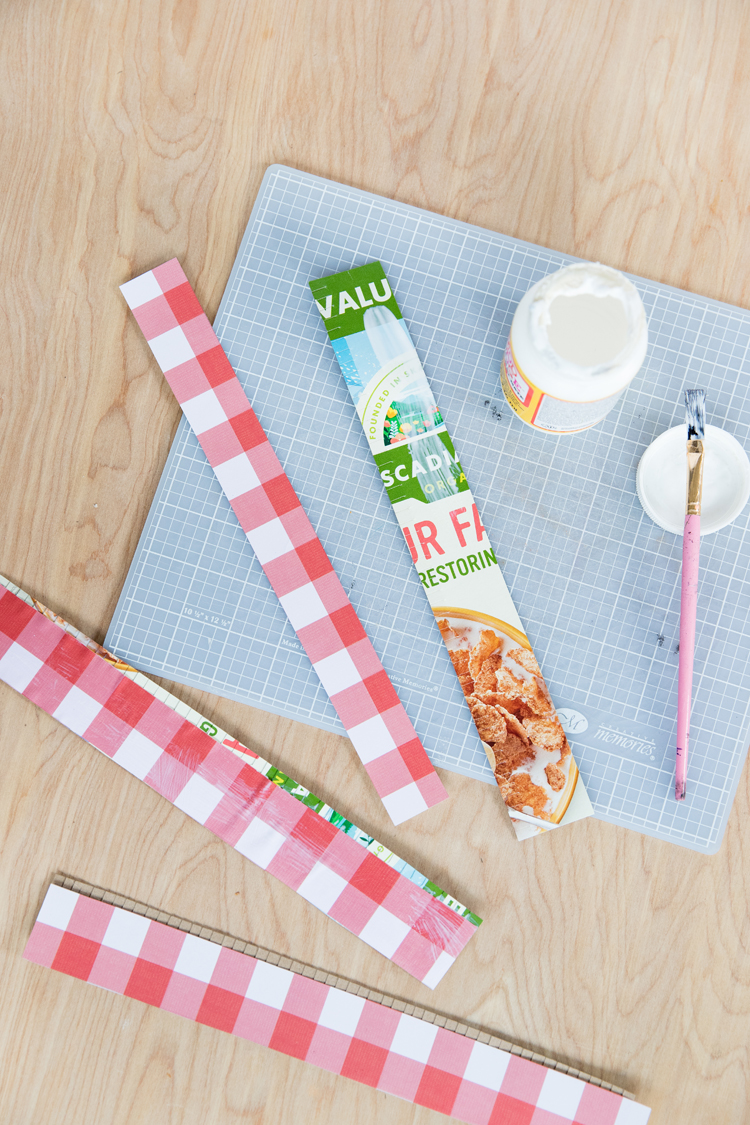
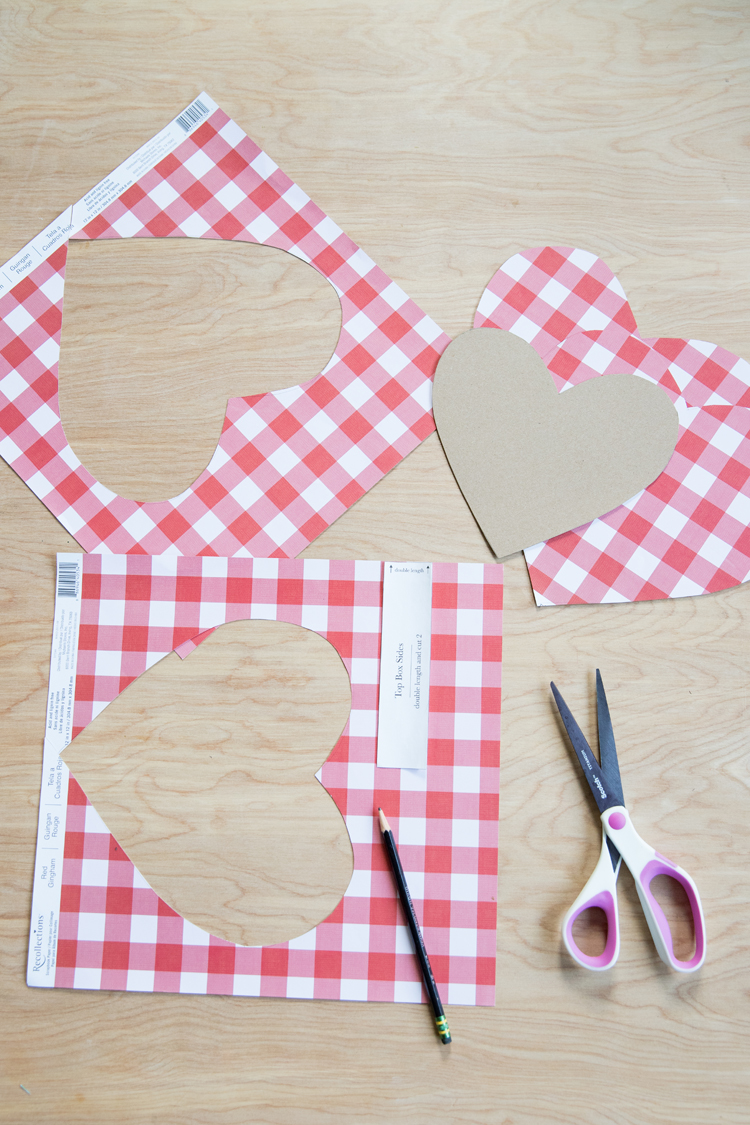
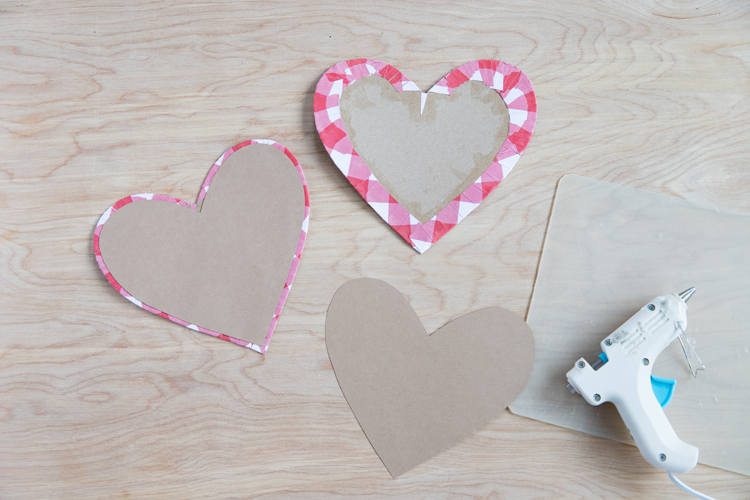
5- Decorate the box pieces. If you are using paper or fabric, lay the top and bottom box pieces down on the material and trace a heart about 1/2-3/4 inch larger. For the sides, use the folded templates to cut pieces to fit the sides exactly, minus the fringed edges.
OPTION: You can also paint the box sides instead. As you can see with my gray fabric box, I opted to paint the bottom sides so that it would reveal a pop of color when opened.
6- Using Mod Podge, adhere the material to the side pieces and seal the surface and the edges with more Mod Podge.
7- Center the cereal tops and bottoms on the larger hearts. Glue in place with Mod Podge.
8- Cut fringe all along the excess material around the box top/bottom. When cutting around curves, it helps to have more thin cuts so it will curve better.
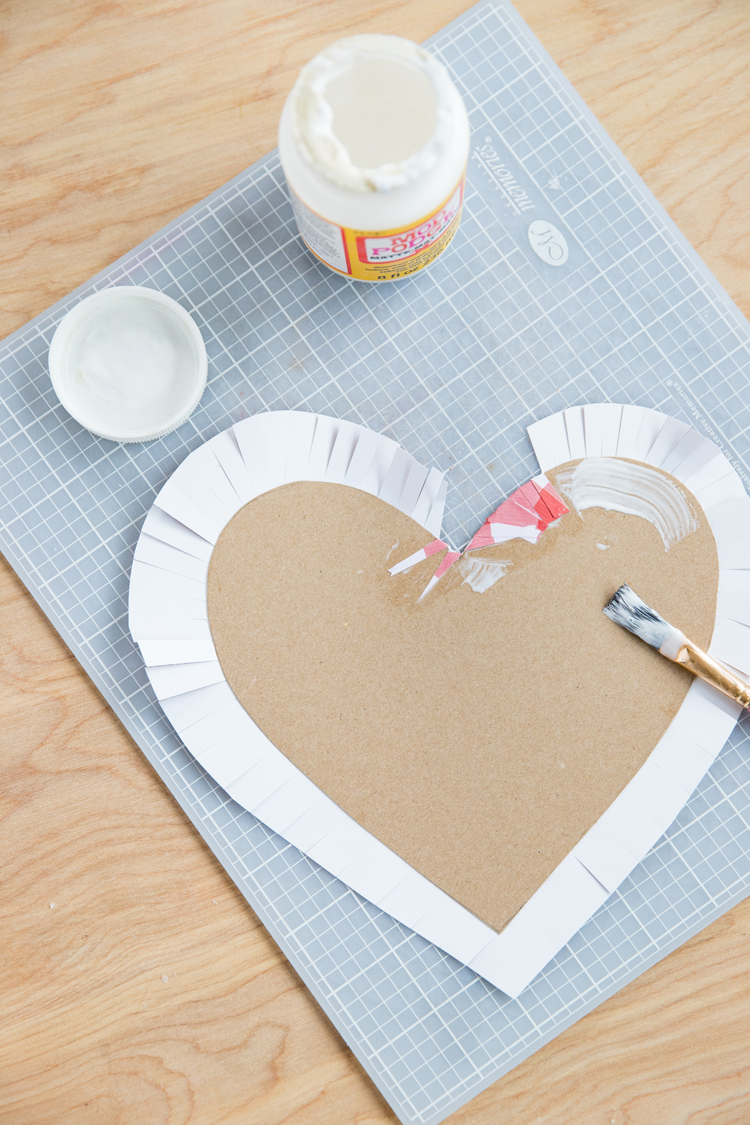
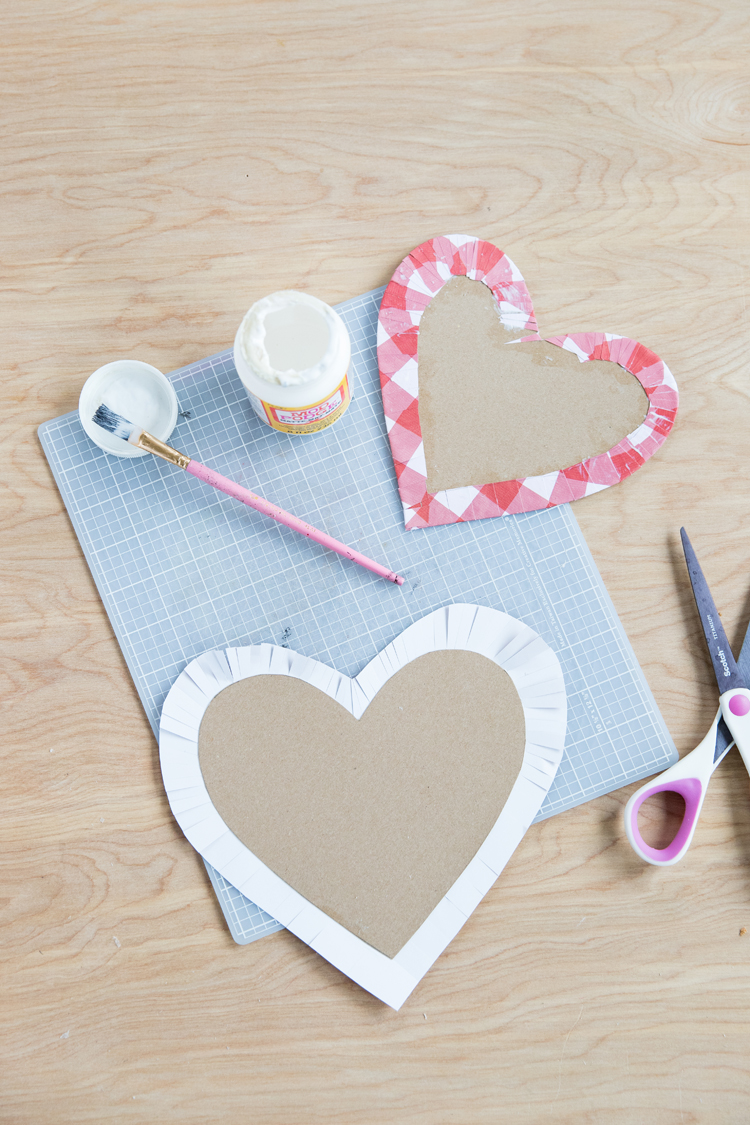
9- Fold the fringe flaps over to the under side of the top/bottom and secure with Mod Podge until the material is completely wrapped around the top/bottom heart box pieces.
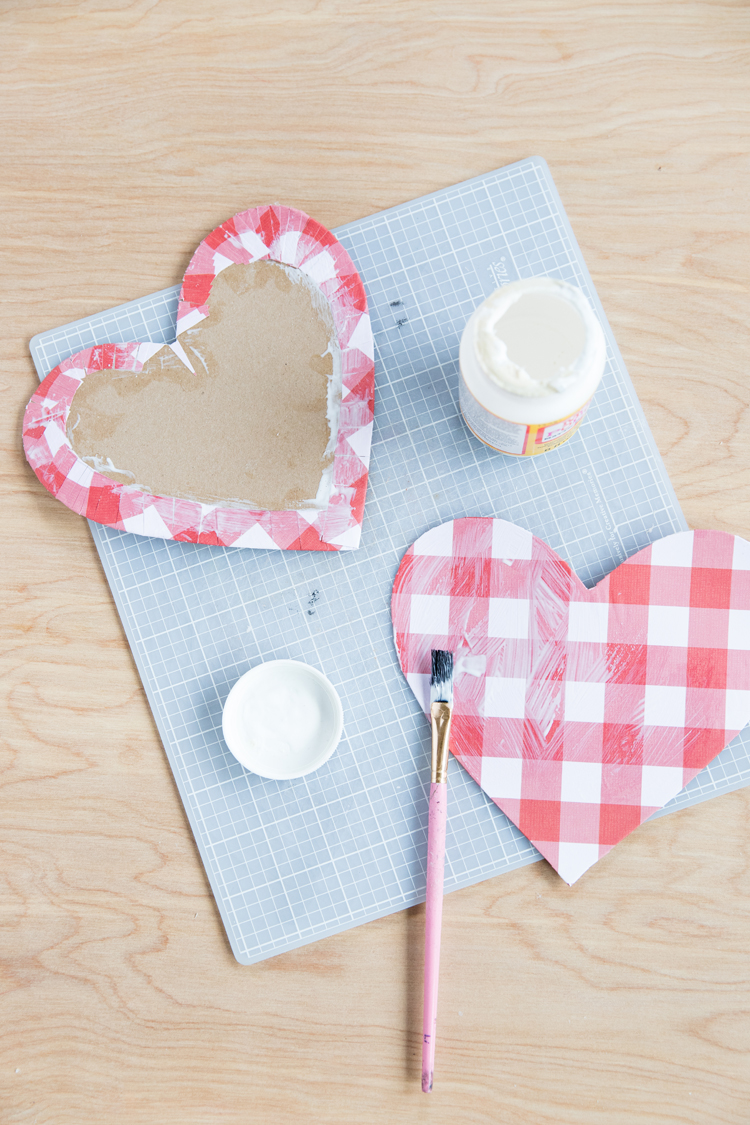
10- Coat the top and bottom with Mod Podge if desired. If you’ve never used Mod Podge, you’ll notice that paper tends to bubble while it’s wet. It should smooth out on its own. If it’s almost dry and there are still bubbles, you may have to smooth them out yourself and add more Mod Podge.
10- Trace and cut the liner template on plain card stock. I used kraft card stock. The top liner piece should be slightly larger than the bottom liner. Not only will they serve as a way to clean up the look of the inside of the box, but they will help the sides of the box find the correct position so that they will nest together properly.
11- Center the liner pieces onto the undersides of the top and bottom box pieces. Using hot glue, secure the center of the liner pieces in place. Then using a thin bead of glue around the edges of the liner, glue the edges securely in place.
12- Using a ruler as a guide tool, fold up the fringe you cut on the side pieces earlier.
13- Glue the side pieces to the top and bottom pieces with hot glue, using the edge of the liner pieces as a guide. Each heart needs two sides pieces. When one side is in place, attach the second until you make it all the way around the heart.
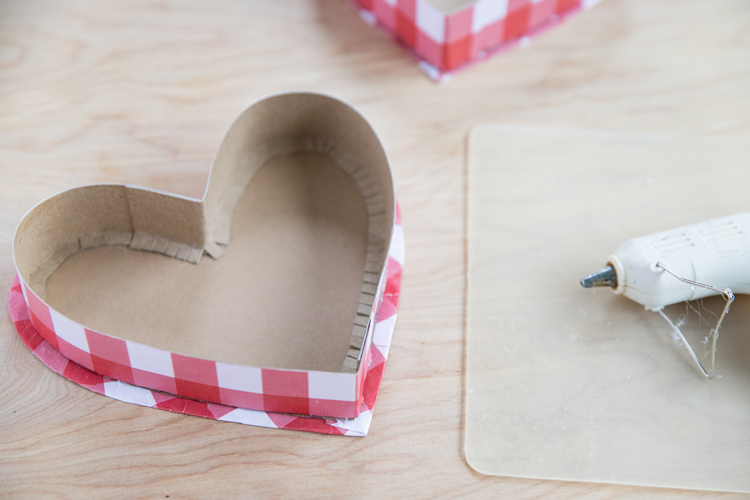
IMPORTANT: Be sure you are gluing the wider (top) sides to the heart with the larger liner heart and the thinner (bottom sides) to the smaller liner heart. This will ensure the top and bottom will nest together cleanly.
Test out your box. Voila!
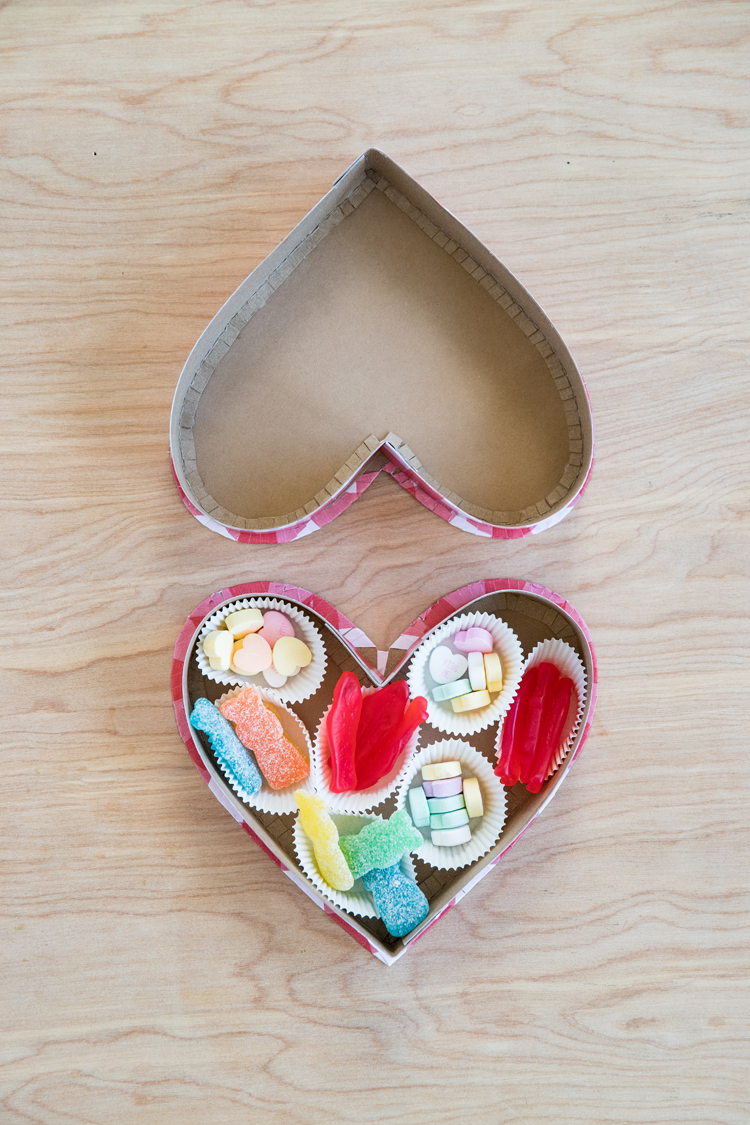
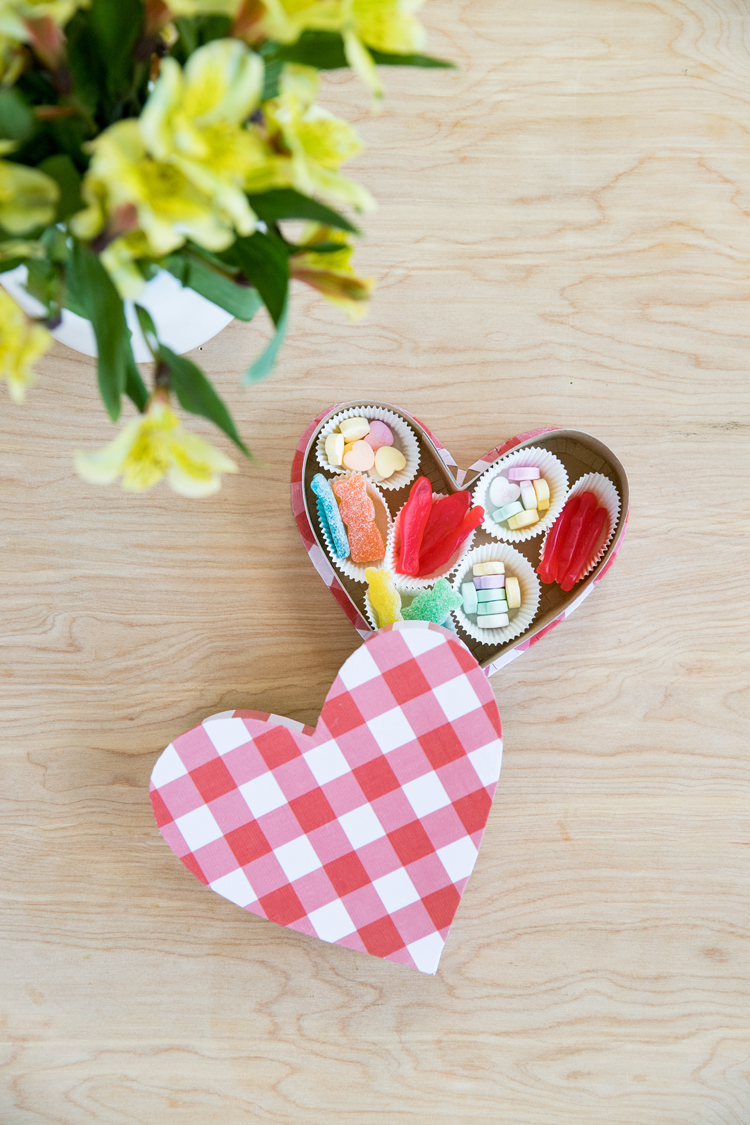
Use mini cupcake liners to add little treats.
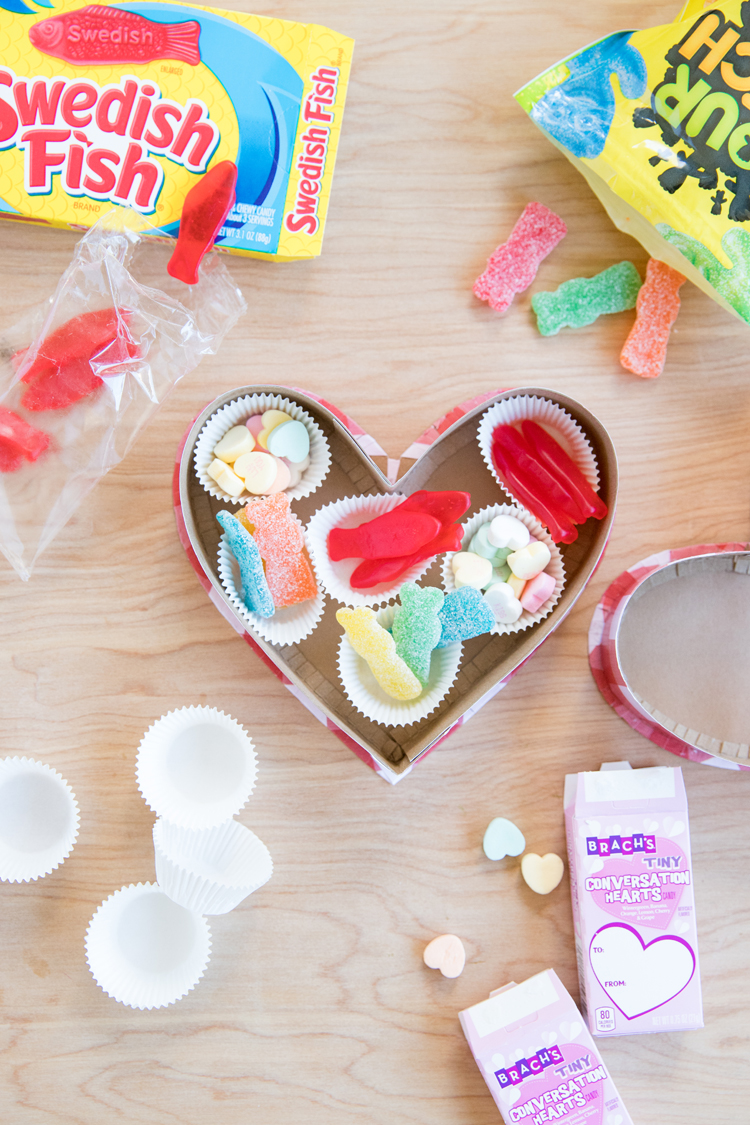
What would you want in your candy heart box? 😉
How fun!! My husband makes Belgian chocolates—I know, right?! This would be fun to fill with them for some special folks I know! ? Thanks so much for the great tutorial! Love your blog!❤️
Oooh lucky you! I love that! And thank you! <3
Hi, your instructions on the heart lids were very confusing. Would you be able to label the images as heart A, B, C?
Nevermind, I figured it out. I’d give it specific labels to each piece because it was a little confusing.
Sorry about that. I’m glad you figured it out. I just went by size, but they are close so I can see why labeling could save time. Good idea!