Have you been wanting to learn how to crochet, but just getting started seems overwhelming?
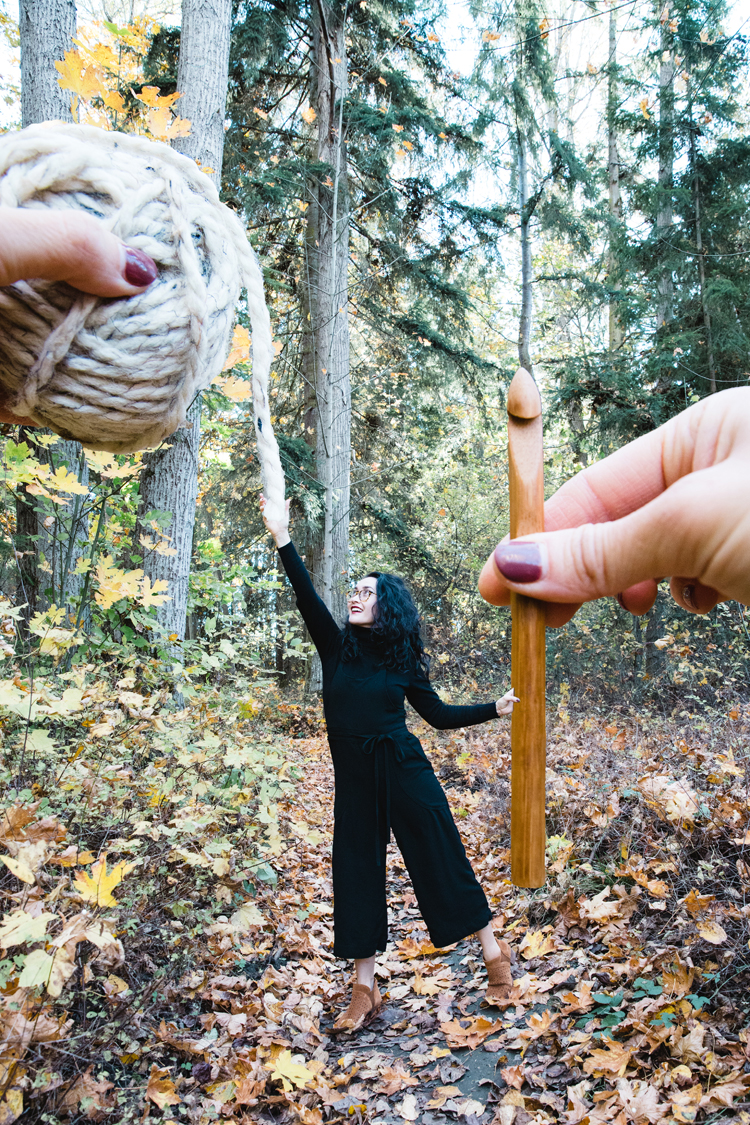
I am SO excited to kick off this Crochet Basics series to teach you how!

The learning curve for crochet can sometimes feel pretty steep, so I’ve broken it down stitch by stitch, video by video.
And then we make something you can actually use with that stitch…even the most basic chain stitch!
Like this plant cozy:
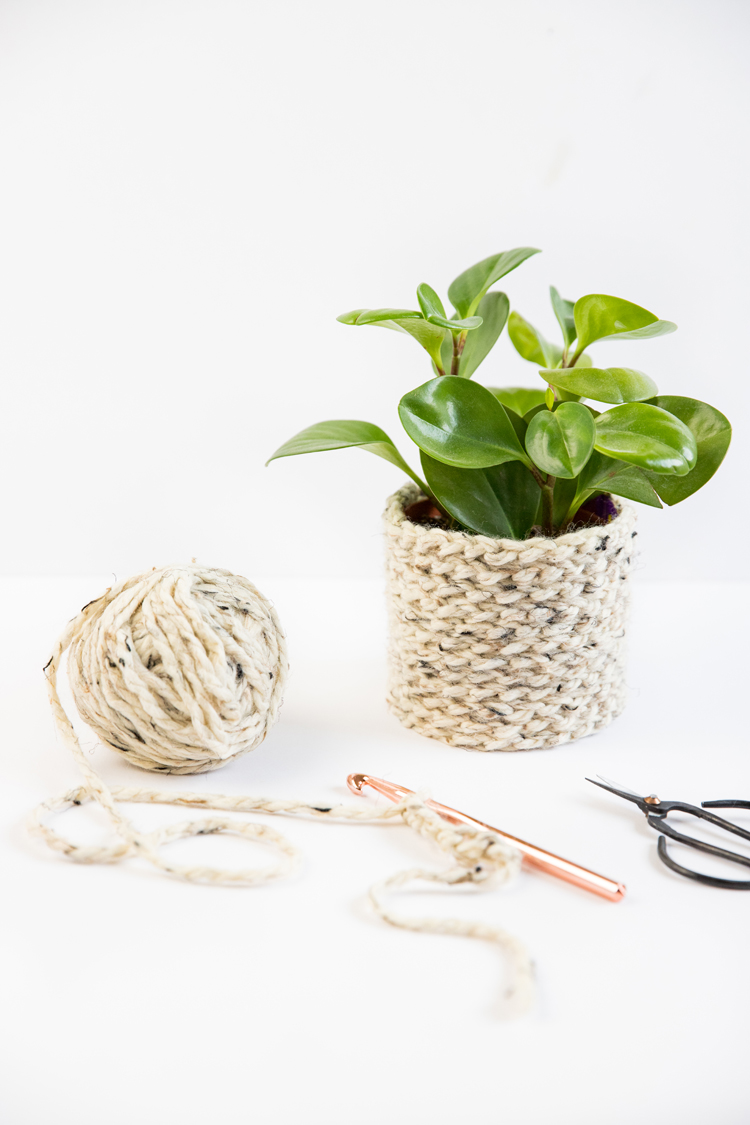
Nothing kills motivation for me more than making something without a purpose or making something that feels overwhelming.
True story… My very first crochet project was a scarf and it took me about 10 years to finish it (that’s not a typo…years… yikes). I made the whole thing in tiny single crochet stitches and ended up never wearing it because it really wasn’t that cute. Ha!
To avoid having that happen to you, I’ve designed projects that are simple and attainable for beginners. I believe you can make beautiful, useful stuff at ANY level of crochet!
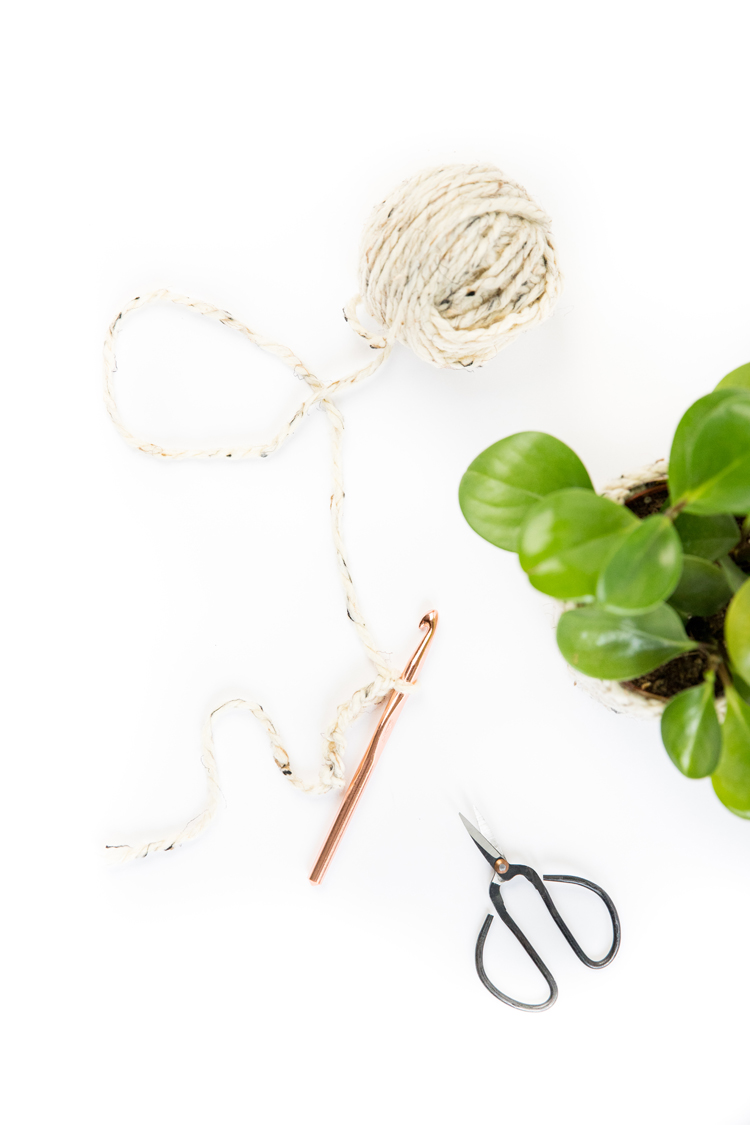
Of course…give a mouse a finished crochet project and s/he’s going to keep crocheting…
That’s the goal anyway! 😉
Before we begin, here’s what you’ll find in this post:
- The first Crochet Basics video: How to hold your hook, how to chain stitch, and how to make a plant cozy!
- Yarn and hook guides + printable.
- Supply guide.
- Basic abbreviations and terms.
NOTE: This post is a little information heavy because it serves as a reference point for the rest of the series.
All you need to get started, is the video in the next section. The rest of the information is here when you’re ready for it later.
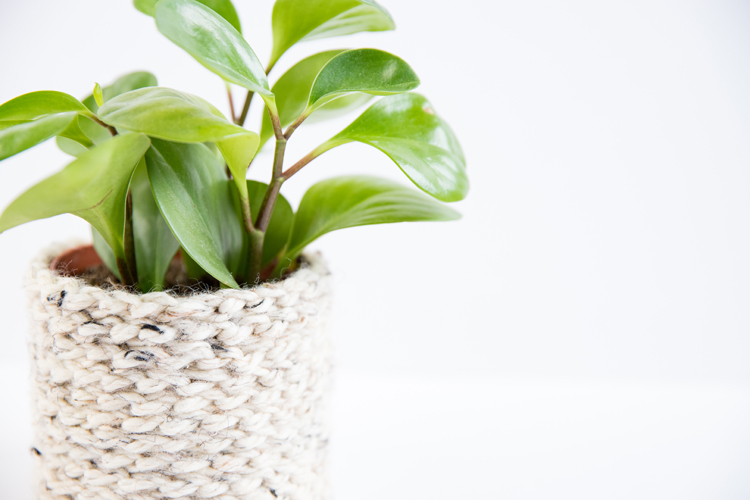
Chain Stitch + Plant Cozy Tutorial
Materials
- N or 9.00 mm hook
- Super Bulky or Category 6 yarn
- empty cereal box
- ruler, scissors, tape
For more information on hooks and yarn, see the next section.
***VIDEO TUTORIAL***
Click play for your first lesson! If you scroll past it, it will pop to the top or side of your screen so you can scroll and read while you watch.
Written Pattern
For this first project you really don’t need a written pattern, but I will always include it for future projects.
***REMEMBER: You don’t really need any of the information below to get started. It’s just FYI for now, and will come in handy as you get more lessons under your belt. ***
Yarn and Hook Guides
Yarn and hooks come in various sizes, materials, and go by all sorts of different names depending on different countries. It can be pretty confusing, so I’ve created guides you can reference as needed.
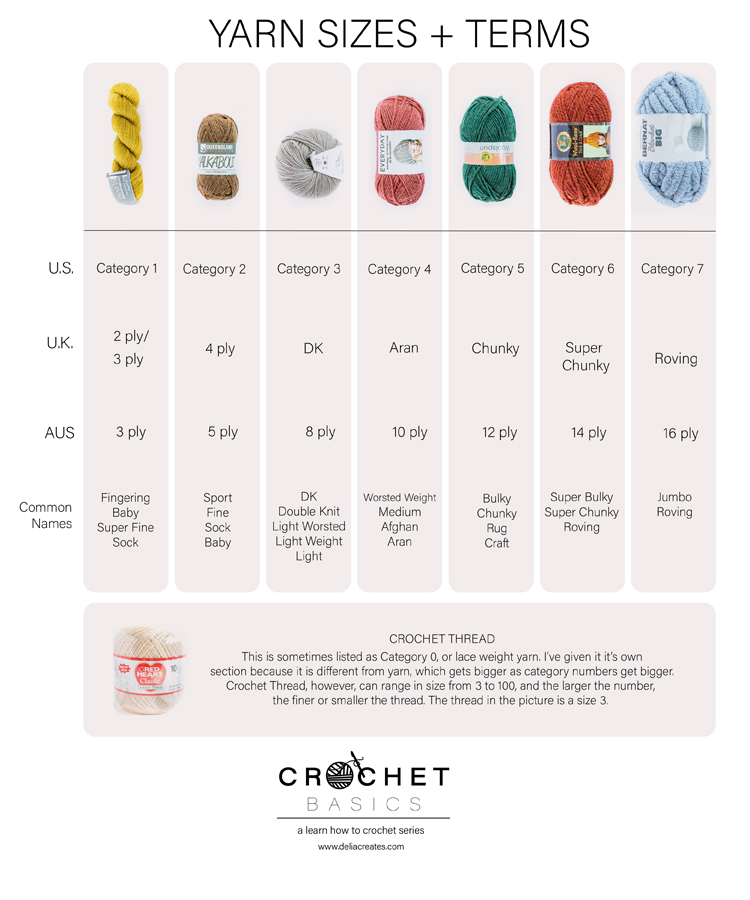
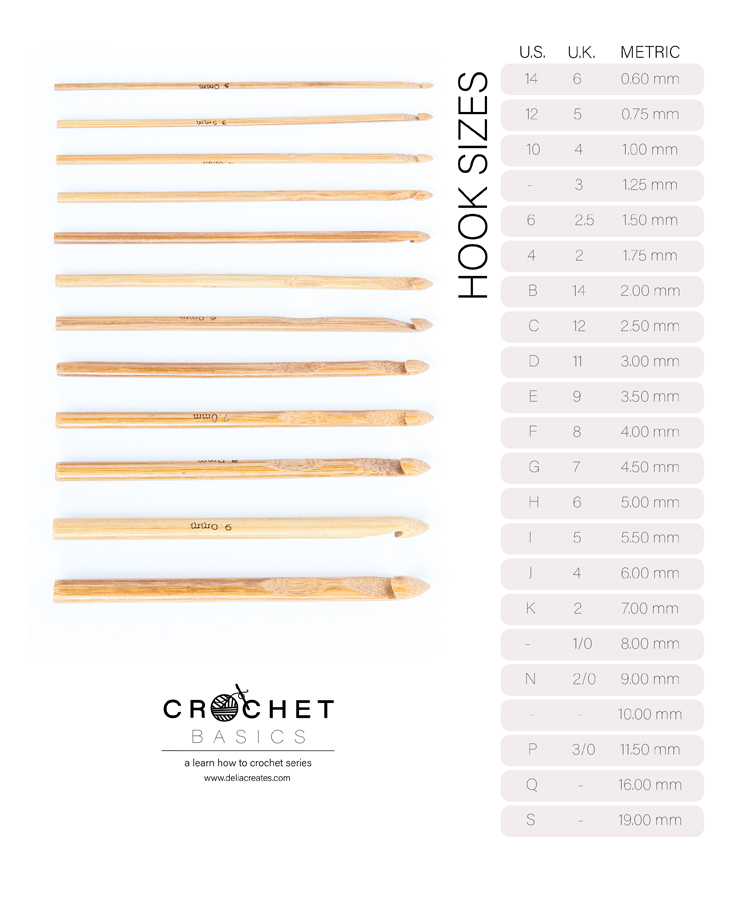
Note: Metric terms for hooks make the most sense (am I right?!) so I rely on those the most. For yarn, I will be using U.S. terms.
This is a list of common hook sizes, but they come in many more sizes, smaller and larger:
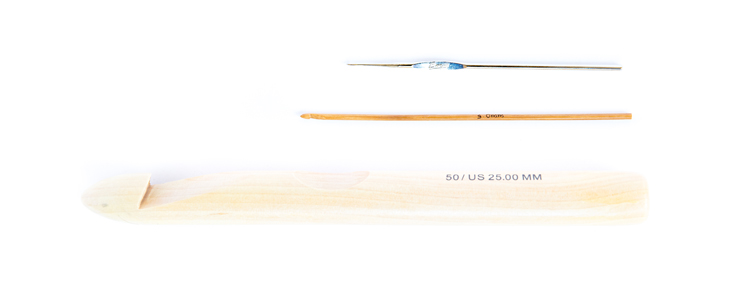
For the printable versions, click below.
Hooks for Beginners
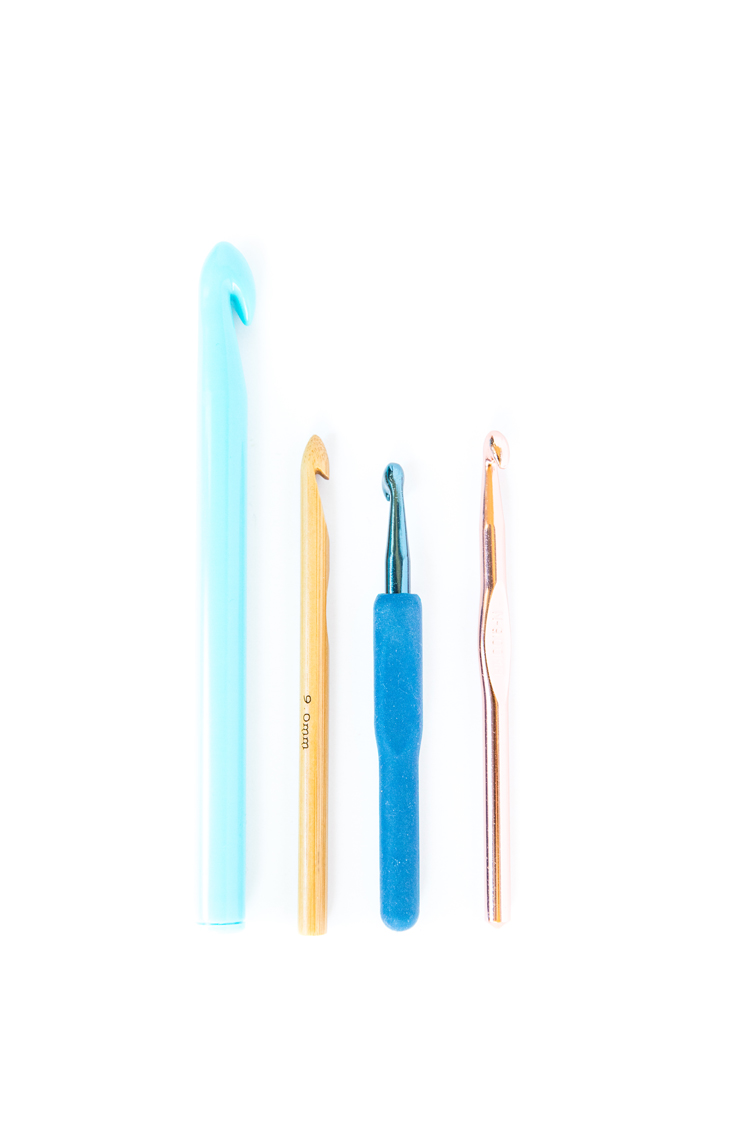
For beginners, and really for any skill level, I recommend aluminum hooks with a tapered throat. They hook yarn smoothly, they don’t snag yarn as often, they are easy to find, and they are just easier to use in my opinion.
You can get ones with silicone grips for comfort. They’re nice to have but definitely not a need. In fact, a hook without a comfort grip can be easier to use with more complicated stitches.
I talk a little bit about this in the video, but here is a more detailed look at the basic anatomy of two common types of hooks.
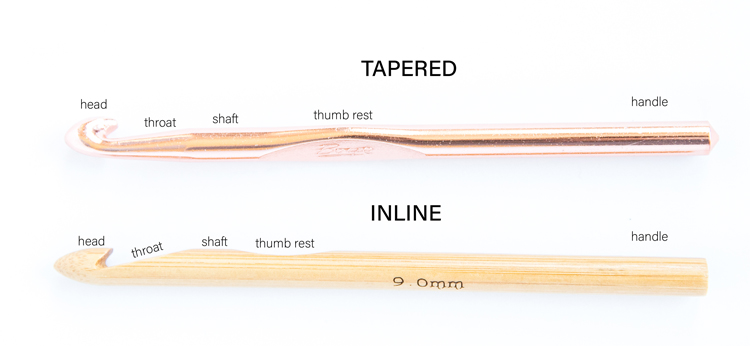
- The head is where you hook your yarn.
- The throat is where the stitches should be worked…I prefer to work lower on the throat and sort of into the shaft. If you work too high on the throat your stitches can become too tight.
- The shaft is where you can gather loops on your hook.
- The thumb rest is where you often hold your hook.
- The handle is the back end of the hook.
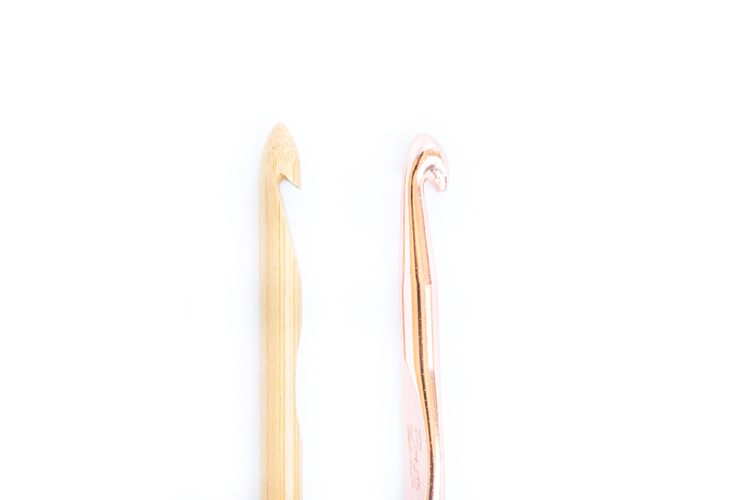
As you can see the main difference between the hooks is all about the throat. A tapered hook is more molded and an inline hook is often notched out of the body of the hook.
Yarn Packaging
If yarn sizes aren’t confusing enough, yarn comes packaged in many different ways as well. Here’s a little flow chart I created to show you some of the most common ways yarn is sold.
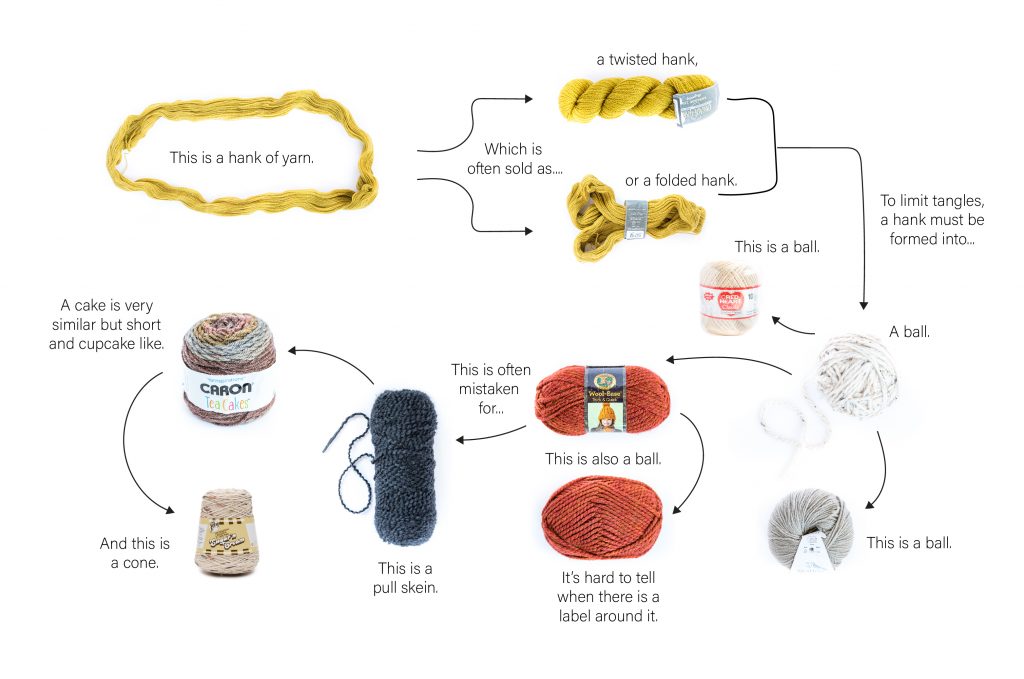
And after all that…all you need to know is that none of this truly matters. Ha! Except for hanks! Make sure you wind those into balls before you end up with a tangled mess…ask me how I know. 😉 Specialty yarn shops have special ball winders and will often provide this service for you.
TIP: There are two ends you can use. One is on the outside of the ball or skein, usually tucked in somewhere under the label. The other end is in the center which can take some searching and sometimes make your start a little messy, but can make pulling out the yarn easier later.
Yarn Size Ranges
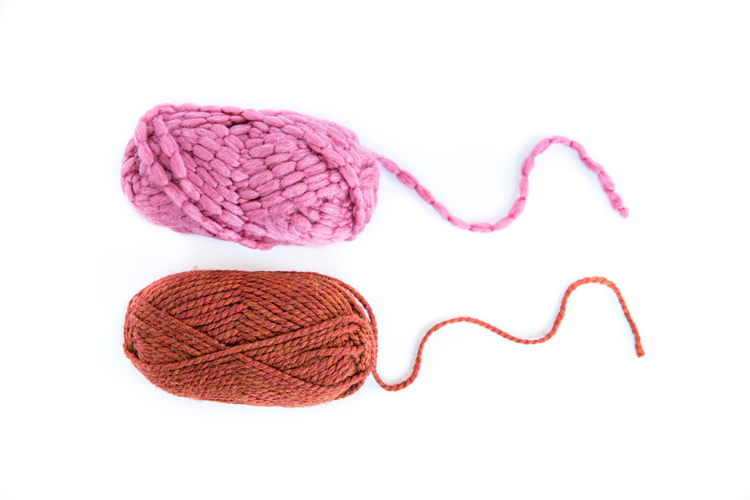
Another thing to keep in mind with yarn sizes, is that within each size there can be a range of sizes, and this is not really measurable or universally regulated between brands. I know! Fun right? 😉 Here is an example that shows two yarns that are both labeled as super bulky or category 6. One is much thicker but they are both listed as the same size.
Always test your gauge before you start a pattern. See the abbreviations and terms section for more information about that.
Supply Guide
Aside from hooks and yarn, here are other supplies you may need:
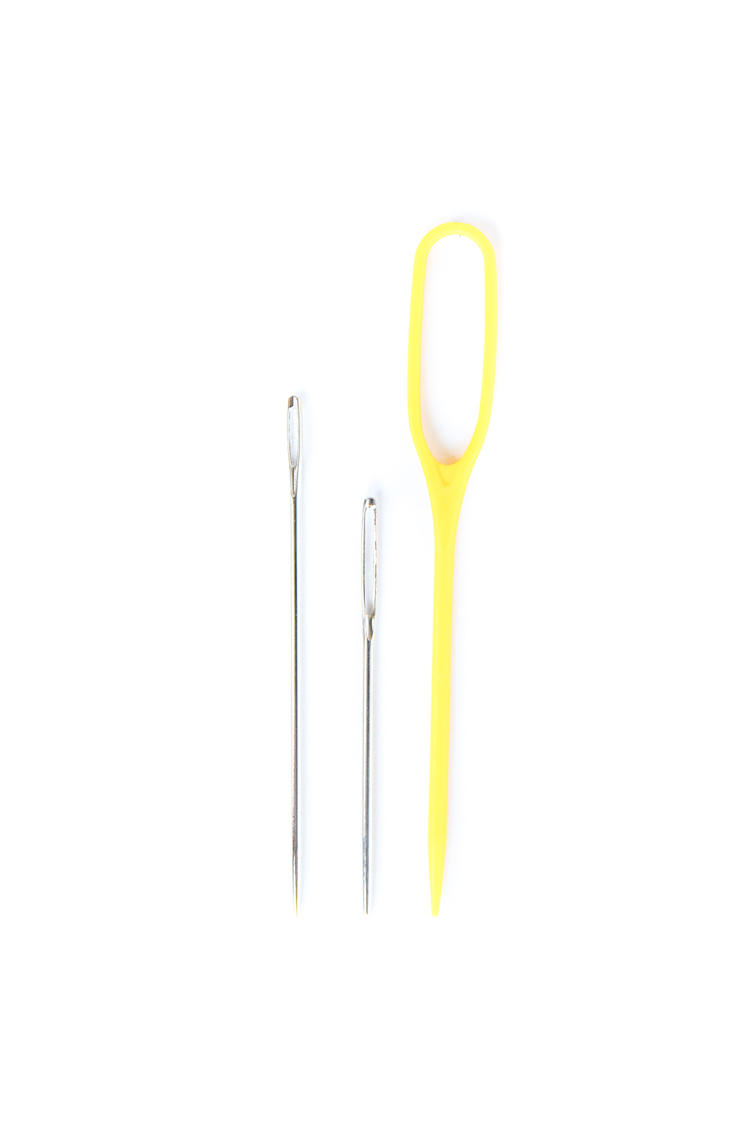
Yarn Needles
There are yarn needles (yellow), tapestry needles (large eye, blunt tip, shorter), and large sewing needles that all work great for seaming pieces together and weaving in tails.
Yarn needles are often made of plastic and are easy to thread, but the large eye can sometimes be a bit cumbersome.
Large sewing needles have a sharp tip which I really like for weaving in ends, but it has a smaller eye that can be difficult to thread.
Tapestry needles are kind a compromise between the two. Larger eye and weaves in between plys of yarn easily. I use these most often.
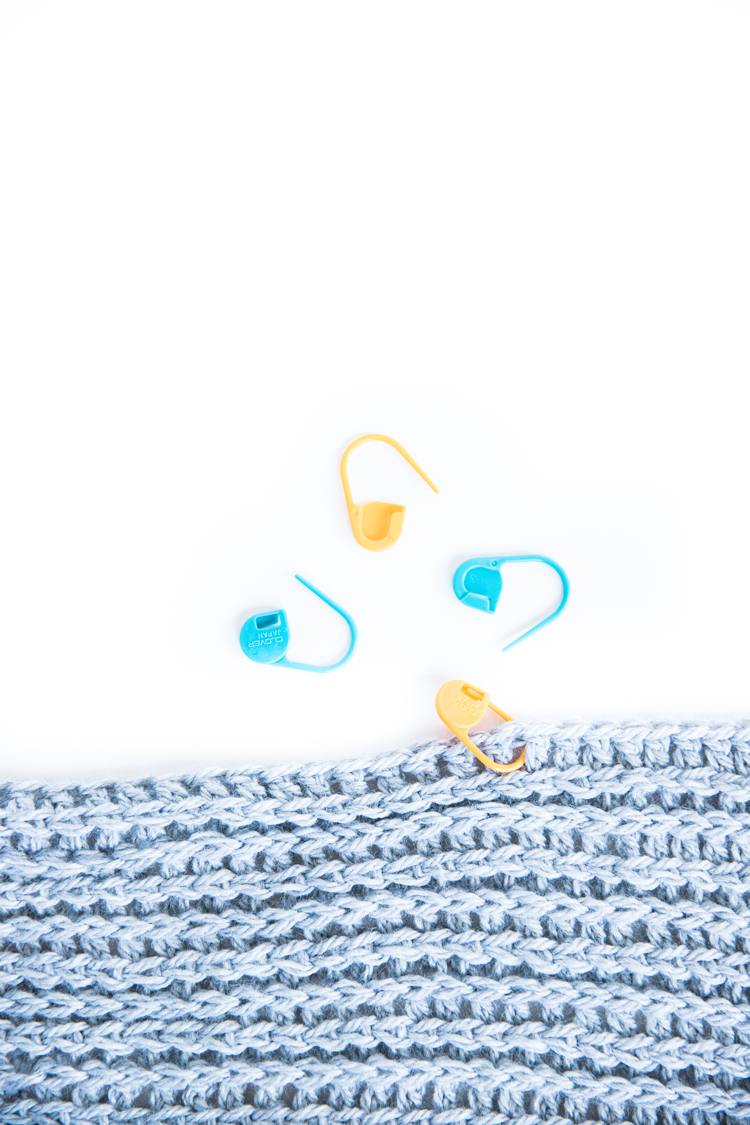
Stitch Markers
To help you mark your spot or sometimes to keep track of the count of your stitches, these little stitch marker clips work great. I bought these at the craft store, but you can also use little slip knots of yarn, ribbon, earrings, hair clips…anything that will mark your place and not snag the yarn.
Other Supplies
Rulers and measuring tape come in handy for measuring gauge or tension (see definition below). Scissors are also a must.
There are other supplies like yarn bowls, project bags, and stitch counters but those are all nice to have supplies and are not necessary.
Basic Abbreviations and Terms
Most of the terms you need to begin, are discussed in the video, but here are more for future reference.
This is another area of crochet that can vary by country. I live in the U.S. so this series is designed in U.S. terms. I have included equivalent U.K. terms in the chart below.
Abbreviations
Since terms are constantly repeated in crochet patterns, abbreviations are used to save space and make them less cumbersome to read.
This is a basic list of common abbreviations. Most patterns will list a key of abbreviations as well.
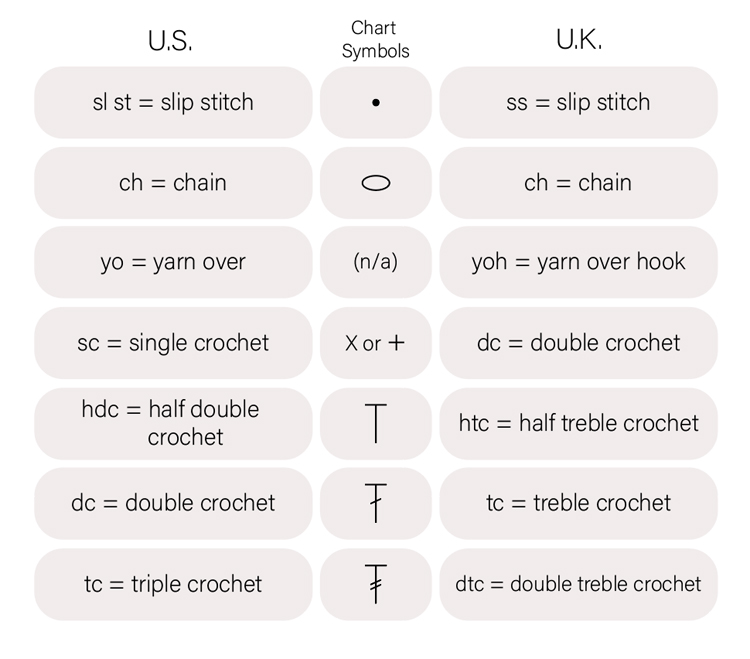
The chart symbols in the center are universal signs for the same stitches and are what are used in crochet chart patterns shown below. (This is a quick screen capture I made of a google search).
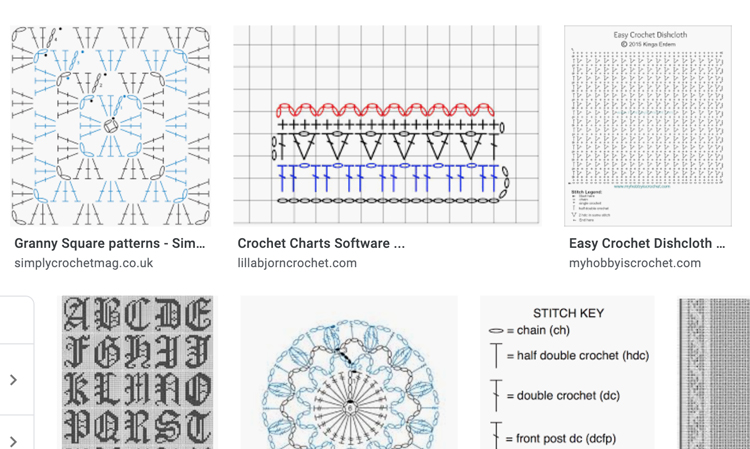
This is just an FYI. I won’t go into detail about chart patterns.
Asterisks
Another technique used to simplify and shorten patterns is to use * *, { }, [ ] , or ( ), to signify a group of stitches that needs to be repeated several times.
For example: {2 dc, 5 sc} Repeat four times. OR *2dc, 5 sc* Repeat four times.
You would know to work the stitches in between asterisks or parentheses four times.
Gauge
Also called “tension” in U.K. terms. This is how tightly or loosely your stitches are worked. Most patterns will list gauge as a square measurement. For example:
4 x 4 inch square = 5 stitches x 3 rows
To test your gauge, create a swatch or sample square that is a little bigger than the listed gauge. For this example, I would make a swatch that is about double the size. Measure a 4 x 4 inch square from the middle of the swatch to see if it is about 5 stitches x 3 rows. Don’t stretch it when you measure it, but do press it flat as needed.
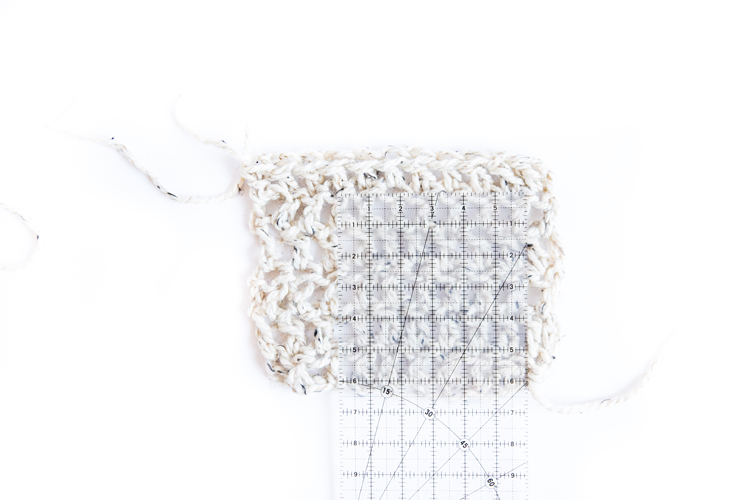
If it’s too small, it means your gauge may be too tight and vice versa. Everyone crochets a little bit differently. Your style may be to lean more tightly or loosely. The pattern designer’s style influences the gauge as well.
I find that it’s sometimes easier to change hooks rather than habits. You can go up a hook size to help loosen your gauge and down a hook size to help tighten it up. Just be sure to follow the gauge if you want your project to turn out the same size.
Okay! That wraps up this first lesson. More terms, techniques, and stitches will be defined in future lessons, but please comment with questions and I’ll try to update this post as needed.
MORE POSTS IN THIS SERIES:
How to single crochet + bow tutorial.
How to double crochet + scarf tutorial.
How to half double crochet + hat tutorial.
How to crochet in the round and make a beanie.


I love the idea of wrapping the chain around cardboard to make a planter. I wish I would have thought of that back when I first learned to crochet. Your video is awesome. So easy to understand and follow.
Thank you Melissa! That is so kind of you to say.
Thanks fir the videos Delia! I’m going to study these to become adequate at crocheting.
Thanks Bryan! I am so glad these videos are helping. I’m sure you’ll be a pro in no time.
I didn’t see any video
I’ll add a title to make its location more clear. Once you pass it though, it pops to the right side of your screen so you can scroll and read while you watch.
Your videos and diagrams are so clear and comprehensive, at the same time.
Love the picture with the giant ball and hook.
Love the way you make all this information so clear. Only thing I suppose is not correct: aren’t the symbols for ch. and sl. st. swapped, in the abbreviations key picture?
Otherwise loving this Back to the Basics ride. Great job!
Thank you for catching that! I did transpose those and didn’t realize it. Thank you. I will fix it soon. I appreciate you speaking up.
Still can’t see the video for the plant cozy tutorial
I’m sorry you can’t see the video. Do you use an ad blocker? If so, the video will not show while an ad blocker is in place.
Thank you! I really like how you add in all the different variables of personal style: like the gauge change idea to change hooks vs change your style. And hold technique variations that feel comfortable. You are a true teacher and you kindness shows! I’m releasing SO easily.
*relearning
Thank you Sari! You are so kind. <3 I'm so happy you're getting back into crochet!
I can’t figure out how to get the video. Do we have to download something first? I dont’ see anywhere to click Play. Just adds and suggestion to add chrome extension “private mode”
I’m so sorry about that Nat. You shouldn’t have to download anything. I will contact my ad provider (who hosts the video) and see what they say. Will you please email me so we can communicate easier until this is resolved: [email protected] ?