

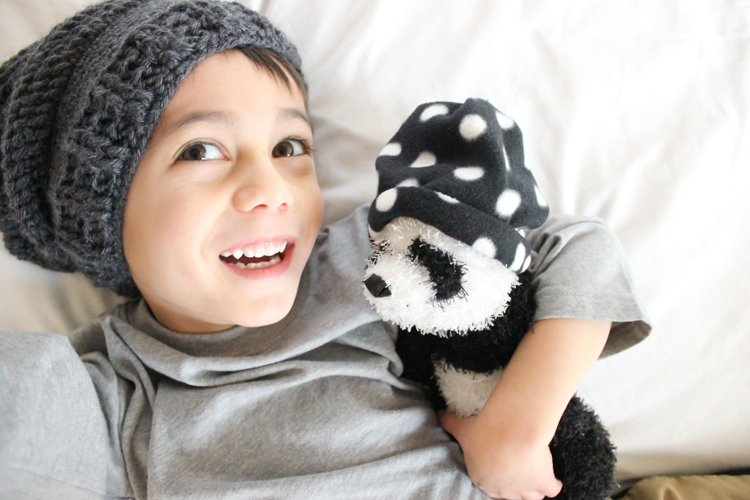
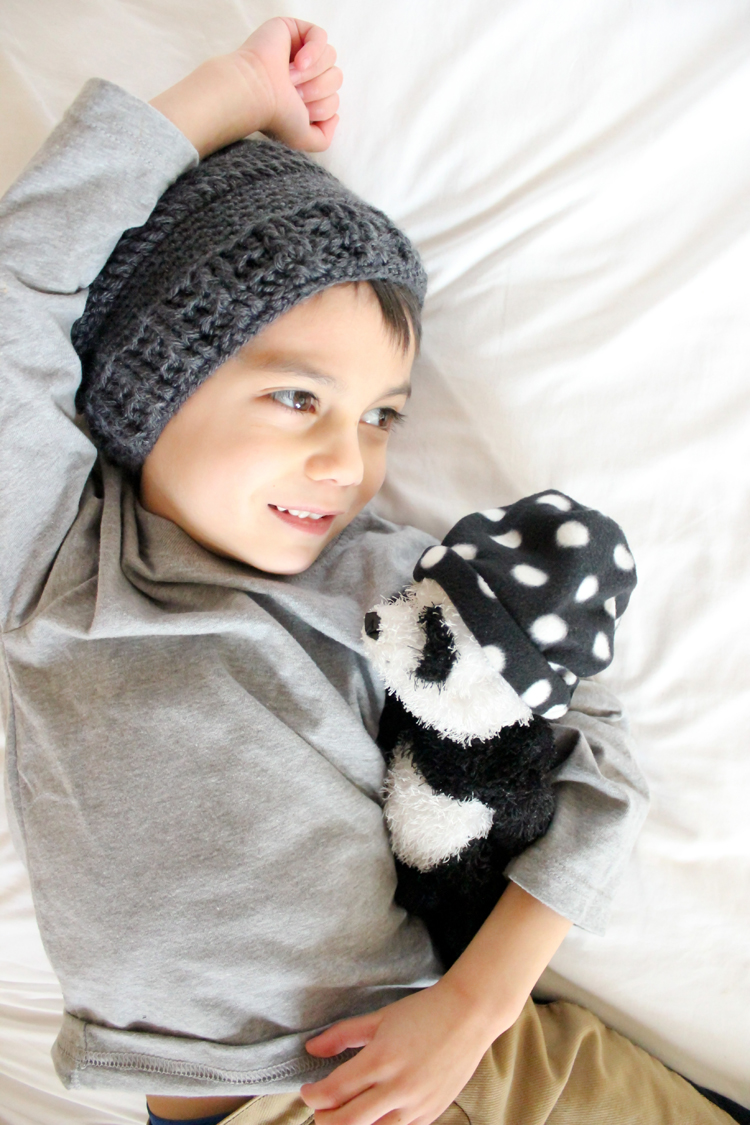
Are you and the kids in the mood for a wintery fun project because of the Winter Olympics?
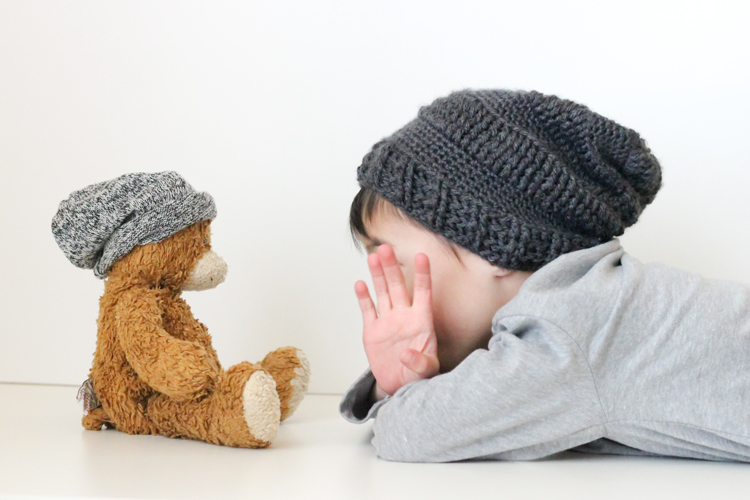 Or are you going nuts with cabin fever from too many consecutive snow days, and need something to do?
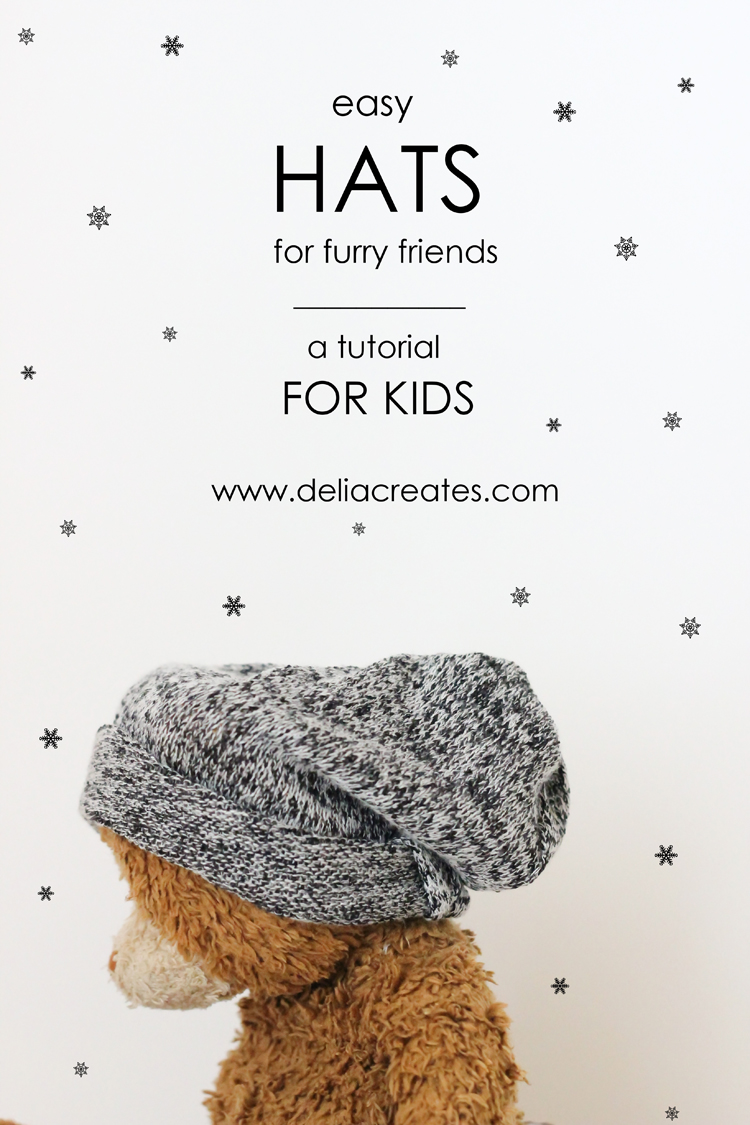
Either way…we’ve got you covered! Today’s post is for kids!
 All it takes is some scrap fabric, a snip of yarn, and one line of sewing.

 Simple, easy, and fast enough to keep a young child’s attention span.
Let’s make some!
Materials
1/4 yard or a scrap of fleece, knit, or sweater fabric (anything with stretch) thread machine or hand sewing needle measuring tape scissors 8 inch piece of yarn pins or wonder clips (quilter clips) your favorite furry friend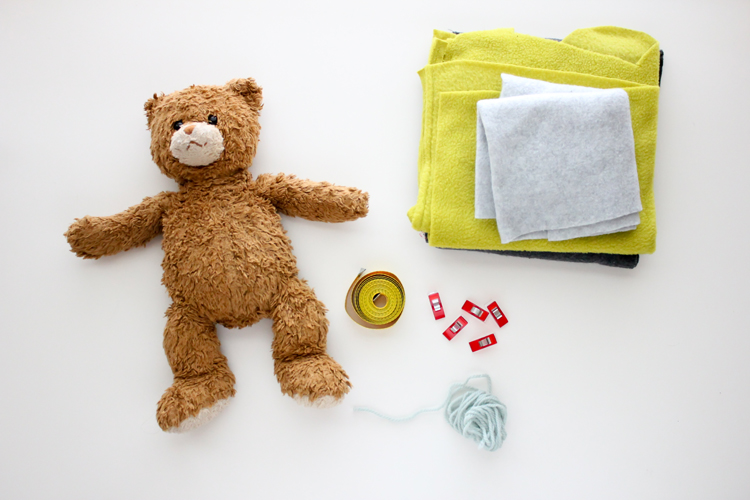
Notes:
– Wonder clips are great for kids, because they are easier to use than pins (just clip and go), and they are safer (no sharp points!). I got a pack of 10 from Joann for a few bucks with a coupon. You can also buy a pack of 50 HERE on Amazon for $15-20 (affiliate link). They are great for attaching bias tape as well.
– This tutorial is for kids, but is written with the purpose of helping adults complete the project with their young children.
FIRST
Measure your stuffed animal’s head.
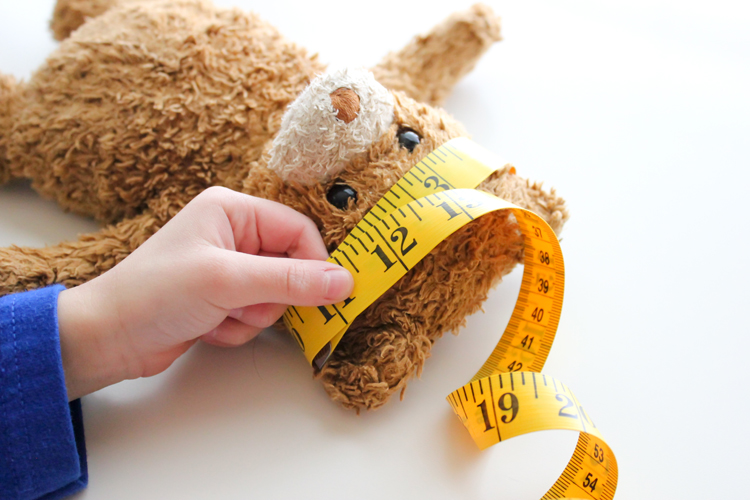
Take your measurement and add one inch. That will equal the length of fabric you need to cut.
You also need to make sure your fabric is about 9+ inches in height.
Now, stretch your fabric. The direction that stretches the most is going to be your length and the other direction is going to be the height of your hat.
SECOND
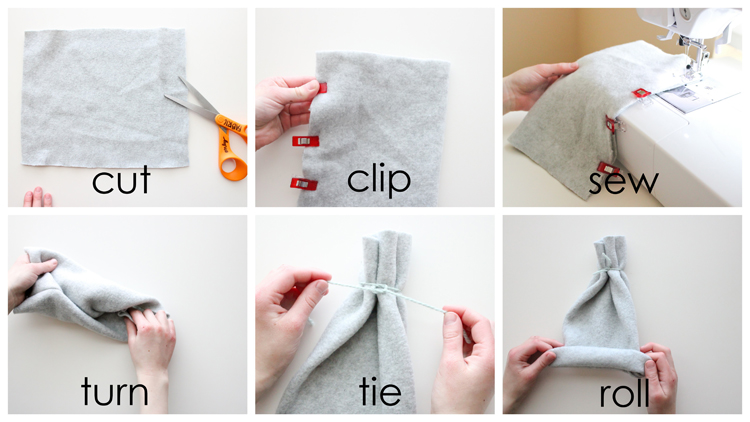
Cut your hat piece out. 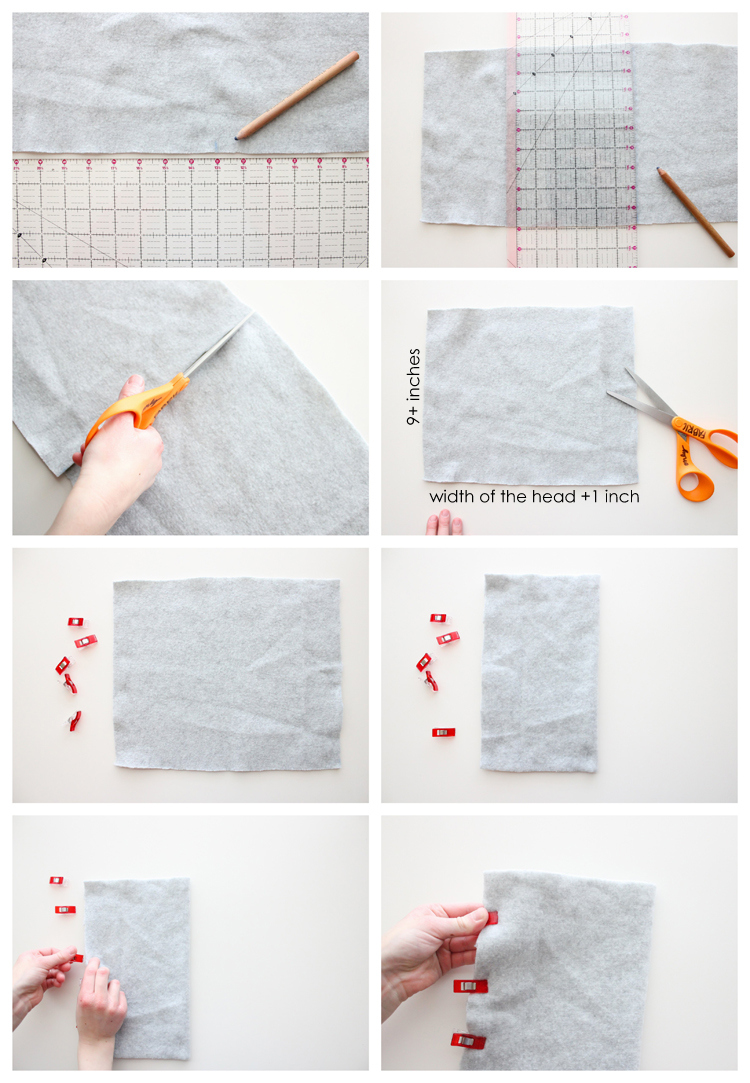 Fold the piece of fabric in half. Clip or pin it together.
THIRD
Sew your hat.
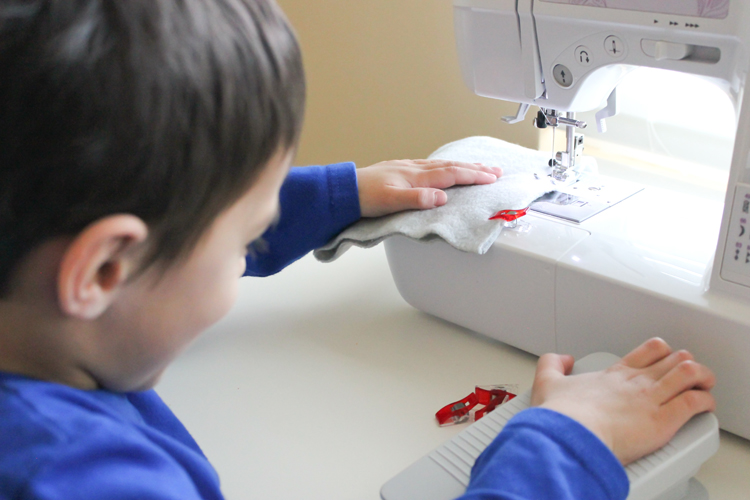
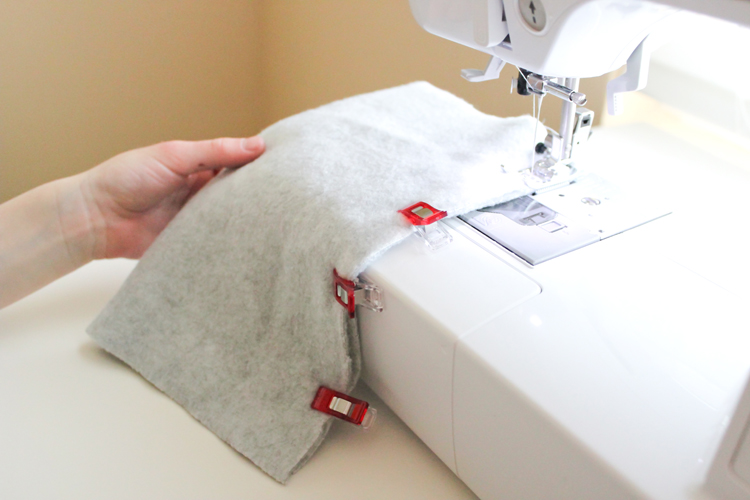 Sew along the side with the pins or clips with a 1/2 inch seam allowance. You can hand sew this or machine sew it.
 Be sure to remove the clips or pins as you sew.
If you are machine sewing your hat, and the foot pedal is too hard to reach. Bring it to the table and use your hand to push it down. Be sure your sewing machine speed is on slow!

 FOURTH
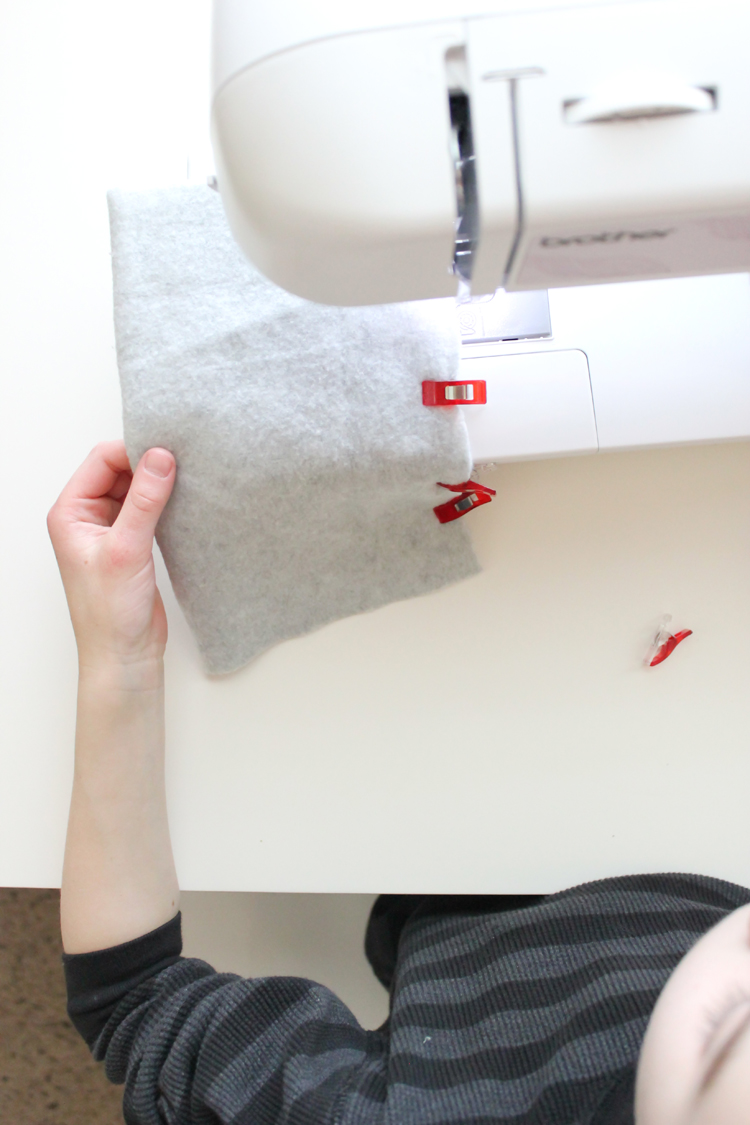
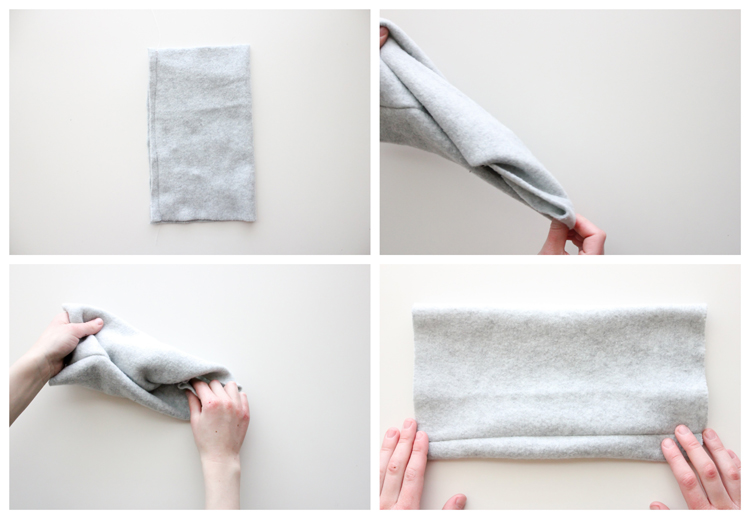 Once the hat is sewn up the side. Turn it right side out.
FIFTH
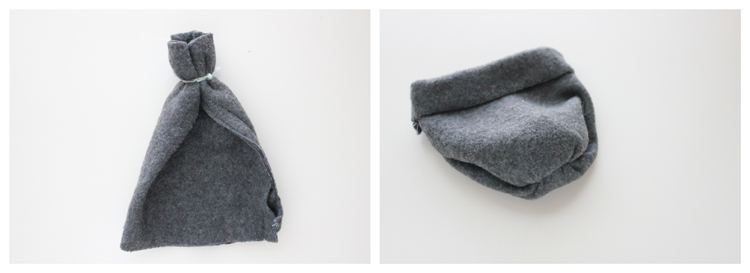
Tie your hat together.
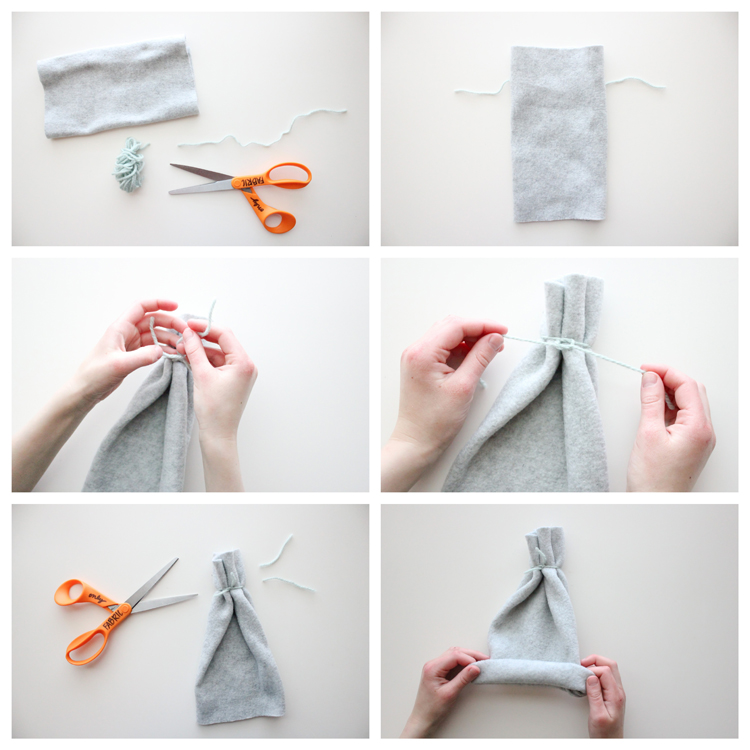 Tie the yarn tightly around the top of the hat in a double knot and trim the yarn tails.
Cuff the button of the hat by rolling it up once or twice.
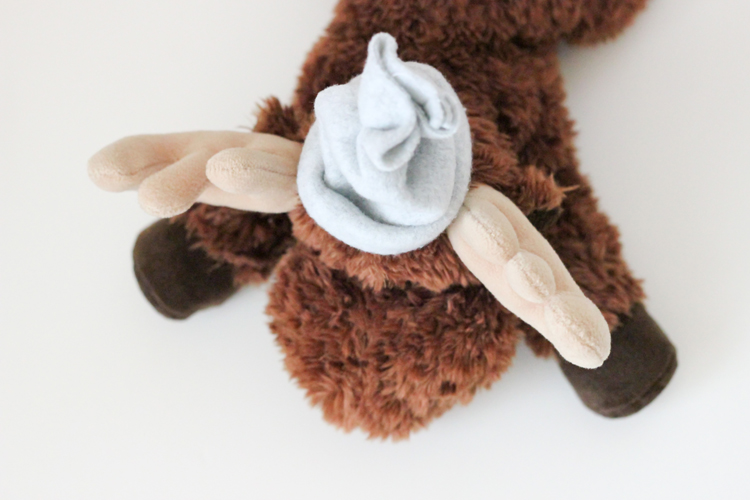
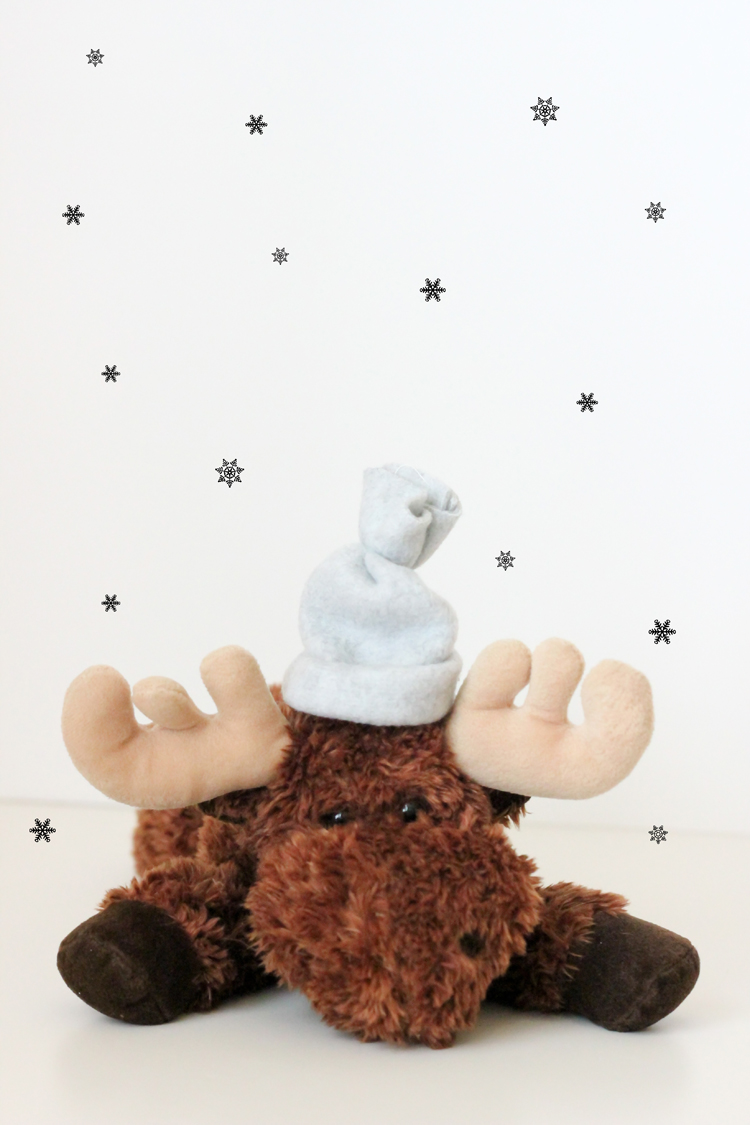
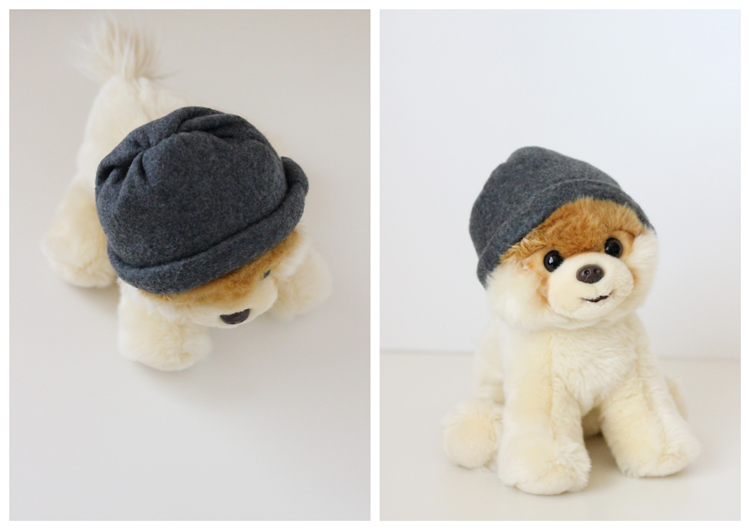
Tada! You made a hat!
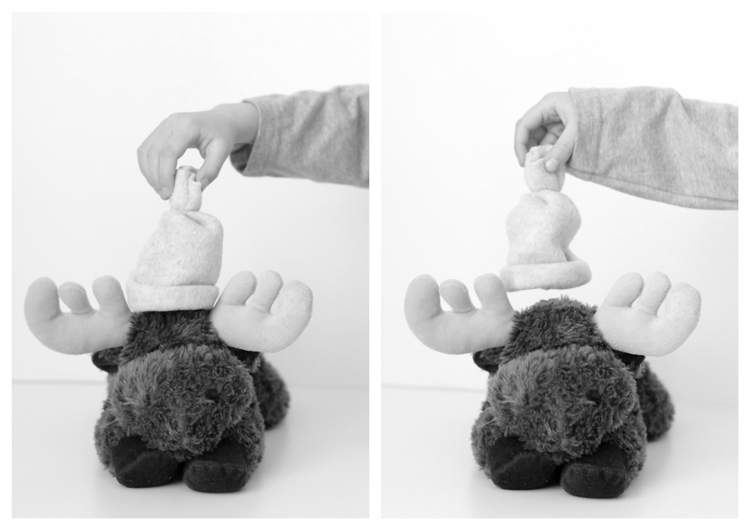 (Mr. Moose requires a safety pin to help keep his hat on ;).)
 Just in case the tutorial seemed more complicated than it needed to be, here is a quick review:
That is all there is to it!
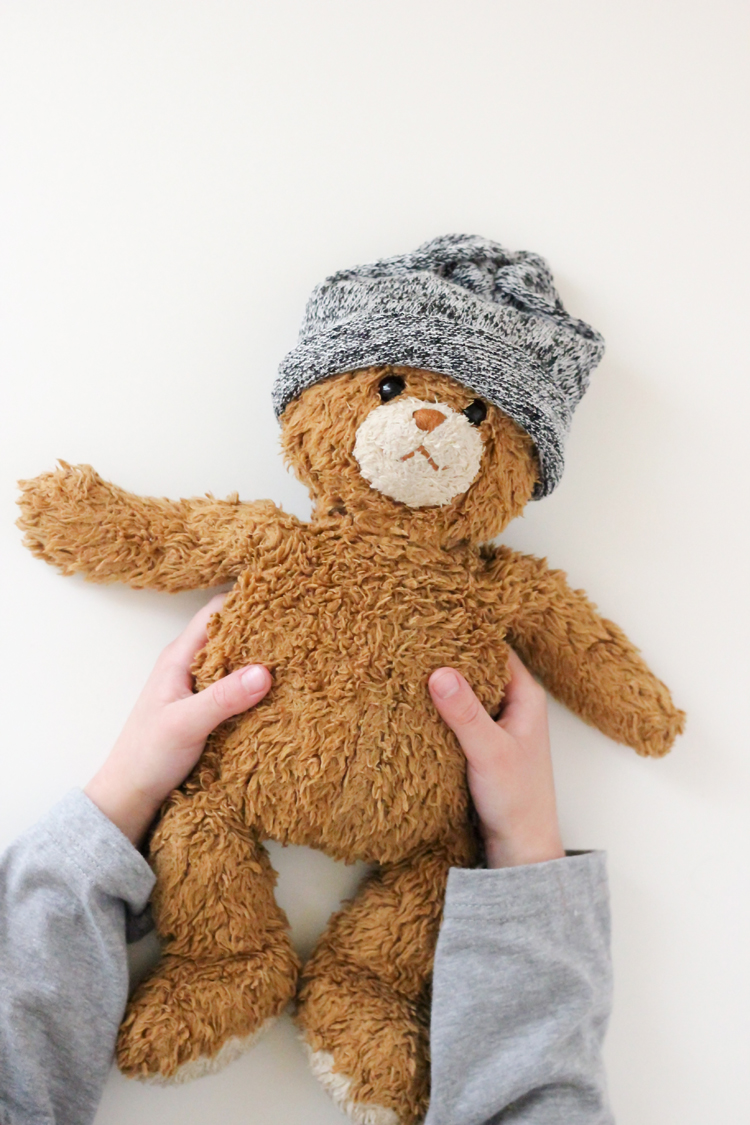
If you don’t want the top of your hat to have a poof of fabric, you can make a slouch beanie by tying the top of the hat, BEFORE turning it right side out. Then, when you turn it right side out, the poof is on the inside of the hat.
 It’s more thug life than hipster slouch on this puppy. 😉
 But you get the idea.
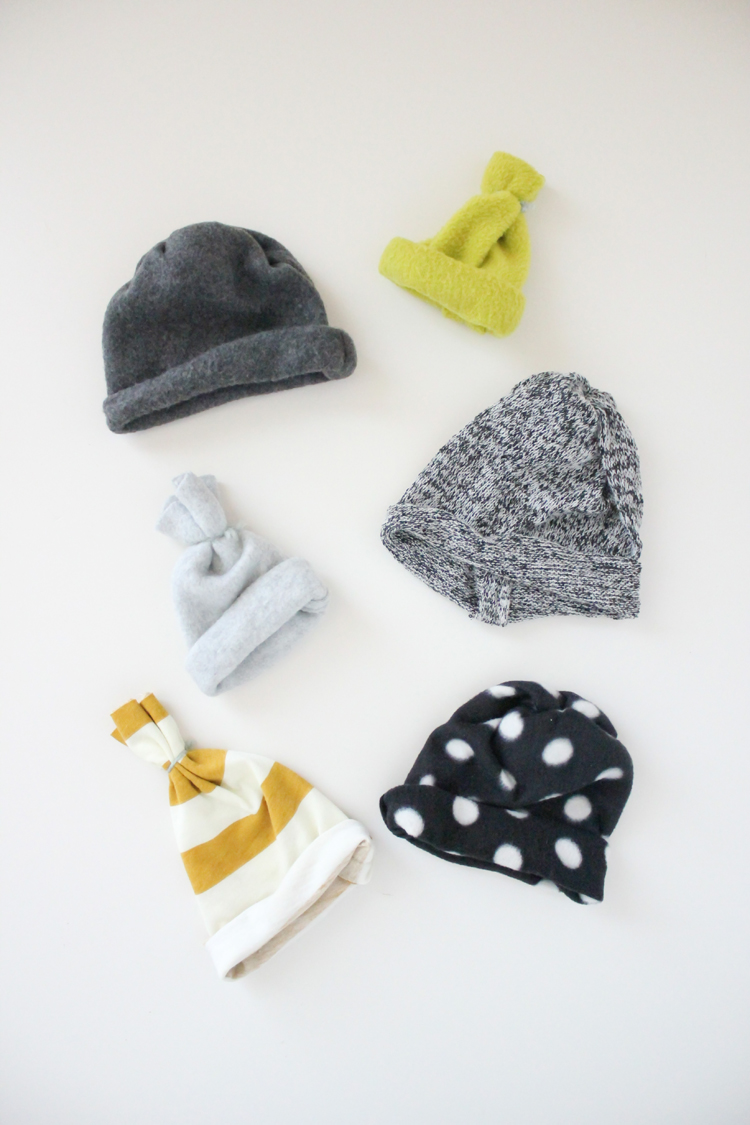
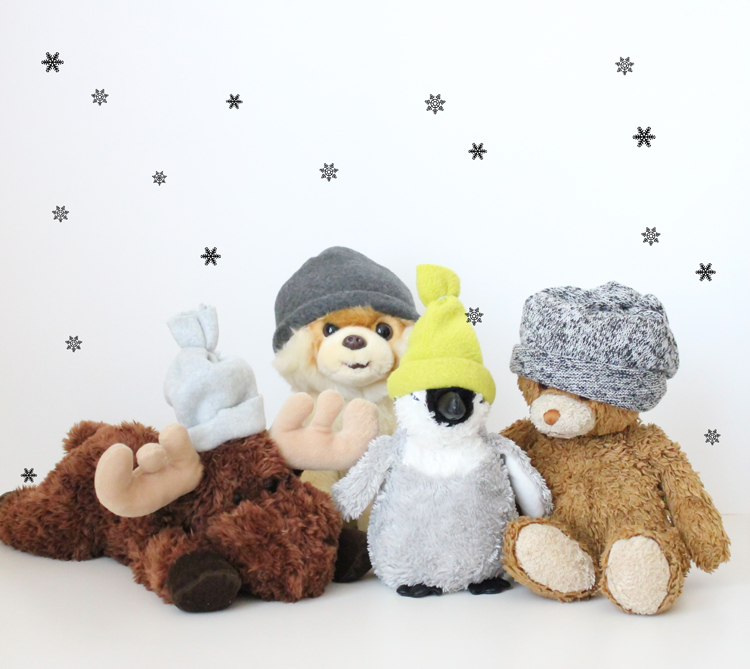
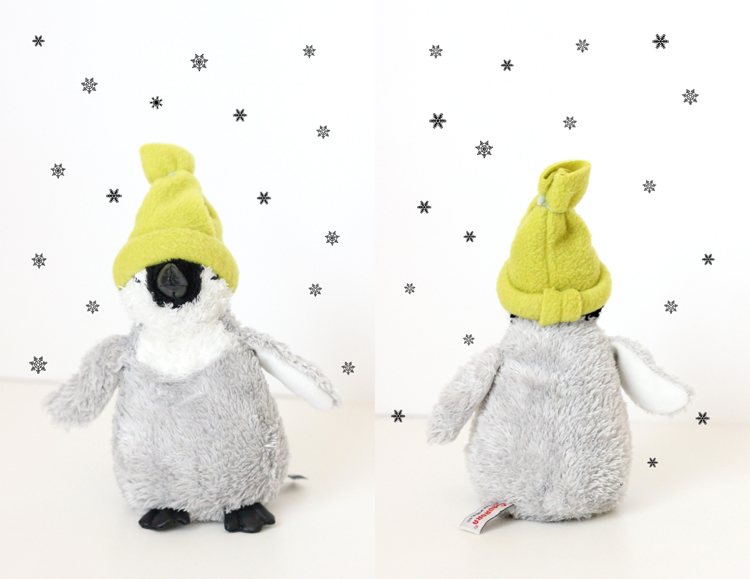 Make your own Chilly Willy the Penguin.
Or make matching hats so you can be twins.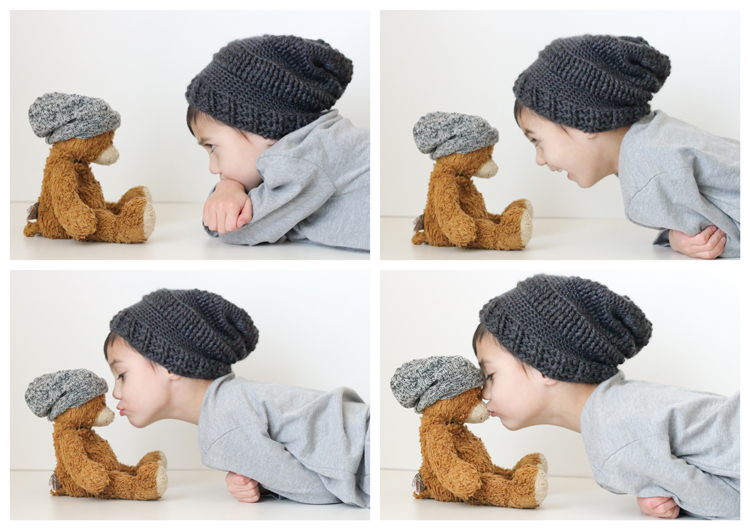
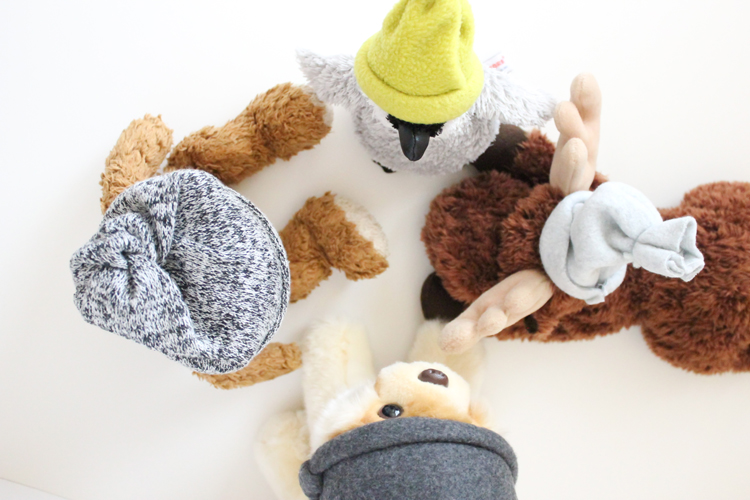
Make one for the one you love best…
Or one for all your furry friends…
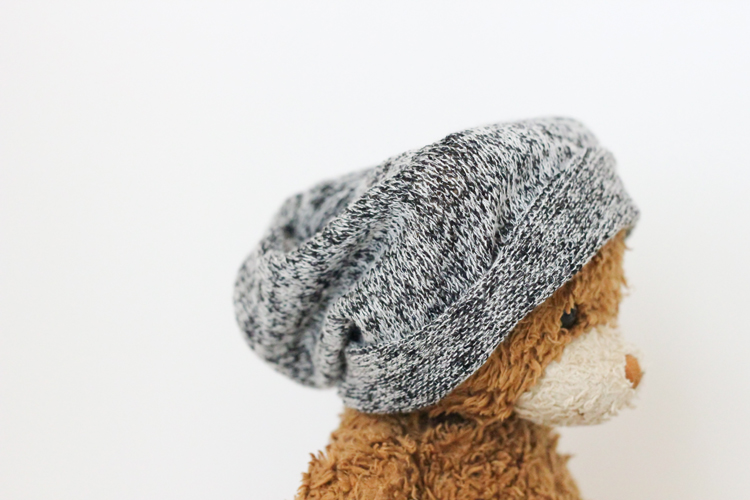
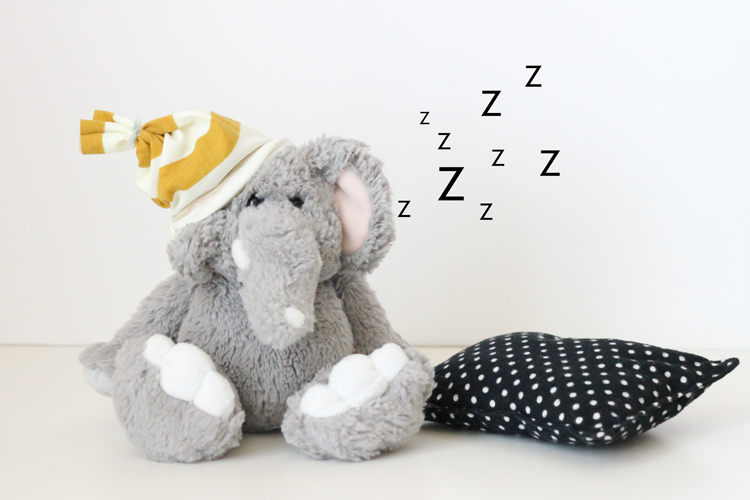
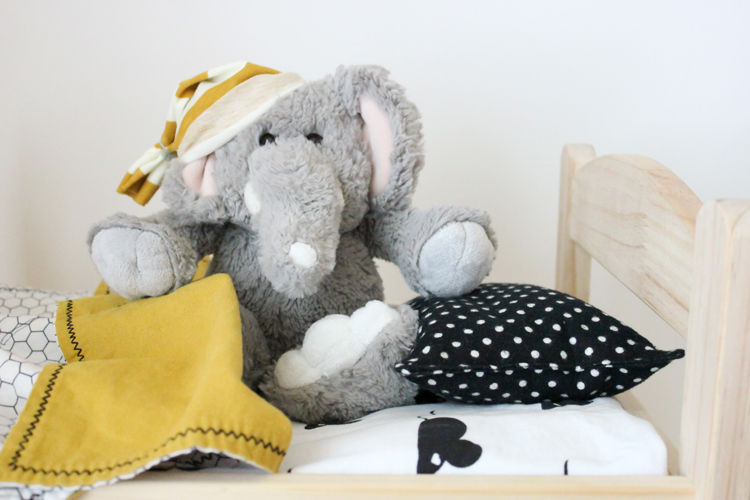
 Or make a sleepy time night cap for the friend you like to share your Z’s with.
You make the night cap the same way as the regular hat, just use knit/t-shirt fabric instead. Make sure the hat is nice and tall and it will flop over nicely.
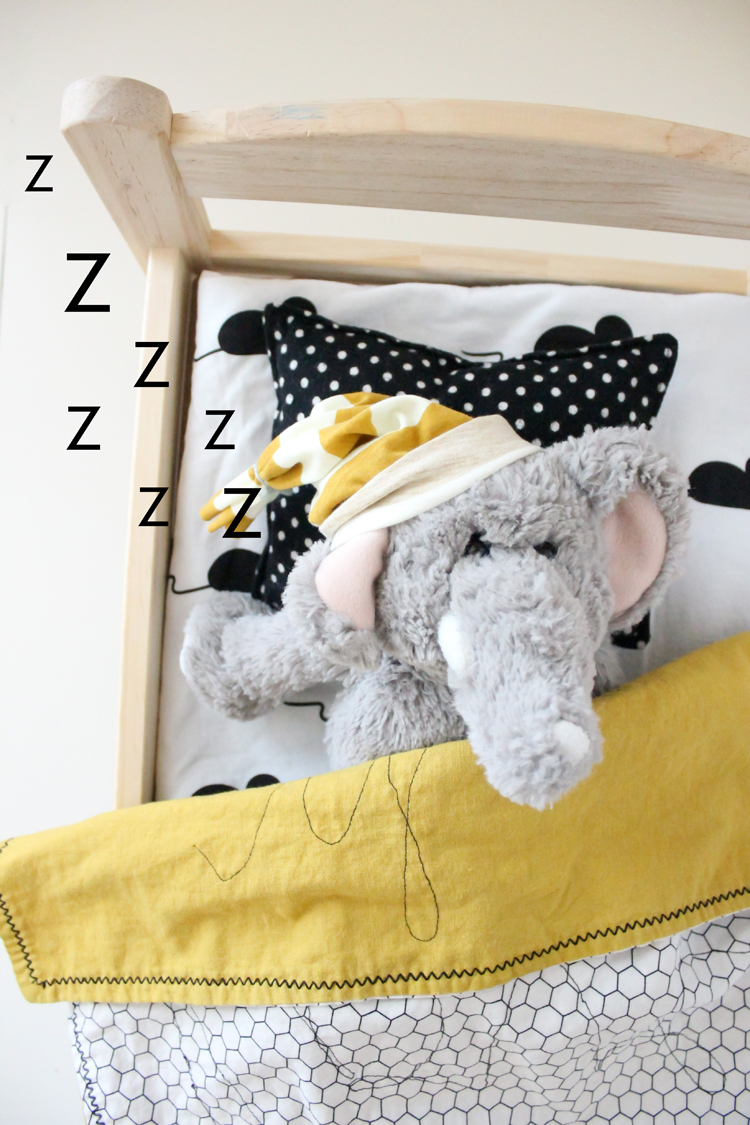 Sweet dreams and thank you for sewing up some hats with us today. 🙂
 Sources:
Oh my goodness! Too cute! I have a four year old that loves to sew with me and he would love this project. The brother sewing machine is perfect for him to use (with mom’s help, of course) because of the adjustable speed. Thanks so much for sharing!
Totally! Love that adjustable speed. Thanks Kristin! 🙂
What a fun idea. Just last weekend I sewed together with my 4 yr old daugther for the first time. And she’s hooked. The last two days she asked me several times each day if we can sew now. So this definitely is going to be the next sewing project. Just one straight line and a hat for her favorite animals and dolls afterwards. She’ll love it! Thanks a lot…
I love that she loves to sew! Happy hat making! 🙂
This is too cute!! What a fun project
Thank you Vicky!
My 5 year old loves to sew – she puts the foot pedal on a step stool so that she can reach it more easily.
Smart!
Oh my goodness, how cute!! And what a fun project for a cold day! I’ve got a Craft Gossip post scheduled for later today that links to your tutorial:
http://sewing.craftgossip.com/tutorial-simple-hats-kids-can-make-for-their-stuffed-animals/2014/02/10/
–Anne
Aw. Thanks Anne! You’re the best!
YES! I knew it had to be a stuffie hat! My boys LOVE this idea and are now furious I am making them wait until after school tomorrow to make them ha! So cute!
ha! I would be too! 😉 Thanks Kelly.
Cute and simple… I like it! My daughter always begs to sew with me, maybe she’d like to try one of these. =)
Totally. A great beginner project for little hands! 🙂
This is adorable! My boys have done one sewing project and have been asking to try another. This is perfect!
Thanks Marigold! Happy sewing! 😉
This is fantastic! My kids will love this! We need snowed in activities…..And I always love your photos……such a clean & lovely aesthetic 😉
Thank you so much Leigh Anne!
Thank you so much for this tutorial, my daughter (8) just loves sewing like grandma, that talent skipped one generation lol and this helps a whole bunch, even though we don’t have a sewing machine, it’s very encouraging to go buy one for her birthday which is soon 🙂 Do you have an advice on which sewing machine is good for that age?
thanks a million again 🙂
That is so fun! My grandmother crochets and I crochet, but my mother doesn’t much care for it. I think it’s kind of fun to have something just grandmothers and granddaughters can share. 😉 As for machines. I like Brothers because they are inexpensive but have most of the bells and whistles that more expensive machines have. If you get a step above the cheapest Brother (probably in the $200 range), then it will also come with a speed control option, which is a great safety measure to help prevent them from sewing through their fingers. I have never used it, but I have heard others liking the Ikea sewing machine as a beginner sewing machine as well. I started on a $50 Kenmore. It drives me nuts to sew with it now, but it was an affordable and decent first machine. I hope that helps! You are such a great grandma to pass along your passion for sewing!
Haha, my daughter was just asking me to make a hat for her baby doll. Now she can do it! Thanks so much for the idea!
ha! Perfect!
Ohhhh this is such a cute, fun idea! Perfect fix for cabin fever I’d say:) Oh, and Reid is adorable. I love the pictures!
Thanks LeeAnne! 😉
Delia: Just found your blog. Wonderful! I can’t wait to show the hats to my grand daughter. She’ll be making the for her American Girl Dolls. The crochet child’s hat – do you have a source for the pattern. I would love to make up a few of them.
Ooh. What a great grandmother you are! The child’s hat pattern is a crochet pattern I sell here: http://www.deliacreates.com/2014/01/sloane-hat-crochet-pattern-release.html
I can’t believe I forgot to refer to it in the post. I’ll add that now! 🙂 Thank you!
Adorable! We have included this idea in our post (included links to you) – ‘7 Cute Craft Ideas for Toys’ – http://www.billylids.com.au/blog/item/14-teddy-get-your-skates-on-7-seriously-cute-craft-ideas-for-plush-toys%E2%80%8F.html
Hi there, just became alert to your blog through Google, and found that it is really informative.
I’m gonna watch out for brussels. I will appreciate if you continue this in future.
A lot of people will be benefited from your writing.
Cheers!
cute Idea
Where do you get those pin clippies?
Do you mean the red clover clips? I got them from Jo-ann in the quilting tools section. I use them all the time for non quilting things though. They are perfect for sewing with leather.