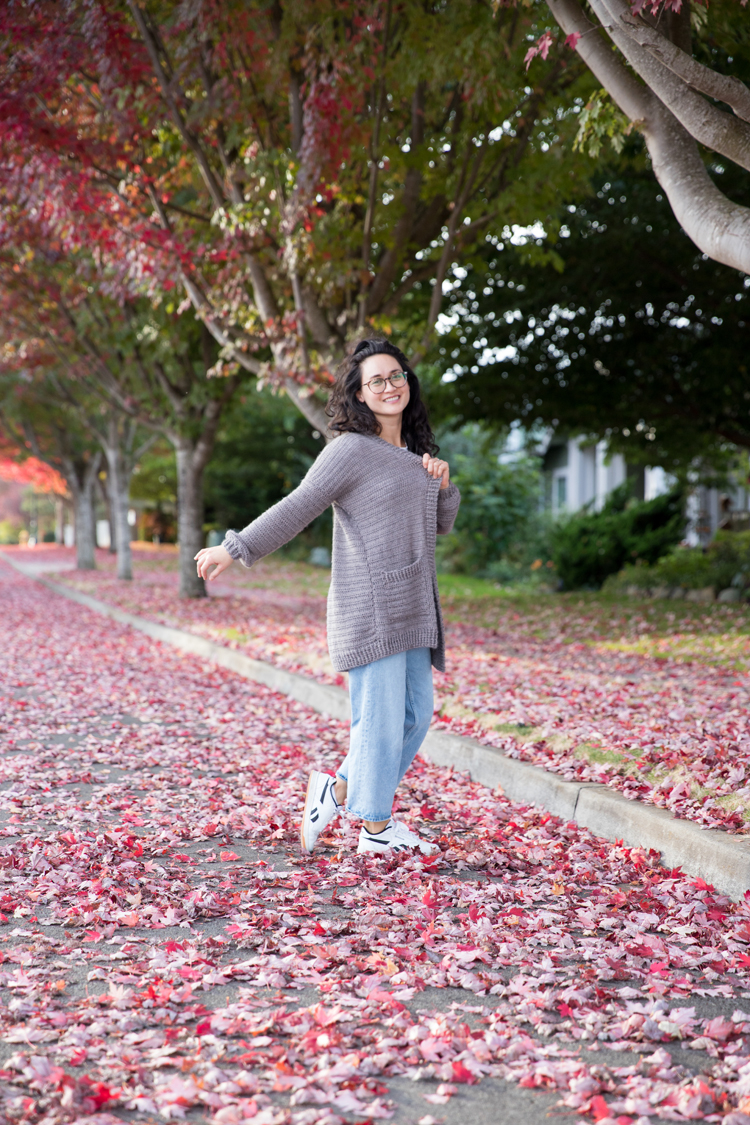
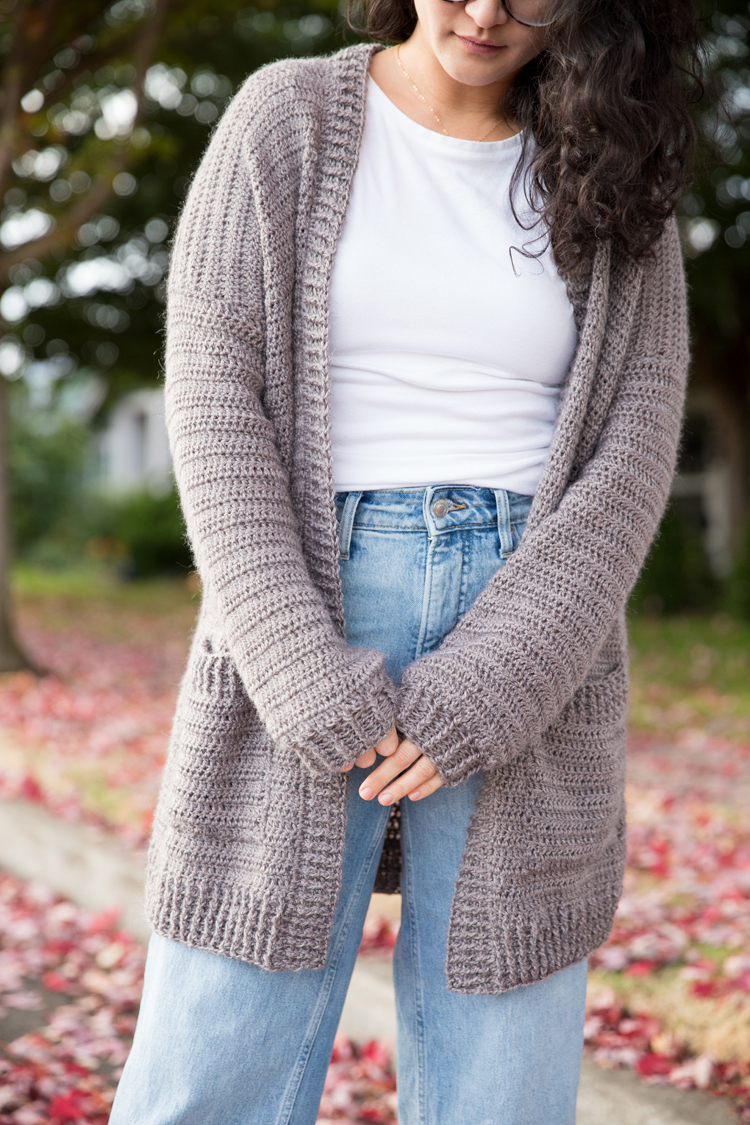
Are you a beginner at crochet and think you can only make scarves and hats? Think again! As the name implies, this cardigan is made up of easy to crochet rectangles.
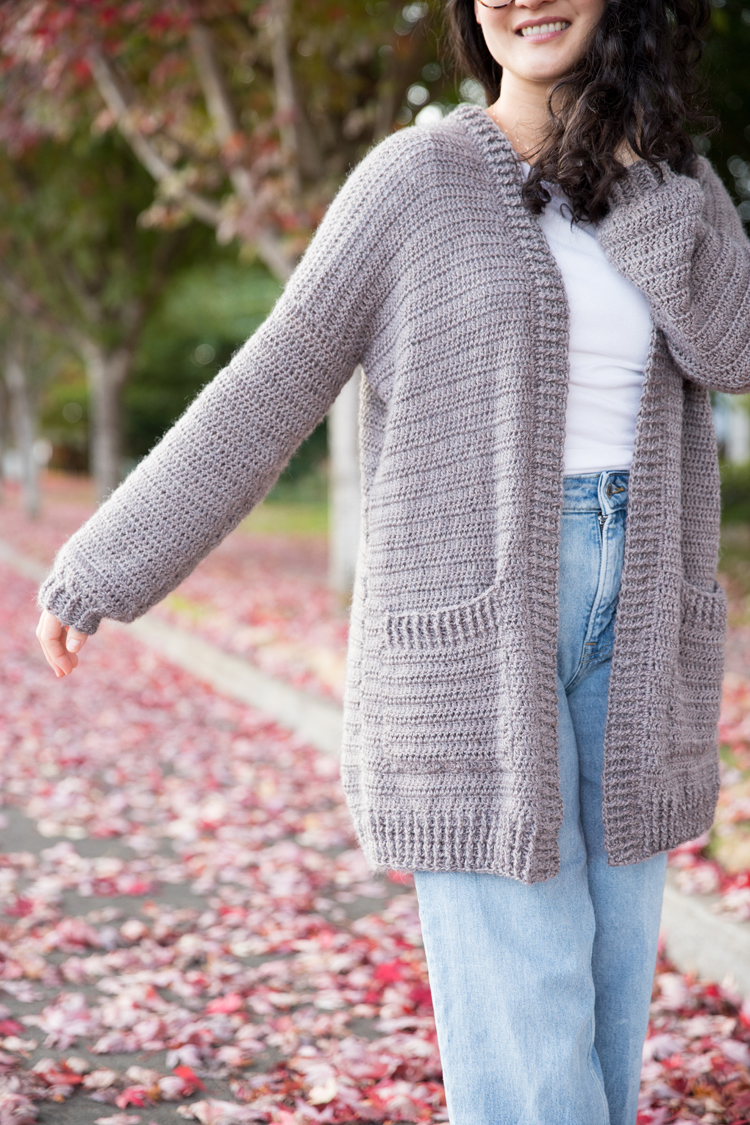
If you can double crochet and single crochet, that is mostly what this project uses. To get the textured ribbing around the collar and hems, I show you how to work those double crochets in the front and back posts. If that technique is new to you, don’t worry, I break it down in the video (scroll down to right before the written pattern). We’ll go over seaming with single crochet as well, which is like sewing with crochet.
Now, if you are brand brand new to crochet, I have a Crochet Basics series that you may want to check out first. It covers how to hold your hook and how to tie a slip knot, then builds your skills up from that point with fun, easy projects.

Note: There are also some fitting things to go over…you’ll see that the sizing section is a bit wordy ;)…but it’s worth the read to make sure you get a cardigan that fits.
If you want the printable PDF, ad – free version of this pattern, you can check out my shop or buy it here:
Okay, let’s make a cardigan!
MATERIALS
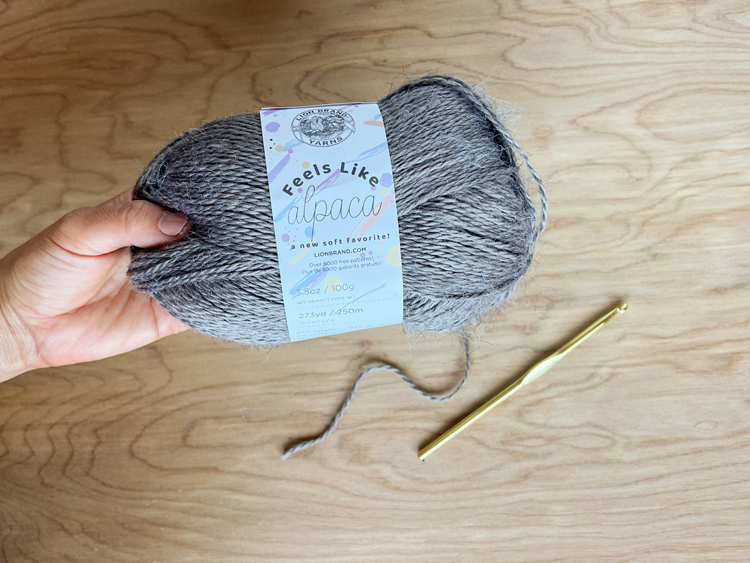
- DK/light/size 3 yarn*
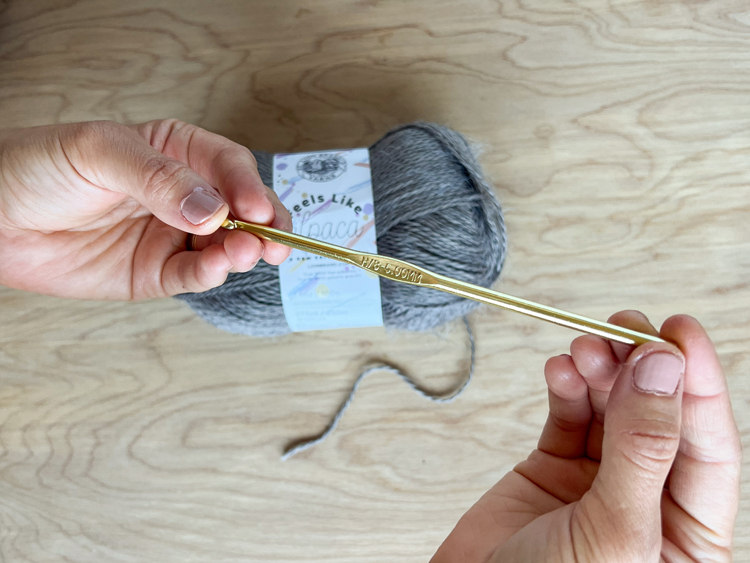
- H/8 or 5.00 mm hook
- scissors
- yarn needle
- sewing clips or stitch markers
Material Notes
*DK or category 3 yarn is thinner and lighter than worsted weight yarn (category 4) and can be a little more of a challenge to find than thicker yarns, especially in chain stores, but their DK offerings are getting better. I use this type of yarn because it is often lighter and crochet can be pretty dense or heavy with garments. If you want to use a worsted weight yarn, you will have to adjust your gauge to match the finished sizing, but this pattern is pretty forgiving.
*You will need about 23-31 ounces or about 1,800 to 2,500 yards of yarn. This will vary between sizes. For reference, I made a size small and used about 24 ounces or 1,900 yards of yarn. I recommend over buying the amount of yarn you will need in the same color lot (so that the color won’t change if you need to go get another skein) and then return what you don’t use.
*I used “Feels Like Alpaca” yarn in Taupe from Lion Brand which is an acrylic yarn that behaves like wool. Do not use cotton or a cotton blend. It usually works up looser, denser, and with more drape which significantly affects sizing. I have a similar cardigan made with cotton yarn HERE.
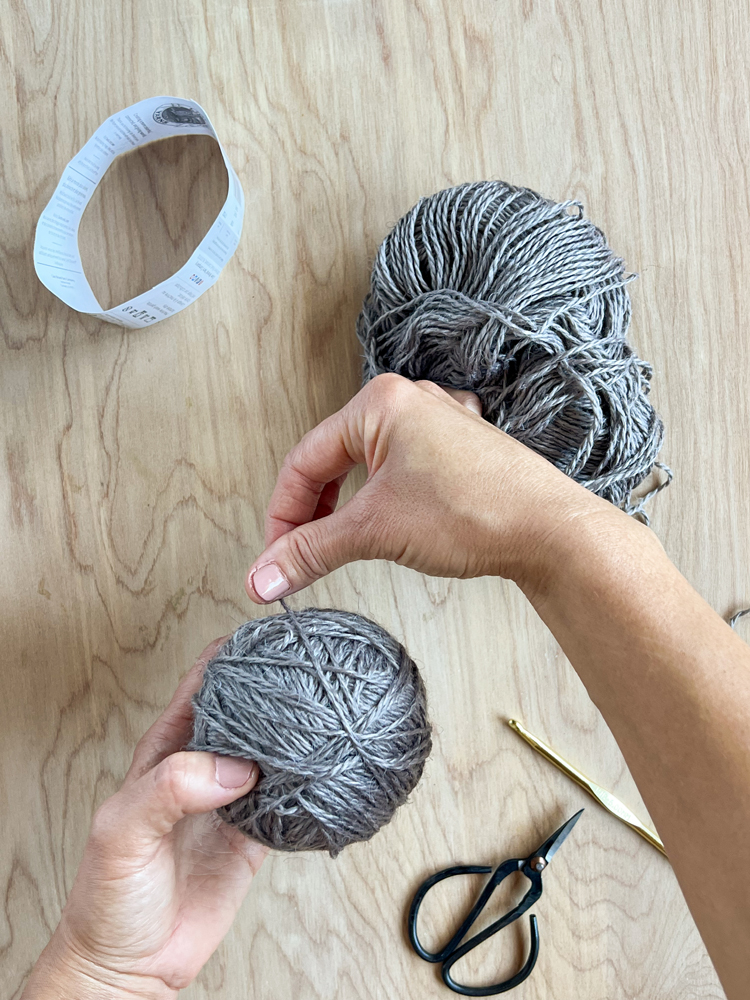
*I highly recommend rolling all your skeins into cakes or balls before you begin, to prevent future tangles and frustration.
SIZING
This section is lengthy, but it is important to read through before you begin.
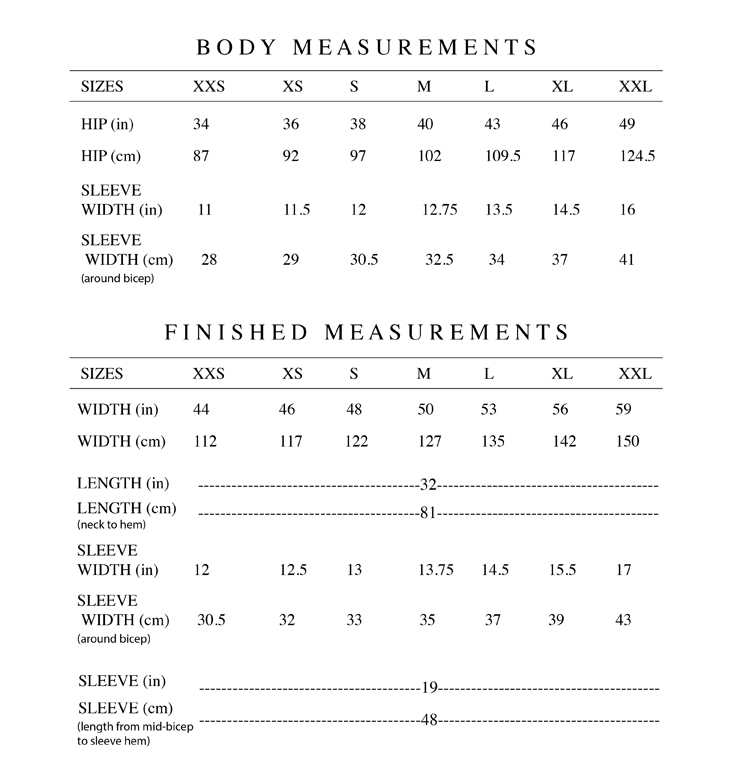
Measurements
Sizing Notes
Typically, you will use hip measurement to determine which size to make, because most often in women’s sizing, hips are bigger than waist and bust. If this is not the case, then use whichever measurement is largest (of bust, waist, or hips) to select your size.
Remember, this is a rectangle that will be the same size from top to bottom, so it just needs to be wide enough to accommodate the widest part of your body.
This is a split front cardigan that doesn’t need to close over the front of your body. Use your best judgement to get the fit you want – oversized and baggy or more form fitting. Ten inches of ease has been added, so I recommend using the finished measurements as a guide if you want to make adjustments.
DISCLAIMER: This FREE pattern has not been tested in all sizes. Instead of hiring a pool of testers and putting this out as a paid pattern, I’ve decided to put it out for free and update it as needed. The sizing should be pretty forgiving, as it is a split front cardigan, but as you work up each rectangle, test the fit as you go.
CARDIGAN LENGTH ADJUSTMENTS
After seaming together the shoulders of the cardigan body, try it on. Now you can measure the sleeve length and cardigan length to adjust it to your preferences. Keep in mind that the yarn will stretch as it hangs on your body.
If you want to lengthen or shorten the cardigan body, you can remove the shoulder seams and add or remove rows. Remember to add 2.5 inches to account for the ribbed bottom hem band. This will also impact the collar ribbing pattern portion so be mindful that the stitch count will be different and you may need more yarn if you lengthen the cardigan body.
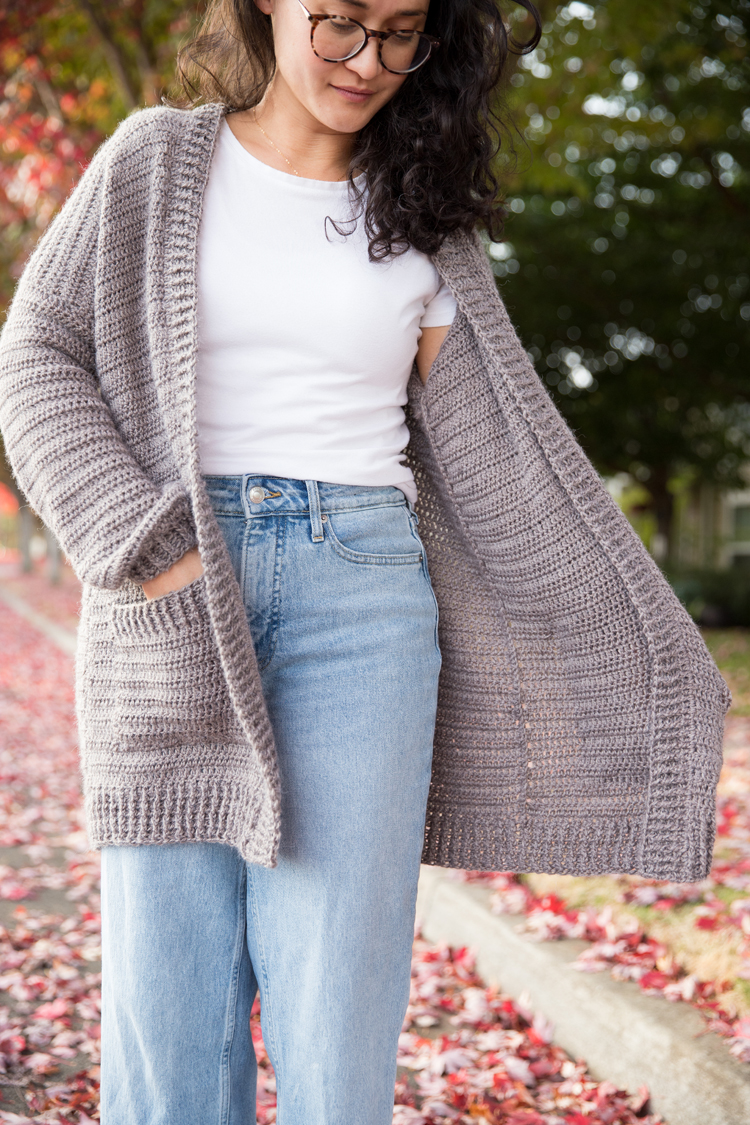
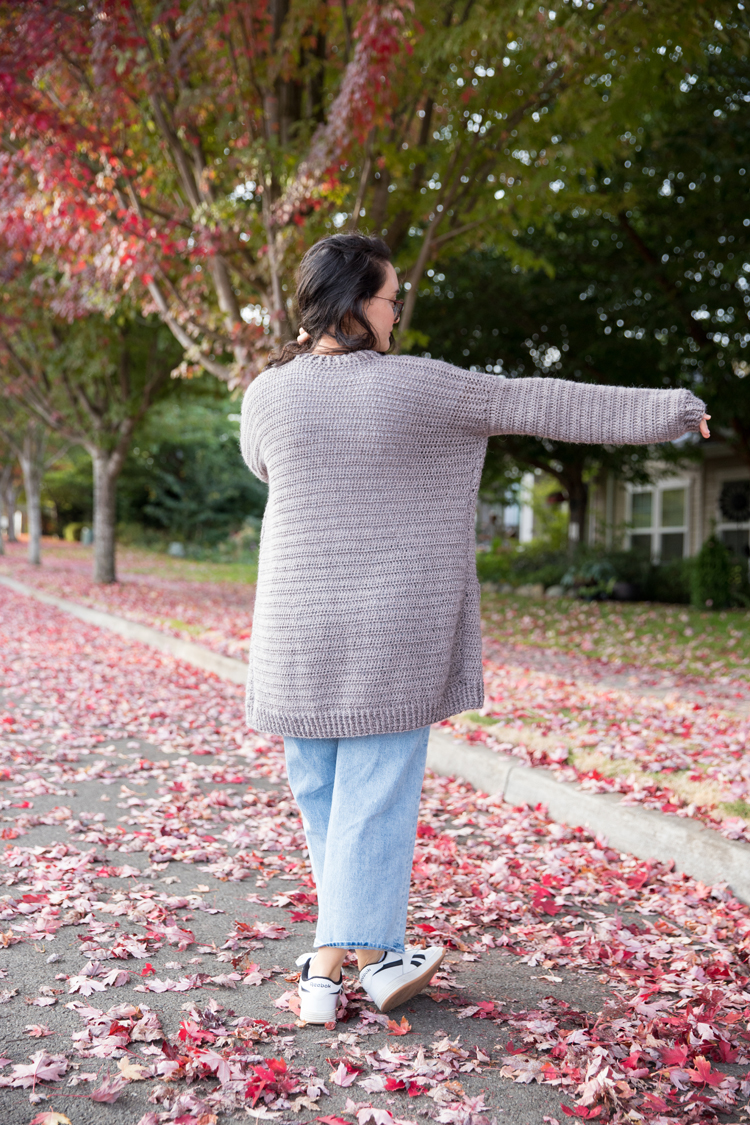
For reference, I am 5’3 (and a half ;)) with a longer torso and shorter legs. This cardigan hits me at the low to mid thigh, a few inches above my knees.
SLEEVE ADJUSTMENTS
WIDTH: Because the width of the cardigan changes with each size, the sleeve is written to be the same length for any size. For most, the sleeve will begin mid-bicep so you’ll want to use that measurement to determine the proper width. This may vary for you if you have broader shoulders, so I
recommend doing a fit before seaming the sleeve in, especially if you are between sizes.
If you make adjustments to the sleeve width, remember to make the arm hole bigger when you seam the cardigan body sides together. The sleeve width should stretch to fit the arm hole, so you have some flexibility there.
LENGTH: Like with cardigan body length, seam together the shoulders of the cardigan body and measure where you want your sleeve to end. Use the gauge to guide you on how many rows to remove or add to the pattern, and be sure to add 1.5 inches for the sleeve band. Remember that the sleeve will stretch and drape a bit longer when worn.
REMEMBER: Whatever changes you make to the back pieces, you also need to make to the front pieces. You may also need more or less yarn for the collar if you add or subtract rows.
GAUGE
4″ x 4″ = 15 double crochet x 10 rows
Because this is a larger project and sizing matters, I recommend working up a test swatch to see if your gauge is correct. If you are pretty close, but not exact, that is okay. The stitches stretch some as they are worn, so being within a half stitch or so is fine. If you are significantly too tight, you may want to try using a larger hook and if you’re too loose, a smaller hook can help.
ABBREVIATIONS
- ch = chain
- sl st = slip stitch
- sc = single crochet
- dc = double crochet
- fpdc = front post double crochet
- bpdc = back post double crochet
VIDEO TUTORIAL
If it hasn’t already, the video will start after the ad and should pop to the side or top of your screen as you scroll down so you can watch it while you read the written pattern.
It includes a refresher on how to work a chain, dc, slip stitch, and sc. It also shows you how to seam the pieces together and how to work fpdc and bpdc stitches.
Note: An ad will show before the tutorial, so if you “x” out of the video pop up, you have to refresh the page to get it to return. If the video looks grainy, select the gear button on the bottom right and increase the resolution to 1080p.
WRITTEN PATTERN & TUTORIAL
You will be creating 5 rectangles: 1 back, 2 front pieces, and 2 sleeves (plus two optional pockets).
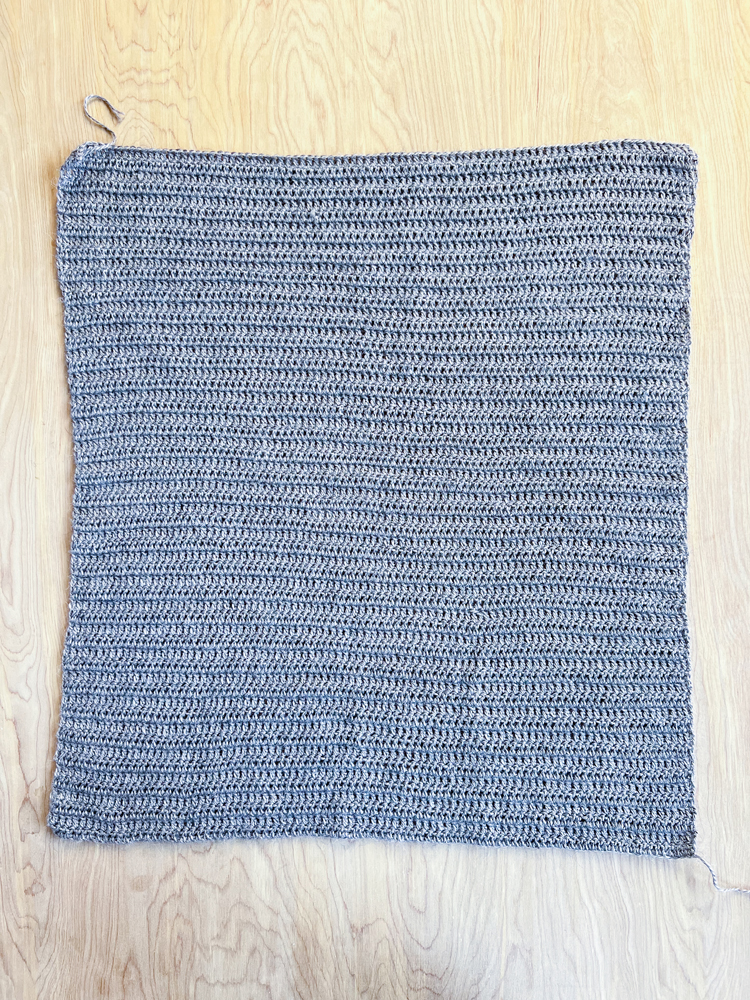
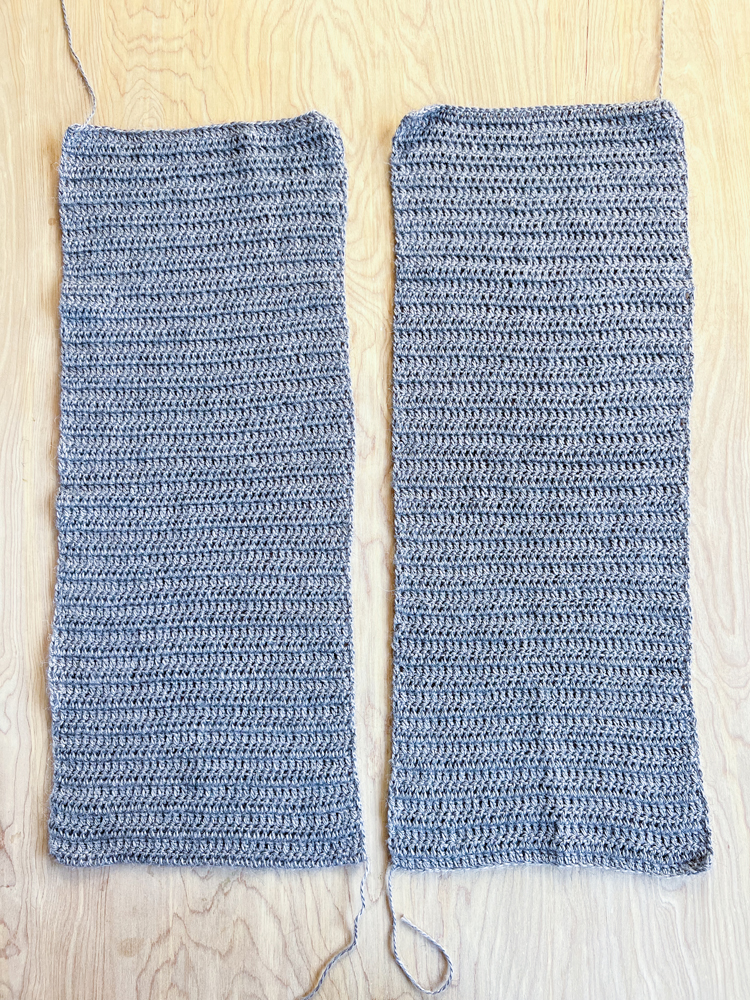
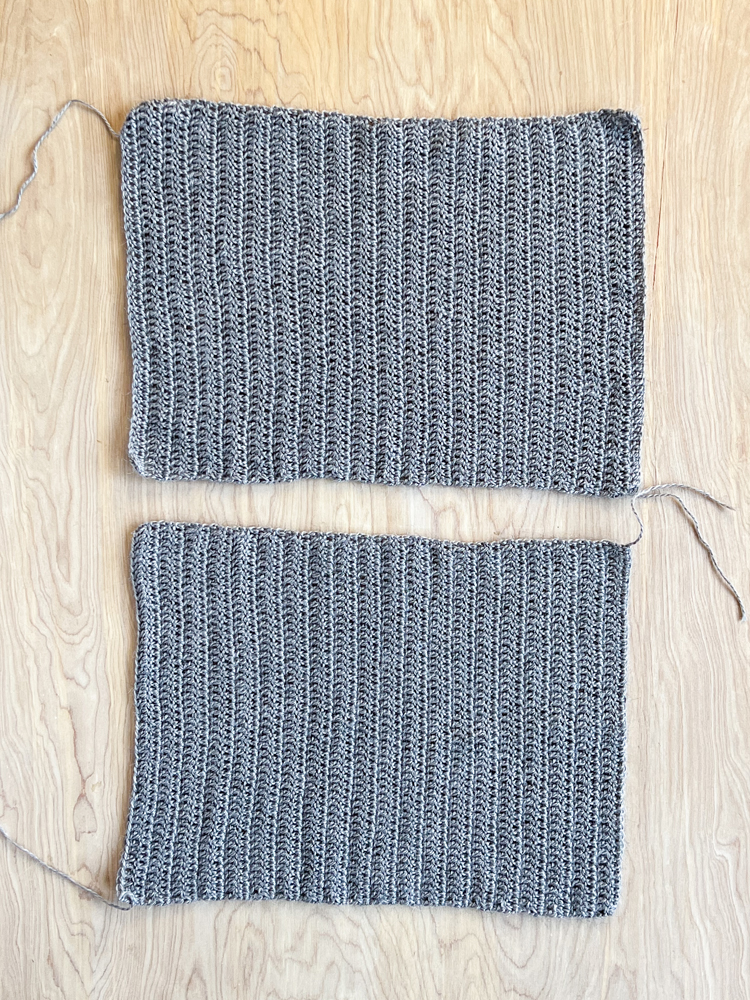
Sizing is as follows: XXS (XS, S, M, L, XL, XXL). Follow the number indicated in the same position as your size.
So if you are a size L, you would use the starred number: 1(2, 3, 4, 5*, 6, 7). Sometimes it helps to copy and paste the pattern into a word document so you can print it and highlight the number for your size.
Back piece (make one)
Chain 85 (89, 93, 97, 102, 107, 112)
Row 1: Dc in third chain from the hook, work 82 (86, 90, 94, 99, 104, 109) dc in the remaining chains. Total stitches (skipped chains count as one stitch) = 84 (88, 92, 96, 101, 106, 111).
Rows 2 to 60: Turn, chain 2, work 83 (87, 91, 95, 100, 105, 110) dc.
Total stitches (ch 2 counts as one) = 84 (88, 92, 96, 101, 106, 111).
Tie off end and cut an 8 inch tail.
Front piece (make two)
Chain 38 (40, 42, 44, 47, 50, 53)
Row 1: Dc in third chain from the hook, work 35 (37, 39, 41, 44, 47, 50) dc in the remaining chains. Total stitches (skipped chains count as one stitch) = 37 (39, 41, 43, 46, 49, 52).
Rows 2 to 60: Turn, chain 2, work 36 (38, 40, 42, 45, 48, 51) dc.
Total stitches (ch 2 counts as one) = 37 (39, 41, 43, 46, 49, 52).
Tie off end and cut an 8 inch tail.
Sleeves (make two)
Chain 48 (50, 51, 54, 57, 60, 65).
Row 1: Dc in third chain from the hook, work 45 (47, 48, 51, 54, 57, 62) dc in the remaining chains. Total stitches (skipped chains count as one stitch) = 47 (49, 50, 53, 56, 59, 64).
Rows 2 to 35: Turn, chain 2, work 46 (48, 49, 52, 55, 58, 63) dc.
Total stitches (ch 2 counts as one) = 47 (49, 50, 53, 56, 59, 64).
Tie off end and cut an 8 inch tail.
FIT TEST: Hold it on your arm and make sure the length of the sleeve fits from mid-bicep to wrist. Add or subtract rows if it does not fit.
Pockets (OPTIONAL)
Chain 26.
Row 1: Dc in third chain from the hook, work 23 dc. Total 25 stitches including two skipped chains counting as one stitch.
Rows 2-13: Chain 2, work 24 dc. Total: 25
Row 14: Turn. Chain 2, *fpdc, bpdc*, repeat from * to * 12 more times, fpdc.
Row 15: Turn. Chain 2, *bpdc, fpdc*, repeat from * to * 12 more times, bpdc.
Row 16: Repeat Row 14.
Row 17: Repeat Row 15.
Seam Cardigan Together
The video shows this in more detail, if you need more instruction than this.
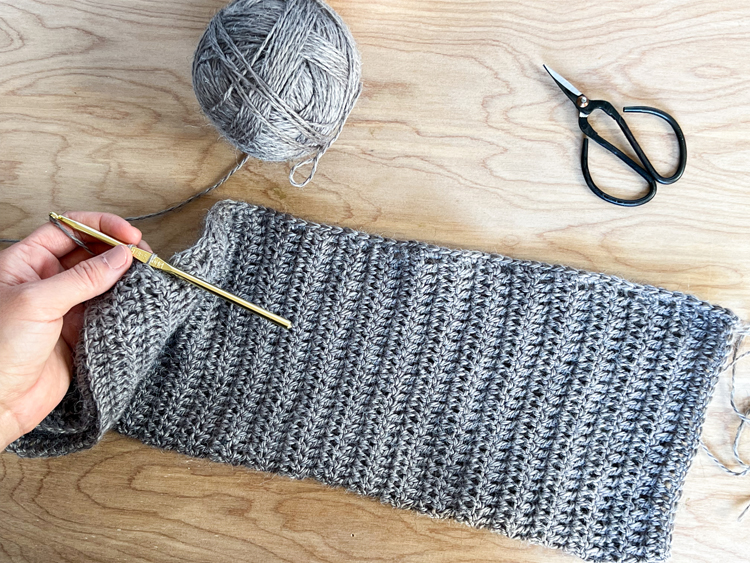
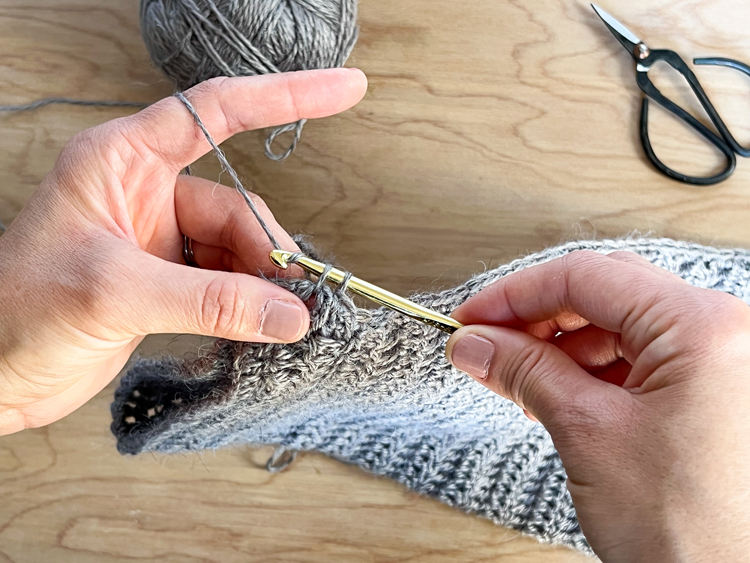
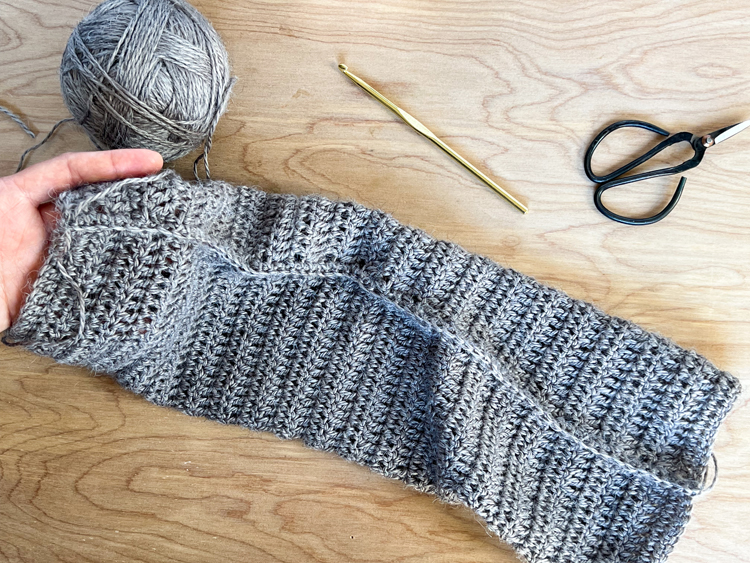
Sleeves:
Fold them in half width-wise.
Tie a slip knot, insert your hook, and slip stitch to one corner of two joined edges.
Then work a sc in the same/near the same spot to secure the corner.
You are joining row side to row side, so work 2 sc in the sides of each joined set of rows all the way down the length of the sleeve.
Work 2 sc at the end corner to make it extra secure.
Cut an 8 inch tail and tie off.
***Double check the length to see if it’s correct. It should fit from about mid-bicep to wrist. Remember you will be adding a cuff as well that will add about 2 inches. If it’s too long, remove some rows. Too short? Add some rows, before seaming and continuing.
Shoulders:
Select the ends that are stretchier. Hint: The end that had a starting chain will be less stretchy. You want the stretcheir ends for the back piece and the front piece to be at your shoulders.
Line them up and seam together the shoulders as you did the sleeves.
Because you are joining stitches to stitches (and not rows to rows) you only need to work 1 sc per stitch.
Cut an 8 inch tail and tie off.
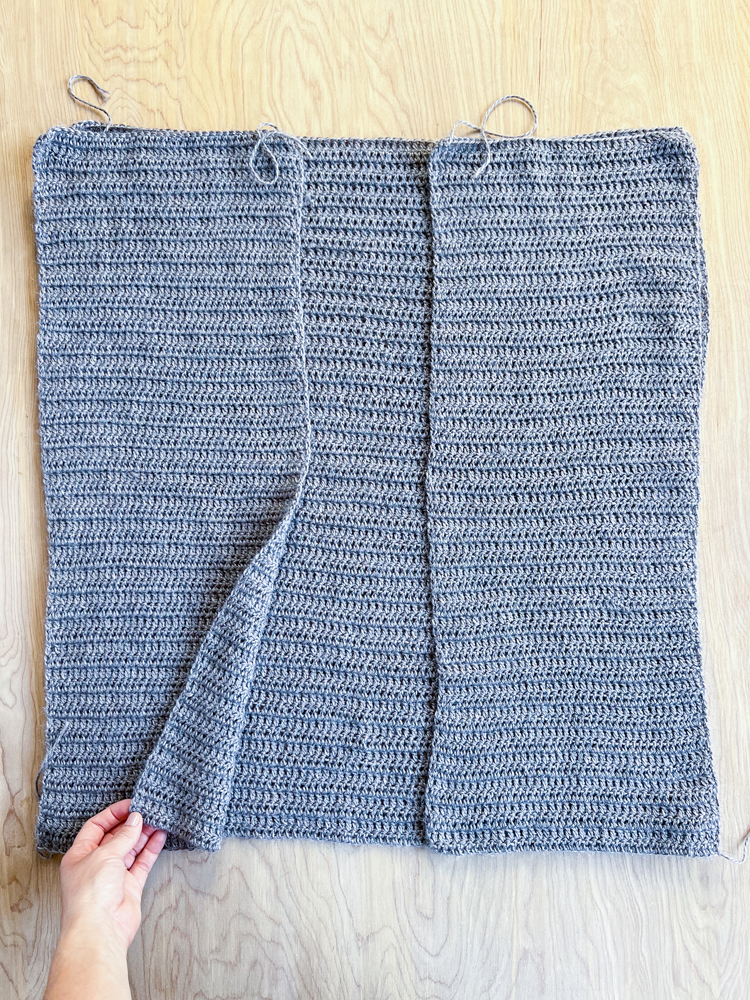
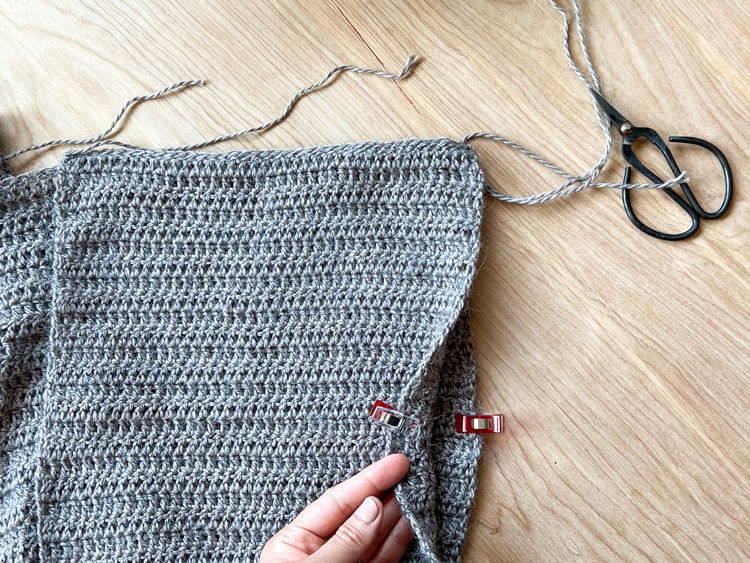
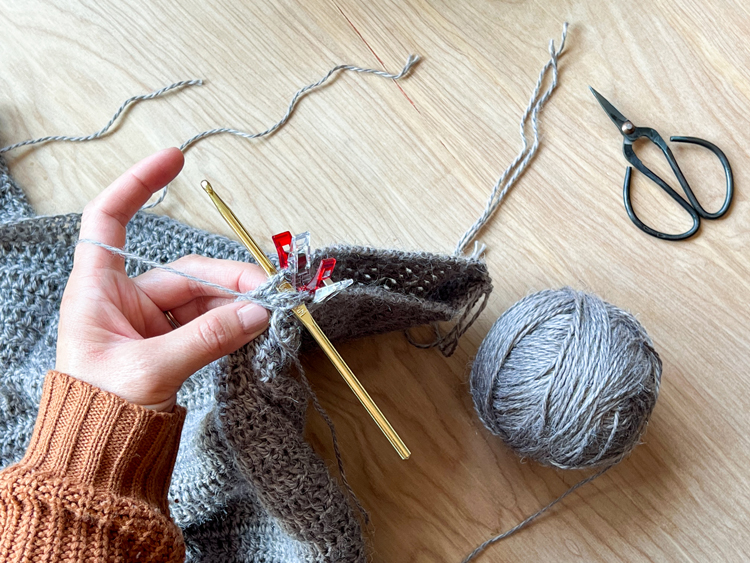
Sides and Arm Holes:
Count the number of rows listed for your size from the shoulder seam down the front piece and mark with a clip or stitch marker. Repeat for the back side and make sure both clips match up.
15 (16, 17, 18, 19, 20, 22)
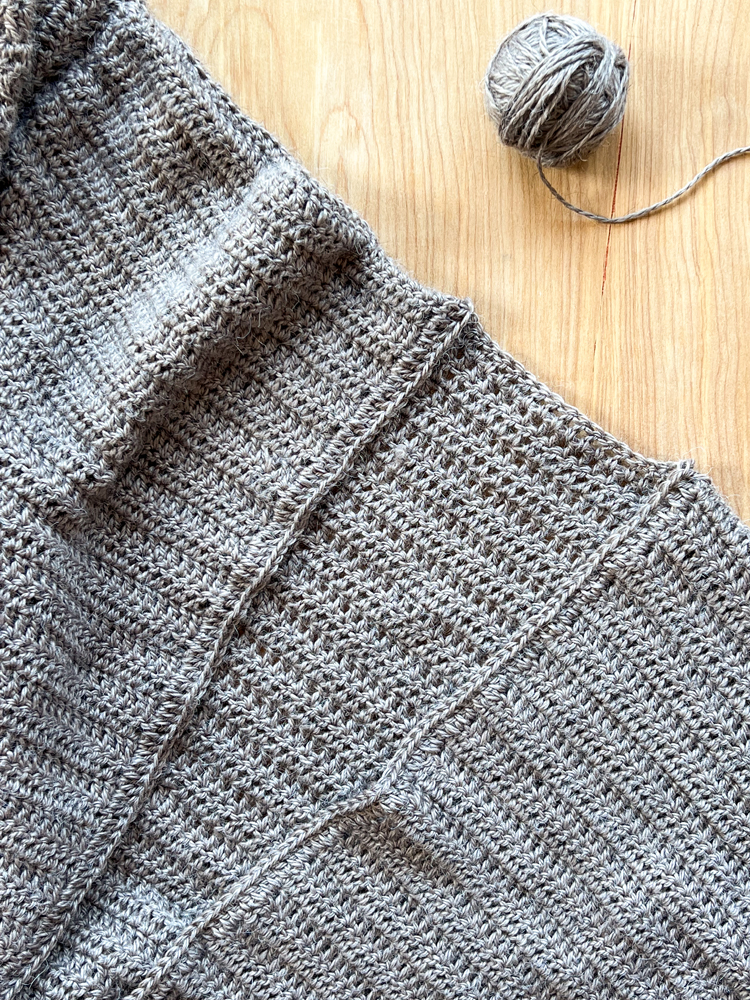
Seam the sides from the clips/stitch markers to the bottom of the cardigan as you did the shoulders.
***FIT CHECK!: Try it on at this point and make sure the arm opening feels comfortable. Hold the sleeve up to the hole to test fit as well. The sleeve should stretch some to fit the arm hole.
You may also want to test sleeve length at this point to see if you want to add or subtract rows. It’s much easier to remove the seaming and fix this now.
Add Sleeves
With the cardigan body wrong side out, turn the sleeves right side out.
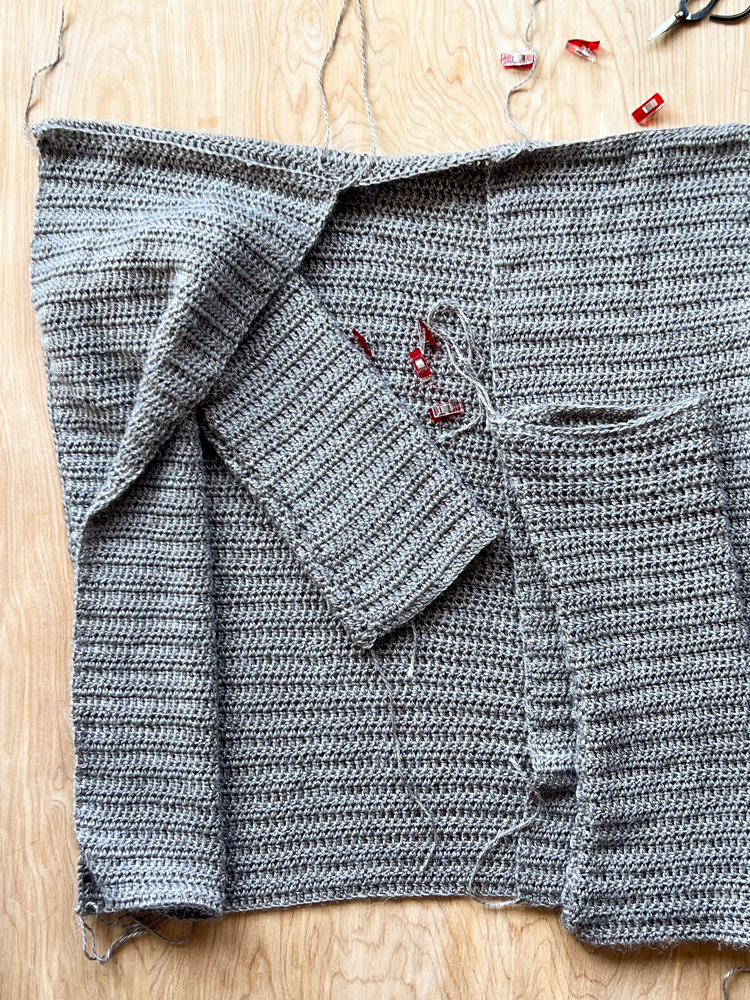
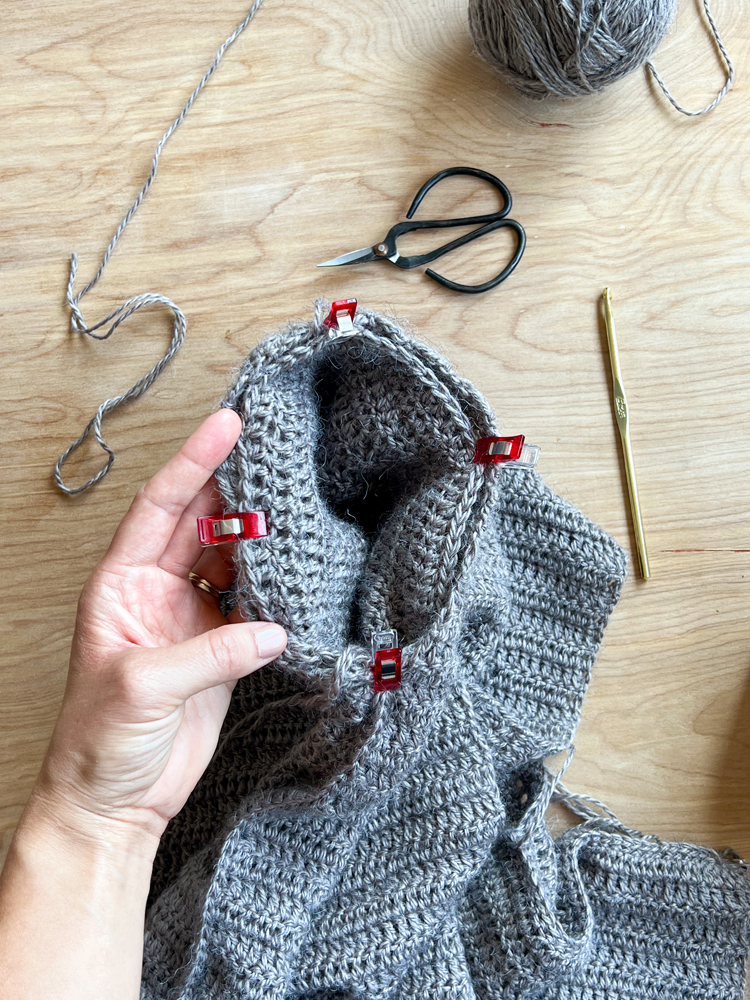
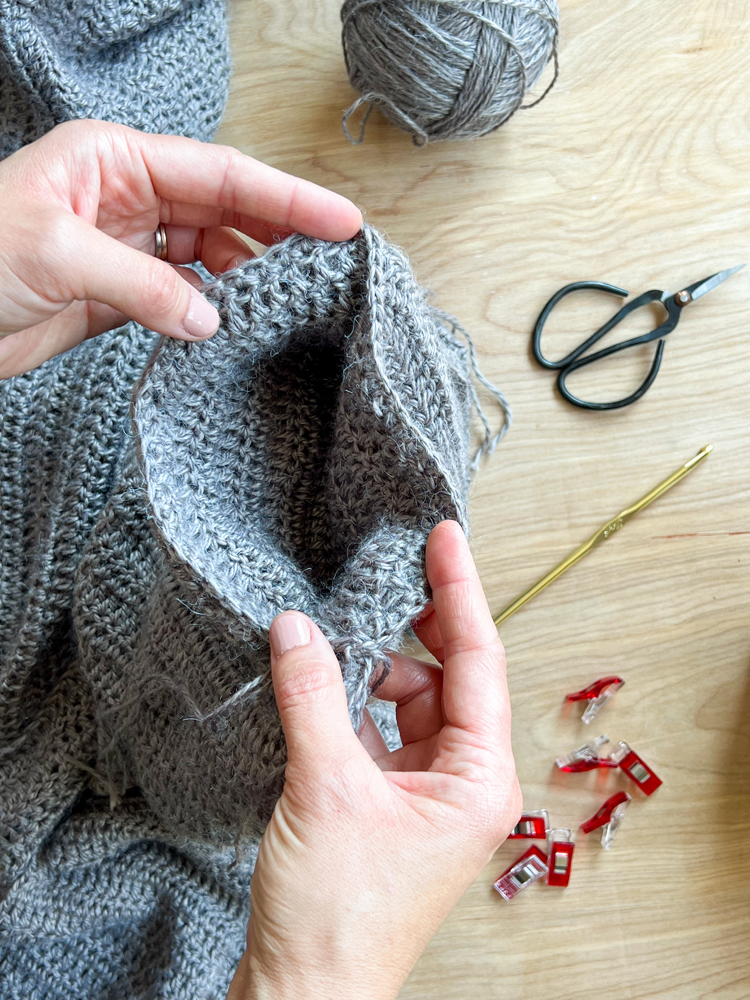
Find the stretchier end of the sleeve. This is the end you want attached to your shoulder.
Matching sleeve seam with side seam, insert the sleeve into the arm hole (right sides facing), and clip at the seams. Then stretch the sleeve to fit the arm hole and clip in place.
Seam together with sc stitches. There are no prescribed number of stitches to work. Just work enough to make it clean and secure and make sure the sleeve is stretching to fit the arm hole rather than the arm hole shrinking to the sleeve. Work a few extra slip stitches at the arm pit to ensure it is secure and to help clean up any gaps.
Cut an 8 inch tail and tie off.
Turn the cardigan, including sleeves, right side out.
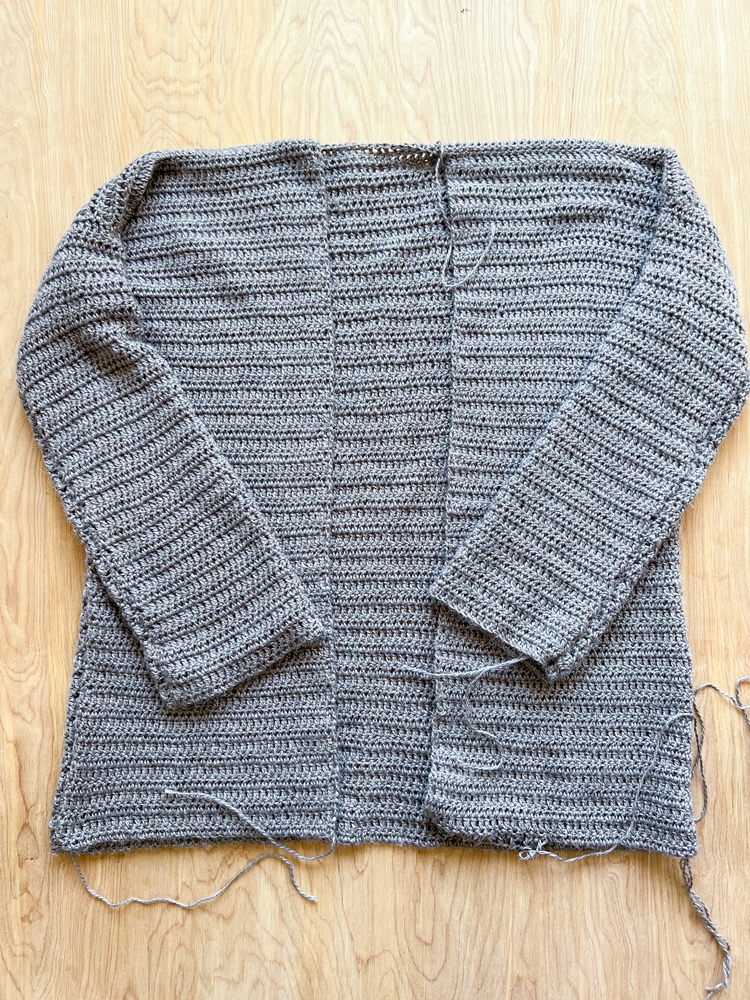
For this next section, again, refer to the video for clearer instructions.
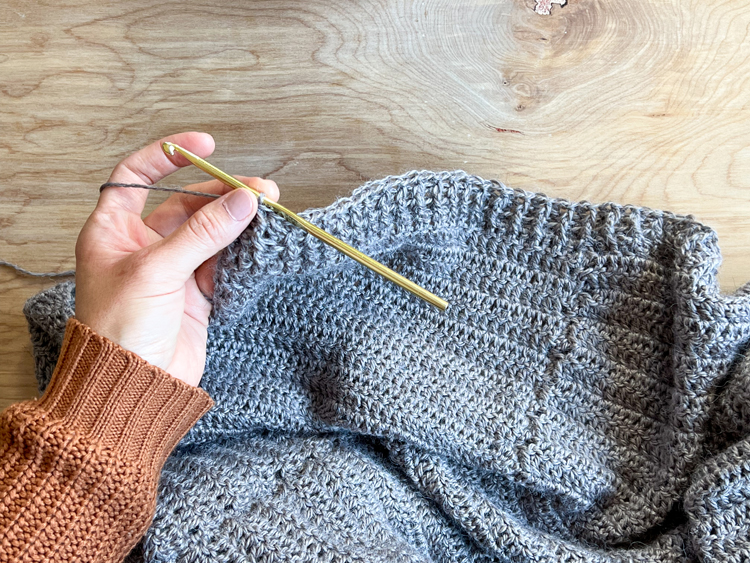
Bottom Hem Band
Sizing XXS (XS, S, M, *x, XL, *xx) *See separate section for Sizes L and XXL
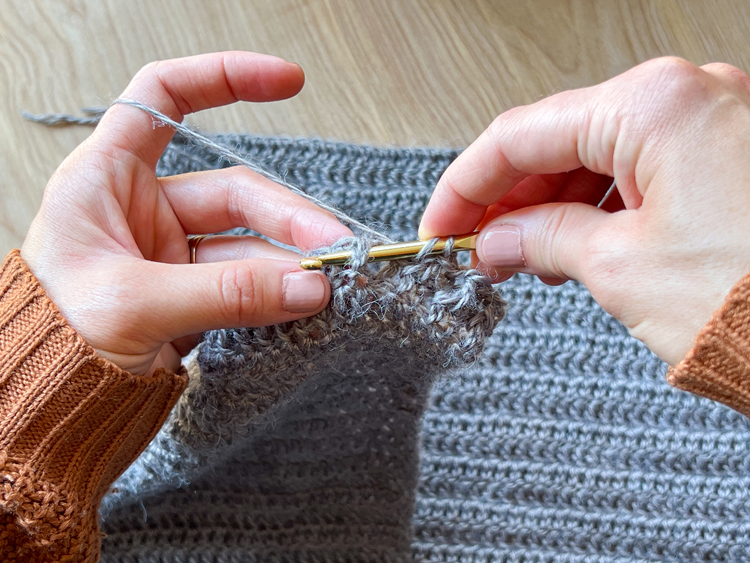
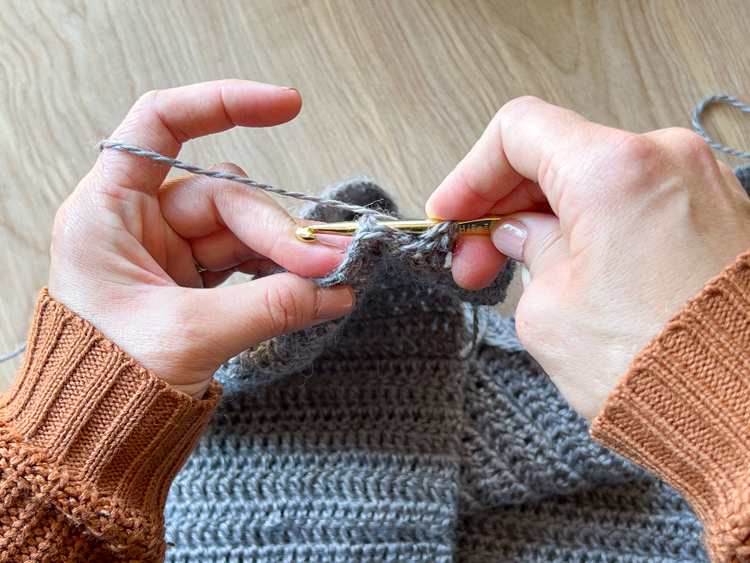
Row 1: Slip stitch into one corner. Chain 2, *fpdc, bpdc*, repeat from * to * 77 (81, 84, 89, x, 100, xx) times. Work one regular dc. Total stitch count = 156 (164, 172, 180, x, 202, xx)
Row 2: Turn, chain 2, *bpdc, fpdc*, repeat from * to * 77 (81, 84, 89, x, 100, xx) times. Work one regular dc. Total stitch count = 156 (164, 172, 180, x, 202, xx)
Row 3: Turn, chain 2, *fpdc, bpdc*, repeat from * to * 77 (81, 84, 89, x, 100, xx) times. Work one regular dc. Total stitch count = 156 (164, 172, 180, x, 202, xx)
Rows 4 and 6: Repeat Row 2
Rows 5 and 7: Repeat Row 3
Sizing L ( XXL)
Row 1: Slip stitch into one corner. Chain 2, *fpdc, bpdc*, repeat from * to * 94 (105) times. Total stitch count = 191 (213)
Row 2: Turn, chain 2, *bpdc, fpdc*, repeat from * to * 94 (105) times. Total stitch count = 191 (213)
Row 3: Turn, chain 2, *fpdc, bpdc*, repeat from * to * 94 (105) times. Total stitch count = 191 (213)
Rows 4 and 6: Repeat Row 2
Rows 5 and 7: Repeat Row 3
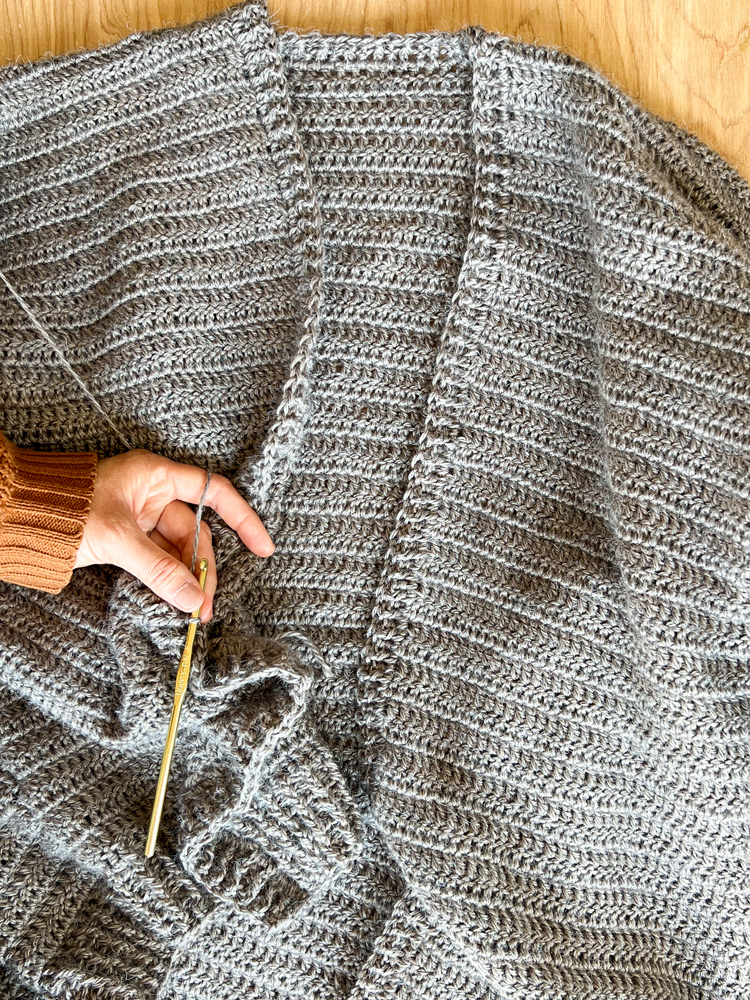
Collar Band
NOTE: For sizes XXS, XS, S, M follow pattern. For sizes L, XL, XXL, add an additional dc to on one of the shoulder seams, to make sure you get a total of 282 stitches.
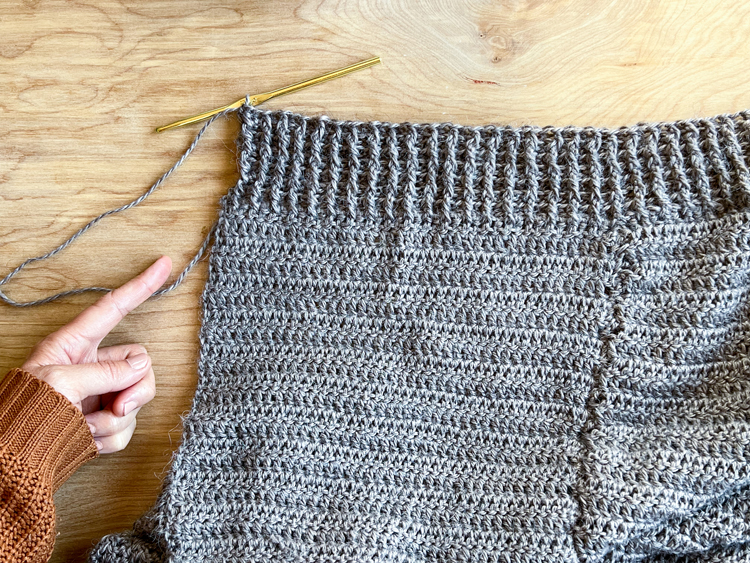
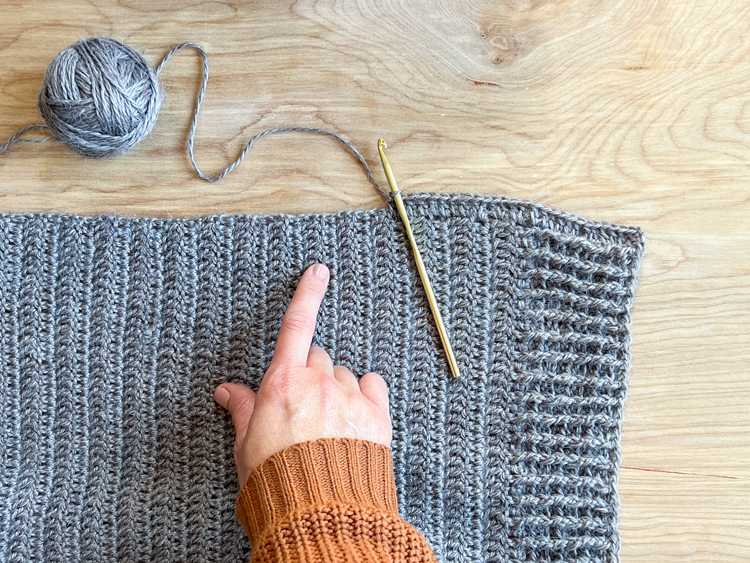
Turn from hem band into collar. You need to create a base of dc stitches first, before working fpdc and bpdc.
Row 1: Chain 2, dc around 281 times. (Work 2 dc in the side of each row. There are two loops/spaces on the side of row. If you work each stitch in those there will be less obvious gaps. At the neck, simply work one dc per stitch.)Total = 282 stitches.
Row 2: Turn, chain 2 ,*fpdc, bpdc*, repeat from *to* 280 times. Work a 1 regular dc to end the row. Total stitches = 282.
Row 3: Turn, chain 2, *bpdc, fpdc*, repeat from * to * 280 times. 1 dc. Total = 282.
Row 4: Repeat Row 2.
Row 5: Repeat Row 3.
Sleeve Bands
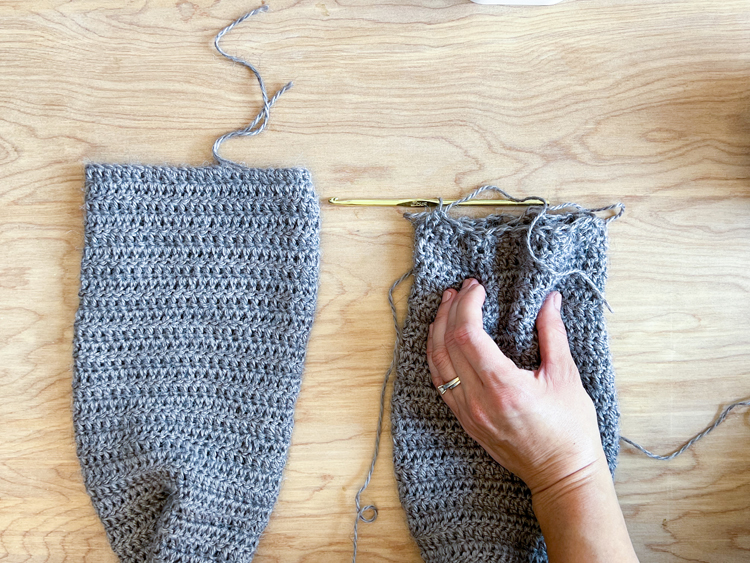
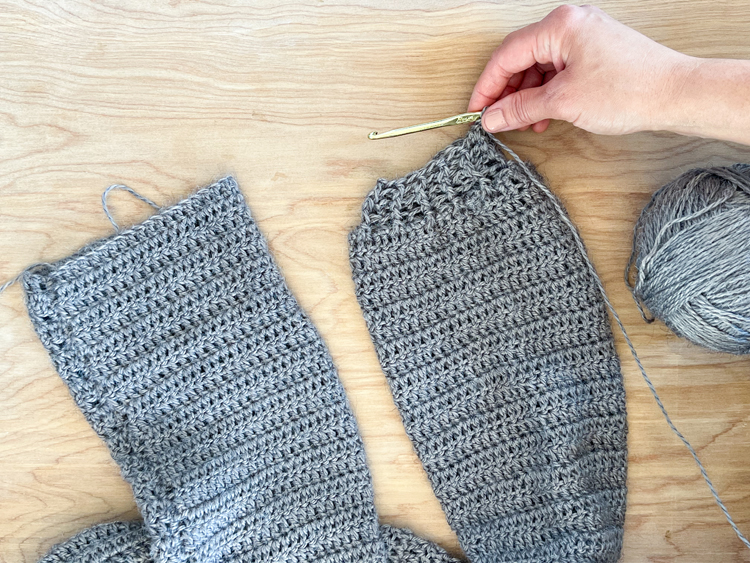
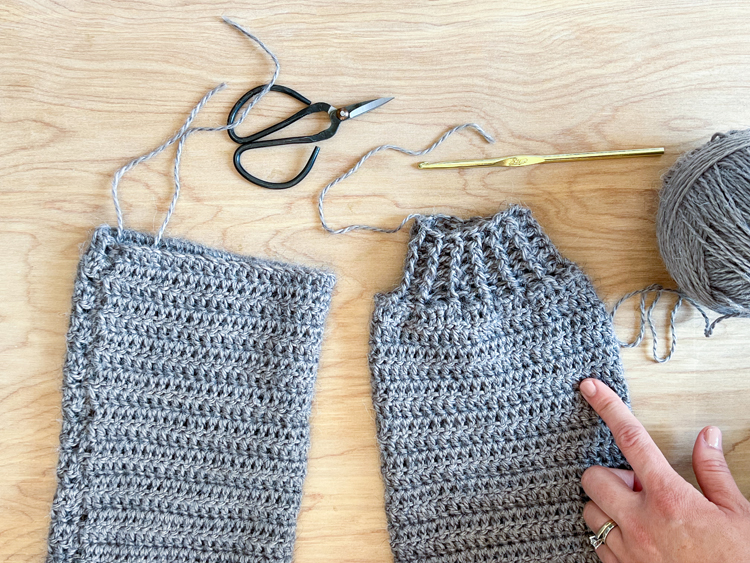
You want the sleeve band to cinch the sleeve inward, so the first round will be comprised of decreasing stitches to cut the number of total stitches into about half. See the video for instruction.
Sizes: S (L, XXL)
Round 1: Attach with slip stitch. Chain 2. Work *decreasing fpdc, decreasing bpdc*, repeat from *to* 22 (25, 29) times. Slip stitch to top of chain 2. Total stitches = 25 (28, 32).
Round 2: Chain 2, *fpdc, bpdc*, repeat from *to* 22 (25, 29) times. Slip stitch to top of chain 2. Total stitches = 25 (28, 32).
Rounds 3-6: Repeat Round 2.
Sizes: XXS (XS, M, XL)
Round 1: Attach yarn with slip stitch. Chain 2. Work *decreasing fpdc, decreasing bpdc*, repeat from *to* 20 (21, 23, 26) times. Work 1 dc. Slip stitch to top of chain 2. Total stitches = 24 (25, 27, 30).
Round 2: Chain 2, *fpdc, bpdc*, repeat from *to* 20 (21, 23, 26) times. Work 1 fpdc. Slip stitch to top of chain 2. Total stitches = 24 (25, 27, 30).
Rounds 3-6: Repeat Round 2. Cut an 8 inch tail and tie off.
Repeat for other sleeve.
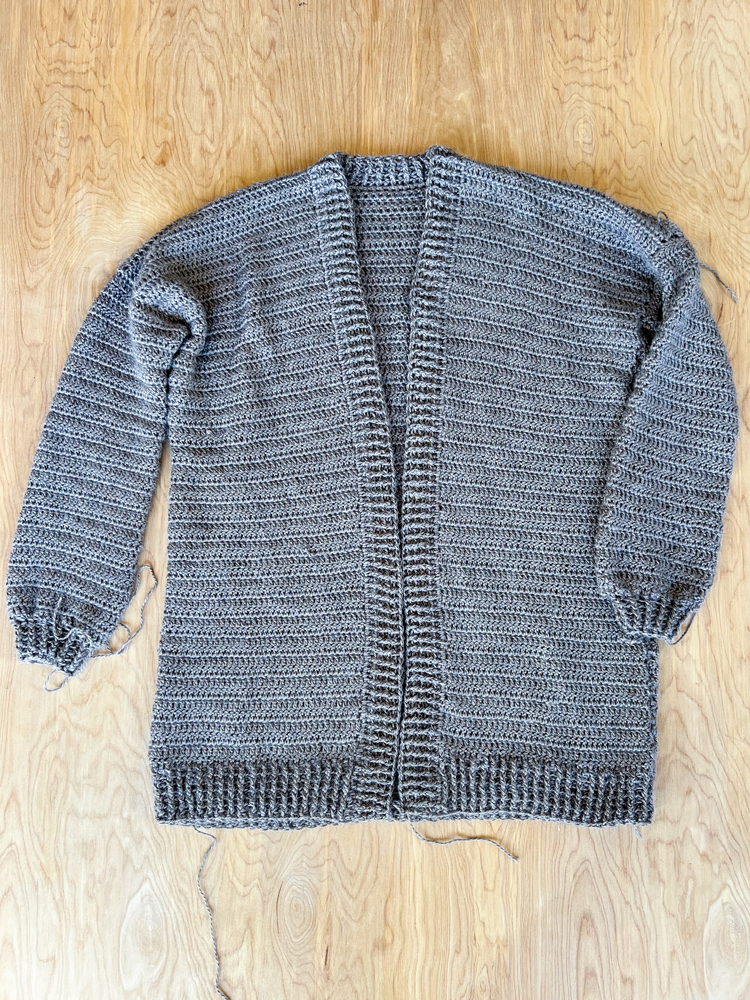
OPTIONAL: Sew on pockets.
Using a yarn needle and some scrap yarn (double the amount of the perimeter of the pocket is plenty), whip stitch the pockets in place.
Count stitches from the collar and rows from the hem band to ensure both pockets are placed evenly on each side.
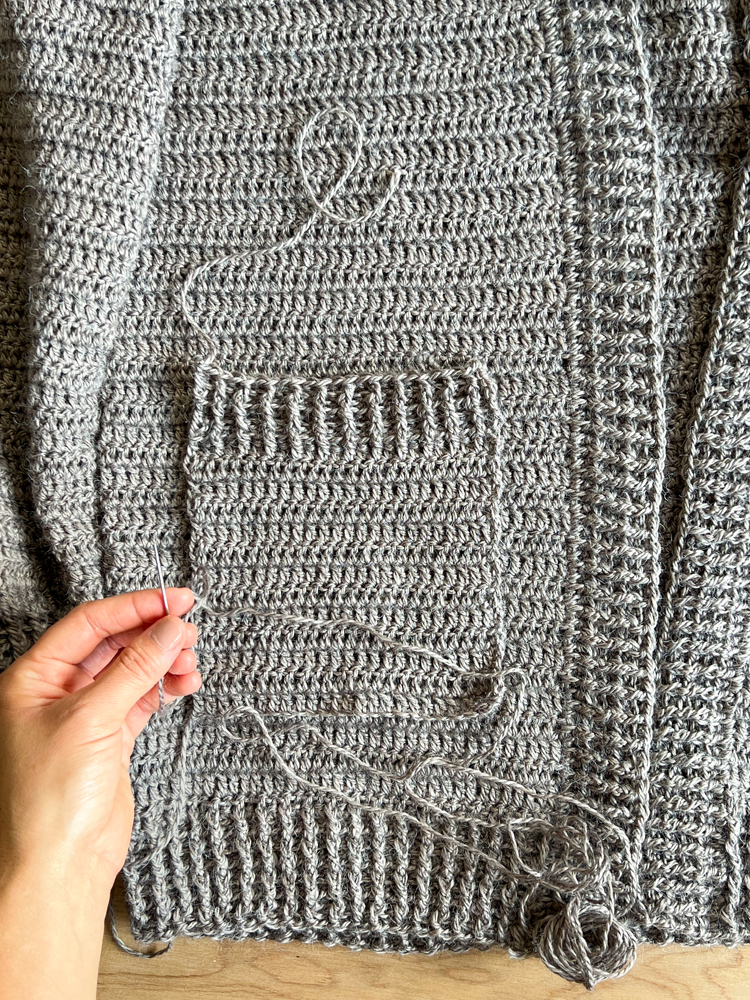
The video shows this in more detail.
Weave Ends
Thread each tail onto a yarn needle and sew it into surrounding stitches in a way that disguises the tail. Once you have sewn in a few inches, pull it snugly and snip close to the cardigan. The tension should snap it back into the cardigan, hiding the end. Repeat for all the tails.
And you’re all set!

You made a freaking cardigan!!!

Feels good to take string and make it something cozy and wearable huh?

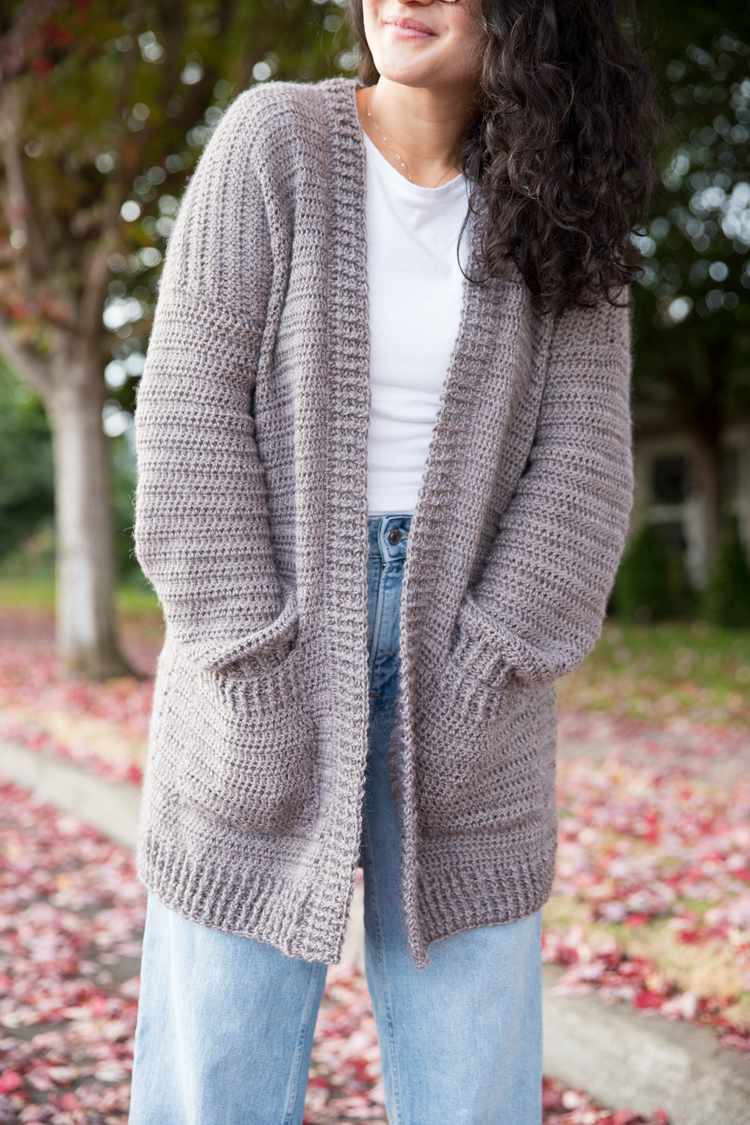
If you feel ready to tackle another cardigan with a more challenging twist? Try this cabled cardigan that also is also made from rectangles.
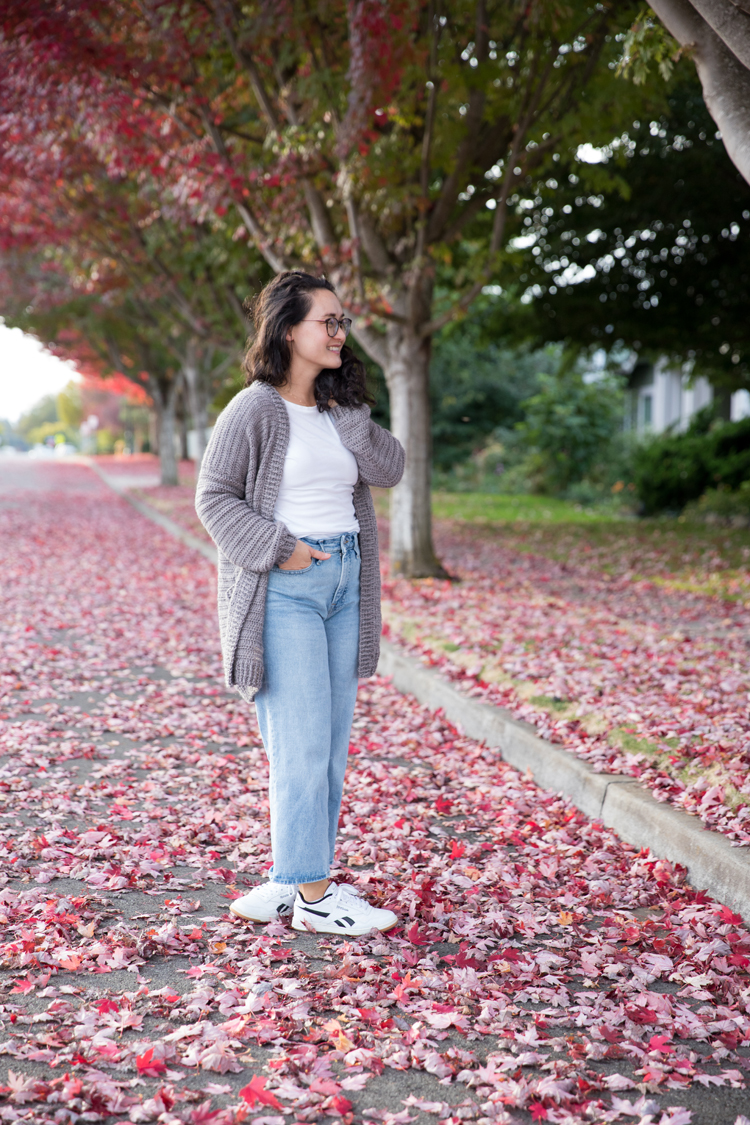
If you would like a printable PDF, ad-free version of this pattern. You can buy it in my shop:


Is there a printable pattern
You can copy and paste it into a word document for personal use, but I don’t have a printable one created yet. I may make those available in the new year.
You did a lot of work to make this possible. Thank you for the gift. Very kind and generous of you.
Thank you for appreciating the work it takes to write patterns and for leaving such a kind comment.
Hi looks like a lovely project, do you think the cardigan would turn out be to heavy if I used a half double crochet instead of double crochet? Have already purchased some yarn.
It will be heavier because hdc is a more dense stitch than dc. If you are using a really light yarn like this imitation alpaca yarn I used, I think it wouldn’t be *too* heavy.
Hi! I am having difficulty finding the video tutorial. I am nearly done but trying to figure out the fpdc, bpdc and decreasing fpdc, decreasing bpdc. I checked your youtube account and didn’t see it there either. THANK YOU so much for this amazing pattern! I can’t believe I’m making a freakin cardigan!! It’s so cute and cozy!! Can you post the link?
I am so excited you’re so close! So sorry for the technical difficulties. I think I answered you in another thread but I did just implement an update for my video/ad host. I’m hoping that will fix it, but if not, please reach out via email or instagram message and I will try to help you either fix the video issues or for sure finish your cardigan. <3
Hello. Any chance the video on your stitches (Video tutorial near the beginning) can be uploaded again? It’s not loading. Thanks.
So sorry about that Grace. Sometimes you have to refresh the post page for the video to replay.
I’m having the same problem even with reloading it several times 🙁
So sorry Susan. I just implemented an update today. I hope that fixes things. If not, will you please either email me or message me on instagram? I’m info@deliacreates or @deliacreates. That way I can try to troubleshoot what the problem is or even just help you personally with any questions you have.
Thank you so much for this!! 😀
I was wondering if this could work as unisex?
I think so! Just measure the widest part of their body to determine which size to make.
I am LEGITIMATELY excited to make this! I get antsy in these cold months, and this is just the right project to keep me occupied until spring. Thank you for the clear steps, and for providing this for free! You’re awesome.
Aw yay! That makes me so happy. I too struggle in the dark cold months of winter. Thank goodness for projects! So glad this one will help carry you through.
Thank you for the pattern! I’m looking forward to starting this project, but as a newbie the video tutorial would be very helpful (I am not able to access it). Would it be possible to see it on YouTube?
It is only available on my site. I would be happy to help you trouble shoot your issues with seeing the video. If you are using a browser or any technology that blocks ads, the video will not show for you. If this doesn’t apply to you, email me at [email protected] and I can try to work through the problem with you from there. (I don’t get responses here as quickly, so please email me).
Requesting the desktop version of the webpage (if on a mobile device) seems to help it load. Just an fyi 🙂
Thank you Ashya! That is very helpful insight. It’s hard for me to know what advice to give when I can’t replicate the problem. So your feedback is much appreciated!
Looks really lovely, cannot wait to try this! I was looking for the perfect mix to start something useful but not too intricate so I wouldn’t abandon it mid-project, and this is just what I was hoping for <3
Thank you! I know what you mean about losing interest if it drags on too long. I hope you enjoy the pattern. <3
I am so excited to make this… could I use a yarn weight 4 instead? There is so much more selection than 3.
You can, but you will have to adjust the pattern as you go. The stitch and row counts will be different and it will be a heavier cardigan. I know worsted weight has so many more options, but size 3 is really more ideal for a garment when you’re crocheting. I have seen companies start to step up their DK offerings and I hope to see more.
I wasn’t able to get the yarn you used, I instead collected Stylecraft Special DK. I love their color selection. I don’t know if you’ve ever used that yarn. It’s 100% acrylic.
I normally crochet a little tighter so I have to go up a hook size. Your yarn uses a 5mm recommended hook, mine uses a 4mm. I’m able to make your gauge (except for the rows, I can’t make mine that short) with a 5 or 5.5mm. But the gaps from the DC are noticeable. Seems that way no matter what hook I use, unless I use a 4mm. Which is about 1” smaller stitch wise than your gauge (15 stitches makes about 3”).
I know the gaps are kind of a thing with DC. And I’m using a robin’s egg blue color (it’s called Sherbet) so I think it shows more. Does yours show the gaps, especially after wearing it for a while? It’s hard to see from the photos. I wonder if your yarn is a bit thicker, too.
I’m getting a little frustrated with myself. It’s a gift for my daughter. But I’m also not used to working with DK. I’ve used it for blankets, but I normally work with worsted weight. Stylecraft Special DK is so soft though, wow!
Anyway thank you so much for the pattern. I really love it. It’s very well written. And I appreciate your video. I hope I can get my project to work out!
I’m so sorry it has been frustrating. Also sorry for my delayed response. I do have visible gaps in mine but the yarn is a bit fuzzy so it works. I’m not familiar with that yarn, but I know how smooth a yarn is can make a difference in how it works up. Are you on instagram? If you direct message me, we can send photos back and forth and trouble shoot better. Or email works too. I’m [email protected] or @deliacreates on IG. My guess is that it will look better once it’s all together rather than looking at it up close, but send me a picture and we can work it out. <3
Thanks for this great pattern!! Looking forward to making one soon – my daughter has already requested one…….it looks great!!
Hello Delia! I’m a multiplyed sickness woman in sweden and done the cold month of the year I’m in very match in pain, but crocheting and knitting I can surviving. I will give you so many thanks for your free patterns so I can service.
dobyou have a download copy
Hi Marianne. I have an ad free, pdf version which you can purchase here: https://www.deliacreates.com/product/rectangle-crochet-cardigan-pattern/
As always, the free version lives on my website.
I hope that helps. 🙂
Delia