When I write about mommy blogger photography, I do it with the nonprofessional mommy photographer in mind, because that’s what I am. I write from my self-taught perspective to help make photography more accessible to the everyday photographer. If you happen to fall in that category, I have some fun techniques for you to try this summer.
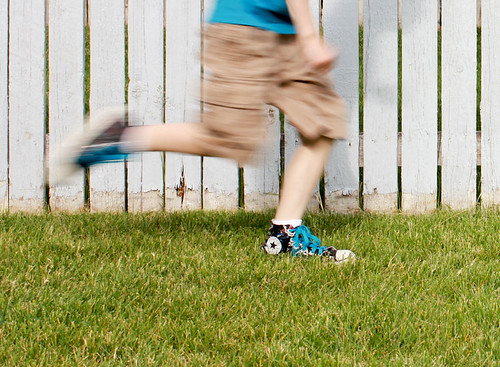
1. Movement Blur.
Capture your child’s energy by blurring their movement.
Simply widen your aperture a little bit so that you can slow your shutter speed down to about 1/160 or slower. Then snap away. Of course you can use a slower shutter speed if you like. Any speed that is slow enough to capture the blur is fine.
The trick is to find the sweet spot or the setting that helps you achieve just the right amount of blur. I think it’s more pleasing to the eye to catch some blur and have the rest of the subject be crisp or at least crisper.
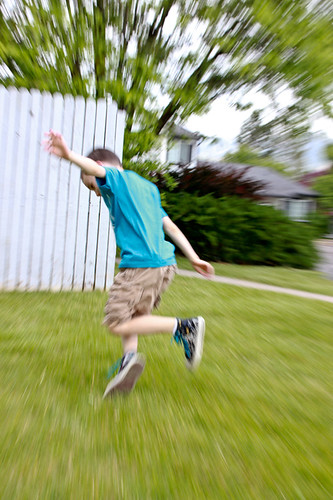
2. Focal Zoom.
This one is really fun. It has a dizzying effect and creates a look that’s frenetic and full of energy. Probably not what you want to go with very often, but a few of these can add interest to your collection of summer pictures. Plus … it’s just plain fun!
You need a zoom lens, of course. Depending on your lighting situation, you may need to narrow your aperture (dial up to a larger f-stop number). Slow down your shutter speed to about 1/160 or slower.
Set your lens either all the way zoomed in or completely zoomed out. Choose a focal point and center your lens on it. As you press the shutter release button, twist your zoom lens in or out depending on your starting point.
That’s it. Very simple technique. The spot that you centered on stays in focus (mostly) while the rest blurs into a cool star wars like tunnel of blur. Starting all the way zoomed in or entirely zoomed out can give you varying effects. Try both and see which one you like better.
3. Light Writing.
Warm summer nights are a great time to try light writing.
Set your tripod up and a remote or self timer.
Set your ISO to 400 and your aperture to as wide as it will go (smallest f-stop number possible).
Turn off the auto focus on your lens. If you don’t, your camera won’t be able to find something to focus on and won’t take the shot.
Now set your shutter speed VERY slow … like 15-20 seconds slow.
Then take a small light source: a flash light, a sparkler, a glow stick, or a phone even! When the shutter goes off, start writing or drawing, until the shutter closes again. The camera captures all of the movement and creates a pretty picture of light.
If you’re writing words, just remember that the resulting image will be of the reverse of what you drew.
You can even make it a date! My husband and I did it as an at-home date one night after the kids went to bed. It would be fun to try it with kids, too, if you don’t mind them staying up after dark. 🙂
It’s addictive fun. I promise you, get ready to have a blast!
4. Mid-day Sun.
Mid-day photography can be tricky, because the sun creates harsh shadows. But with a reflector, you can diminish or reduce those shadows by helping the sunlight bounce onto the darkened parts of your subject. Don’t have a reflector? Use a large piece of foam board. They’re cheap and work great.
Angle your reflector underneath your subject, adjust your ISO to the lowest setting and increase your shutter speed and aperture to get proper exposure. Success!
You can also try having your subject stand in front of … or eclipse … the sun. Use the reflector again if you want both your background and your subject to be fairly well exposed.
Or you can white out your background by ditching the reflector and adjusting your camera settings to how you would set them for open shade. Maybe bump up your ISO one step, slow down your shutter speed. This properly exposes your subject and then sends the background into a white light glow.
(As you can see, we like airplane rides around here … )
5. Sun Flare.
To achieve sun flare, simply move slightly to the side of your subject and allow sunlight to stream directly into the camera.
When you snap, you get flares of light, and if the light hits reflective surfaces, bubbles of joy. It’s lovely.
Of course you don’t need to be outdoors for this. I have achieved the same effect with a very bright window that had streams of bright sunshine coming through.
Just be careful that you don’t use this technique too often. The sun can damage the mirrors inside your camera over time. I have already had to replace mine once. Buying a UV filter can help protect your camera a little bit. You can find them at your local big box store for about $5.
And there you go. These are five fun things you can try this summer to beef up your photography experience. If my references to ISO, aperture, and shutter speed had you stumped, you can read my basics post for more information.








I could not be more grateful for all the effort you put in to help me get take better photos! I am appreciated it!
btw, You got to come up with printable-pocket size version! maybe an idea?
I admire who shares her knowledge with others!!! Always grateful!
Have a great day Delia
love the photo hints…will try them out soon. Thx. for all the cool tips.
Great tips! Thanks!
Awesome tips and things I’ve never tried before!! Adding to the to do list. 🙂
Awesome tips, thanks! Number 1 is a bit hit with my kids….can’t seem to get them focused though, any tips on that, other than taking pictures of them in their sleep? 😀
haha…that is tricky. Sometimes I fake them out and say, look at the bird and then snap really quick while they pause to look. Or if they are old enough, I’ll open up a silly dialogue that makes them smile, laugh, and make cute faces. It’s tough for sure. Just keep snapping and you’ll get a good one. I probably take at least 50 pictures each time and keep maybe 4-5 of those 50. I think the digital photography was invented for parents. 😉