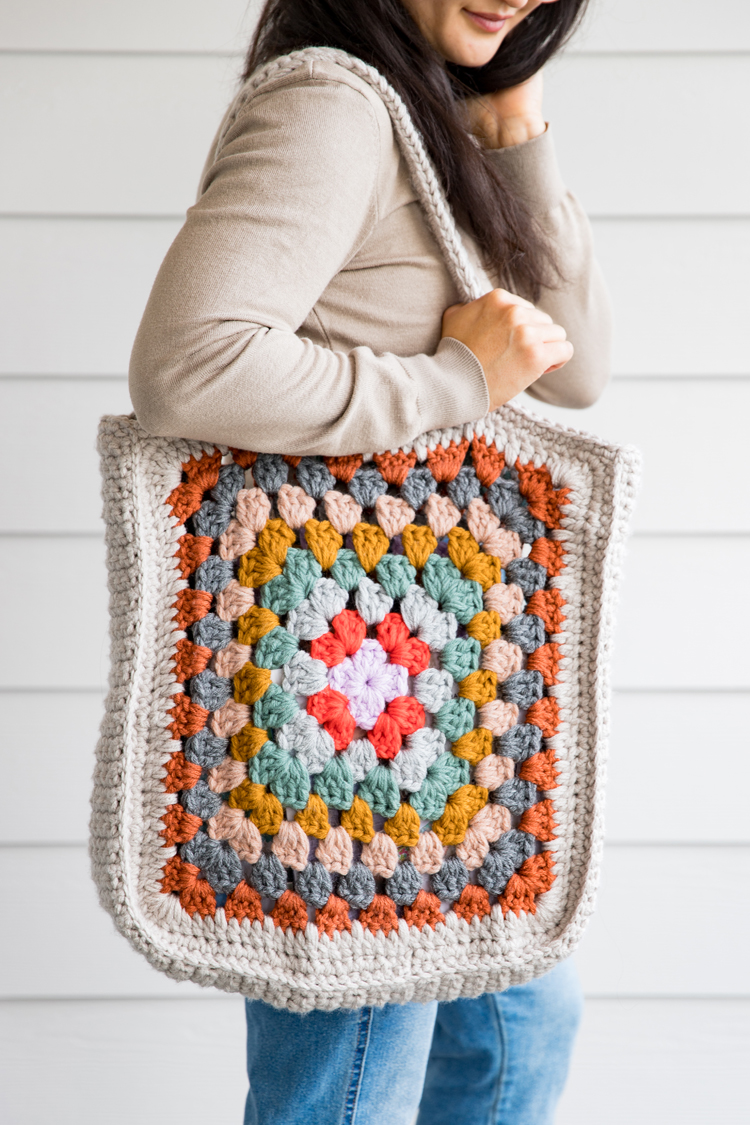
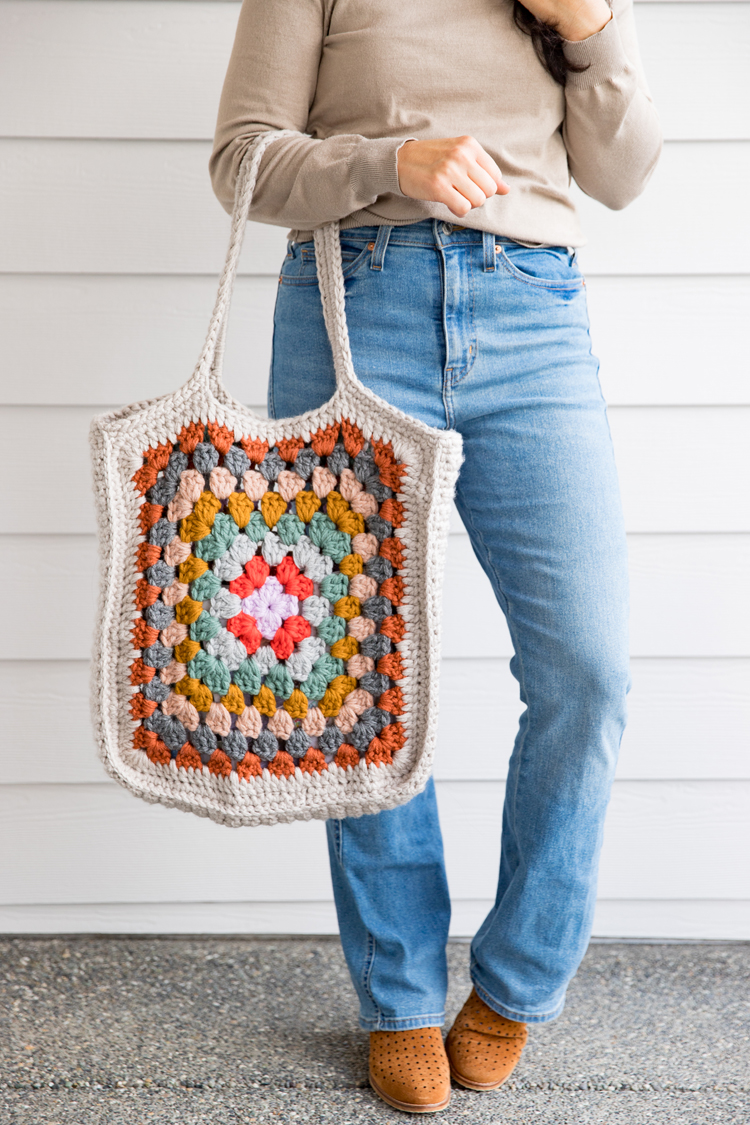
I’m usually a neutrals kind of person, but I had so much fun choosing all the colors for this granny square tote bag!
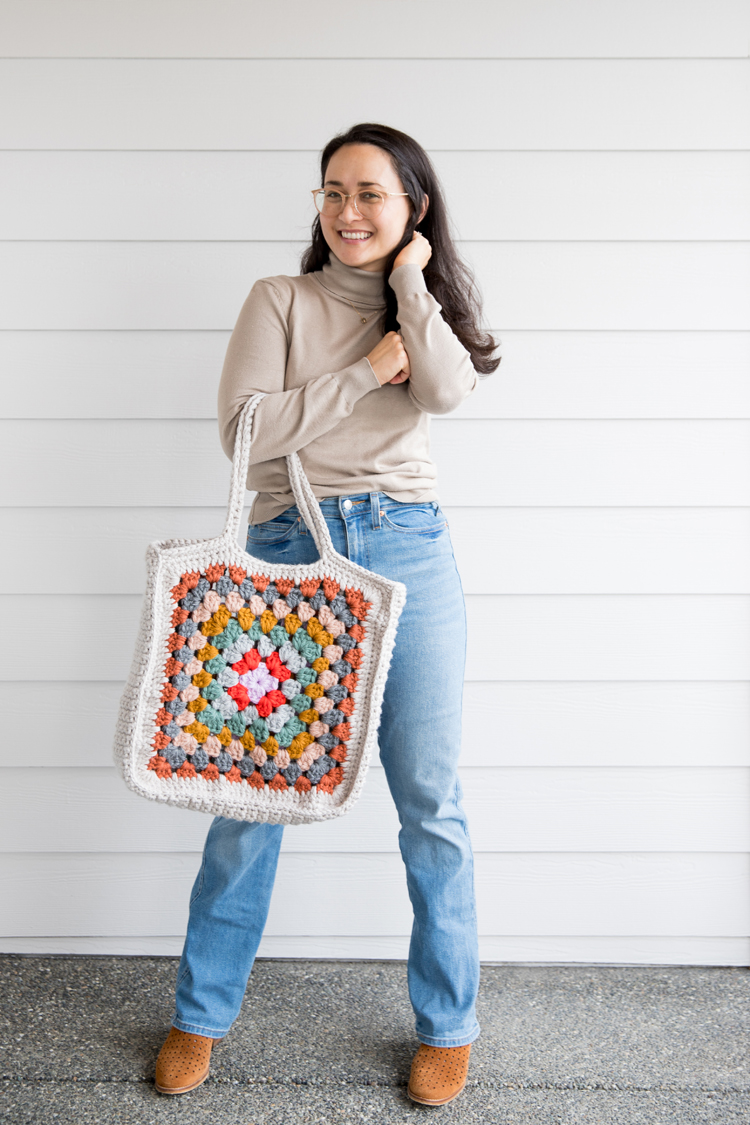
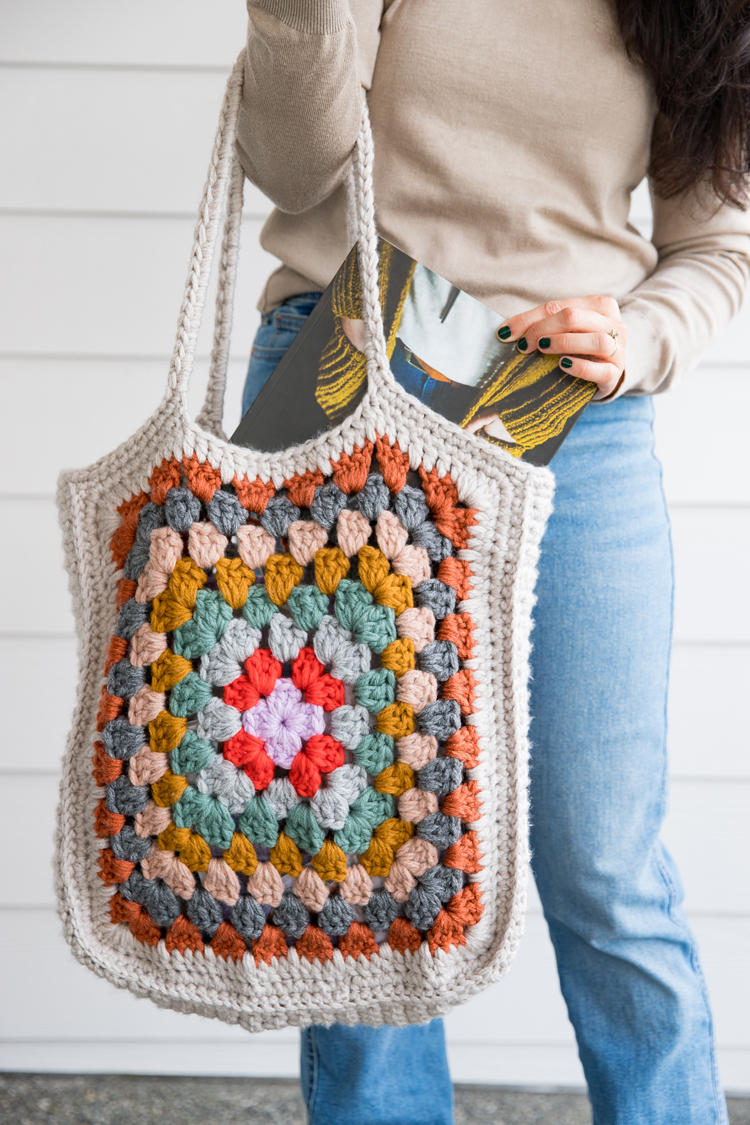
Unlike most granny squares, the granny squares used in this tote are over-sized and really sturdy because we are working with four strands of yarn at a time. Just like with my four strand crochet tote, the multiple strands of worsted weight yarn work together to make the bag much less stretchy and give it the strength it needs to bear a lot more weight than single strands.
If you are a beginner crocheter, I wouldn’t make this project your first, but it is beginner friendly in that it uses only basic stitches (double crochet, single crochet). If you have never made a granny square, but you’ve worked in the round, then this is very similar.
I included a video tutorial just before the pattern below that walks you through how to make one. Once you know the formula of how the squares are formed, it’s a breeze. The only annoying part is all the end weaving in you have to do because there are so many color changes. It’s worth it though!
This can also be a stash buster if you have left over yarn from other projects. My only warning is that the tote will be most sturdy if you use cheap, acrylic yarns rather than wool blends. I used some wool blends because I really wanted the color, but the majority of my tote is made up of the inexpensive Loops and Thread Impeccable yarns from Michaels.
Let’s get started…
MATERIALS
- Worsted Weight yarn in 8 colors – 1 skein each*
- Worsted Weight yarn in main color – 4 skein (see notes)*
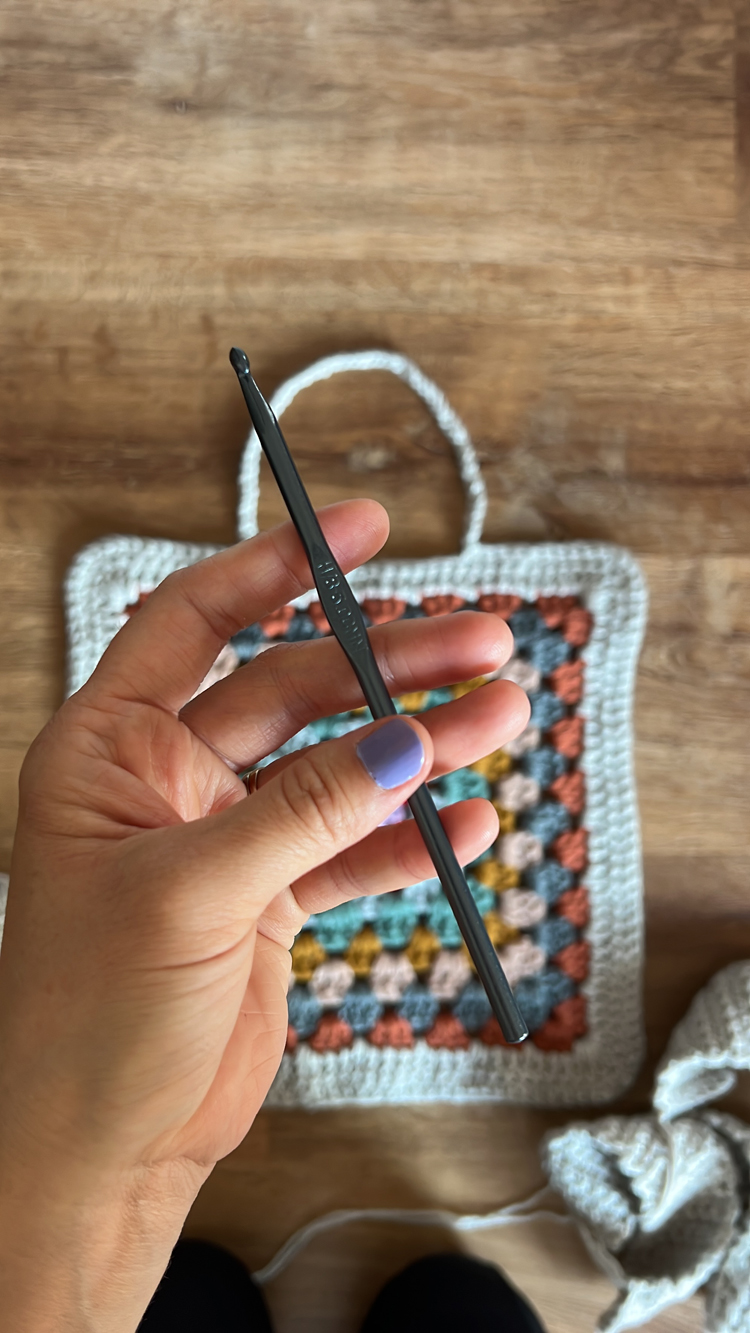
- 9.00 and 5.00 mm crochet hooks
- Scissors, yarn needle
- Optional: Small scale

MATERIAL NOTES
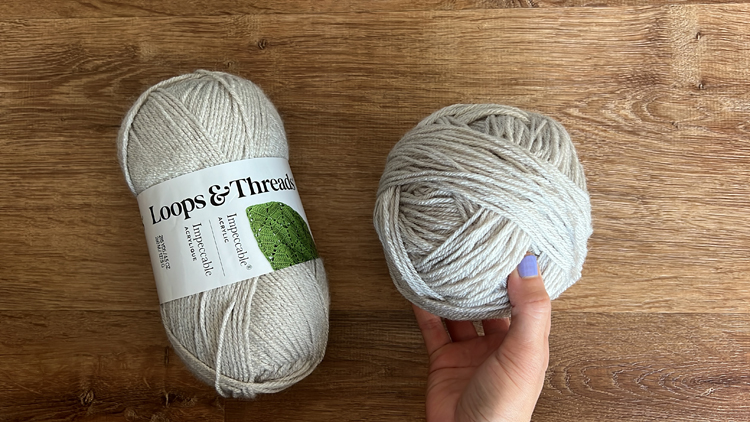
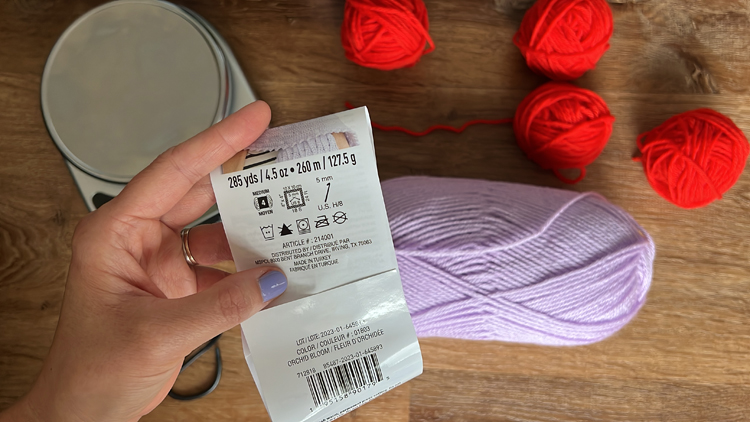
*I mostly used Impeccable yarn by Loops and Thread from Michaels which come in 285 yard skeins. One skein of each color for the granny square portion was more than enough. For the main color, which makes up the majority of the bag) I used about 215 yards of each of the four skeins.
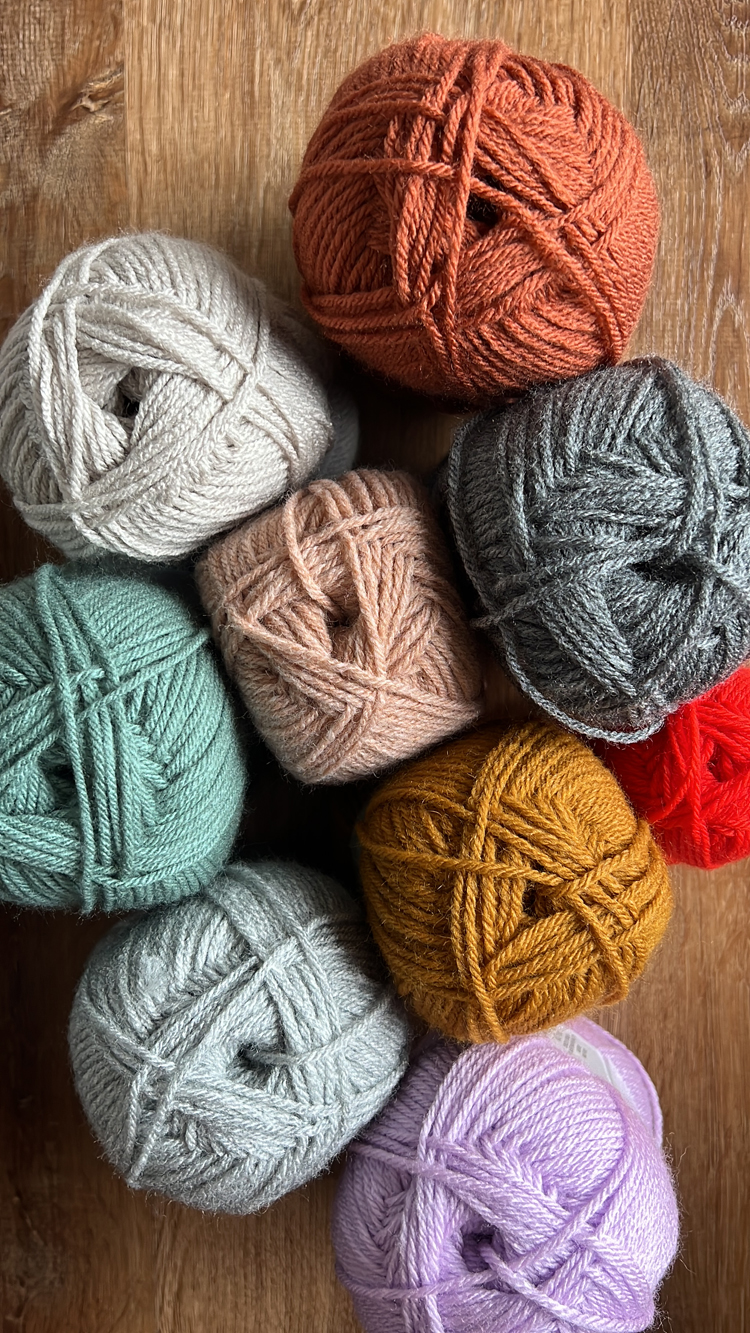
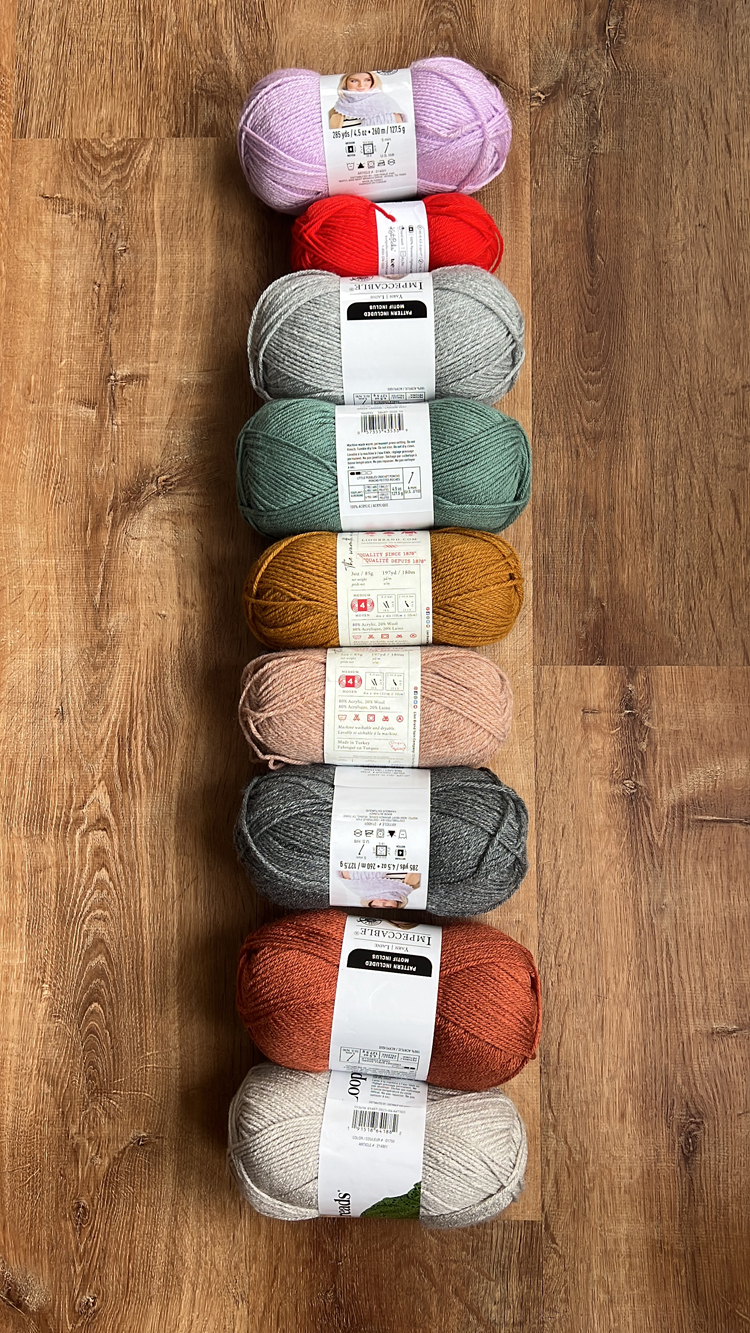
If you want to use yarn from your stash, I recommend using it only for a few accent colors and have the bulk of the bag be made up of cheap acrylic yarn, especially the main color of which you will need about 860 yards. You may have to play a little yarn chicken to figure out how much you’ll need for the granny square colors but it if helps, I used a total of about 90 yards of yarn on the outer (8th) round of one of the granny squares (including all four strands).
ABBREVIATIONS
Note: This pattern is written in US terms.
- ch = chain
- sl st = slip stitch
- sc = single crochet
- dc = double crochet
GAUGE & MEASUREMENTS
3 x 3 inches (tote side/bottom strip) = 7 sc x 8 rows
Center of the granny square = 2 3/8 inches squared = 4 clusters of 3 dc worked into a chained ring
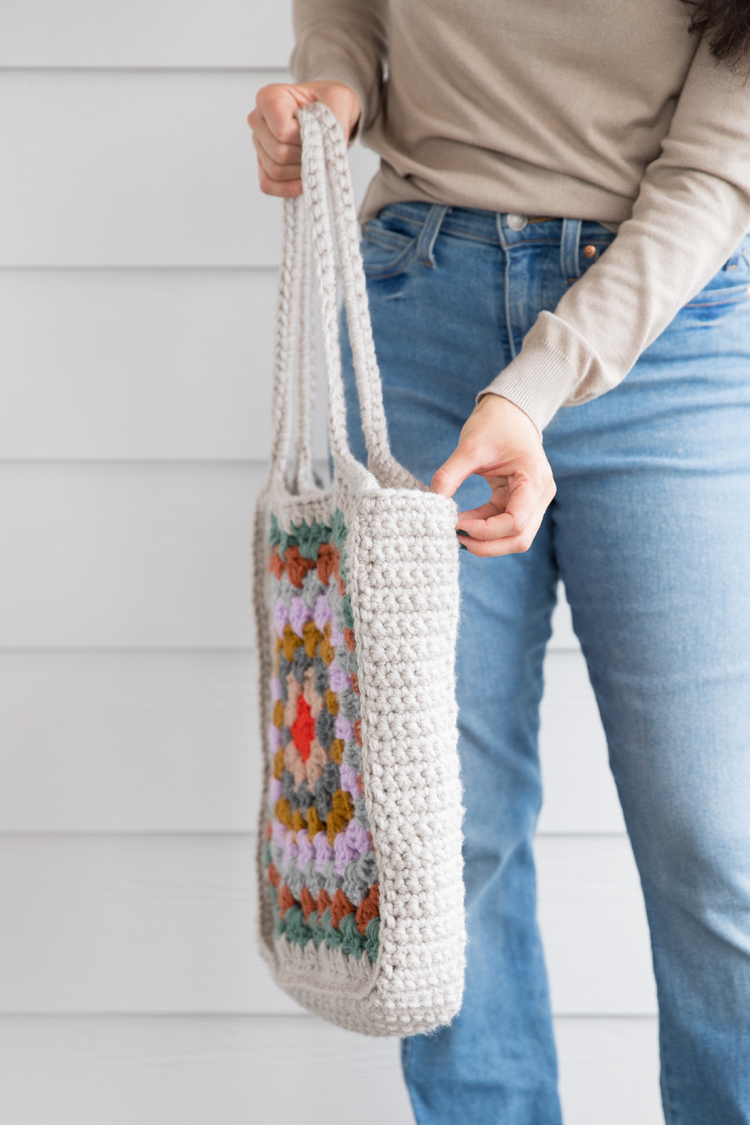
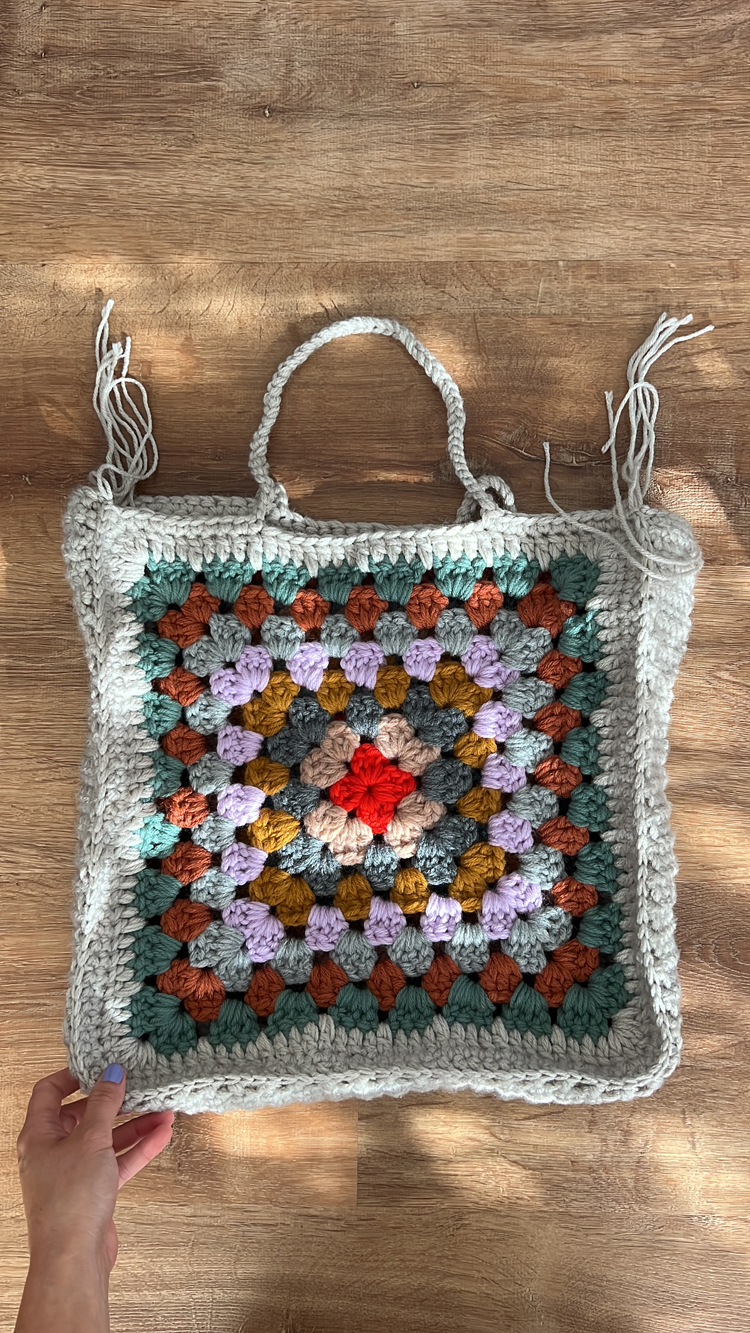
The finished size of the bag is about 15.5 inches tall, 15 inches from side to side, and 3 inches wide. The handles add about 10 inches more to the height.
The granny squares are about 13.5 inches squared before adding the main color. If you’re noticing that I am having a hard time gauge the sizing for this project by now, you would be correct. Ha! As long as your two granny squares are the same size as each other… no one will be wearing this bag on their bodies, so sizing can be a little bit flexible.
YARN PREP
Divide and roll each color of yarn into four equal balls. A small scale is very helpful if you want to divide it as close to evenly as possible. If you don’t have one, eyeballing the size of each ball should be fine if you purchased more yarn than you think you will actually use. For the main color, simply roll the four skeins into their own individual balls.
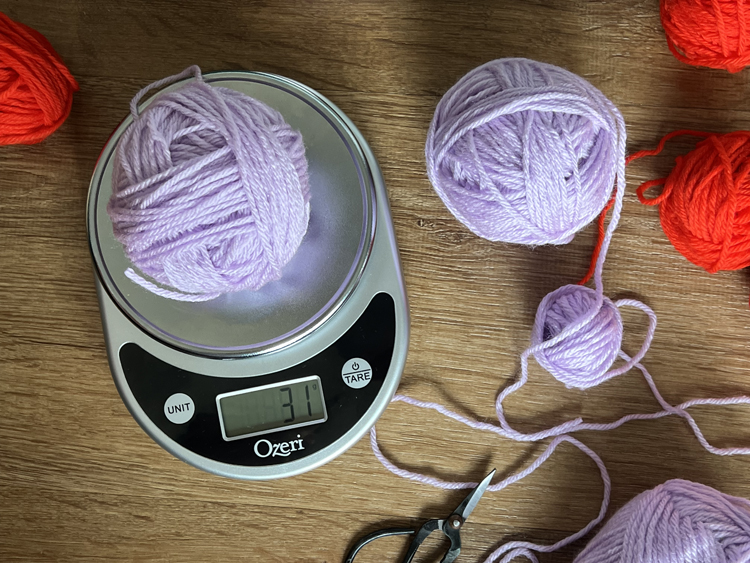
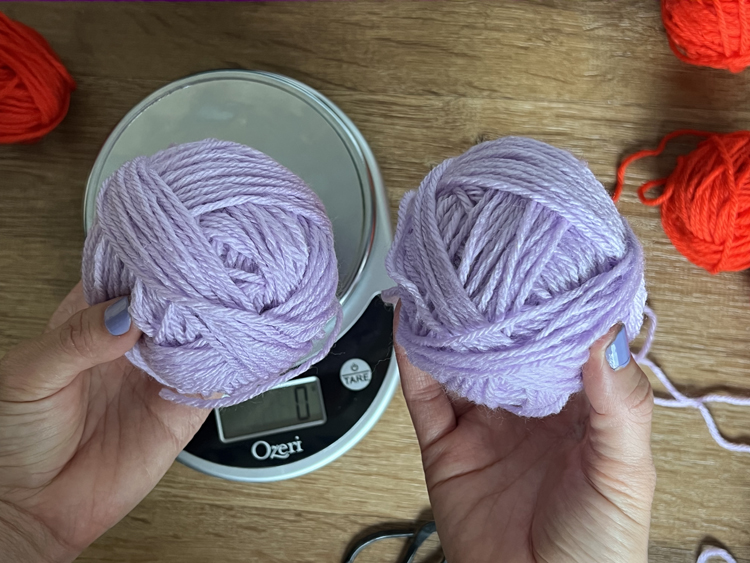
You may be tempted to not roll all your yarn in to a ball (a cake works too!) but I promise you that the time you take for this step will save you a lot of headache later. The balls allow the four strands to be combined into one strand smoothly and they help minimize tangles.
VIDEO TUTORIAL
If the video has not already popped to the top or side of your screen, then see below for a video tutorial. Note: It will play after an initial ad.
The video briefly reviews how to slip stitch, single crochet, and double crochet. If you need a more detailed refresher on these stitches, check out my Crochet Basics Series.
PATTERN & TUTORIAL
GRANNY SQUARES (make 2)
Use 9.00 mm hook
Note: These granny squares are worked in the “round” because there are no rows and no turning, but don’t worry, they will very much turn out square shaped.
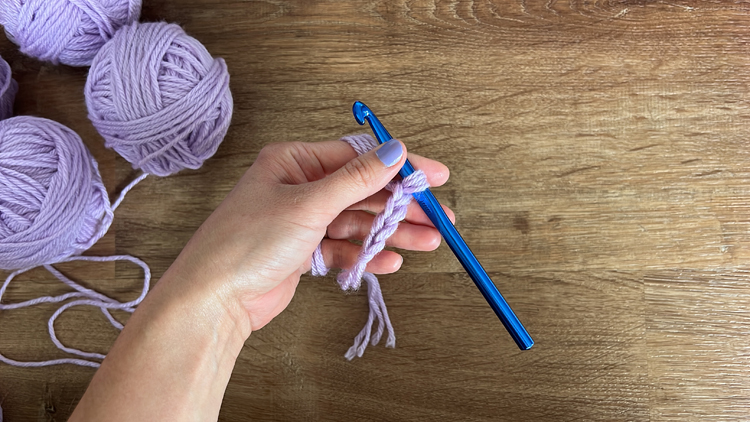
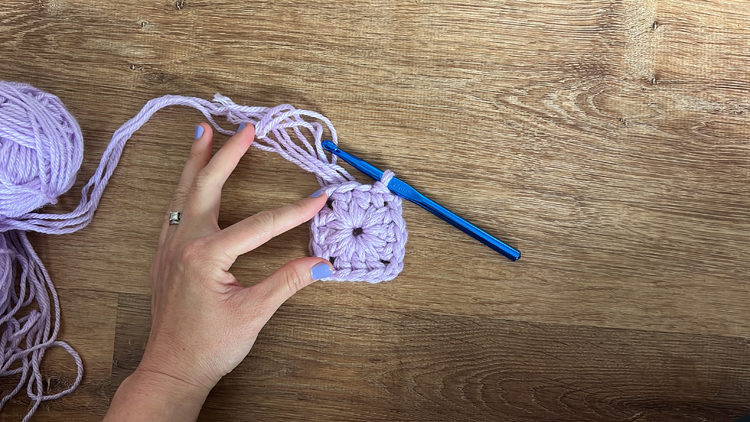
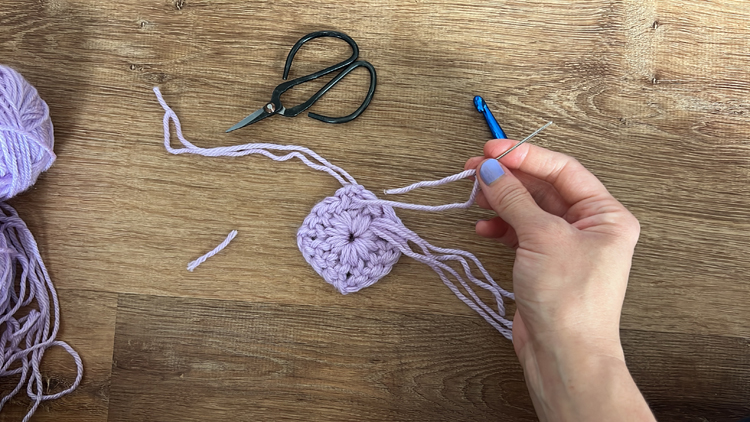
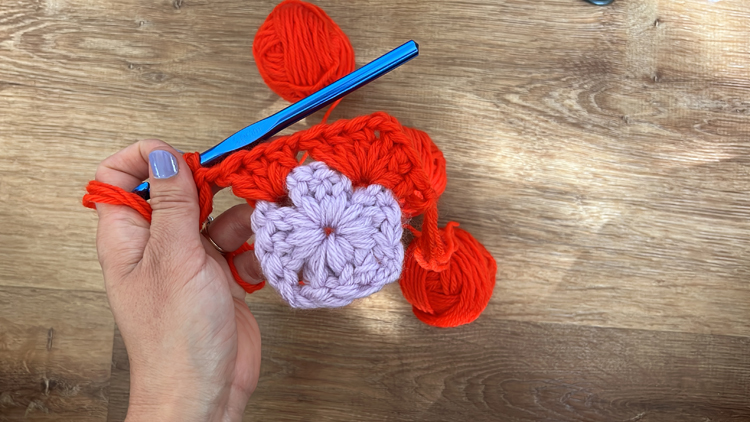
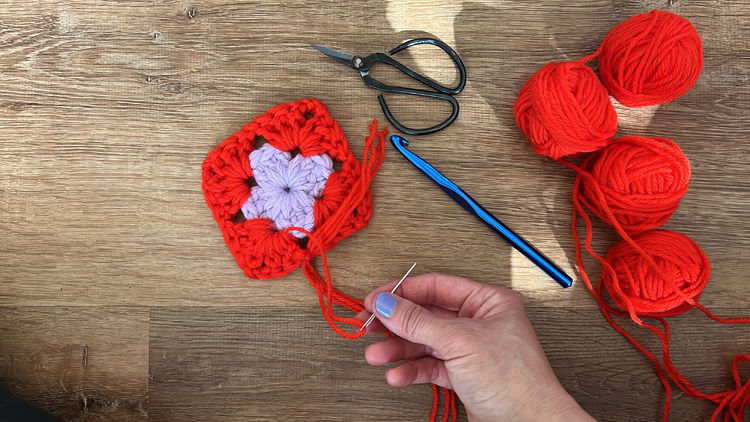
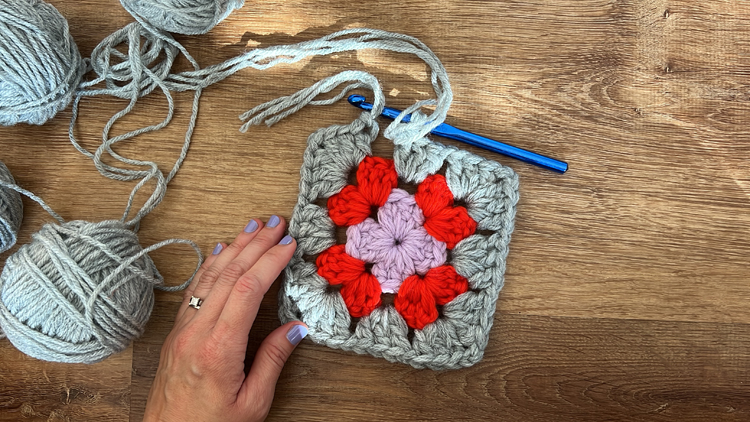
Starting with your first color, gather the four strands and pull out a couple yards of slack with the strands combined. Tie a slip knot.
Chain 4. Sl st into the first ch to form a circle. You will work all Round 1 stitches into this circle.
Round 1: Work a *standing sc (insert your hook into the circle, yarn over, pull through, yarn over and pull through the 2 loops on your hook), then ch 1. This sc + ch will count as your first dc. Work 2 more dc. Ch 2. Work 3 dc. Ch 2. Work 3 dc. Ch 2. Work 3 dc. Ch 2. Slip stitch to the top of the sc+ch from the beginning. Leaving a 3 inch tail, cut and tie off the ends. Weave in all the tails (there are 8 because of the start and ending tails with four strands each).
*A standing sc means you go right into working a sc without working chains beforehand.
TIP: I weave some of the tails into the beginning and end stitches of the round to help make the granny square secure.
Round 2: Tie a slip knot with the new color. Choose a different corner than the one you ended on, and work a *standing dc into the new corner. Work 2 more dc. ch 2, work 3 dc. Ch 1. Work 3 dc, ch 2, 3 dc. Ch 1. Work 3 dc, ch 2, 3 dc. Ch 1. Work 3 dc, ch 2, 3 dc. DO NOT CHAIN 1. The standing dc has a little extra on the top/side that will count as a ch 1. Slip stitch to the top of the standing dc from the beginning. Leaving a 3 inch tail, cut and tie off the ends, and weave them in.
*Again, just like the standing sc, instead of starting the round with chains (which is traditionally how it’s done), we are working a dc right from the start. This creates a cleaner more even look to your granny square.
To work a standing dc = After tying the slip knot, yarn over before inserting the hook into the corner space and hold the yarn in place with your hook hand, insert the hook into the corner space, yarn over and pull through so that you have three loops on your hook. Hold the base of the slip knot on your hook with your non-hook hand to keep it from unraveling. Then complete the dc stitch. The video demonstrates this stitch, if you need a visual.
Round 3:
- Tie a slip knot in the new color. Choose a new corner. Work 2 more dc, ch 2, 3 dc. Ch 1. Work 3 dc in the chain space. Ch 1.
- Work 3 dc, ch 2, 3 dc. Ch 1. Work 3 dc. Ch 1.
- Work 3 dc, ch 2, 3 dc. Ch 1.
- Work 3 dc. Ch 1. Work 3 dc, 2 ch, 3 dc. Ch 1. Work 3 dc. Slip stitch to the standing dc from the beginning. Leaving a 3 inch tail, cut and tie off the ends, and weave them in.
Note: At this point, you can decide to attach the new color in a chain space on the side, rather than a corner. If you do that, just follow the formula of working 3 dc into a chain space, 1 ch over a previous round cluster of 3 dc, and working each corner space with 3 dc, ch 2, 3 dc.
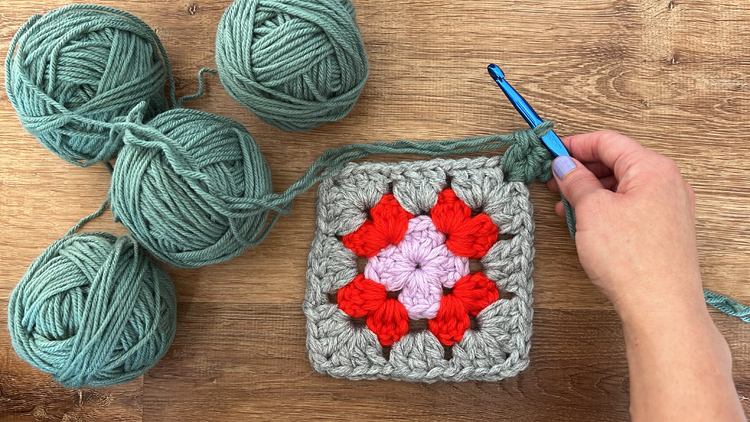
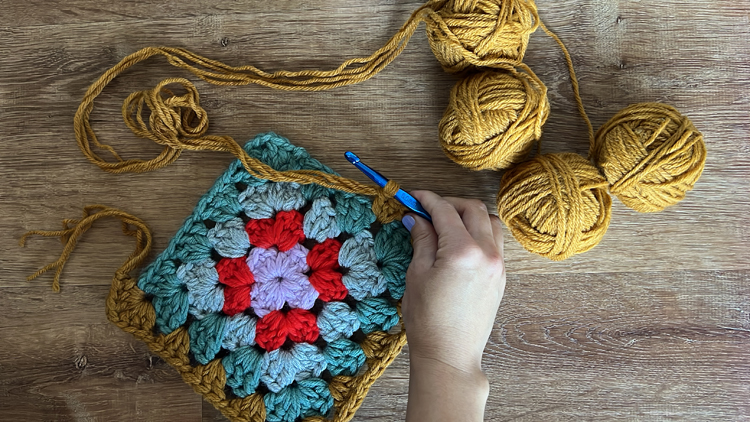
Round 4:
- Tie a slip knot in the new color. Choose a new corner. Work 2 more dc, ch 2, 3 dc. Ch 1. Work 3 dc in the chain space. Ch 1. Work 3 dc. Ch 1.
- Work 3 dc, ch 2, 3 dc. Ch 1. Work 3 dc. Ch 1. Work 3 dc. Ch 1.
- Work 3 dc, ch 2, 3 dc. Ch 1. Work 3 dc. Ch 1. Work 3 dc. Ch 1.
- Work 3 dc, 2 ch, 3 dc. Ch 1. Work 3 dc. Ch 1. Work 3 dc. Slip stitch to the standing dc from the beginning. Leaving a 3 inch tail, cut and tie off the ends, and weave them in.
Round 5:
- Tie a slip knot in the new color. Choose a new corner. Work 2 more dc, ch 2, 3 dc. Ch 1. Work 3 dc in the chain space. Ch 1. Work 3 dc. Ch 1. Work 3 dc. Ch 1.
- Work 3 dc, ch 2, 3 dc. Ch 1. Work 3 dc. Ch 1. Work 3 dc. Ch 1. Work 3 dc. Ch 1.
- Work 3 dc, ch 2, 3 dc. Ch 1. Work 3 dc. Ch 1. Work 3 dc. Ch 1. Work 3 dc. Ch 1.
- Work 3 dc, 2 ch, 3 dc. Ch 1. Work 3 dc. Ch 1. Work 3 dc. Ch 1. Work 3 dc. Slip stitch to the standing dc from the beginning. Leaving a 3 inch tail, cut and tie off the ends, and weave them in.
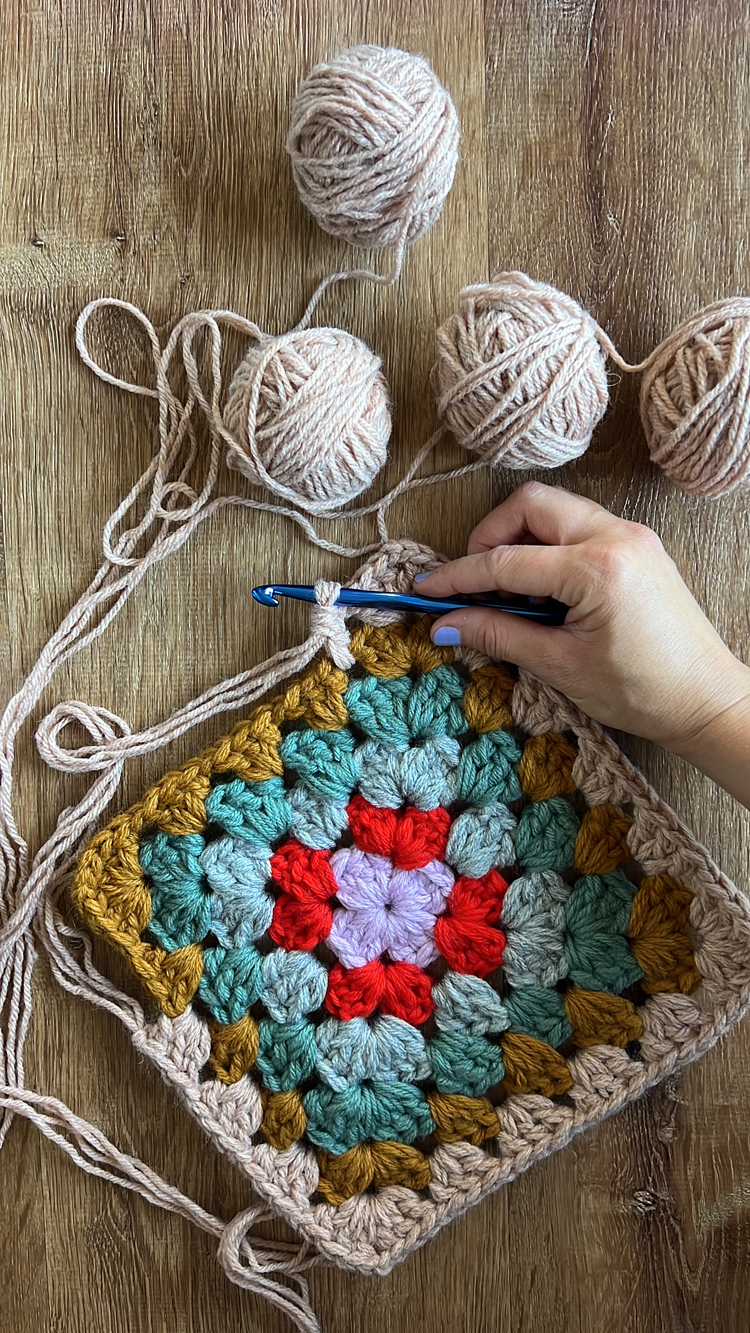
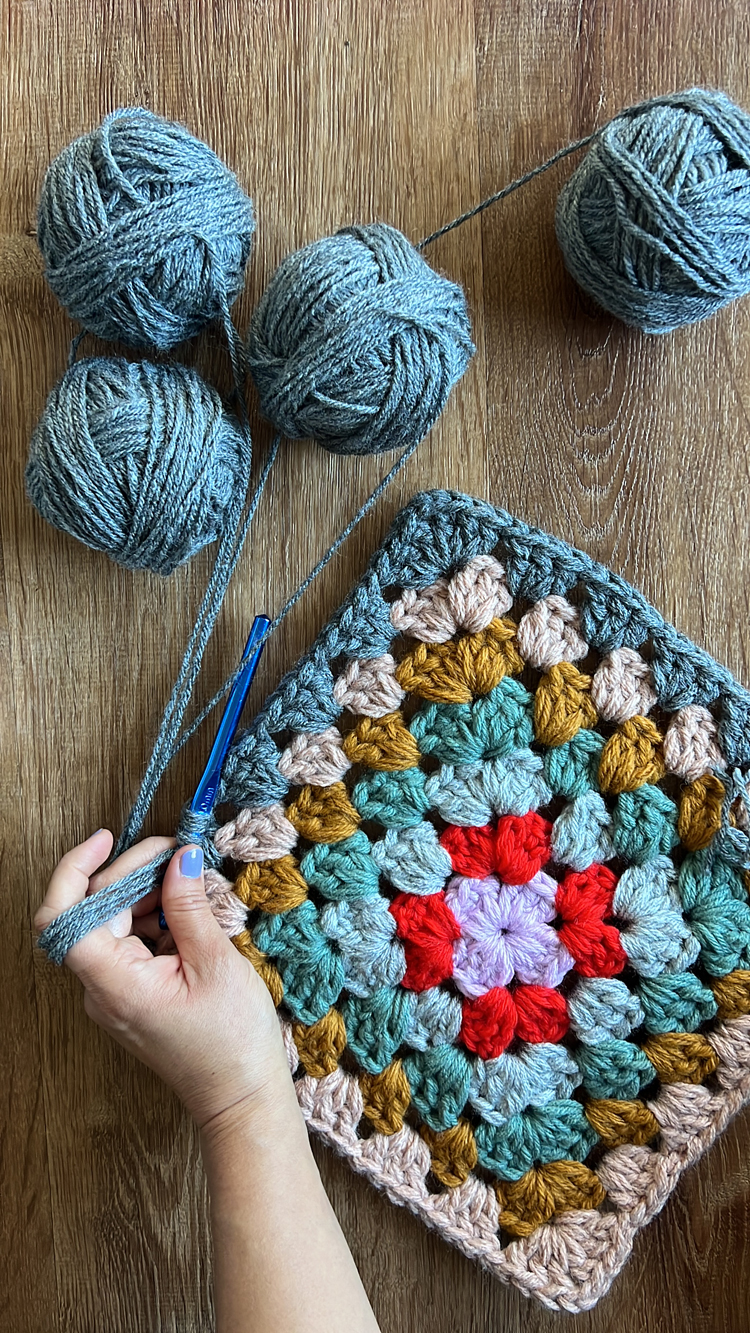
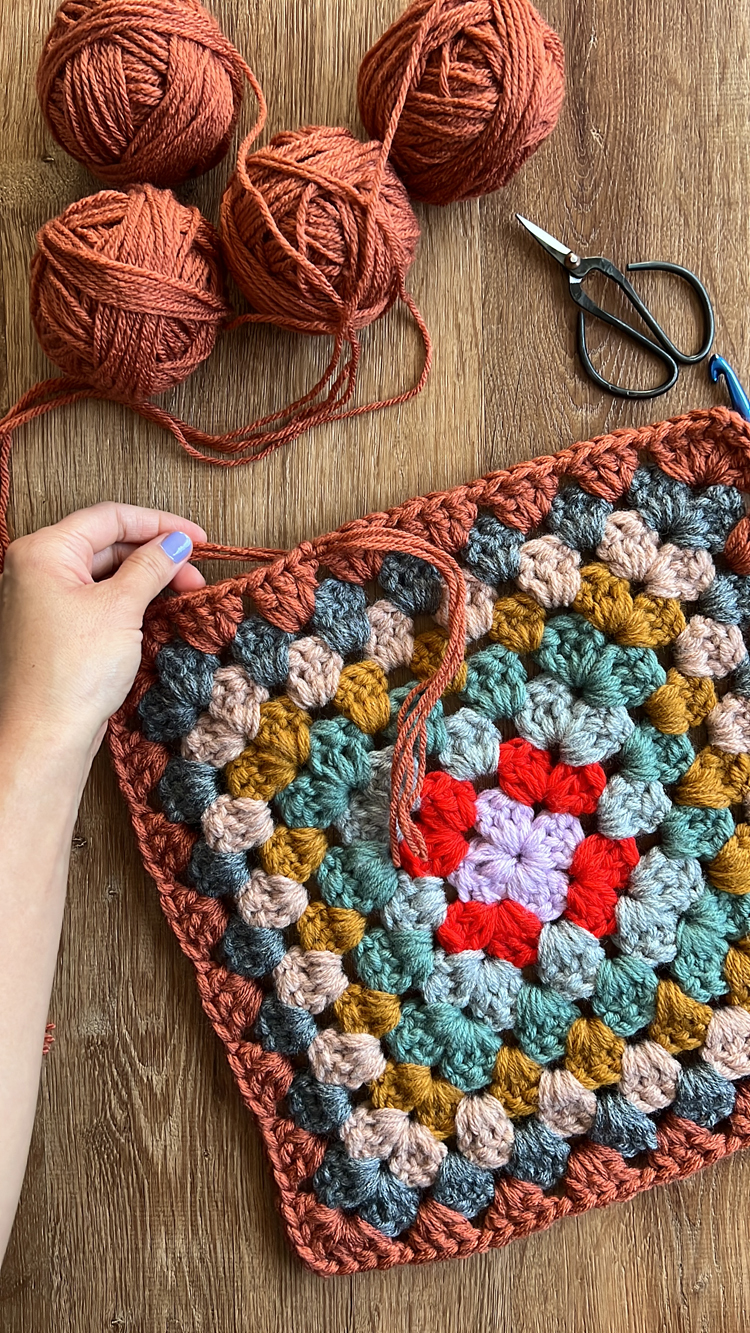
Round 6:
- Tie a slip knot in the new color. Choose a new corner. Work 2 more dc, ch 2, 3 dc. Ch 1. Work 3 dc in the chain space. Ch 1. Work 3 dc. Ch 1. Work 3 dc. Ch 1. Work 3 dc. Ch 1.
- Work 3 dc, ch 2, 3 dc. Ch 1. Work 3 dc. Ch 1. Work 3 dc. Ch 1. Work 3 dc. Ch 1. Work 3 dc. Ch 1.
- Work 3 dc, ch 2, 3 dc. Ch 1. Work 3 dc. Ch 1. Work 3 dc. Ch 1. Work 3 dc. Ch 1. Work 3 dc. Ch 1.
- Work 3 dc, 2 ch, 3 dc. Ch 1. Work 3 dc. Ch 1. Work 3 dc. Ch 1. Work 3 dc. Ch 1. Work 3 dc. Slip stitch to the standing dc from the beginning. Leaving a 3 inch tail, cut and tie off the ends, and weave them in.
Round 7:
- Tie a slip knot in the new color. Choose a new corner. Work 2 more dc, ch 2, 3 dc. Ch 1. Work 3 dc in the chain space. Ch 1. Work 3 dc. Ch 1. Work 3 dc. Ch 1. Work 3 dc. Ch 1. Work 3 dc. Ch 1.
- Work 3 dc, ch 2, 3 dc. Ch 1. Work 3 dc. Ch 1. Work 3 dc. Ch 1. Work 3 dc. Ch 1. Work 3 dc. Ch 1. Work 3 dc. Ch 1.
- Work 3 dc, ch 2, 3 dc. Ch 1. Work 3 dc. Ch 1. Work 3 dc. Ch 1. Work 3 dc. Ch 1. Work 3 dc. Ch 1. Work 3 dc. Ch 1.
- Work 3 dc, 2 ch, 3 dc. Ch 1. Work 3 dc. Ch 1. Work 3 dc. Ch 1. Work 3 dc. Ch 1. Work 3 dc. Ch 1. Work 3 dc. Slip stitch to the standing dc from the beginning. Leaving a 3 inch tail, cut and tie off the ends, and weave them in.
Round 8:
- Tie a slip knot in the new color. Choose a new corner. Work 2 more dc, ch 2, 3 dc. Ch 1. Work 3 dc in the chain space. Ch 1. Work 3 dc. Ch 1. Work 3 dc. Ch 1. Work 3 dc. Ch 1. Work 3 dc. Ch 1. Work 3 dc. Ch 1.
- Work 3 dc, ch 2, 3 dc. Ch 1. Work 3 dc. Ch 1. Work 3 dc. Ch 1. Work 3 dc. Ch 1. Work 3 dc. Ch 1. Work 3 dc. Ch 1. Work 3 dc. Ch 1.
- Work 3 dc, ch 2, 3 dc. Ch 1. Work 3 dc. Ch 1. Work 3 dc. Ch 1. Work 3 dc. Ch 1. Work 3 dc. Ch 1. Work 3 dc. Ch 1. Work 3 dc. Ch 1.
- Work 3 dc, 2 ch, 3 dc. Ch 1. Work 3 dc. Ch 1. Work 3 dc. Ch 1. Work 3 dc. Ch 1. Work 3 dc. Ch 1. Work 3 dc. Ch 1. Work 3 dc. Slip stitch to the standing dc from the beginning. Leaving a 3 inch tail, cut and tie off the ends, and weave them in.
Round 9: Tie a slip knot in the new color. Work a standing dc into any stitch or chain space. Work a dc into each stitch and chain space. When you get to each corner space, work 5 dc into the same space. Repeat for all corners and continue dc into each stitch until you come back to the standing dc from the beginning. Slip stitch to standing dc.
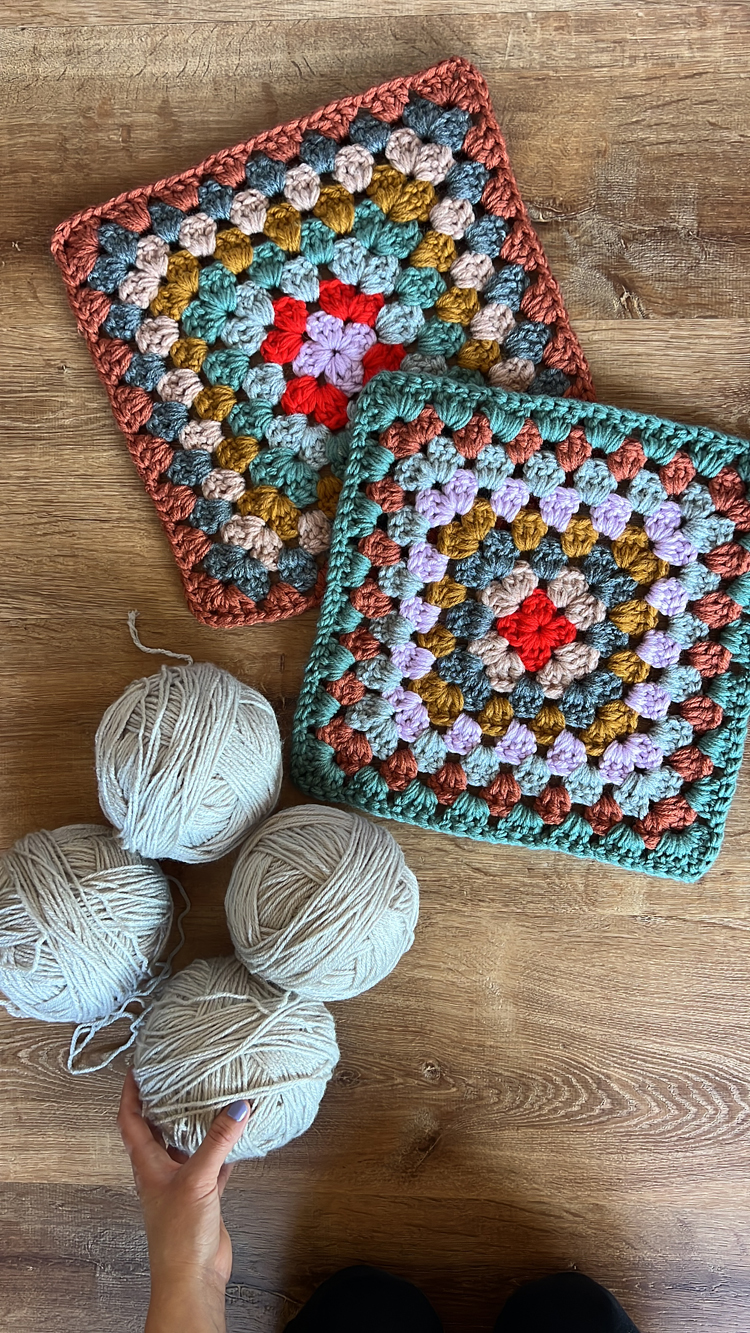
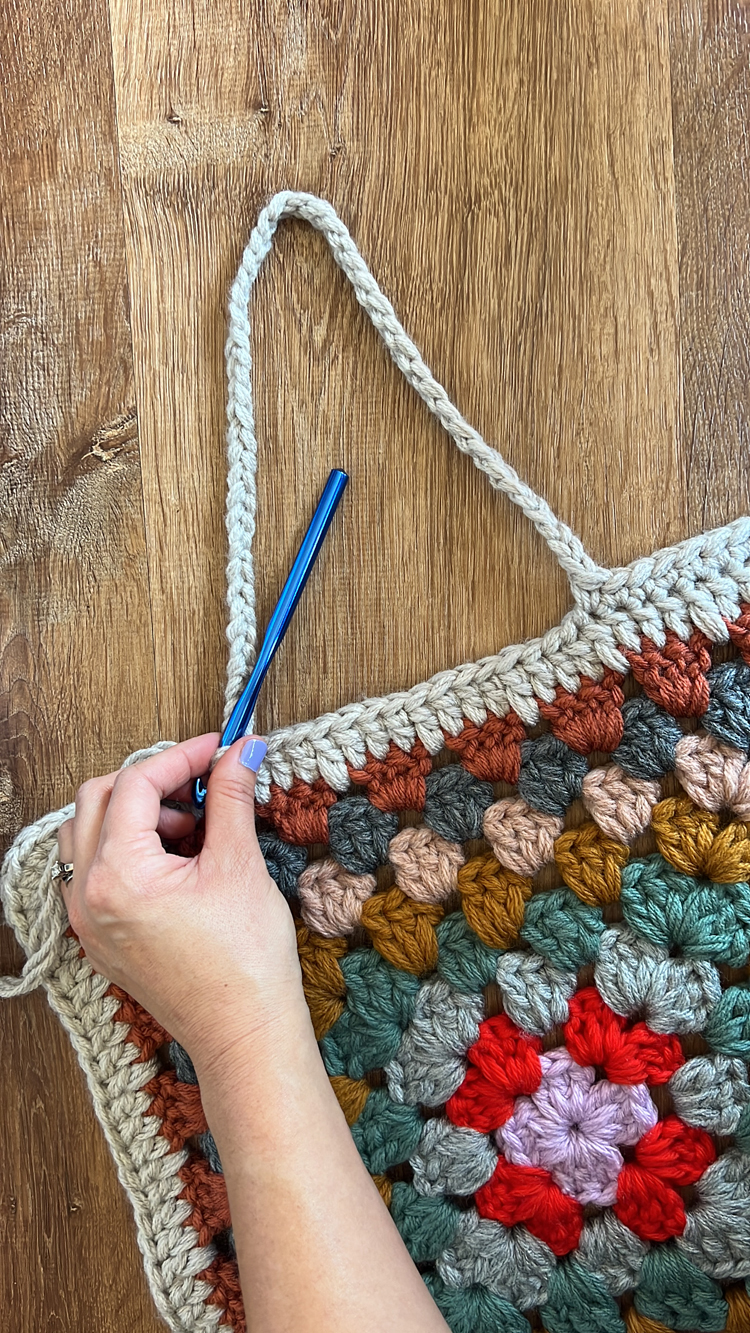
Round 10: Work a sc right into the next stitch (I omitted the starting ch 1 to reduce gaps and holes). Sc into each stitch. When you get the 5 dc corner stitches, work 1 sc in the first, 2 sc into the same stitch for dc stitches 2, 3, and 4. Work 1 sc into the 5th/last dc corner stitch. After the first completed corner, work 8 sc, then chain away from the granny square for 50 chains (this will form the handle). Count 8 stitches inward from the next corner and attach the chain to this stitch with a sc. Sc to the next corner and complete it as you did the previous one. Continue sc in each stitch and completing each corner like the others until you come back around the first sc. Sl st to the first sc. Leaving a 3 inch tail, cut and tie off the ends, and weave them in.
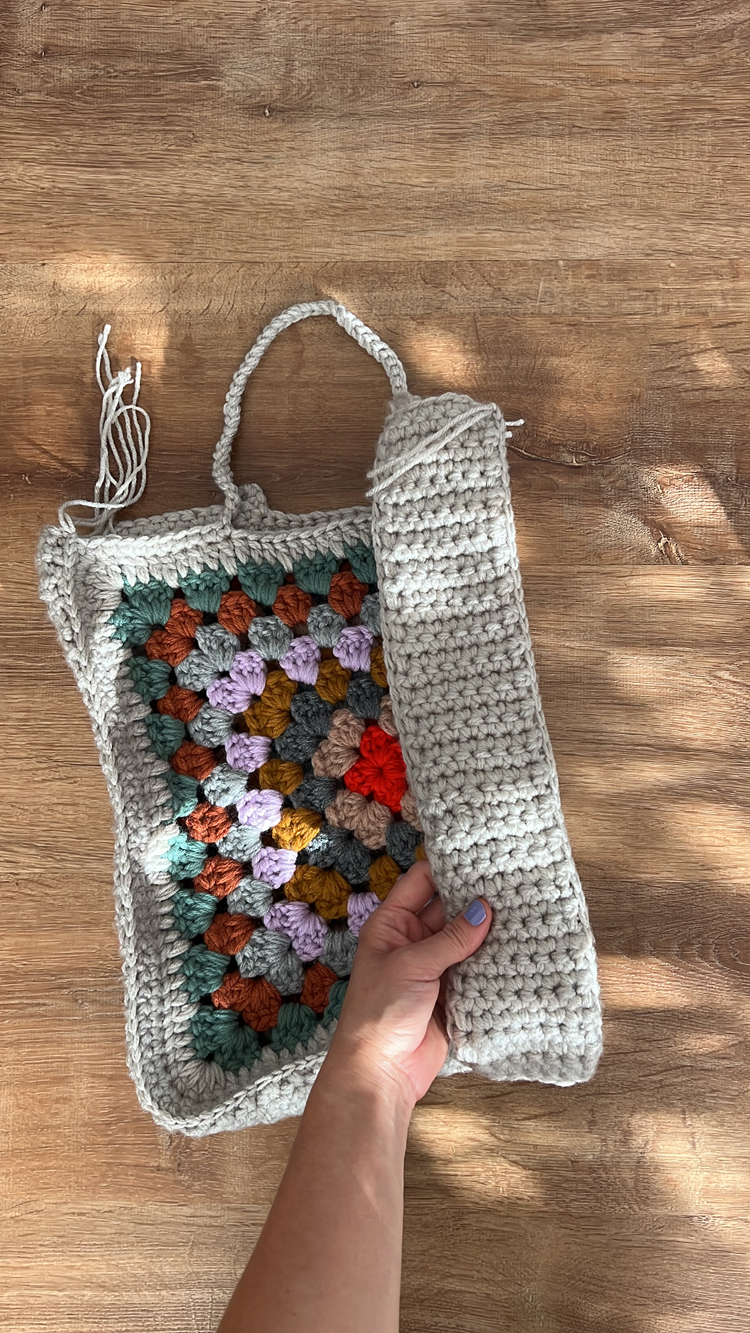
SIDE & BOTTOM STRIP (make one)
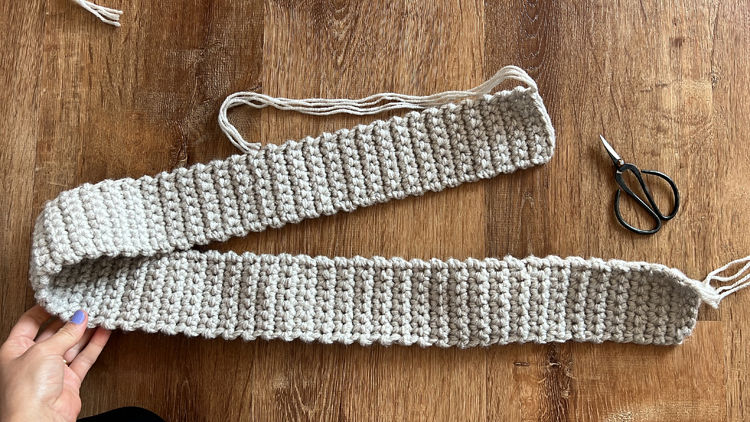
Use 9.00 mm hook and four strands of main color yarn.
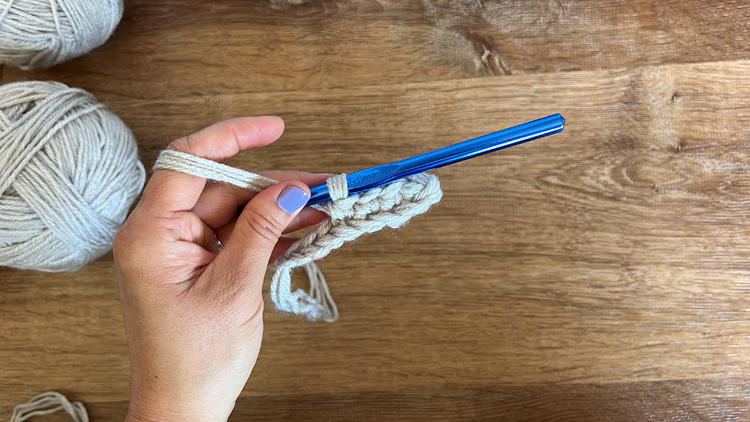
Row 1: Ch 8. Turn, sc into the 2nd ch from the hook. (Total stitch count = 7, the skipped chain doesn’t count)
Row 2: Ch 1, turn, sc into each of the 7 stitches. (7, ch 1 doesn’t count)
Row 3: Ch 1, turn, sc into each. (7)
Rows 4-119: Repeat Row 3.
ASSEMBLE TOTE
Use 5.00 mm hook and only two strands of main color yarn.
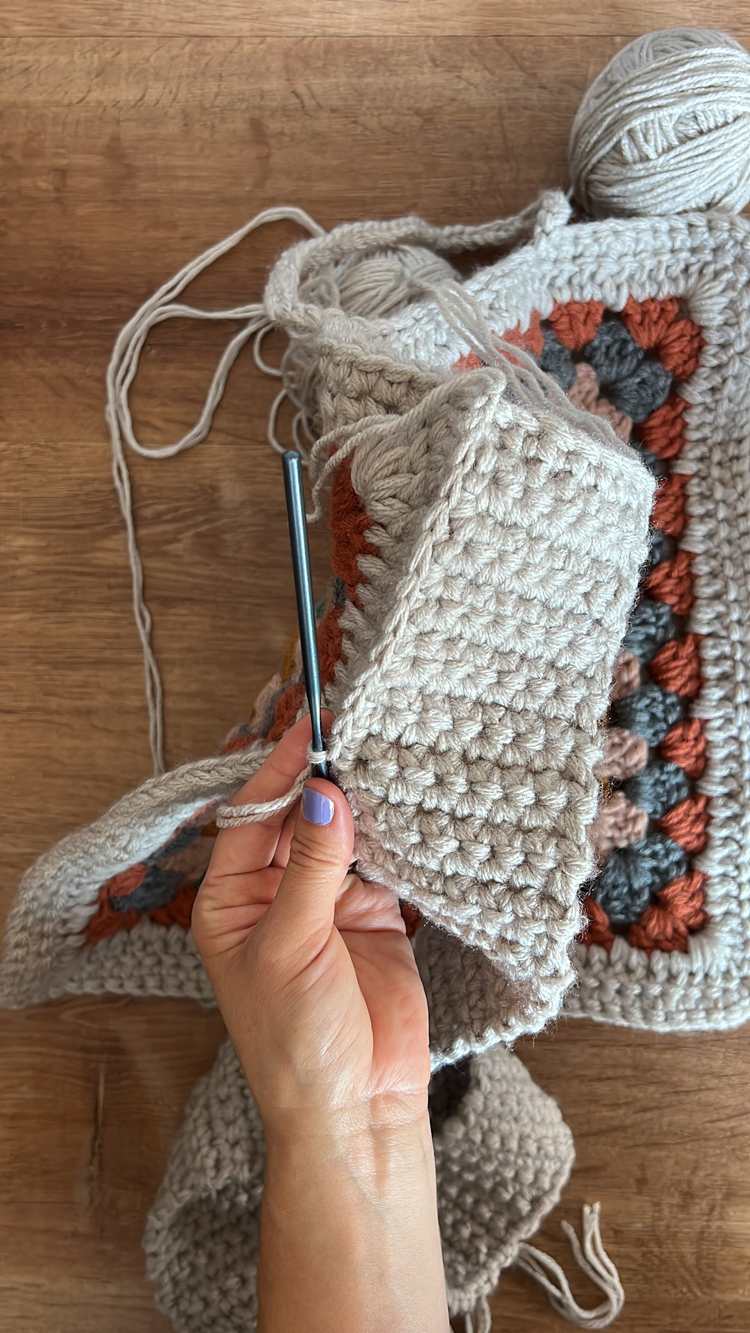
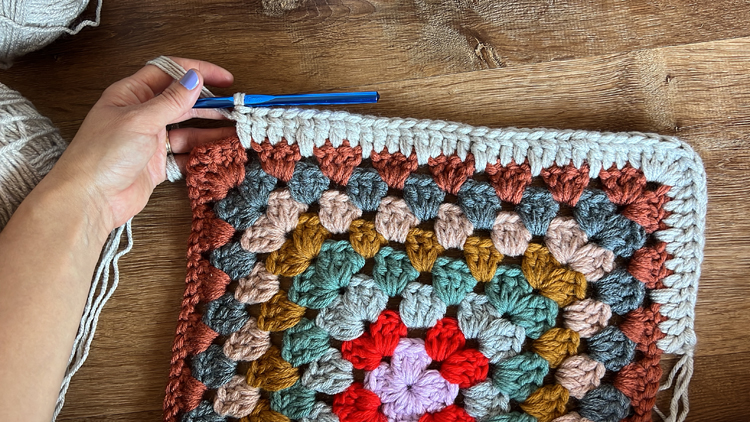
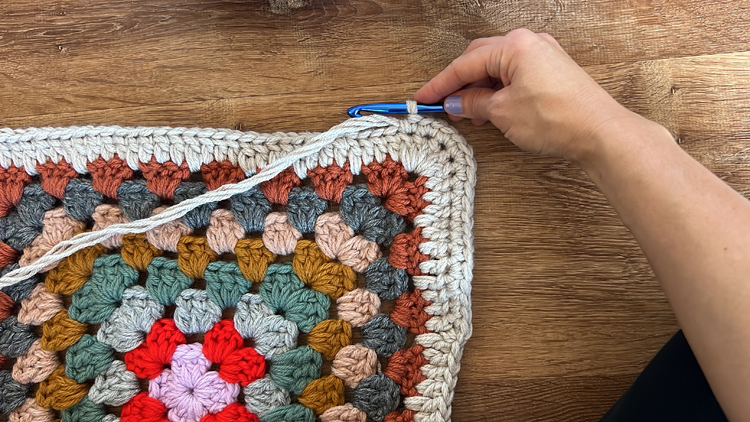
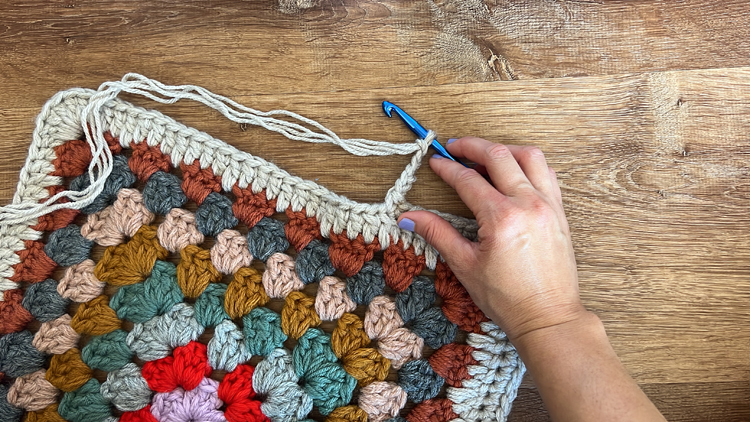
Align the Side/Bottom Strip up with the a top corner of a granny square piece (by the handle). The corner has a group of 3 2 sc worked into the same stitch. Insert your hook into the top sc of the middle of these three and into one corner of the side strip.
Matching each row of the side strip with each stitch for the granny square, seam the strip to the granny square with sc stitches. Leaving a 3 inch tail, cut and tie off the ends, and weave them in.
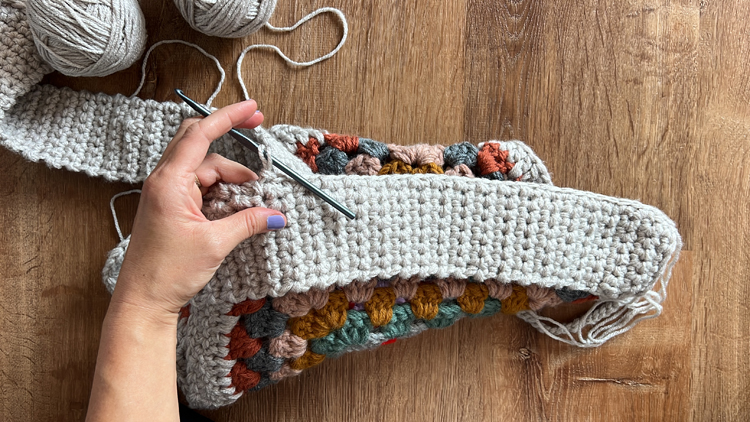
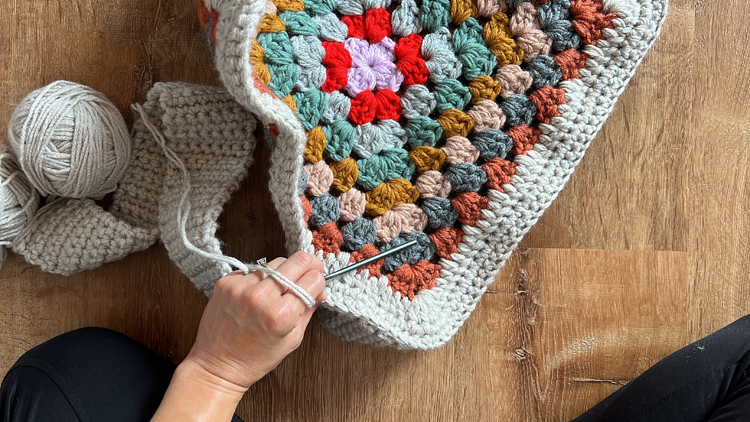
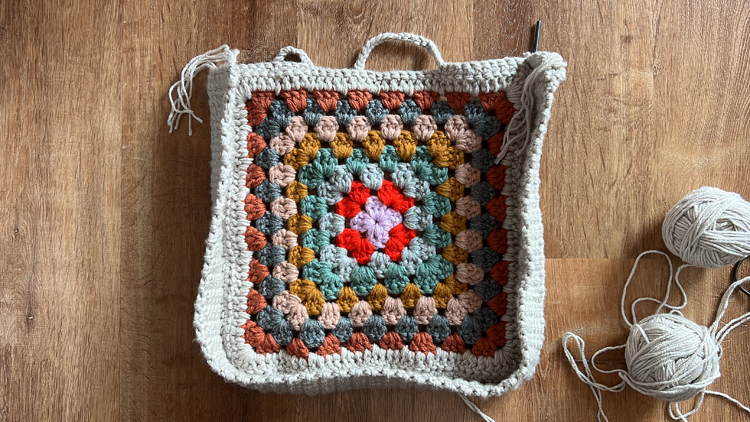
Seam the other granny square to the side strip in similar fashion.
FINISH HANDLE
Use 9.00 mm hook and four strands of main color yarn.
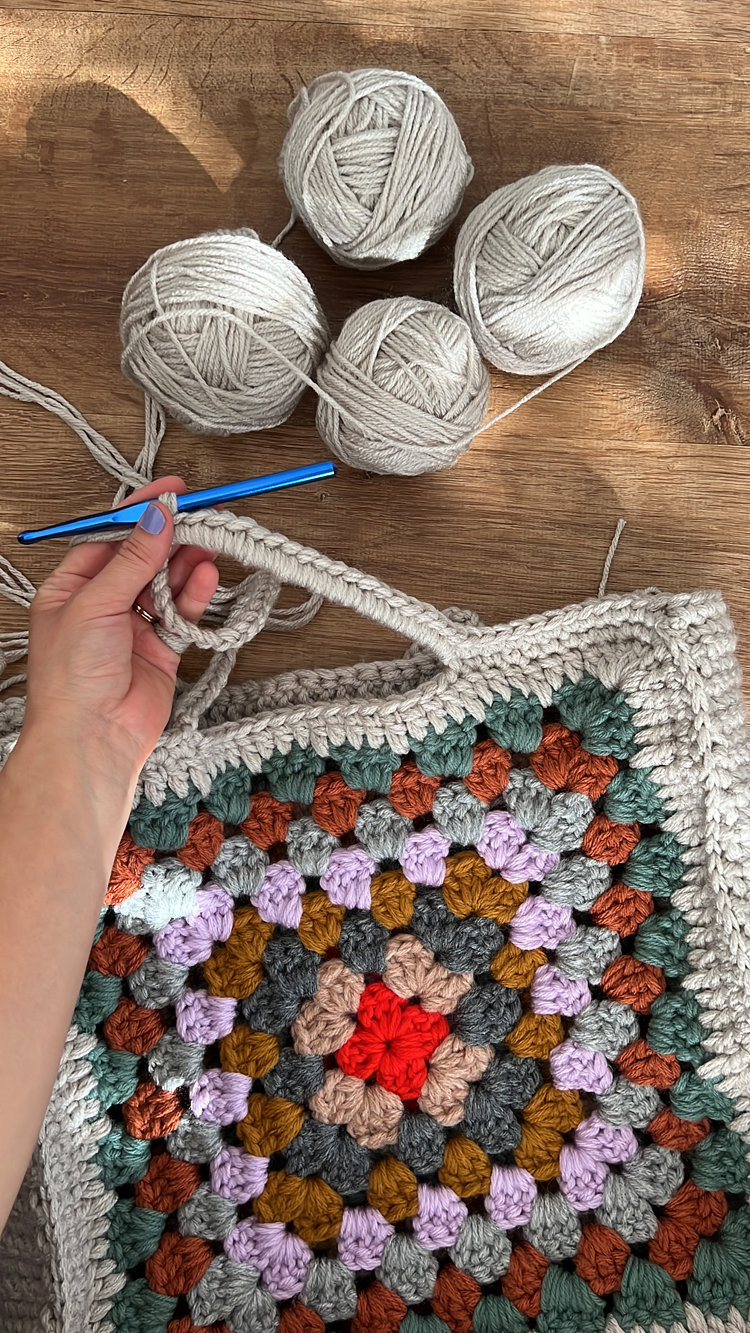
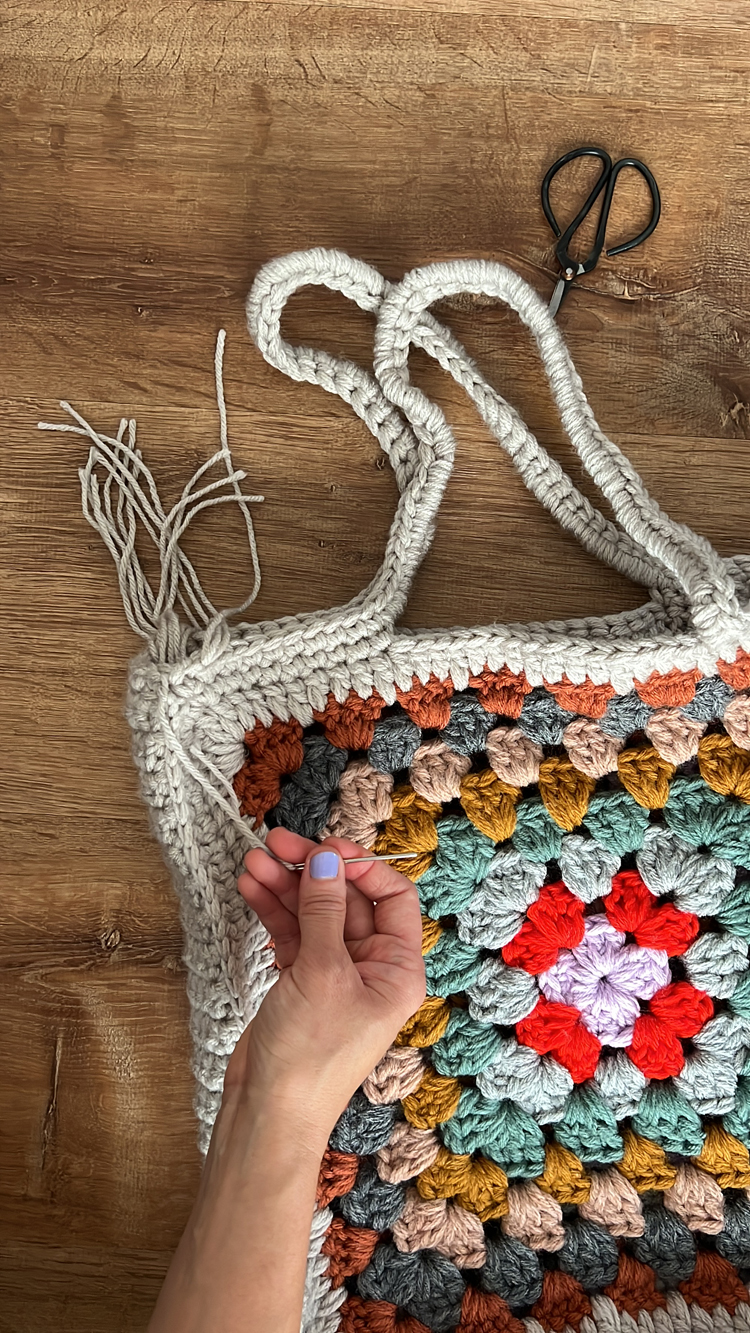
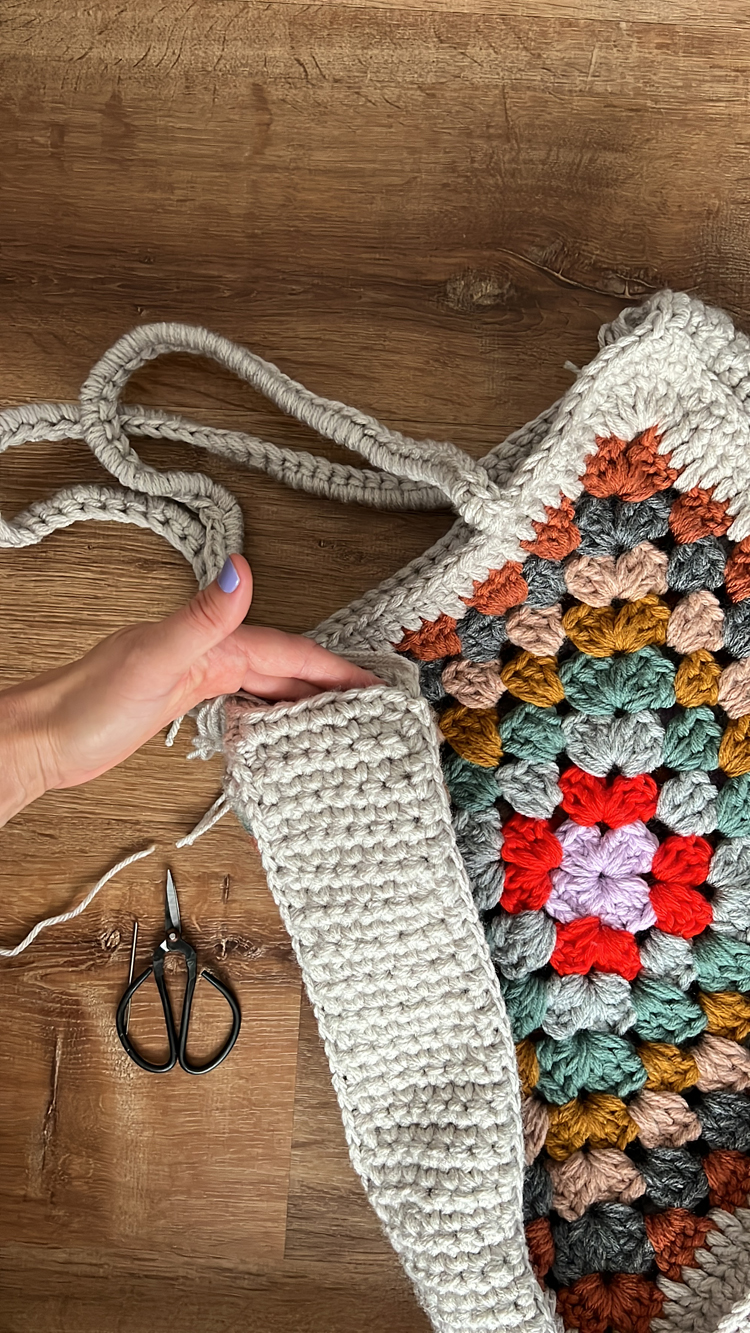
Tie a slip knot and work a sc into one corner at the top of the tote. Sc around the top of the tote, working over corners to smooth them out. When you get to a point where the handle diverges from the bag, work a sc at the base of the handle, then work 50 sc around the chained handle. Spread the stitches out until it fills the handle (it will stretch and bunch, so it needs to be pulled and shaped), then sc into the base of the other side of the handle. Continue sc around the top of the bag and repeat for the other handle. When you get back to where you started, slip stitch to the first sc in the round. Leaving a 3 inch tail, cut and tie off the ends, and weave them in.
After so much dang weaving in, that last woven in end is the sweetest.
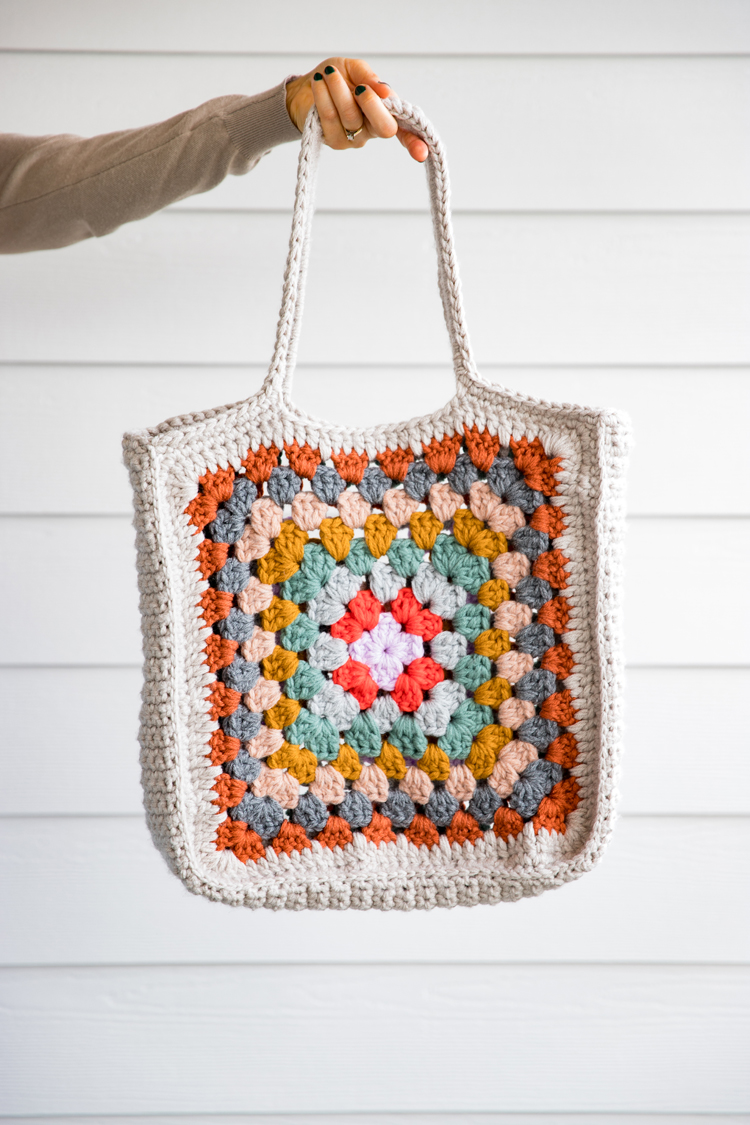
You did it!
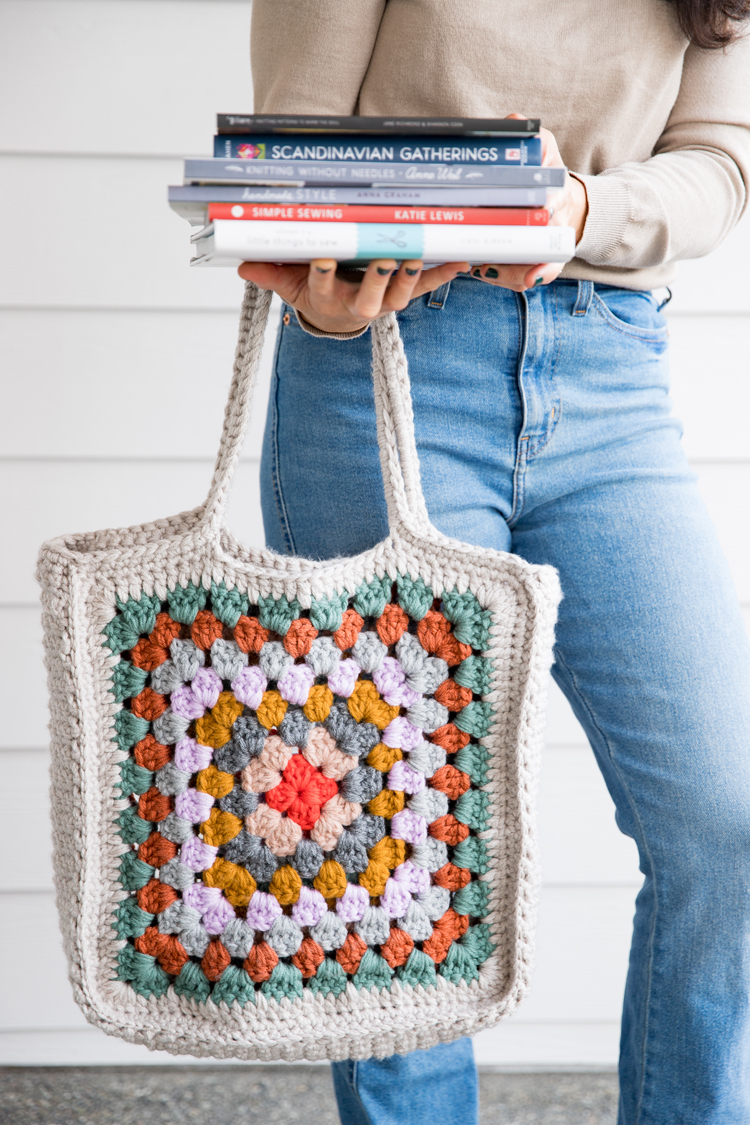
You have a fun, colorful, STURDY granny square tote.


This was a wonderful tutorial!! Made the bag with ease! Everyone is obsessed with it! Thank you so much! The video is a must have!!!
That makes me so happy to hear! Glad you enjoyed the pattern.
Super easy to follow and if anything was misunderstood, the video helped a ton! Such a fun bag and project and already have compliments. I want to make so many more.
I am so happy you enjoyed the pattern! Thank you for your kind comment.
Thank you for sharing this pattern. i am going to think about making this with some of my scrapyarn.Although I usually use cotton for my bags.
I would suggest lining this bag as well.To prevent stretching
Thanks again for sharing.It’s a beautiful bag
You are so welcome. You can line this bag if you want to, but by using four strands together it reduces the stretchiness to the point where you don’t need to line it. I didn’t line mine and I use it to carry heavy books without very much stretching at all.
What color did you use for the main color (the four skeins of white)? I am looking forward to making this.
Hi Sandy! I used the color “putty.” Have fun making one! 🙂
I would absolutely love to try this but I can work from a screen. Is there a printable version of this that I’m not seeing?
Hi Kerri. I am sorry that I don’t have a printable PDF version as of yet. I am working on getting more ad free PDF versions of my patterns listed in my shop. Now that I know you’re interested, I will add this to my priority list. It may be some time before I have it ready though. My apologies.
So just a question regarding round nine, it doesn’t matter where you start?
It doesn’t matter because you will seam the bag pieces together and then form the handles. You are completing each side separately, so where you start doesn’t matter as you form each of those sides. I hope I understood your question correctly. If not please let me know. You can direct message me on instagram (@deliacreates) and I can answer you much faster there.