I am so excited to be here today! I found Delia’s blog soon after I started mine and immediately became an avid reader. She just does the neatest projects, don’t you think? And I’m not sure anyone takes better self-portrait pictures than her. I know I always look ridiculous in mine. : )
Anyway, glad to be here to share a little Halloween project with you. I love decorating with sticks, much to my husband, MJ’s, chagrin. I have them in vases, I use them for other holiday trees and I want to use them in a bunch of other projects but MJ just rolls his eyes. He just doesn’t get it. Oh well. I think they are fantastic. Especially paired with paper roses.
- Sticks
- Box, tub, container
- Spray Paint
- Flower foam
- Paper
- Toothpicks
- Hot glue
1. Find sticks. I found mine on the ground in the park near our house. I loved the gnarly, nubbie-ness of them.
2. Spray the sticks. I used two different dark tones, black and a hammered metal. Now spraying sticks ranks right below watching paint dry on the fun scale because in addition to watching paint dry, you have to rotate and inspect each and every stick to make sure all sides are being coated. Alas, these are the afflictions of stick-lovers.
3. Spray the box. My base is a cheap find in an after-the-holidays sale.
First, I primed it using my favorite gray primer. Then I coated that with 2-3 thin, even coats of the hammered metal paint, not pictured.
4. To add some interest to the box, I used a paper cut-out as a stencil and some silver spray paint. After laying the stencil on the box, I sprayed a couple spurts of silver paint. Not too thick or opaque.
I continued this around the box.
5. When everything was good and dry 24 hours later, it was time to put it together. With a block of floral foam in the box, I started placing the sticks.  The curves and kinks really add to the eeriness.
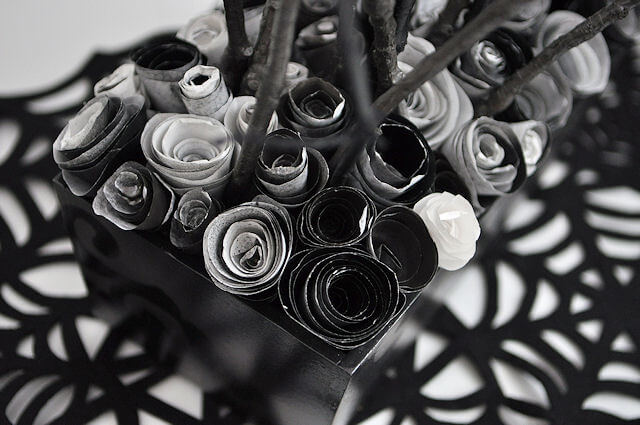
6. Now to hide the foam base. Using the paper I spray painted the sticks on, I made a whole slew of ghoulish-looking roses and it was just perfect. And so simple.
- Cut circles, any size. Bigger circles = bigger roses, smaller = smaller roses. I used both big and small ones. And the circles don’t need to be perfect.
- Cut a spiral within the circle.
- Start tightly rolling the spiral
- Continue until the whole thing is rolled up.
- Once it’s all rolled, work to loosen it a bit to make it look more rose like.
- Drop some hot glue at the bottom to keep things in place.
- Curl the center of the spiral under as the base.
- And you have yourself a paper rose.
Then I glued in a toothpick so I could stick them into the floral foam as well.
7. Cover the floral foam with paper roses.
8. Add a mini-bunting. And you have a ‘spook’-tacular centerpiece with a Little Monster pumpkin.
I have to say I’m totally loving this car art lap desk she just barely blogged about.
I had a travel desk like this as a kid, but definitely not as cute and not handmade! I’m adding this to my to make list.
Go check her out.


this is so cool! love it. and your blog looks so spiffy delia. 🙂
this is so cute! thank you for your ideas!
You are so CREATIVE! This is my first time taking a look at your blog and I love i repeat LOVE what you post!
Keep it up
It is so cute! I love this centerpiece! Thank you
Wow, Amazing… thanks for sharing that, it was very educational! 🙂
Seu blog é lindo demais!!!
Essa ideia is so cute…
Beijinho! 🙂