

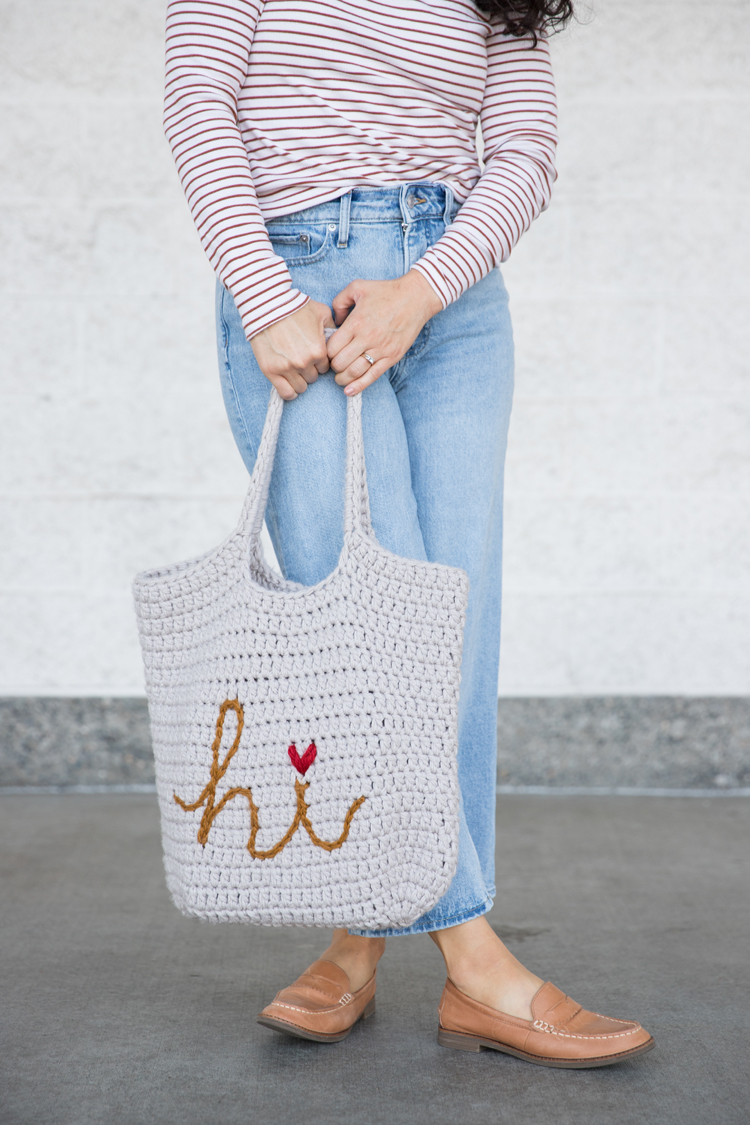
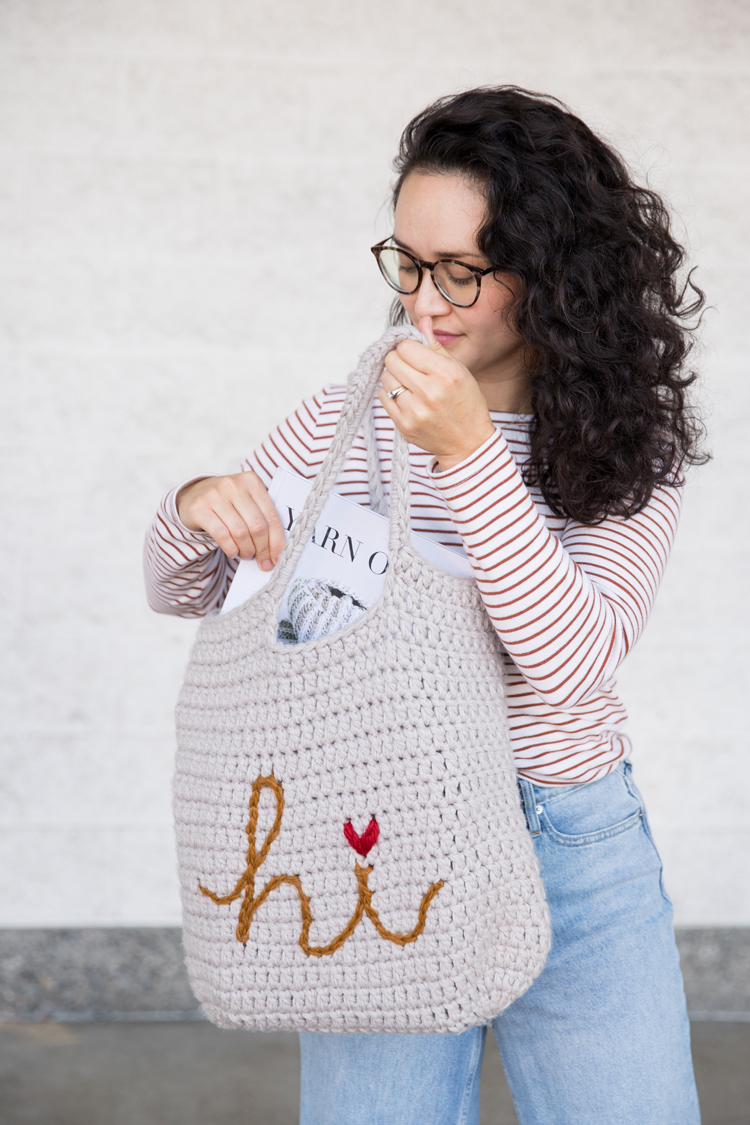
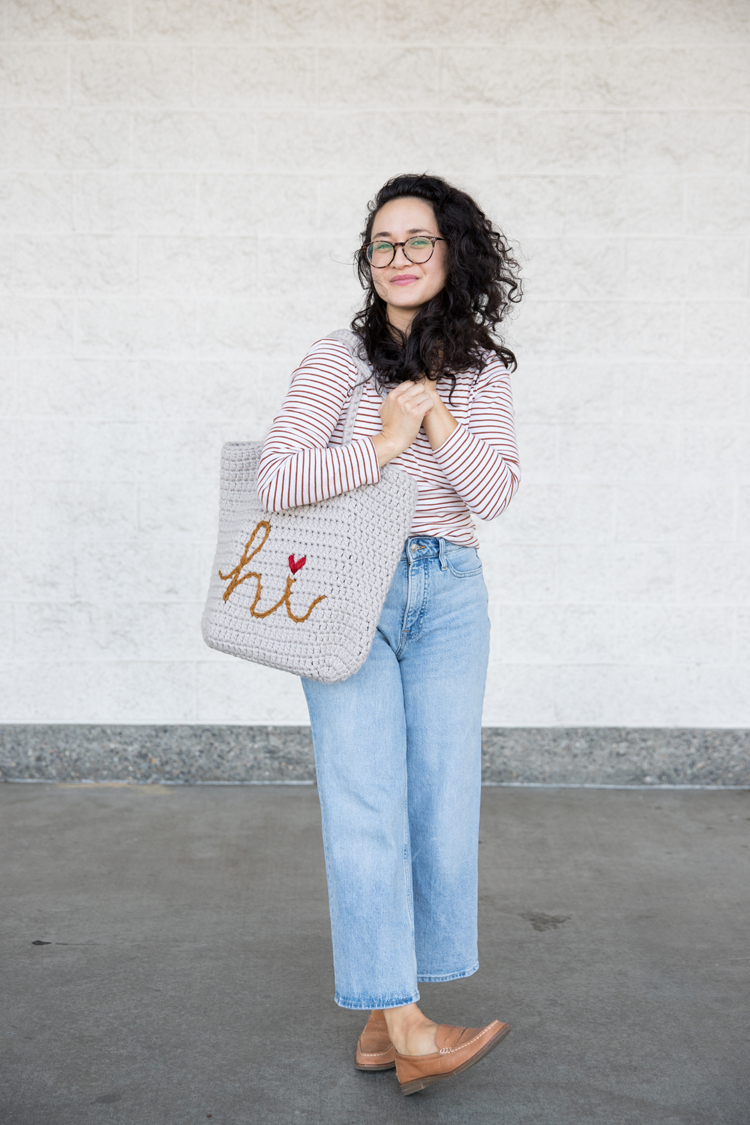
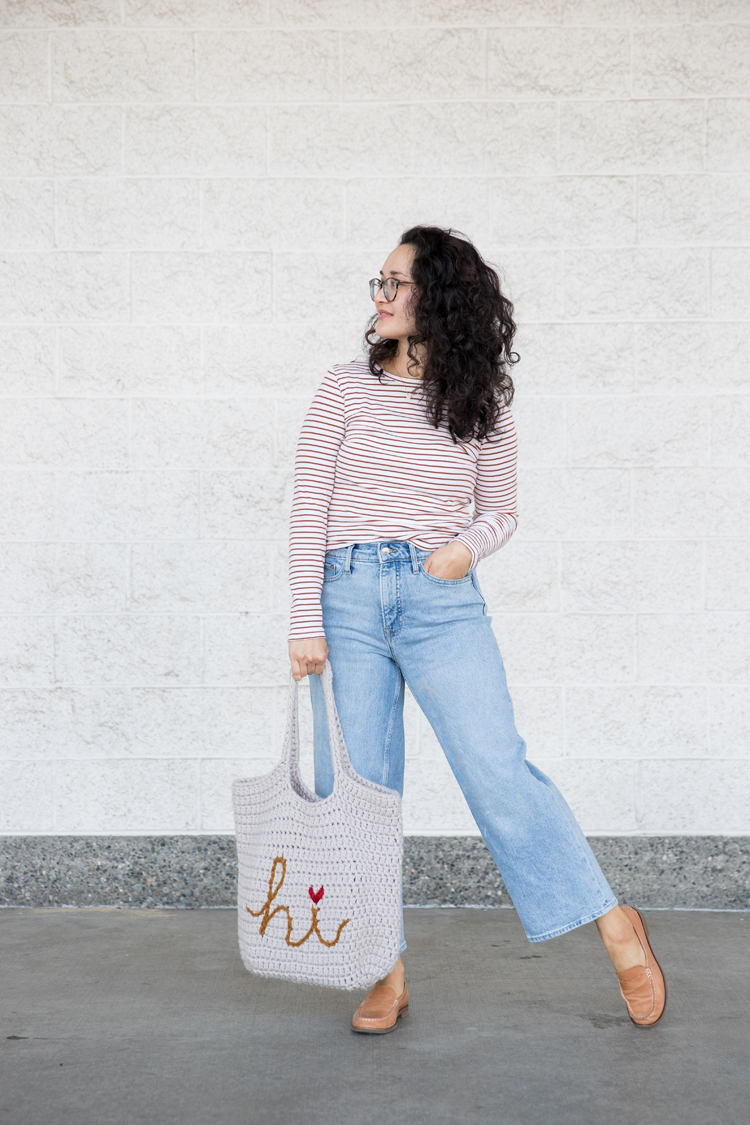
After making my four strand crochet tote bag, I wanted to add a little something extra to it…
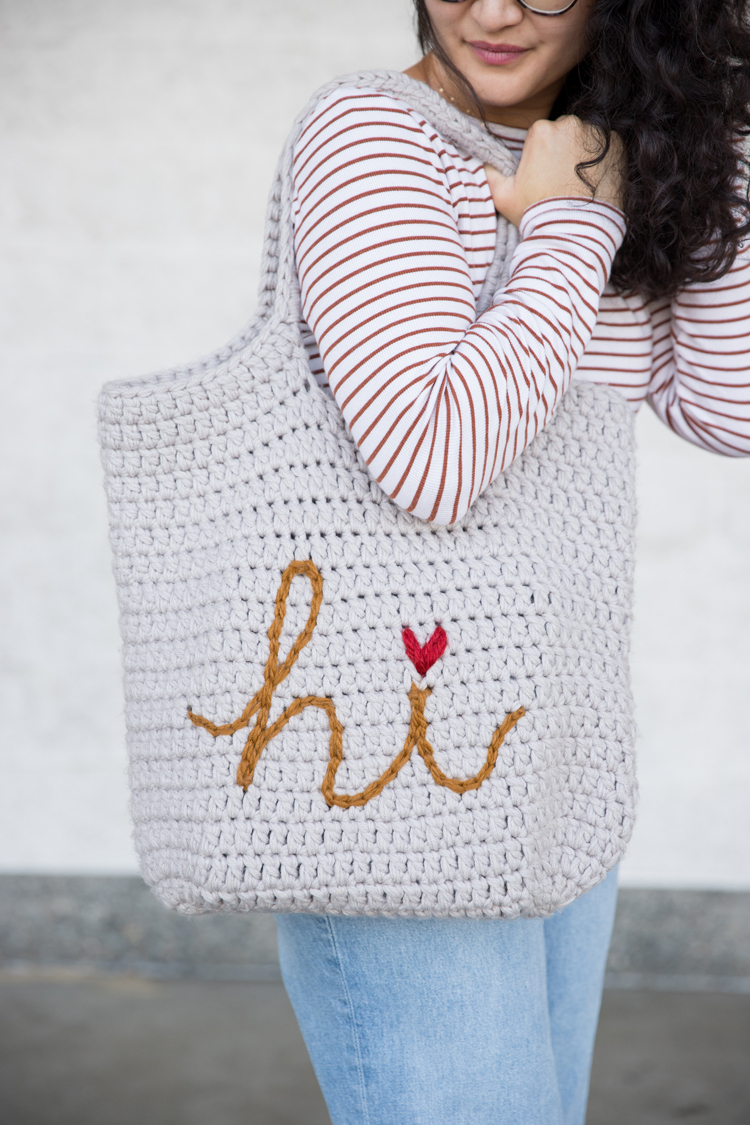
…so I added a friendly message with some surface crochet!
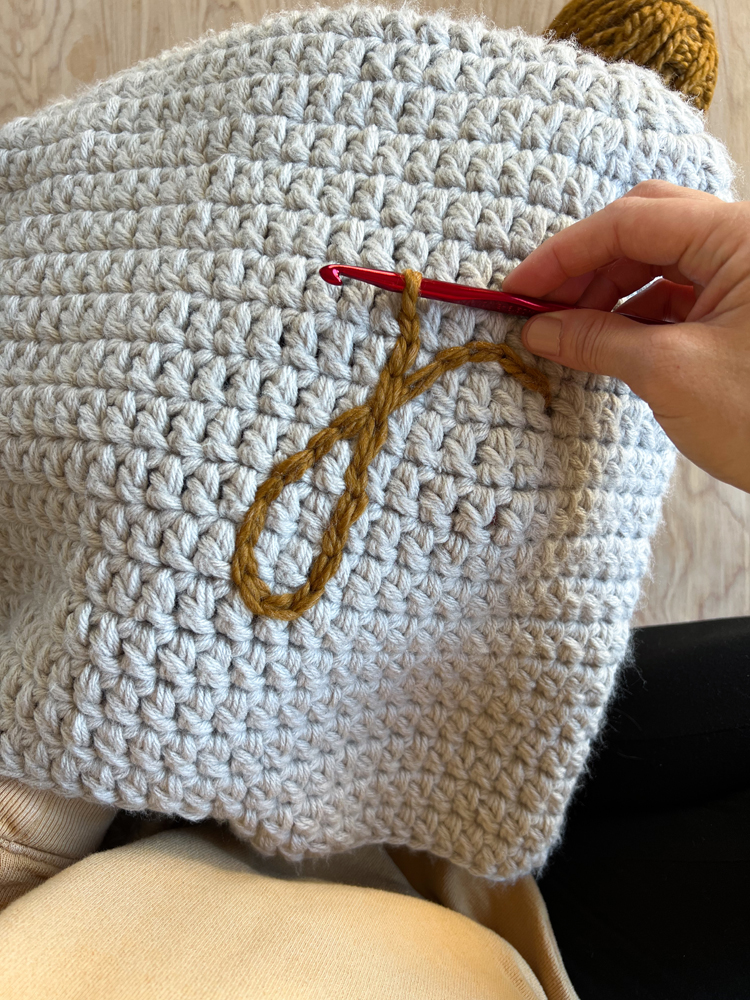
Surface crochet is basically slip stitches on the well…as you can imagine ;)…the surface of your project. It’s like drawing with crochet.
You don’t need any fancy materials, just a hook, yarn, and a yarn needle for weaving in the ends.
It can be a great way to use up yarn scraps!
You can use it with any yarn type or hook size, but this is what I used for this specific project:
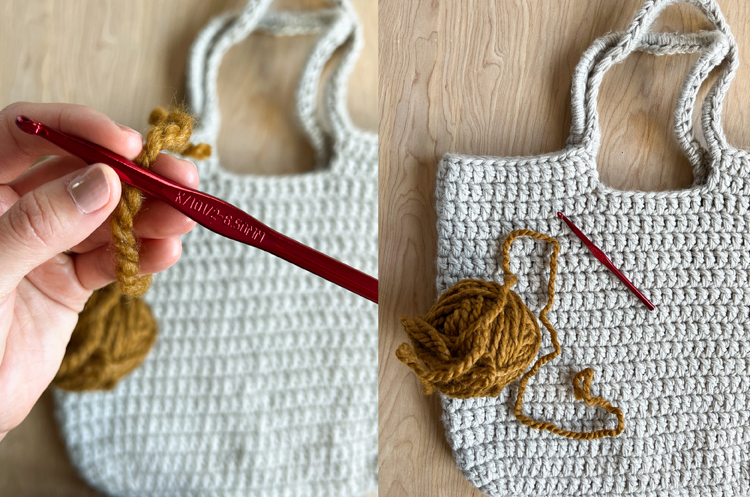
Materials
- Super Bulky or size 6 yarn (I probably used maybe ten yards? It doesn’t take much.)
- K or 6.5 mm hook
- yarn needle and scissors
Video Tutorial
This video offers a really quick tutorial/overview on how to surface crochet.
The video player should have already popped to the top or side of your screen as you’ve scrolled down this post. *The tutorial will play after the opening ads.*
Music is by Pleasant Pictures Music Club.
Tutorial
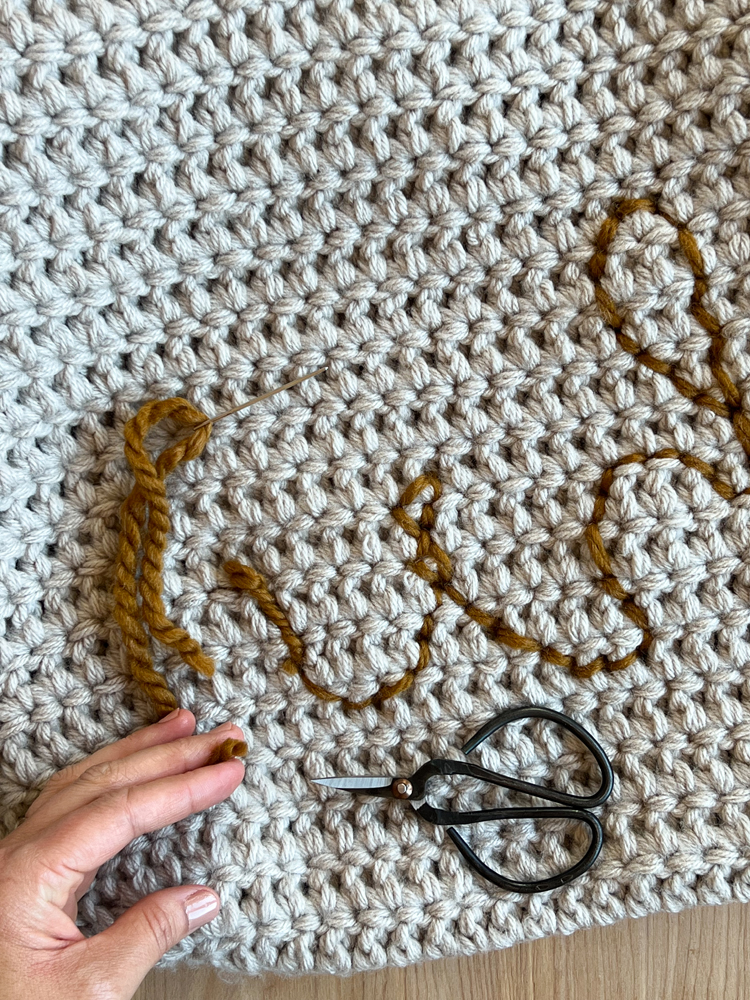
1. Prepare your hook and yarn.
Tie a slip knot and push it through from the back or inside of the bag, where you want to your design to begin. Then insert your hook.
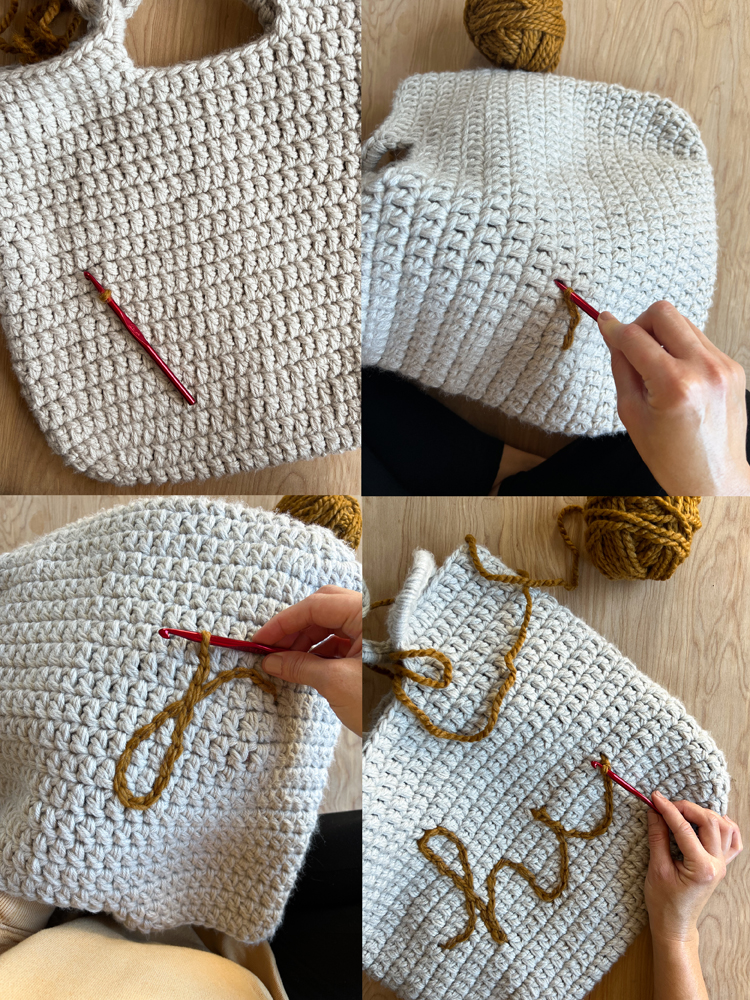
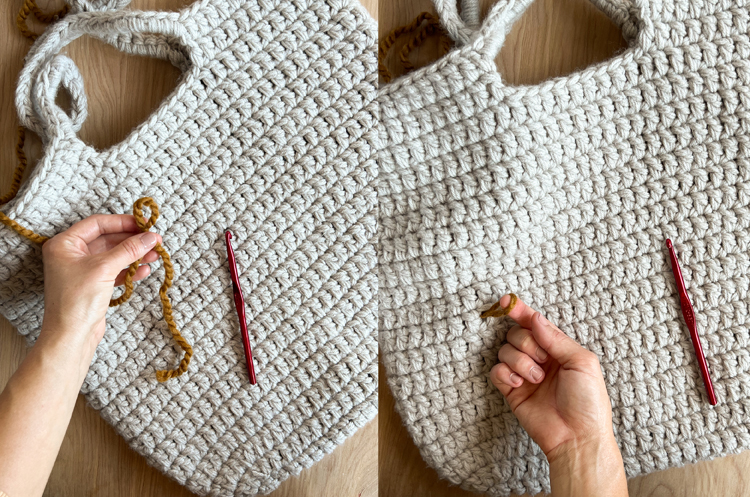
2. Slip stitch your design as desired.
To Slip Stitch: Insert your hook, yarn over from the back, pull the yarn up/through and then it pull through the loop already on your hook.
TIPS:
- If you make a mistake or want to change your design, simply pull on the yarn from the back to pull out your stitches, and reinsert your hook. Then continue with your design.
- As you work be sure to keep your tension loose, otherwise it will make the bag pucker.
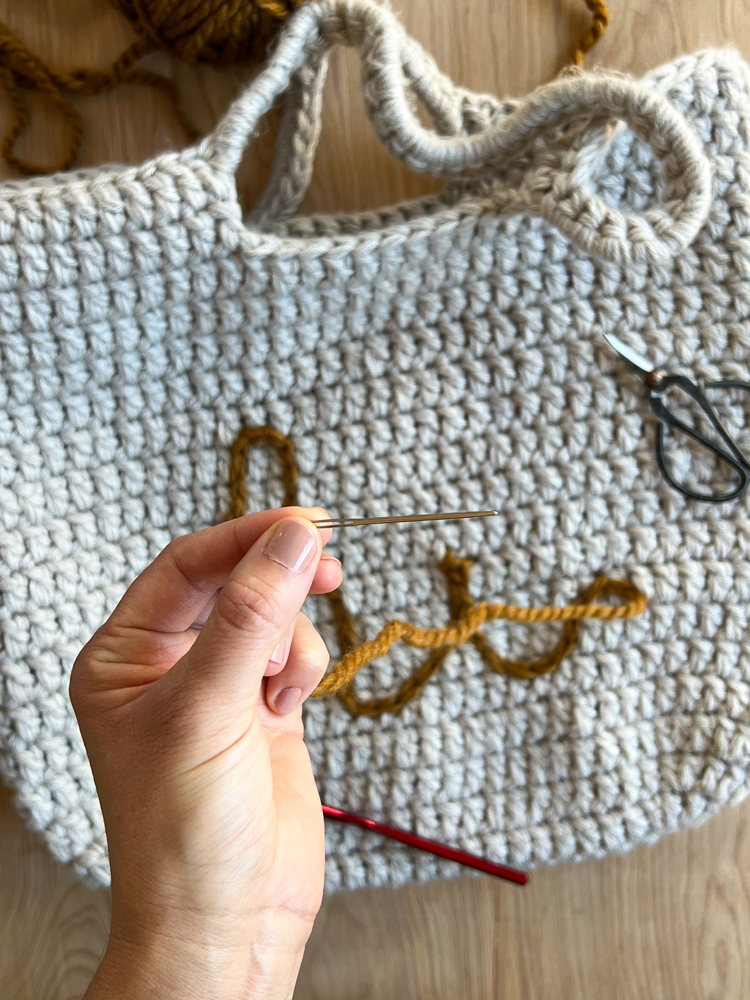
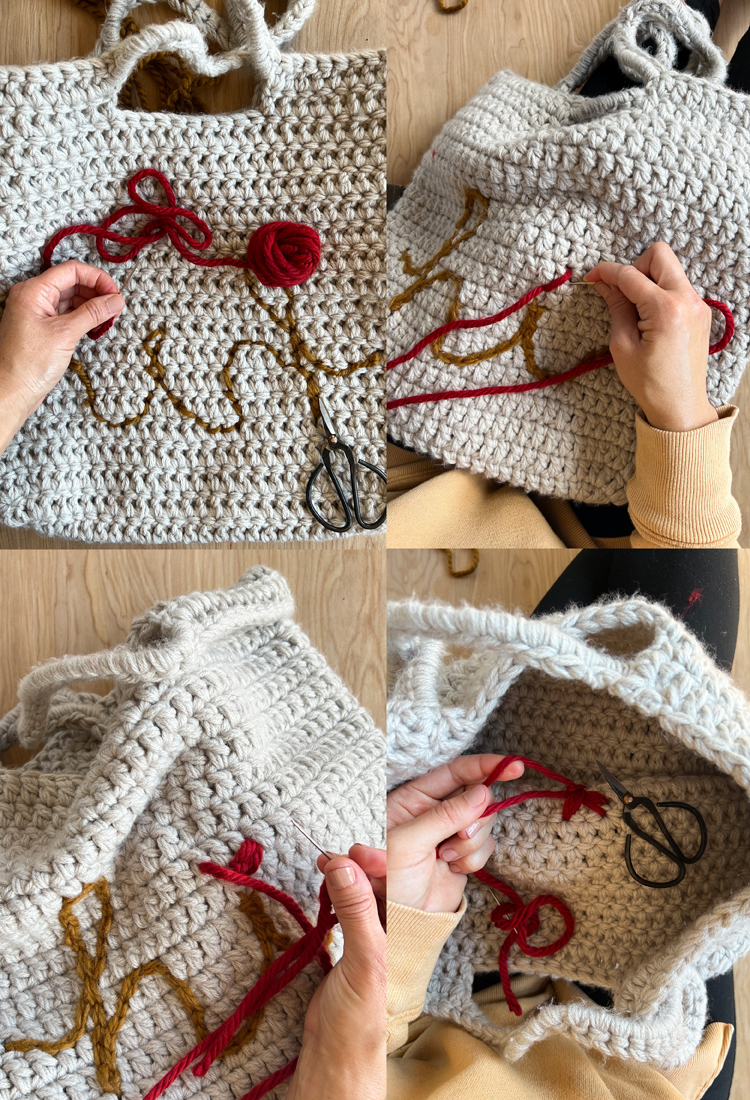
3. Tie off.
When your design is complete, cut an 8 inch tail. Thread the tail onto a yarn needle, and push it to the back/inside of the bag. Then secure it with a knot and weave it in a few times before cutting off the excess. Repeat the process for the other tail from the beginning of your design.
Optional: To dot the “i” of my hi, I decided to sew on a heart with a scrap of red yarn and then I secured it at the back in the same way as I did the surface crochet.
That’s it!
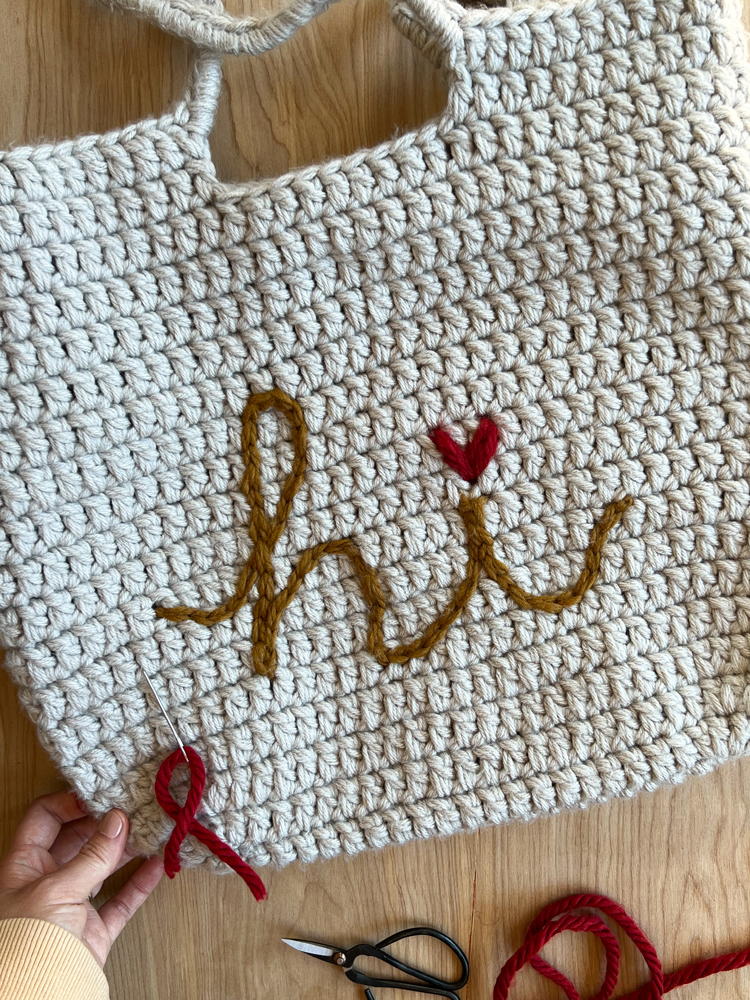
You can create any designs or words you want. As for me, I tried longer words but I kept crochet “writing” too large and it would start to wrap around the bag and not be as legible. Ha! So “hi” it is.
I’ve only made one other surface crochet project. I created a window pane pattern on a beanie…Check out the free pattern and tutorial here… so maybe I just need more practice. But I also suspect sizing down the hook and yarn could allow for sharper turns and pivots.
If you missed the instructions for this bag, I have a free pattern and video tutorial here.
Leave a Reply