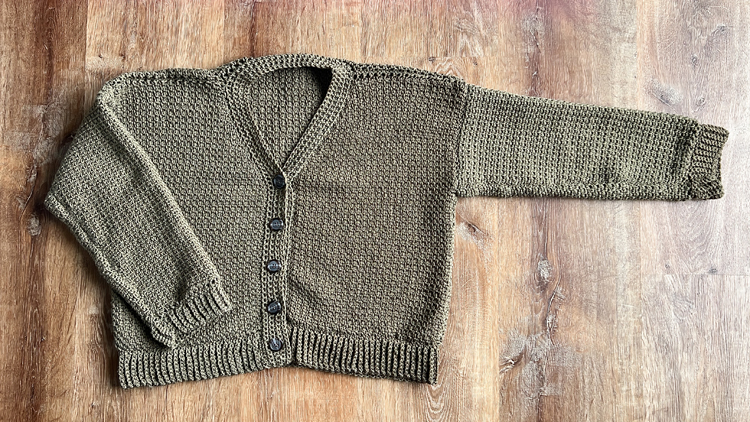
I’ve got another free crochet cardigan pattern for you and it’s probably my favorite! It’s not made from linen yarn but rather it’s made up of “linen” stitches.
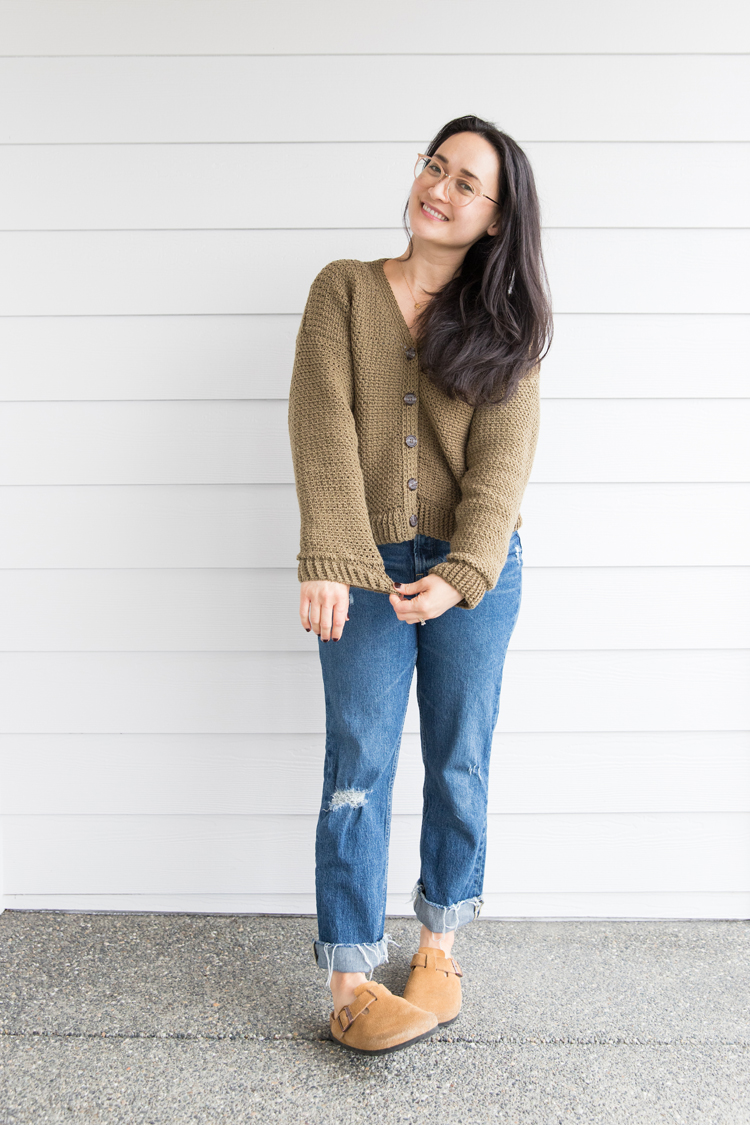
Beginners, don’t let the fancy stitch name scare you off, the linen stitch (also known as the moss stitch) is just single crochet (sc) and chains! The video tutorial walks you through every step, as well as the photo tutorial and free written pattern below.
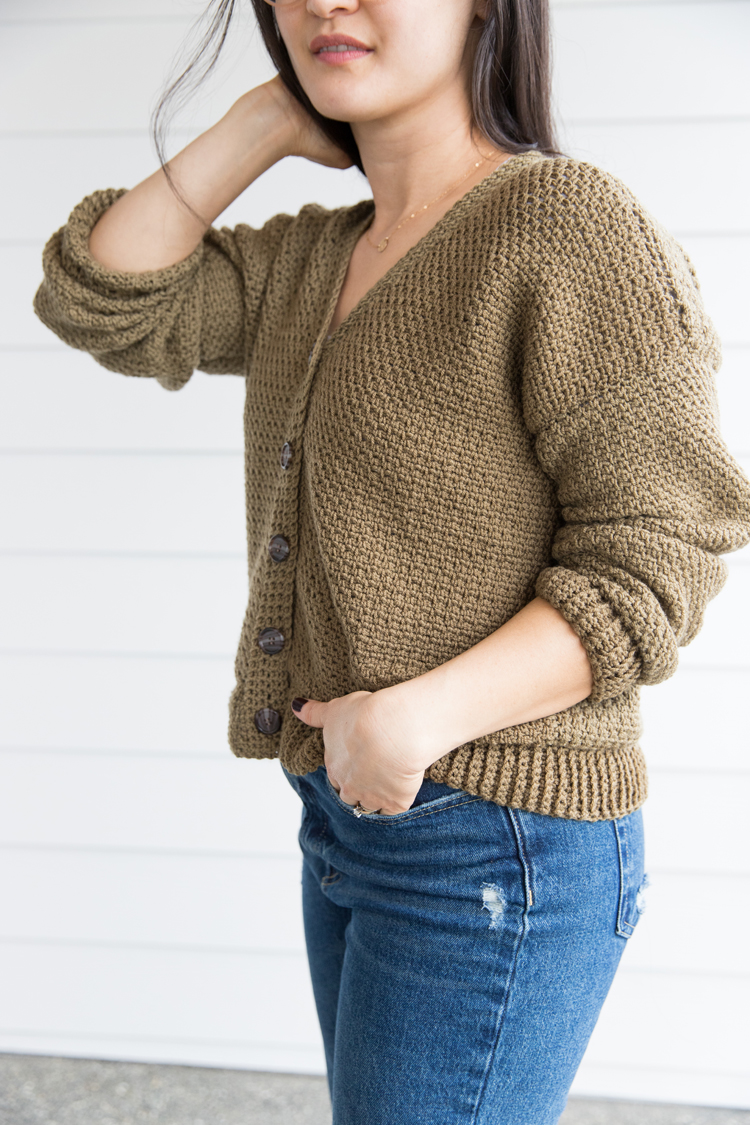
Literally, all you need to know is how to sc and chain for the entire pattern. That said, I recommend this to adventurous beginners or intermediate crocheters because of how tricky it can be to count the rows (they stagger), there is some increasing, and because it requires a lot of seaming of pieces together.
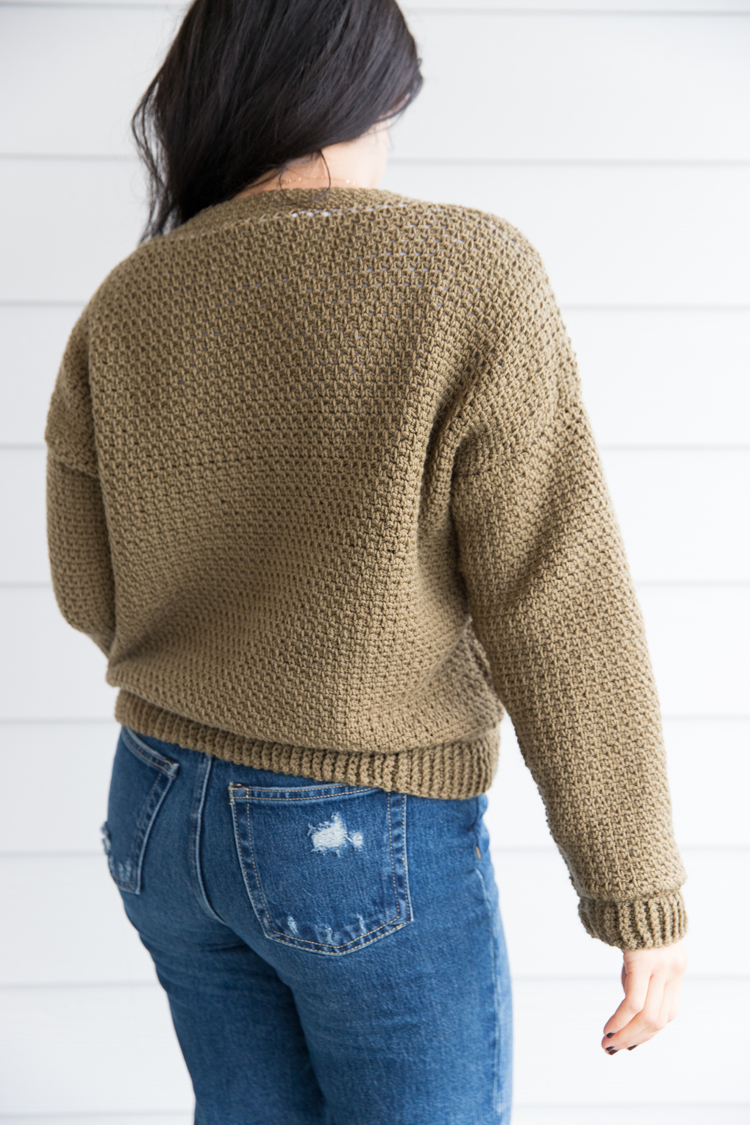
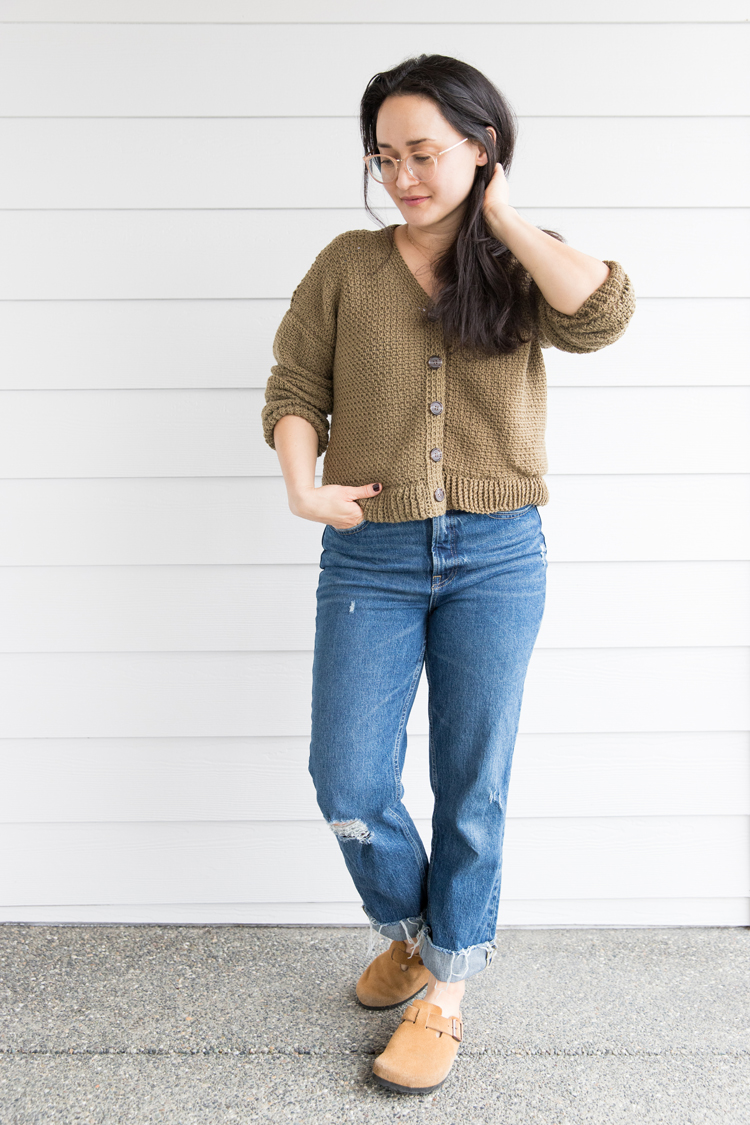
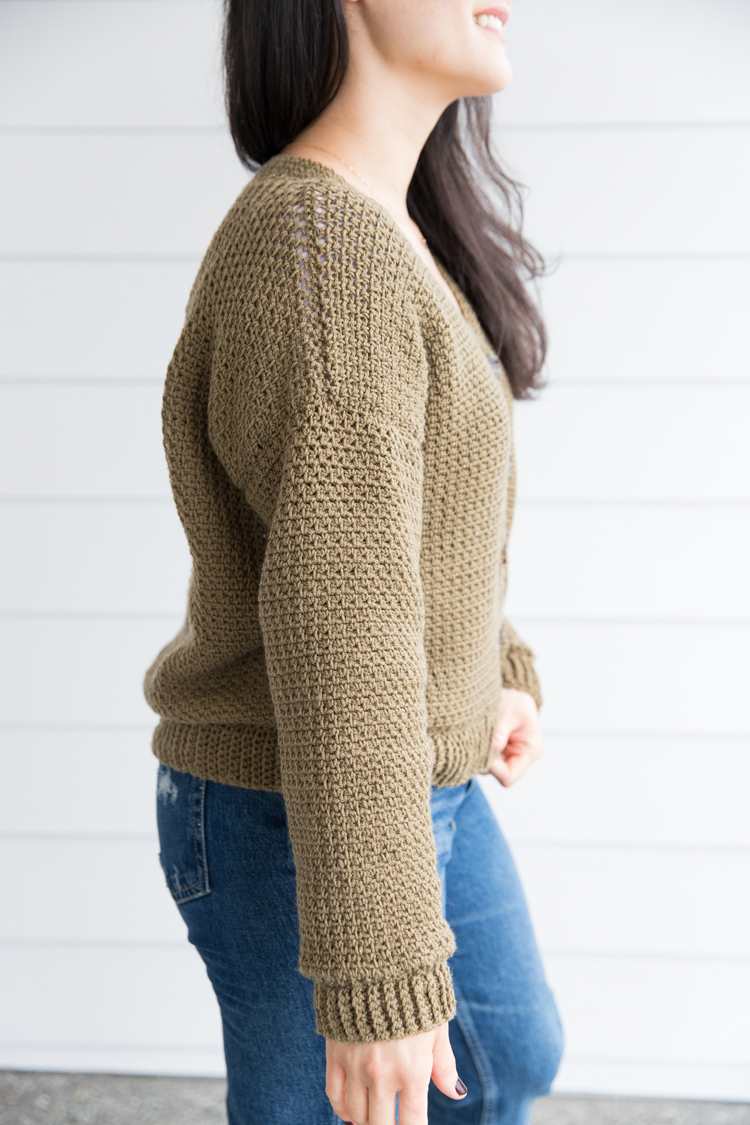
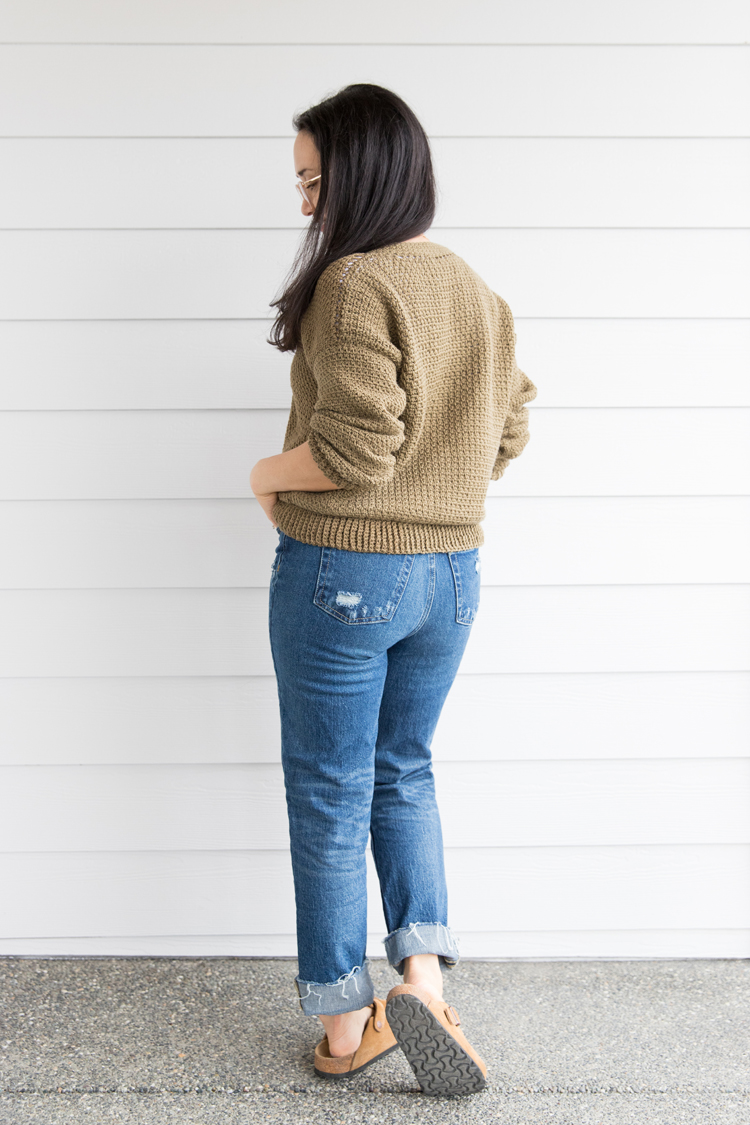
The sizing is for adult XXS-XXL, but those smaller XXS and XS sizes would be well suited for a tween or a teen. I would say they are comparable to youth sizes 12-16. It has a cropped length that is not TOO cropped…it should hit at about the top of your hips.
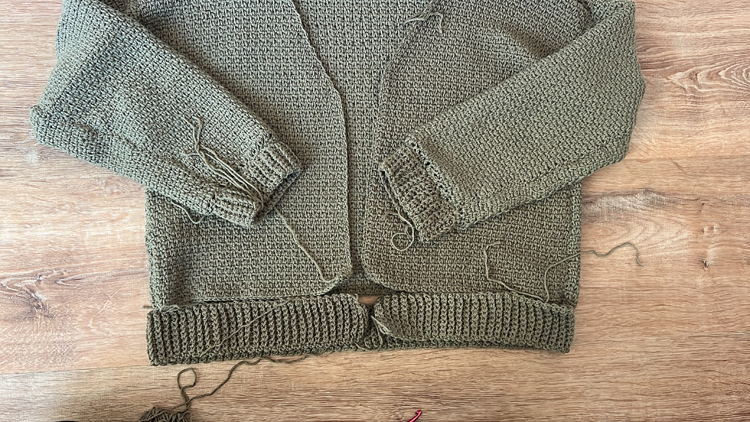
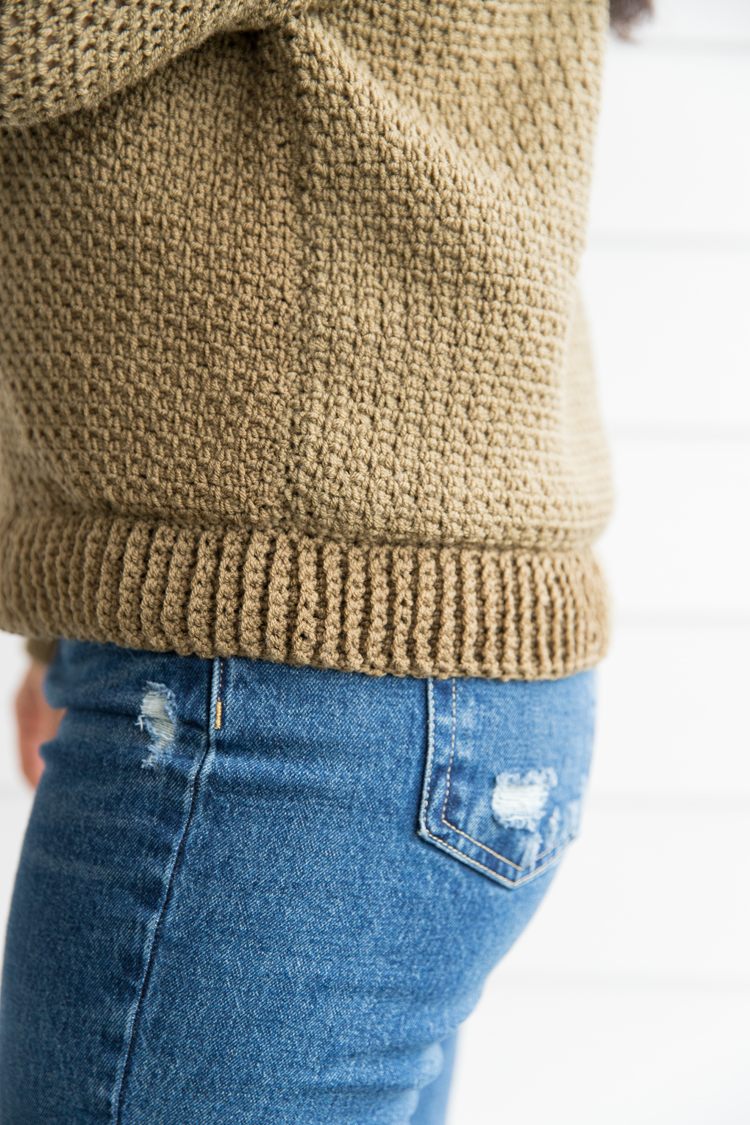
Aside from the stitch type, this cardigan is different from my other cardigan patterns in that I’ve designed the ribbing at the sleeve and the hem to be made separately and then seamed into the rest of the sweater. It makes for a stretchier sleeve hem that is more comfortable to push up when you need to. It’s not restrictive but it also stays put.

My sewing roots guided the construction design of this pattern, which I think is why I like the fit so much. If you are a seamstress then you’ll feel right at home in putting this together.
This is quite a long post so let’s get started!
MATERIALS
- DK yarn (also known as size or category 3 or “lightweight” yarn), 500-700 g
- J/10 6.00 mm hook
- Yarn needle and scissors
- Hand sewing needle and sewing thread that closely matches your yarn
- 5 – 7/8″ inch buttons
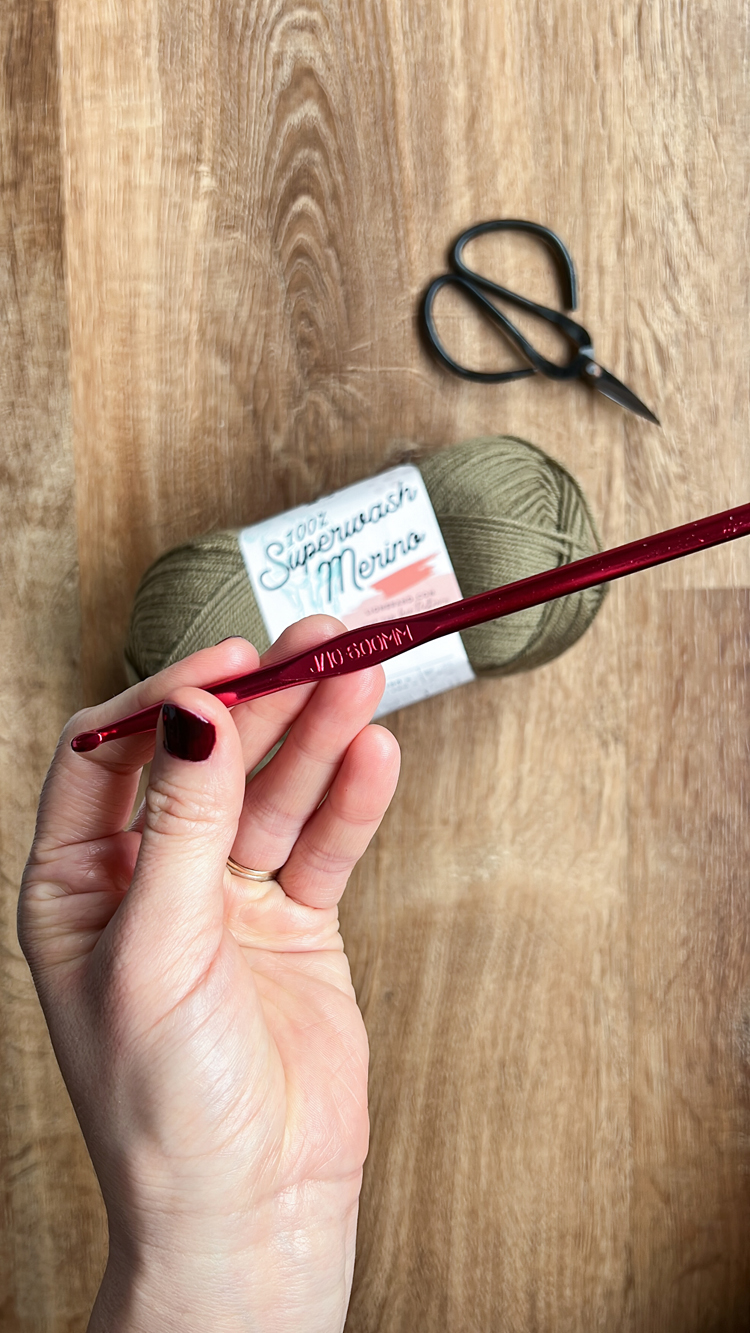
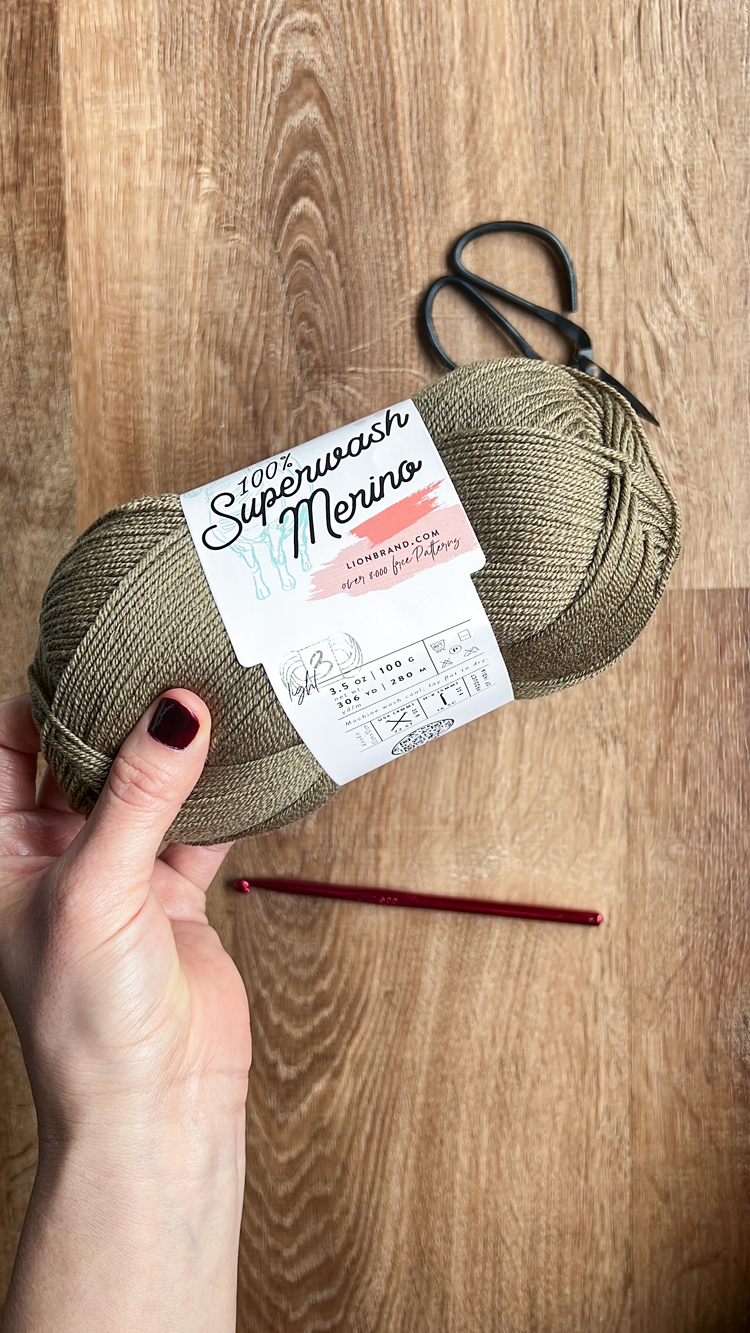
MATERIAL NOTES:
- Yarn amounts: Sizes XXS-S need about 500 g or about 1500 yards of yarn. Sizes M – XL need about 600 g or about 1800 yards. Size XXL needs about 700 g or about 2100 yards.
- Yarn type: I used a very soft 100% Superwash Merino wool yarn from Lion Brand in the color Olive Branch. This is a bit of a pricier yarn at $10-12 per 100g skein than I like to use for such a large project (I want these projects to feel as accessible as possible), but the results are what you pay for…it is so soft on the skin and drapes beautifully. It’s worth watching for sales. I’m pretty sure I got my yarn for about $8 per 100g skein. This pattern will work with wool or acrylic blend yarns. If you want to use a yarn with cotton in it, please note that gauge and sizing will be affected. You may have to adjust your hook size and/or the pattern.
- Hook size: The hook size listed is recommended and it is what I used but it’s just a starting point to determine if it’s the correct size for you. Please work a test swatch to see if your gauge matches the one I list in this pattern. If it’s too loose, go down a hook size. Too tight? Go up a hook size and make another swatch until it matches.
DISCLAIMER
This FREE pattern has not been tested in all sizes. Instead of hiring a pool of testers and putting this out as a paid pattern, I’ve decided to put it out for free and update it as needed.
Please read over the sizing section carefully for best results. I am also open to feedback, so please email me any mistakes you notice or report any fit suggestions ([email protected]) so that I can update and improve the pattern over time. Thank you!
SKILL LEVEL
Adventurous beginner or Intermediate. If you are a brand new beginner, check out my Crochet Basics Series.
SIZING
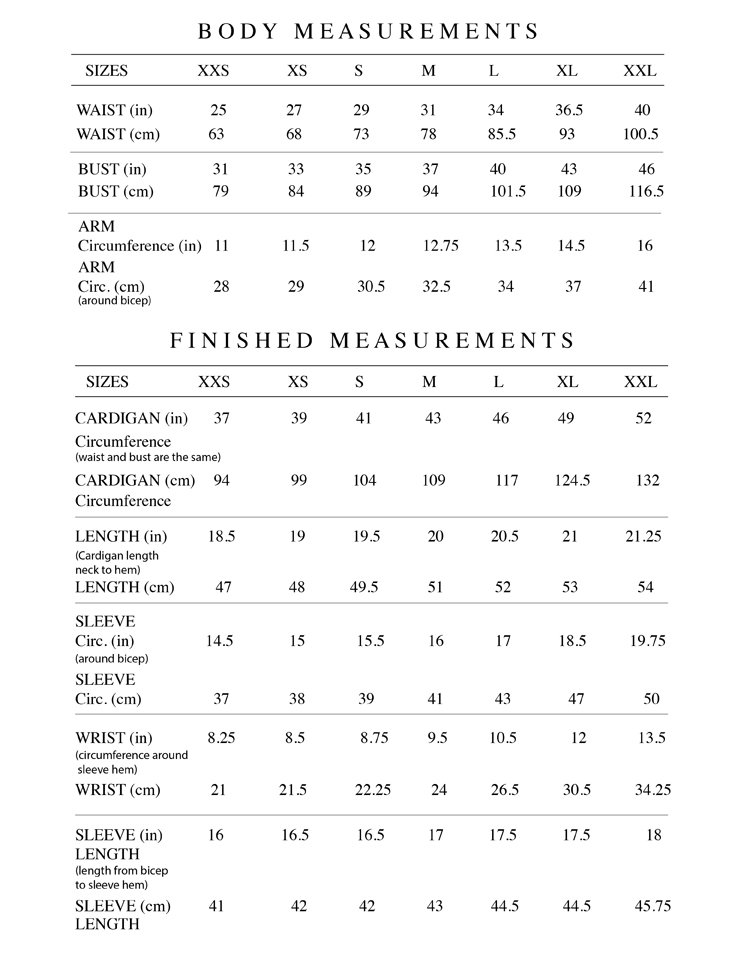
IMPORTANT. PLEASE READ. This portion is lengthy but it is very important for getting best results. Below is a measurement chart that includes body measurements compared to the finished garment size. Measurements are approximate.
DETERMINING SIZING AND FIT
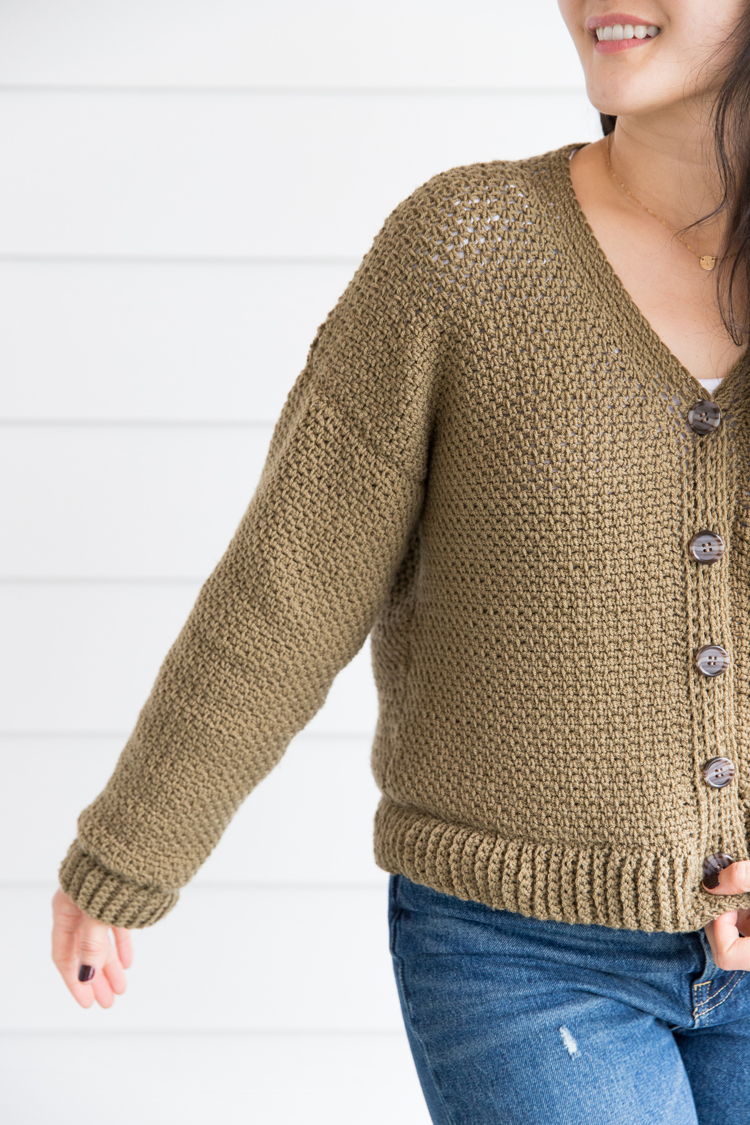
This cardigan is meant to end at the top of your hips and fit loosely around the bust, waist, and arms, but is not “oversized”. I am 5’4″, a size 4-6 in RTW/brand clothing, and I am wearing a size small in the finished photos.
The cardigan is the same size straight down from the bust to the waist. Choose the larger of the two measurements to determine the cardigan width that will best suit you.
FIT ADJUSTMENTS
Add or remove width to the cardigan by adding or removing stitches in groups of 2. You must start and end with a sc and your total stitch count should be an odd number. Remember that the width of the cardigan also accounts for the upper sleeve, so you may need to make adjustments to the length of the sleeve pieces as well.
For lengthening and shortening from neck to hem simply add or remove rows. Remember to account for the bottom hem which will add about 2.25 -2.5 inches to the total length. it will also stretch a little when worn.
Sleeve width adjustments I would stick with a size and go up or down a size as needed. For example, you might want to make a size M but need wide sleeves. Use the stitch count for the size L sleeves, including how many stitches needed to make the sleeve opening on the bodice of the cardigan.
Sleeve length adjustments Add or remove rows at the end or widest part of the sleeve pattern. There are several increases in the sleeve with about 7 or so regular rows at the end. I like to make the sleeve with ribbing attached, then seam one sleeve into the bodice and test for fit. If it’s too long or too short, I can remove the sleeve, add or remove a few rows, and then seam it back in. Easy peasy.
GAUGE
- 4 x 4 inch square = 21 stitches (sc and chains) x 20 rows of linen stitches
- 2 x 2 inch square = 9 sc x 10 rows of ribbing stitches (sc in blo)
Because this is a larger project and sizing matters, I highly recommend working up a test swatch to see if your gauge matches. If you are pretty close, but not exact, that is okay. The stitches stretch some as they are worn, so being within a half stitch or so is fine. If you are significantly too tight, you may want to try using a larger hook and if you’re too loose, try a smaller hook.
ABBREVIATIONS
THIS PATTERN USES U.S. TERMS.
- ch = chain
- sl st = slip stitch
- sc = single crochet
- blo = back loops only
VIDEO TUTORIAL
The video will play here, if it hasn’t already popped to the top or side of your screen, and will play after the initial ads. If you “x” out of the video pop-up, you will need to refresh the page to get it back.
I recommend watching the tutorial and reading the written pattern/tutorial, especially if you are a beginner. The video is about 10 minutes long, but I tried to keep it condensed with important information for each step.
WRITTEN PATTERN & TUTORIAL
- You will make: 1 back piece, 2 front pieces, 2 sleeves, 2 sleeve ribbing, and 1 hem band.
- Then you will seam all the pieces together.
- Add a neck band/ collar/ button placket and button holes.
- Lastly, add buttons and weave in the ends.
Sizes are listed as follows: XXS (XS, S, M, L, XL, XXL). Follow the number indicated in the same position as your size. So if you are a size L, you would use the starred number: 1(2, 3, 4, 5*, 6, 7). Sometimes it helps to copy and paste the pattern into a word document so you can print it and highlight the number for your size.
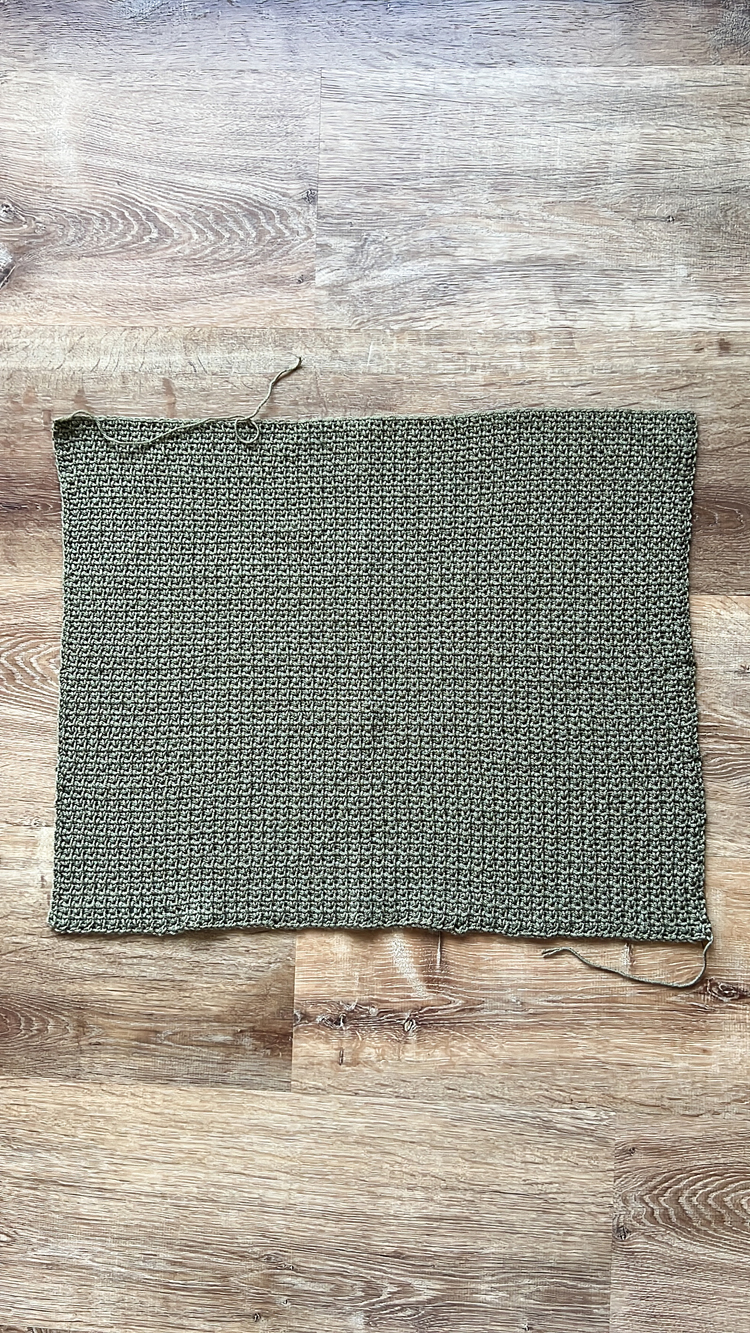
BACK PIECE – make 1
XXS (XS, S, M, L, XL, XXL)
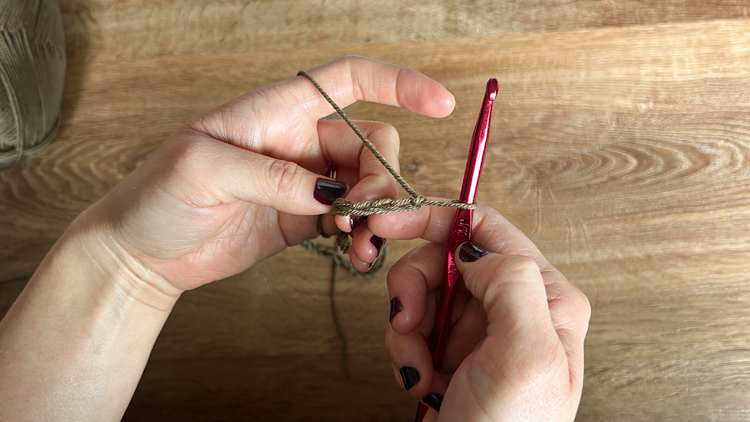
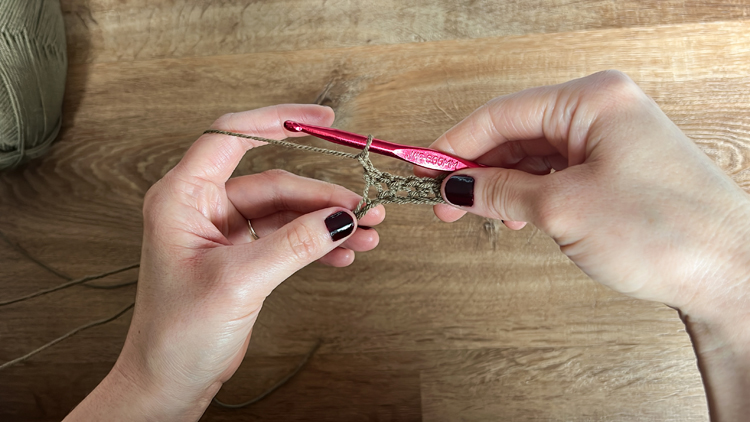
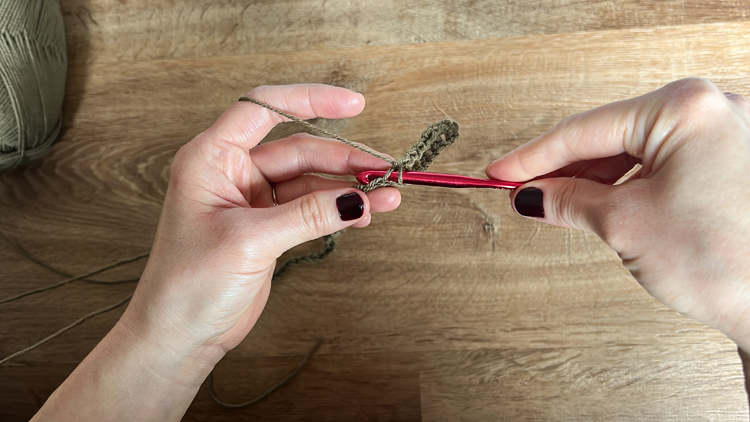
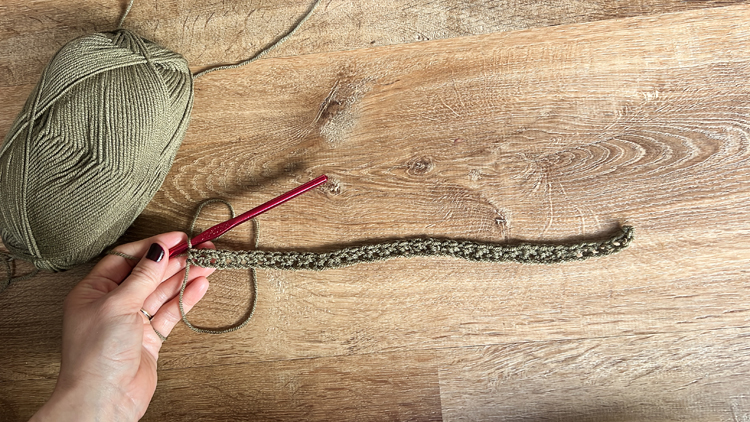
Chain 88 (98, 108, 118, 134, 148, 164)
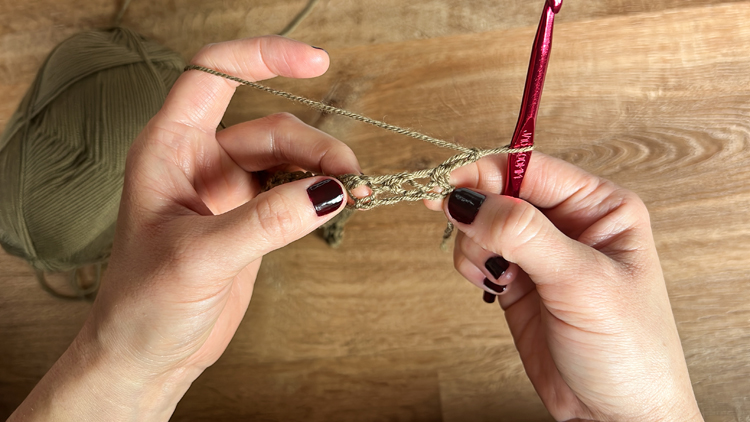
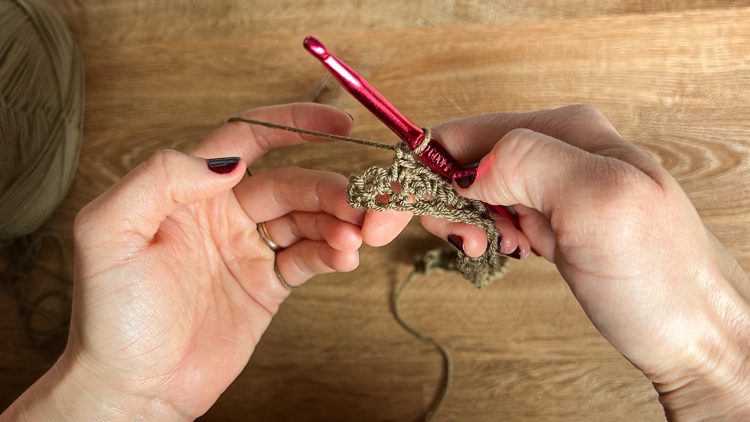
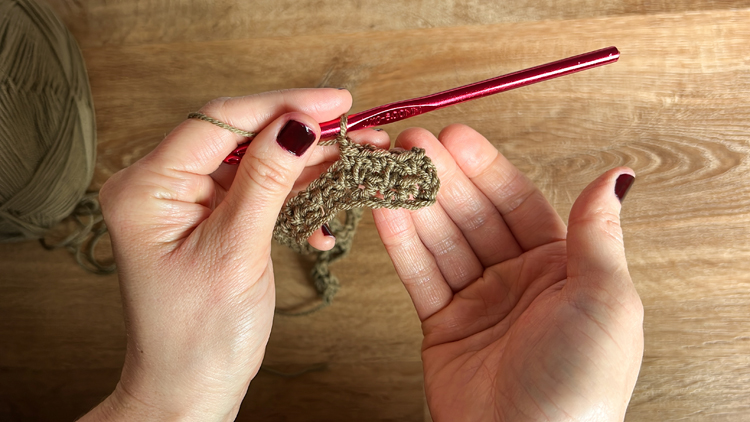
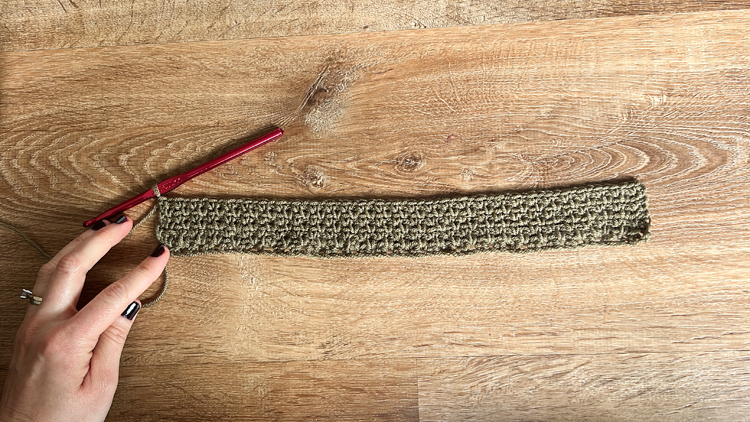
Row 1: Skip the first three chains from the hook, and work a sc into the fourth chain. *ch 1, skip a ch, sc into the next.* Repeat from * to * for the rest of the row. You are essentially creating a grid of sc and chains. You should end the row on a sc. Total stitch count, including two of the skip chains at the beginning = 87 (97, 107, 117, 133, 147, 163).
Row 2: Ch 2, turn. The first chain counts as a “sc” and the second ch moves you over to the chain gap from the previous row. Work a sc into that chain gap. *Ch, skip over the sc from the previous row, sc into the next chain gap.* Continue that pattern from * to * until you get to the last chain gap at the end of the row. Instead of working into the gap, work a sc into the side of the last stitch (which is really a starting chain or skipped chain from the previous row). Total stitch count = 87 (97, 107, 117, 133, 147, 163).
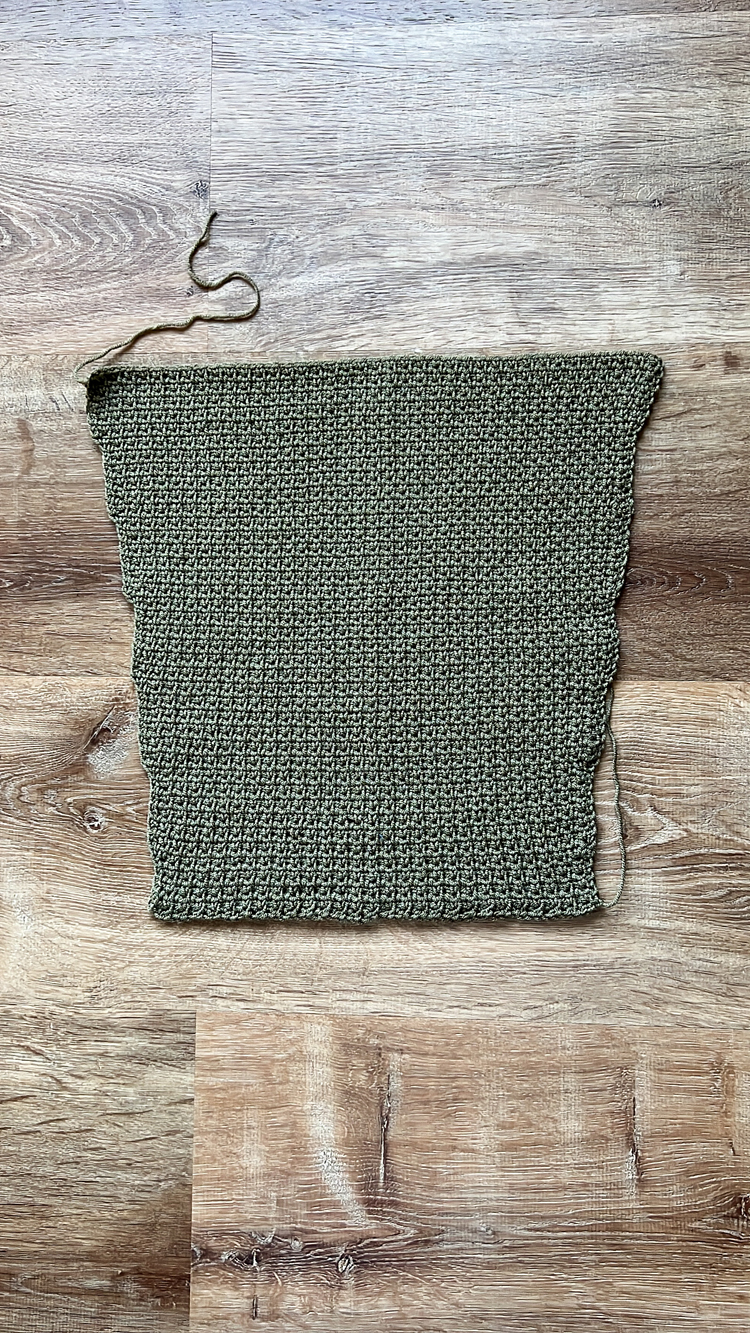
Row 3: Repeat Row 2 for a total of 83 (85, 87, 89, 91, 93, 95) rows.
Tie off the end and leave a 5 inch tail.

SLEEVES – make 2
Chain 54 (56, 58, 62, 66, 74, 80)
Row 1: Skip the first three chains from the hook, and work a sc into the fourth chain. *ch 1, skip a ch, sc into the next.* Repeat from * to * for the rest of the row. You are essentially creating a grid of sc and chains. You should end the row on a sc. Total stitch count, including two of the skip chains at the beginning = 53 (55, 57, 61, 65, 73, 79).
Row 2: Ch 2, turn. The first chain counts as a “sc” and the second ch moves you over to the chain gap from the previous row. Work a sc into that chain gap. *Ch, skip over the sc from the previous row, sc into the next chain gap.* Continue that pattern from * to *until you get to the last chain gap at the end of the row. Instead of working into the gap, work a sc into the side of the last stitch (which is really a starting chain or skipped chain from the previous row). Total stitch count = 53 (55, 57, 61, 65, 73, 79).
Rows 3-9: Repeat Row 2.
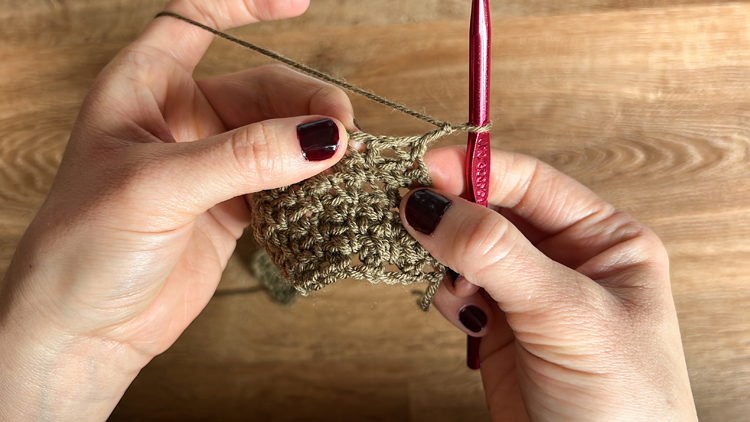
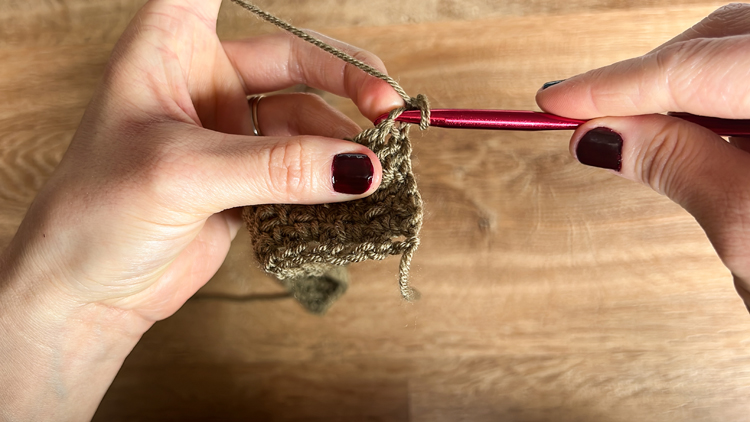
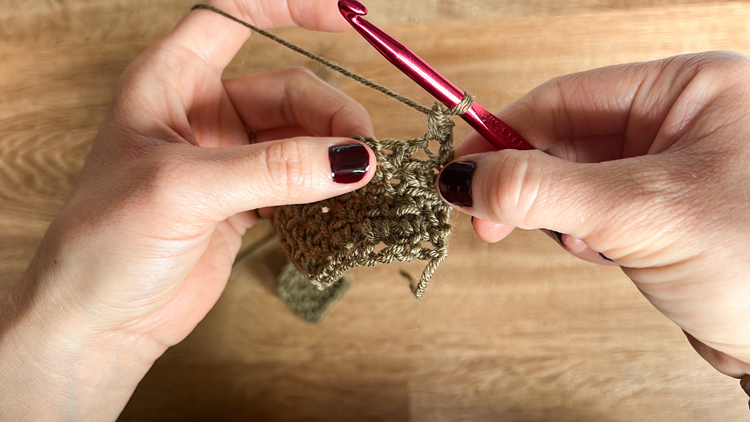
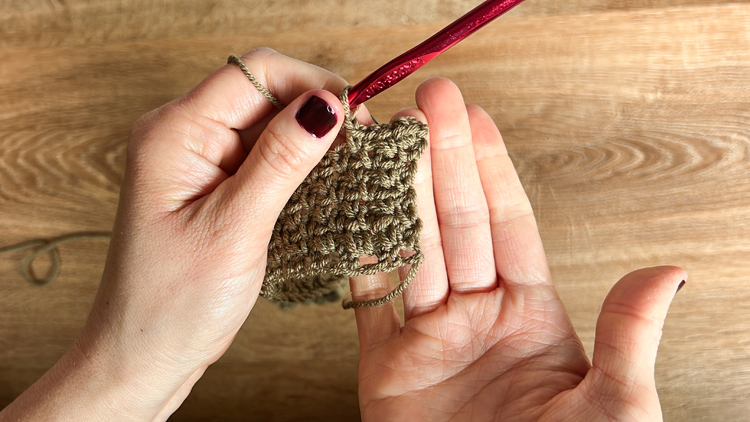
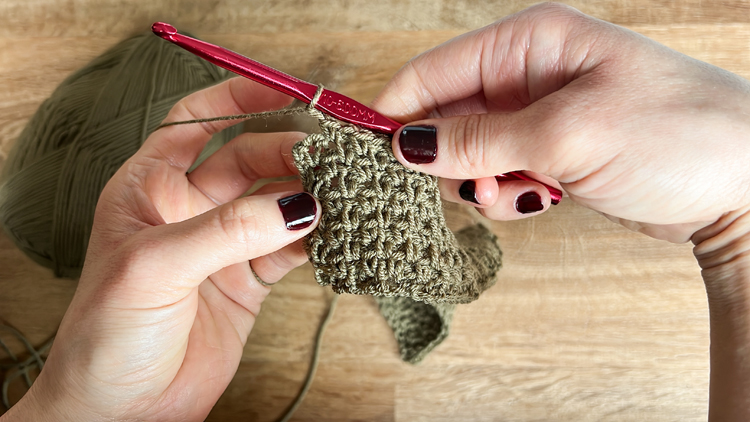
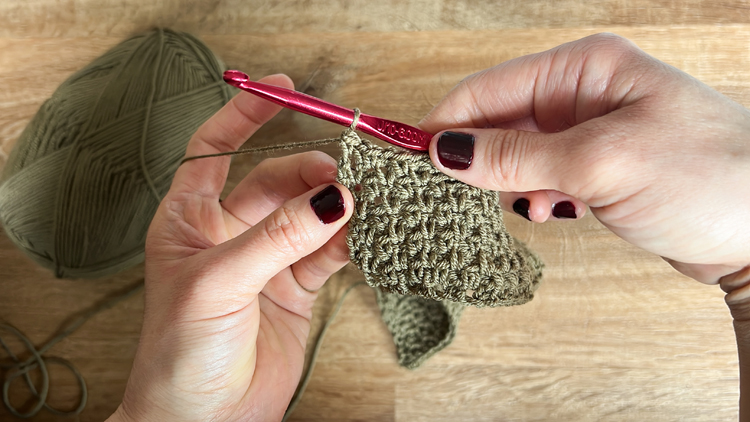
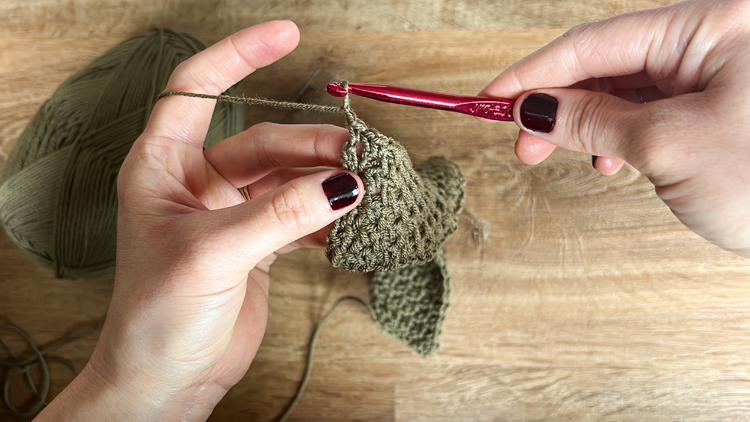
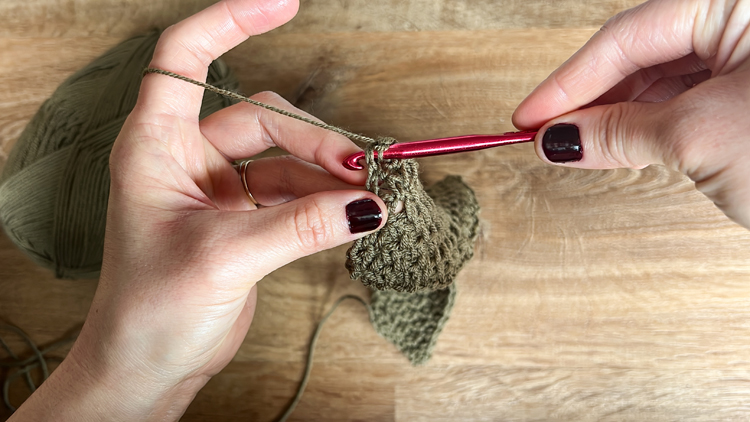
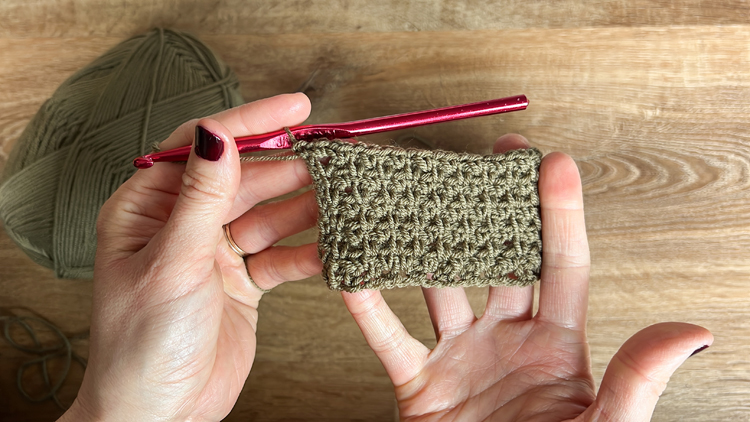
Row 10: (increase) Ch 2, turn. Work a sc into the middle of the sc stitch from the previous row (in the middle of the “v” shape of the stitch). Ch 1 and sc into the next chain gap like normal. *Ch 1, skip the sc from the previous row and sc into the next chain gap.* Continue that pattern from * to * until you get to the last chain gap at the end of the row. This time, work a sc into the chain gap, chain, and then work a sc into the side of the last stitch. These increasing rows increase the total stitch count by four because it includes a new sc and ch at the beginning and the end. Total stitch count = 57 (59, 61, 65, 69, 77, 83).
Row 11: Ch 2, turn.Work a sc into the next chain gap. *Ch, skip over the sc from the previous row, sc into the next chain gap.* Continue that pattern from * to *until you get to the last chain gap at the end of the row. Skip the last chain gap and work a sc into the side of the last stitch. Total stitch count = 57 (59, 61, 65, 69, 77, 83).
Rows 12-21: Repeat Row 11. Total stitch count = 57 (59, 61, 65, 69, 77, 83).
Row 22: (Increase) Repeat Row 10. Total stitch count = 61 (63, 65, 69, 73, 81, 87).
Row 23-33: Repeat Row 11. Total stitch count = 61 (63, 65, 69, 73, 81, 87).
Row 34: (Increase) Repeat Row 10. Total stitch count = 65 (67, 69, 73, 77, 85, 91).
Rows 35-45: Repeat Row 11. Total stitch count = 65 (67, 69, 73, 77, 85, 91).
Row 46: (Increase) Repeat Row 10. Total stitch count = 69 (71, 73, 77, 81, 89, 95).
Rows 47-57: Repeat Row 11. Total stitch count = 69 (71, 73, 77, 81, 89, 95).
Row 58: (Increase) Repeat Row 10. Total stitch count = 73 (75, 77, 81, 85, 93, 99).
Rows 59-69: Repeat Row 11. Total stitch count = 73 (75, 77, 81, 85, 93, 99).
Row 70: (Increase) Repeat Row 10. Total stitch count = 77 (79, 81, 85, 89, 97, 103).
XXS ONLY – Rows 71-74: Repeat Row 11. Total stitch count = 77.
XS and S ONLY – Rows 71-76: Repeat Row 11. Total stitch count = 79(XS) and 81 (S).
M ONLY – Rows 71-78: Repeat Row 11. Total stitch count = 85.
L and XL ONLY – Rows 71-80: Repeat Row 11. Total stitch count = 89 (L) and 97 (XL).
XXL ONLY – Rows 71-82: Repeat Row 11. Total stitch count = 103.
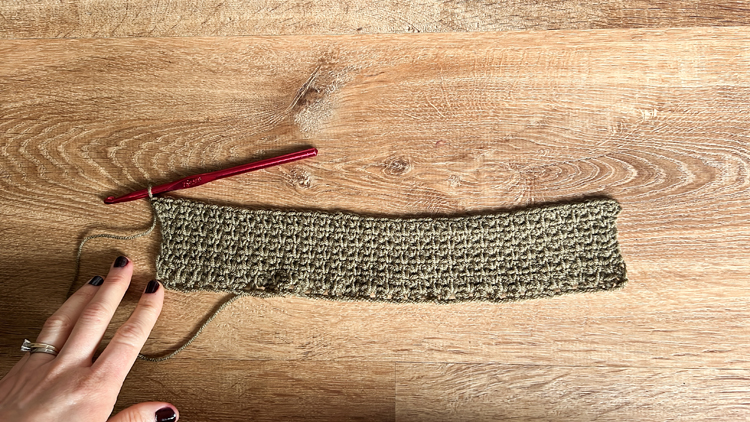
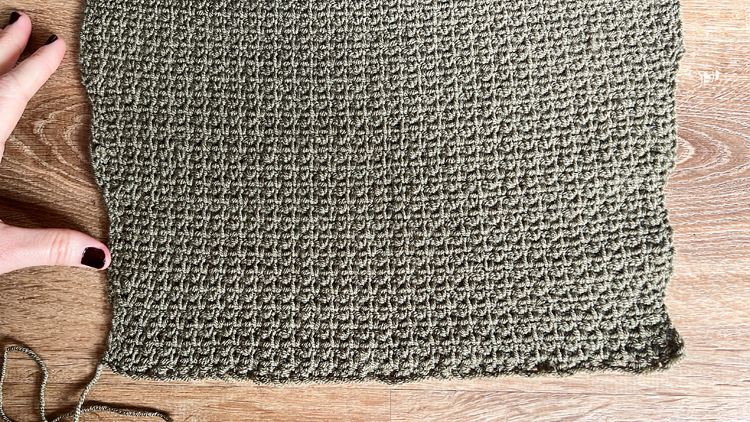
Tie off the end and leave a 5 inch tail.
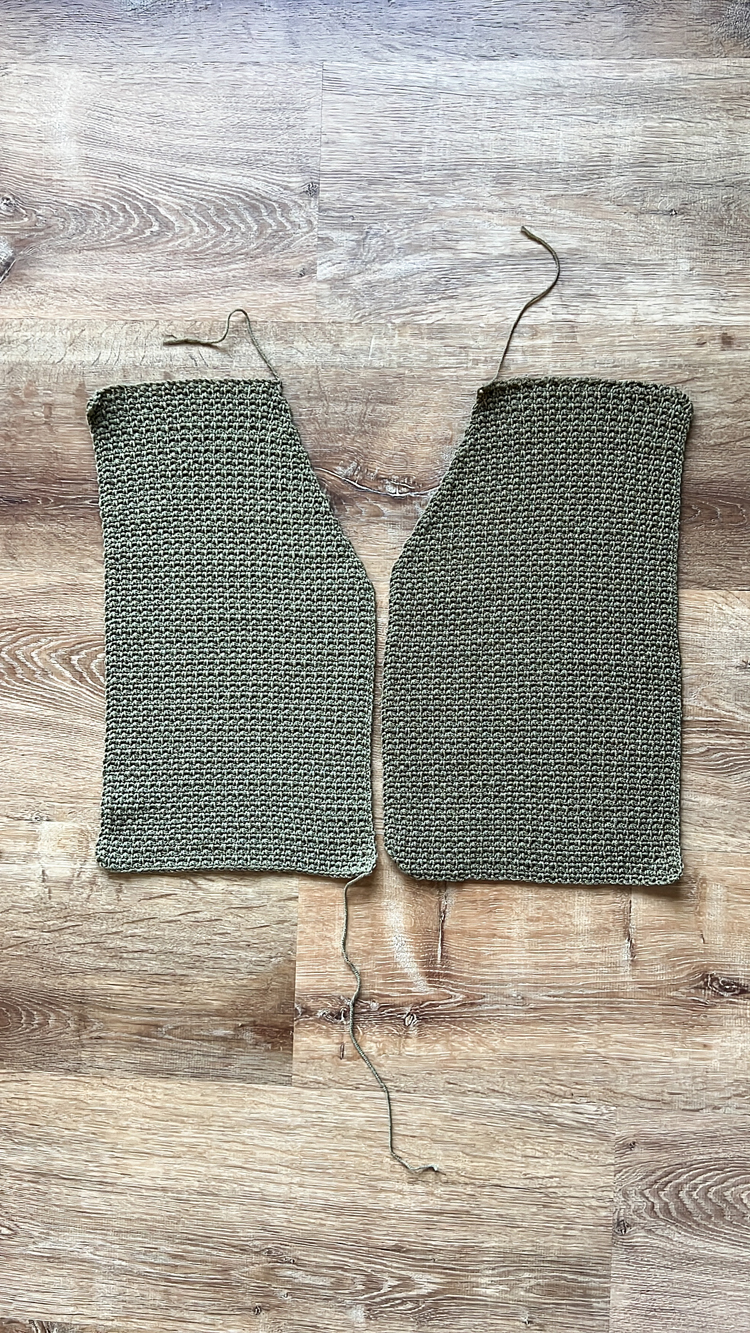
FRONT PIECE – make 2
Follow this pattern twice. The pieces are reversible, so one piece will flip over to create a mirror image. We are going to work on this from the shoulders downward, so it will be “upside down.”
Chain 28 (30, 34, 38,44,48,54)
Row 1: Skip the first three chains from the hook, and work a sc into the fourth chain. *ch 1, skip a ch, sc into the next.* Repeat from * to * for the rest of the row. You are essentially creating a grid of sc and chains. You should end the row on a sc. Total stitch count, including two of the skip chains at the beginning = 27 (31,33,37,43,47,53).
Row 2: Ch 2, turn. The first chain counts as a “sc” and the second ch moves you over to the chain gap from the previous row. Work a sc into that chain gap. *Ch, skip over the sc from the previous row, sc into the next chain gap.* Continue that pattern from * to *until you get to the last chain gap at the end of the row. Instead of working into the gap, work a sc into the side of the last stitch (which is really a starting chain or skipped chain from the previous row). Total stitch count = 27 (31, 33, 37, 43, 47, 53).
Rows 3: Repeat Row 2
Row 4: (increase) Ch 2, turn. Work a sc into the first chain gap. *Ch, skip over the sc from the previous row, sc into the next chain gap.* Continue that pattern from * to *until you get to the last chain gap at the end of the row. This time, work a sc into the chain gap, chain, and then work a sc into the side of the last stitch (which is really a starting chain or skipped chain from the previous row). This will increase the stitch count by 2 (sc + ch). Total stitch count = 29 (33, 35, 39, 45, 49, 55).
Rows 5-7: Ch 2, turn. Work a sc into the first chain gap. *Ch, skip over the sc from the previous row, sc into the next chain gap.* Continue that pattern from * to *until you get to the last chain gap at the end of the row. Skip the last chain gap and work a sc into the side of the last stitch/chain. Total stitch count = 29 (33, 35, 39, 45, 49, 55).
Row 8: (increase) Repeat Row 4. Total stitch count = 31 (35, 37, 41, 47, 51, 57).
Rows 9-11: Repeat Row 5. Total stitch count = 31 (35, 37, 41, 47, 51, 57).
Row 12: (increase) Repeat Row 4. Total stitch count = 33 (37, 39, 43, 49, 53, 59).
Rows 13-15: Repeat Row 5. Total stitch count = 33 (37, 39, 43, 49, 53, 59).
Row 16: (increase) Repeat Row 4. Total stitch count = 35 (39, 41, 45, 51, 55, 61).
Rows 17-19: Repeat Row 5. Total stitch count = 35 (39, 41, 45, 51, 55, 61).
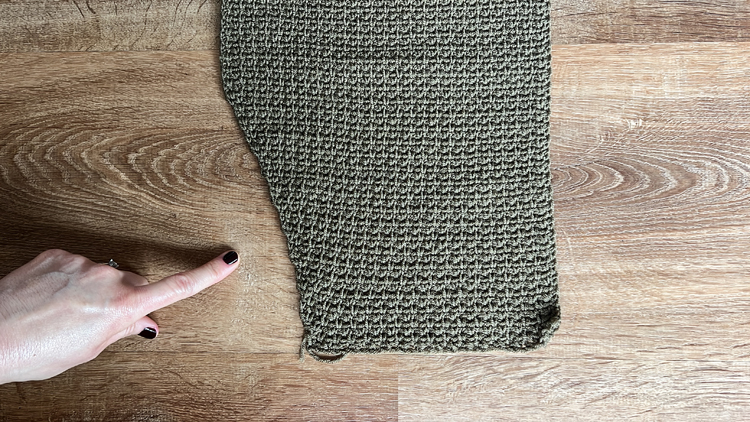
The front piece patterns starts the same for all sizes but now they will finish differently:
SIZE XXS ONLY (front pattern)
Row 20: (increase) Ch 2, turn. Work a sc into the first chain gap. *Ch, skip over the sc from the previous row, sc into the next chain gap.* Continue that pattern from * to *until you get to the last chain gap at the end of the row. This time, work a sc into the chain gap, chain, and then work a sc into the side of the last stitch. Total stitch count = 37.
Rows 21-25: Ch 2, turn. Work a sc into the first chain gap. *Ch, skip over the sc from the previous row, sc into the next chain gap.* Continue that pattern from * to *until you get to the last chain gap at the end of the row. Skip the last chain gap and work a sc into the side of the last stitch/chain. Total stitch count = 37.
Row 26: (increase) Repeat Row 20. Total stitch count = 39.
Rows 27-31: Repeat Row 21. Total stitch count = 39.
Row 32: (increase) Repeat Row 20. Total stitch count = 41.
Rows 33-83: Repeat Row 21. Total stitch count = 41.
Tie off and leave a 5 inch tail.
SIZE XS ONLY (front pattern)
Row 20: (increase) Ch 2, turn. Work a sc into the first chain gap. *Ch, skip over the sc from the previous row, sc into the next chain gap.* Continue that pattern from * to *until you get to the last chain gap at the end of the row. This time, work a sc into the chain gap, chain, and then work a sc into the side of the last stitch. Total stitch count = 41.
Rows 21-23: Ch 2, turn. Work a sc into the first chain gap. *Ch, skip over the sc from the previous row, sc into the next chain gap.* Continue that pattern from * to *until you get to the last chain gap at the end of the row. Skip the last chain gap and work a sc into the side of the last stitch/chain. Total stitch count = 41.
Row 24: (increase) Repeat Row 20. Total stitch count = 43.
Rows 25-27: Repeat Row 21. Total stitch count = 43.
Row 28: (increase) Repeat Row 20. Total stitch count = 45.
Rows 29-33: Repeat Row 21. Total stitch count = 45.
Rows 34: Repeat Row 20. Total stitch count = 47.
Rows 35-85: Repeat Row 21. Total stitch count = 47.
Tie off and leave a 5 inch tail.
SIZE S ONLY (front pattern)
Row 20: (increase) Ch 2, turn. Work a sc into the first chain gap. *Ch, skip over the sc from the previous row, sc into the next chain gap.* Continue that pattern from * to *until you get to the last chain gap at the end of the row. This time, work a sc into the chain gap, chain, and then work a sc into the side of the last stitch. Total stitch count = 43.
Rows 21-23: Ch 2, turn. Work a sc into the first chain gap. *Ch, skip over the sc from the previous row, sc into the next chain gap.* Continue that pattern from * to *until you get to the last chain gap at the end of the row. Skip the last chain gap and work a sc into the side of the last stitch/chain. Total stitch count = 43.
Row 24: (increase) Repeat Row 20. Total stitch count = 45.
Rows 25-27: Repeat Row 21. Total stitch count = 45.
Row 28: (increase) Repeat Row 20. Total stitch count = 47.
Rows 29-31: Repeat Row 21. Total stitch count = 47.
Row 32: (increase) Repeat Row 20. Total stitch count = 49.
Rows 33-35: Repeat Row 21. Total stitch count = 49.
Row 36: (increase) Repeat Row 20. Total stitch count = 51.
Rows 37-87: Repeat Row 21. Total stitch count = 51.
Tie off and leave a 5 inch tail.
SIZE M ONLY (front pattern)
Row 20: (increase) Ch 2, turn. Work a sc into the first chain gap. *Ch, skip over the sc from the previous row, sc into the next chain gap.* Continue that pattern from * to *until you get to the last chain gap at the end of the row. This time, work a sc into the chain gap, chain, and then work a sc into the side of the last stitch. Total stitch count = 47.
Rows 21-23: Ch 2, turn. Work a sc into the first chain gap. *Ch, skip over the sc from the previous row, sc into the next chain gap.* Continue that pattern from * to *until you get to the last chain gap at the end of the row. Skip the last chain gap and work a sc into the side of the last stitch/chain. Total stitch count = 47.
Row 24: (increase) Repeat Row 20. Total stitch count = 49.
Rows 25-27: Repeat Row 21. Total stitch count = 49.
Row 28: (increase) Repeat Row 20. Total stitch count = 51.
Rows 29-31: Repeat Row 21. Total stitch count = 51.
Row 32: (increase) Repeat Row 20. Total stitch count = 53.
Rows 33-35: Repeat Row 21. Total stitch count = 53.
Row 36: (increase) Repeat Row 20. Total stitch count = 55.
Rows 37: Repeat Row 21. Total stitch count = 55.
Row 38: (increase) Repeat Row 20. Total stitch count = 57.
Rows 39-89: Repeat Row 21. Total stitch count = 57.
Tie off and leave a 5 inch tail.
SIZE L ONLY (front pattern)
Row 20: (increase) Ch 2, turn. Work a sc into the first chain gap. *Ch, skip over the sc from the previous row, sc into the next chain gap.* Continue that pattern from * to *until you get to the last chain gap at the end of the row. This time, work a sc into the chain gap, chain, and then work a sc into the side of the last stitch. Total stitch count = 53.
Rows 21-23: Ch 2, turn. Work a sc into the first chain gap. *Ch, skip over the sc from the previous row, sc into the next chain gap.* Continue that pattern from * to *until you get to the last chain gap at the end of the row. Skip the last chain gap and work a sc into the side of the last stitch/chain. Total stitch count = 53.
Row 24: (increase) Repeat Row 20. Total stitch count = 55.
Rows 25-27: Repeat Row 21. Total stitch count = 55.
Row 28: (increase) Repeat Row 20. Total stitch count = 57.
Rows 29-31: Repeat Row 21. Total stitch count = 57.
Row 32: (increase) Repeat Row 20. Total stitch count = 59.
Rows 33-35: Repeat Row 21. Total stitch count = 59.
Row 36: (increase) Repeat Row 20. Total stitch count = 61.
Rows 37: Repeat Row 21. Total stitch count = 61.
Row 38: (increase) Repeat Row 20. Total stitch count = 63.
Rows 39: Repeat Row 21. Total stitch count = 63.
Row 40: (increase) Repeat Row 20. Total stitch count = 65.
Rows 41-91: Repeat Row 21. Total stitch count = 65.
Tie off and leave a 5 inch tail.
SIZE XL ONLY (front piece)
Row 20: (increase) Ch 2, turn. Work a sc into the first chain gap. *Ch, skip over the sc from the previous row, sc into the next chain gap.* Continue that pattern from * to *until you get to the last chain gap at the end of the row. This time, work a sc into the chain gap, chain, and then work a sc into the side of the last stitch. Total stitch count = 57.
Rows 21-23: Ch 2, turn. Work a sc into the first chain gap. *Ch, skip over the sc from the previous row, sc into the next chain gap.* Continue that pattern from * to *until you get to the last chain gap at the end of the row. Skip the last chain gap and work a sc into the side of the last stitch/chain. Total stitch count = 57.
Row 24: (increase) Repeat Row 20. Total stitch count = 59.
Rows 25-27: Repeat Row 21. Total stitch count = 59.
Row 28: (increase) Repeat Row 20. Total stitch count = 61.
Rows 29-31: Repeat Row 21. Total stitch count = 61.
Row 32: (increase) Repeat Row 20. Total stitch count = 63.
Rows 33-35: Repeat Row 21. Total stitch count = 63.
Row 36: (increase) Repeat Row 20. Total stitch count = 65.
Rows 37: Repeat Row 21. Total stitch count = 65.
Row 38: (increase) Repeat Row 20. Total stitch count = 67.
Rows 39: Repeat Row 21. Total stitch count = 67.
Row 40: (increase) Repeat Row 20. Total stitch count = 69.
Rows 41: Repeat Row 21. Total stitch count = 69.
Row 42: (increase) Repeat Row 20. Total stitch count = 71.
Rows 43-93: Repeat Row 21. Total stitch count = 71.
Tie off and leave a 5 inch tail.
SIZE XXL ONLY (front piece)
Row 20: (increase) Ch 2, turn. Work a sc into the first chain gap. *Ch, skip over the sc from the previous row, sc into the next chain gap.* Continue that pattern from * to *until you get to the last chain gap at the end of the row. This time, work a sc into the chain gap, chain, and then work a sc into the side of the last stitch. Total stitch count = 63.
Rows 21-23: Ch 2, turn. Work a sc into the first chain gap. *Ch, skip over the sc from the previous row, sc into the next chain gap.* Continue that pattern from * to *until you get to the last chain gap at the end of the row. Skip the last chain gap and work a sc into the side of the last stitch/chain. Total stitch count = 63.
Row 24: (increase) Repeat Row 20. Total stitch count = 65.
Rows 25-27: Repeat Row 21. Total stitch count = 65.
Row 28: (increase) Repeat Row 20. Total stitch count = 67.
Rows 29-31: Repeat Row 21. Total stitch count = 67.
Row 32: (increase) Repeat Row 20. Total stitch count = 69.
Rows 33: Repeat Row 21. Total stitch count = 69.
Row 34: (increase) Repeat Row 20. Total stitch count = 71.
Rows 35: Repeat Row 21. Total stitch count = 71.
Row 36: (increase) Repeat Row 20. Total stitch count = 73.
Rows 37: Repeat Row 21. Total stitch count = 73.
Row 38: (increase) Repeat Row 20. Total stitch count = 75.
Rows 39: Repeat Row 21. Total stitch count = 75.
Row 40: (increase) Repeat Row 20. Total stitch count = 77.
Rows 41: Repeat Row 21. Total stitch count = 77.
Row 42: (increase) Repeat Row 20. Total stitch count = 79.
Rows 43-95: Repeat Row 21. Total stitch count = 79.
Tie off and leave a 5 inch tail.
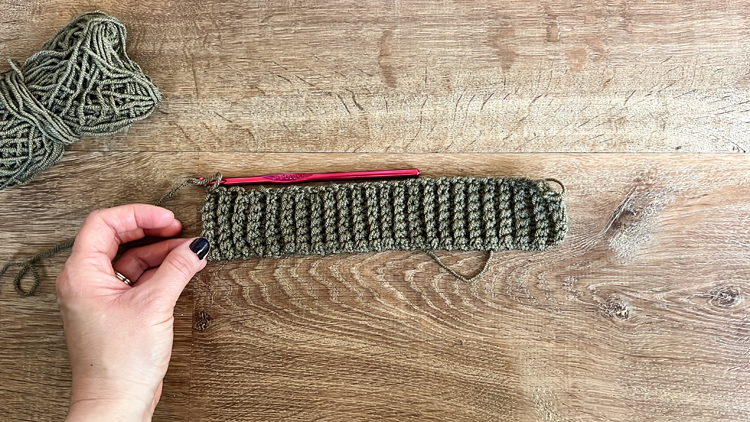
SLEEVE RIBBING – make 2
Ch 9.
Row 1: Sc into second ch from the hook. Sc across the row. Total stitch count, not including the 1st skipped ch = 8.
Row 2: Turn, ch 1, sc into blo in each stitch in the row. Total stitch count = 8.
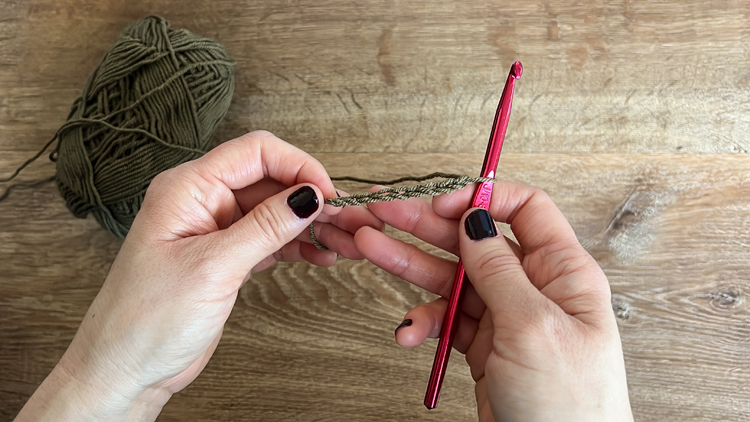
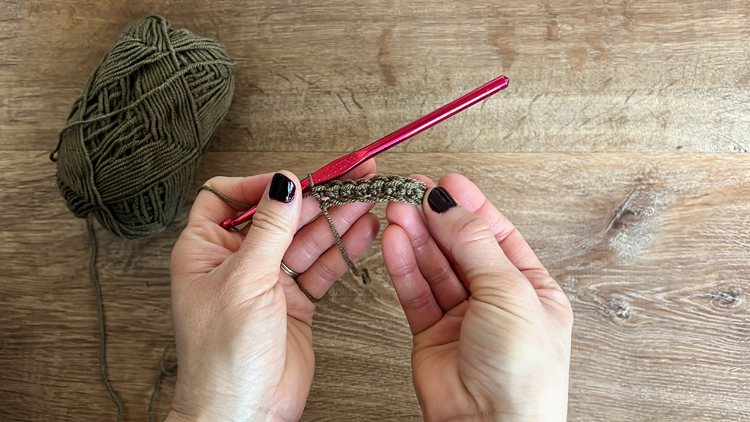
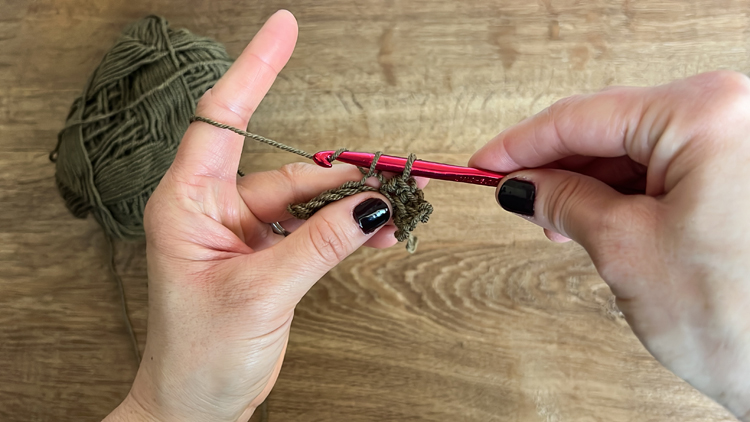
XXS ONLY – Rows 3-43: Repeat Row 2.
XS ONLY – Rows 3-45: Repeat Row 2.
S ONLY – Rows 3-47: Repeat Row 2.
M ONLY – Rows 3-50: Repeat Row 2.
L ONLY – Rows 3-55: Repeat Row 2.
XL ONLY – Rows 3-63: Repeat Row 2.
XXL ONLY – Rows 3-70: Repeat Row 2.
Do not tie off. Use the working yarn to seam to the sleeves (see section on seaming)
HEM BAND RIBBING – make 1
Ch 11.
Row 1: Sc into second ch from the hook. Sc across the row. Total stitch count, not including the 1st skipped ch = 10.
Row 2: Turn, ch 1, sc into blo in each stitch in the row. Total stitch count = 10.
XXS ONLY – Rows 3-194: Repeat Row 2.
XS ONLY – Rows 3-204: Repeat Row 2.
S ONLY – Rows 3-214: Repeat Row 2.
M ONLY – Rows 3-224: Repeat Row 2.
L ONLY – Rows 3-239: Repeat Row 2.
XL ONLY – Rows 3-254: Repeat Row 2.
XXL ONLY – Rows 3-269: Repeat Row 2.
Do not tie off. Use the working yarn to seam to the bottom of the cardigan (see section on seaming).
SEAMING
In this pattern, every piece is seamed or joined together with sc.

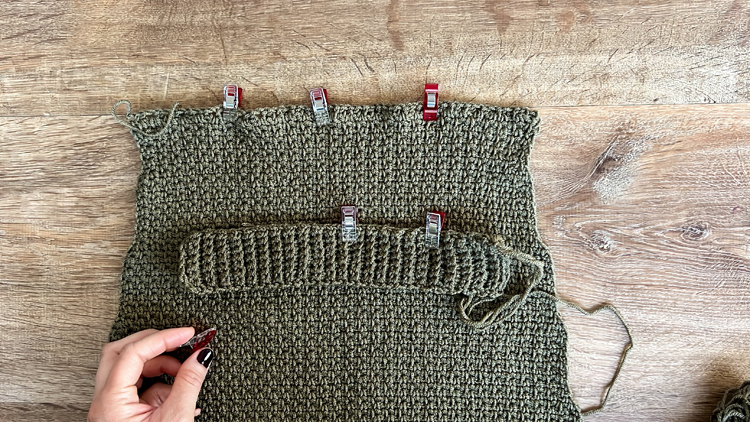
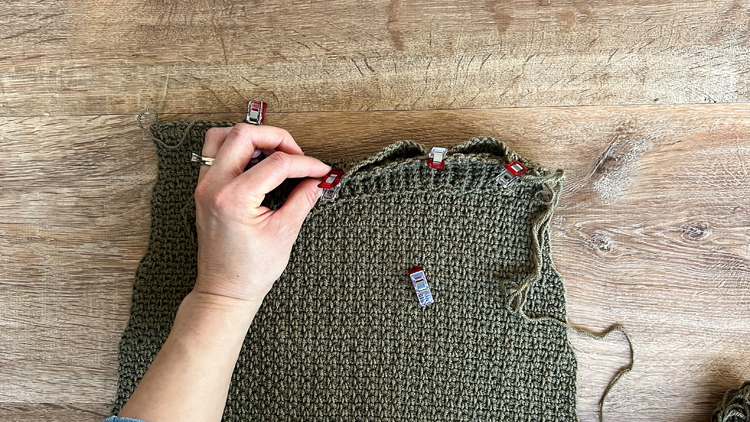
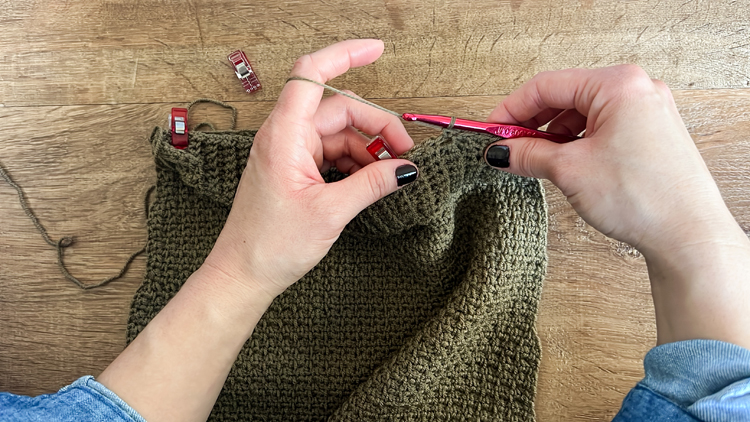
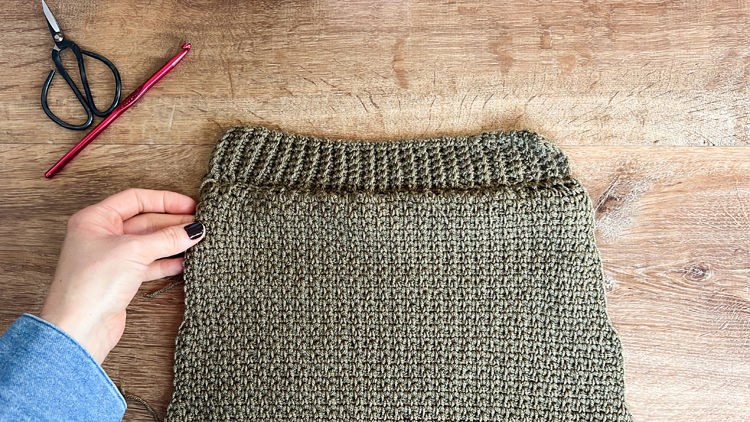
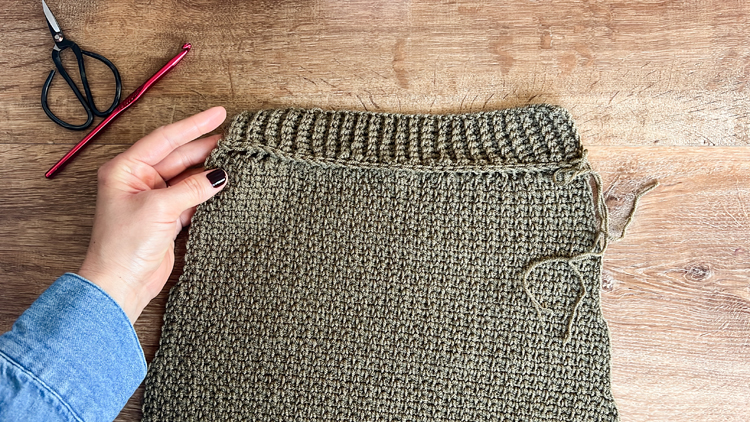
Sleeve Ribbing
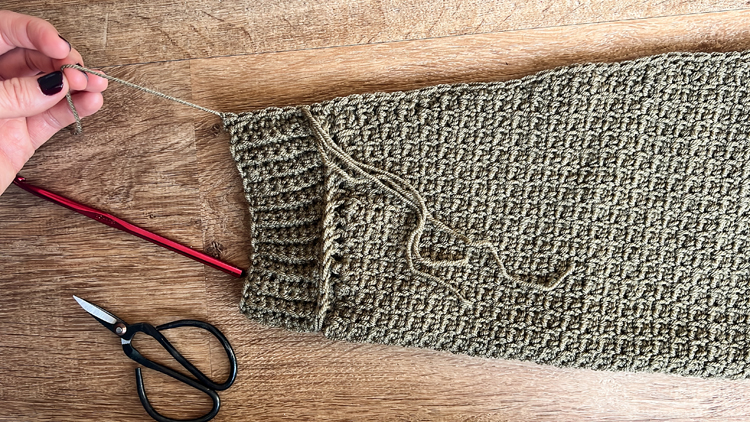
Evenly divide and mark with stitch markers, clips, or pins the sleeve ribbing and the shorter end of the sleeve pieces. The sleeve ribbing will stretch to fit the sleeve width and we want it stretch evenly and consistently. Pin/clip the ribbing to the sleeve.
Using the working yarn from the ribbing (remember you didn’t tie it off), insert your hook through both one corner of the ribbing and one corner of the short end of the sleeve, and sc the ribbing in place. Tie of the end and leave a 5 inch tail. Repeat for the other sleeve and ribbing.
TIP: For an even looking seam, insert your hook wherever makes sense with the ribbing (it may vary as you stretch it) and into the chain gaps of the sleeve piece, not the sc stitches.
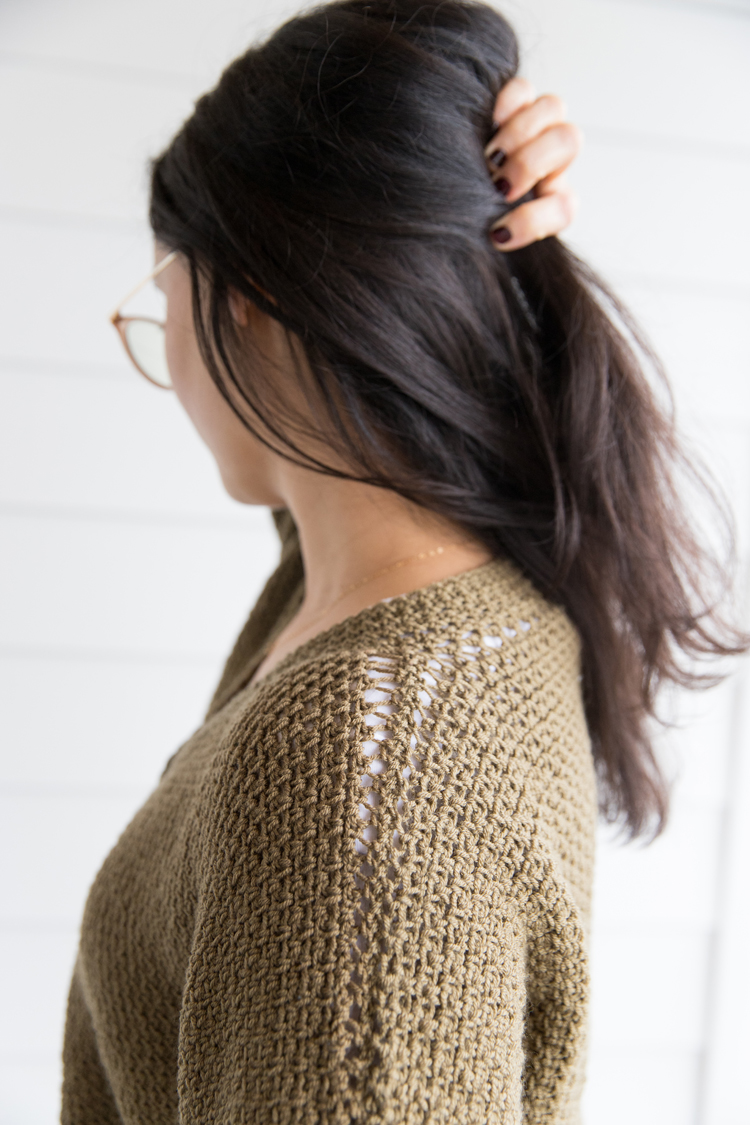
The seam will look a bit “holey” because you worked in the chain gaps/spaces, but once it’s worn it will not be noticeable. The sleeve sort of bubbles up and slouches over the sleeve.
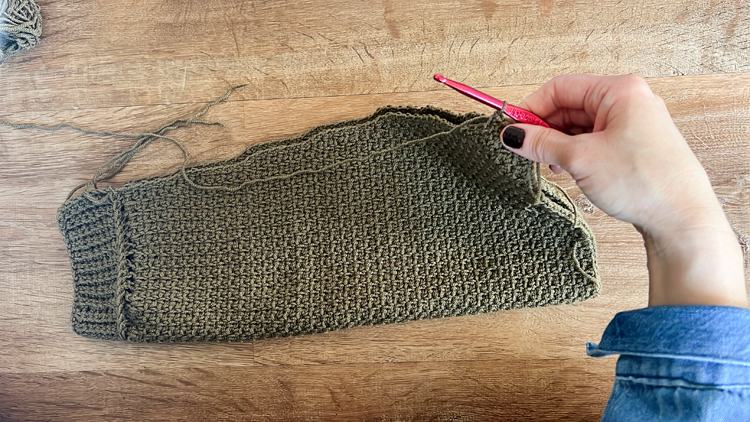
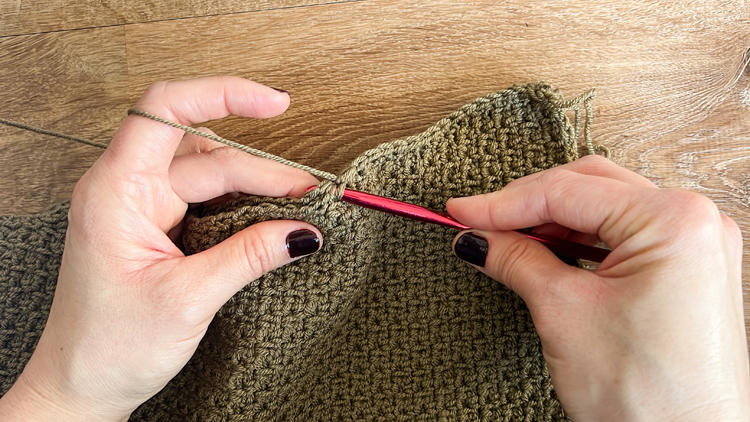
Sleeves
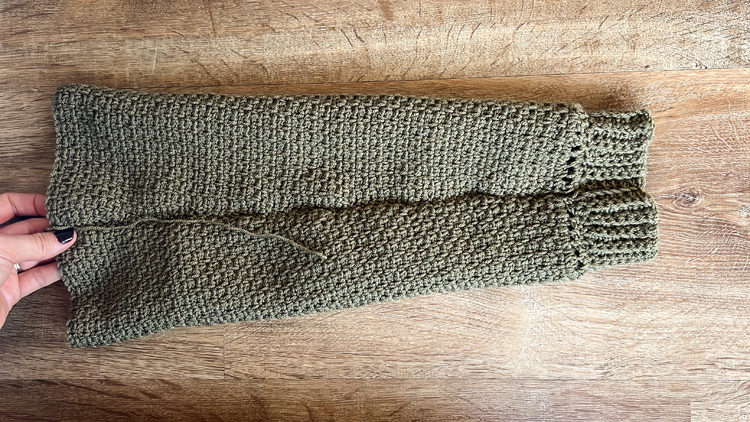
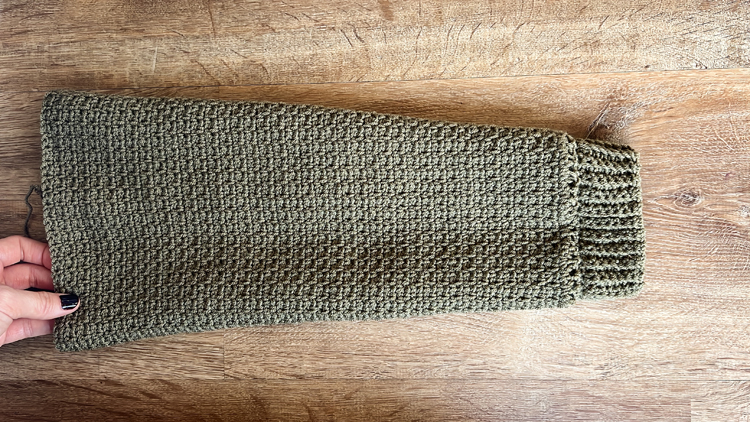
Fold the sleeves in half, length-wise. Tie a slip knot and insert your hook into it. Insert your hook into both layers of the sleeve at one end/corner and slip stitch it in place. Sc the sleeve into a tube, inserting your hook through both layers, matching row to row as you go. Tie off the end and leave a 5 inch tail. Repeat for the other sleeve.


Front and Back Pieces
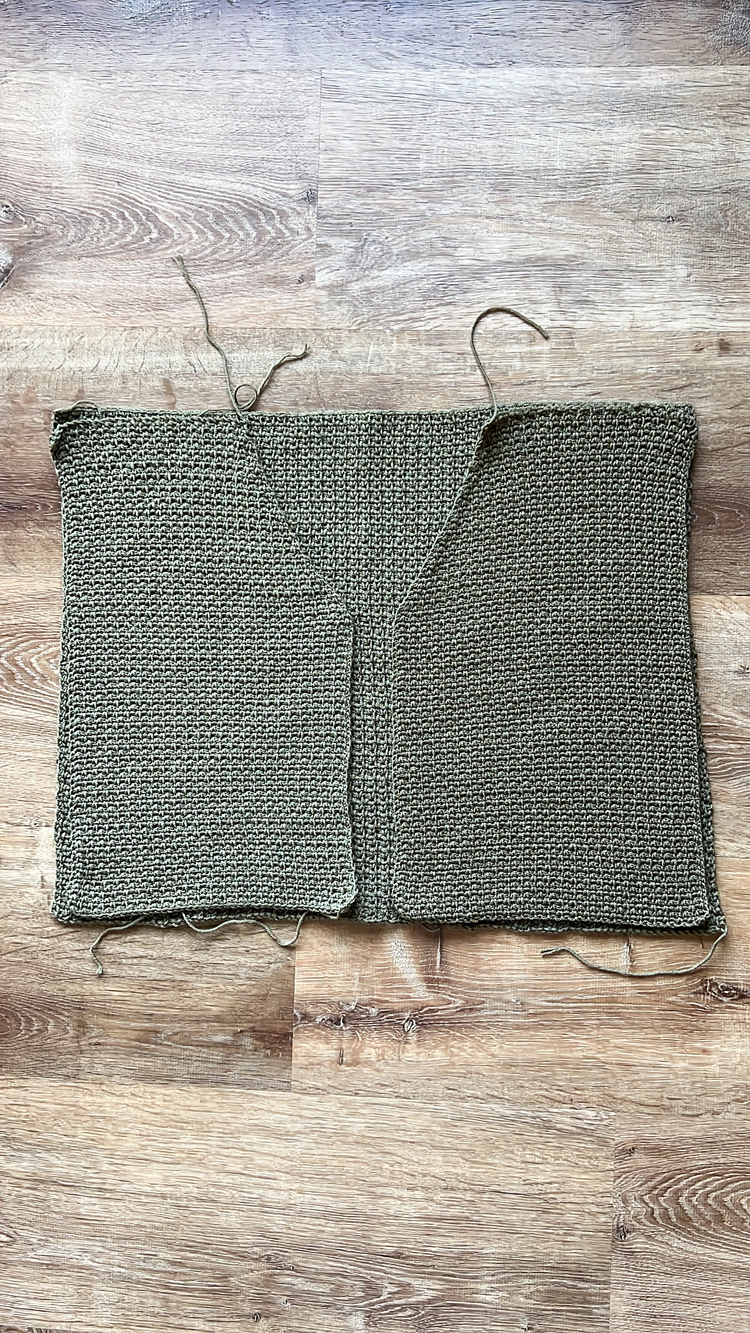
Lay the front pieces on top of the back piece, each piece mirroring each other. As the front pieces were worked “upside down” so that the “v” shape of the stitches point downward, make sure the back piece is oriented the same way.
Note: The front pieces may seem narrower than they should. You can block them to help the stitches relax to the correct size, or you can just make sure your stitch count is correct and know that it will stretch to fit as the cardigan comes together. There should be about a 1.5 inch gap between the pieces where the neckband/button placket will go.
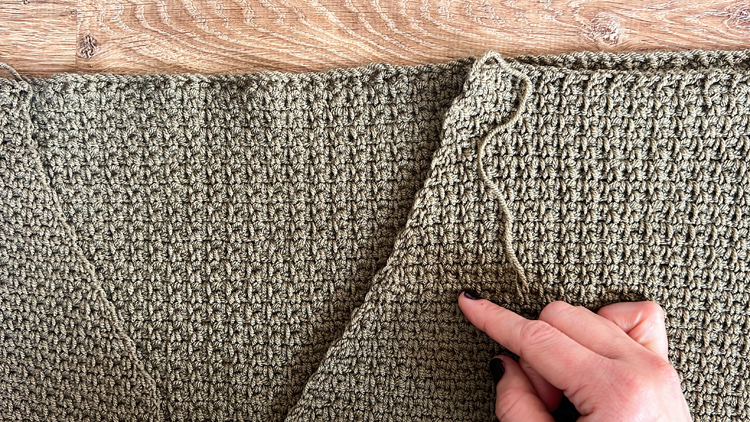
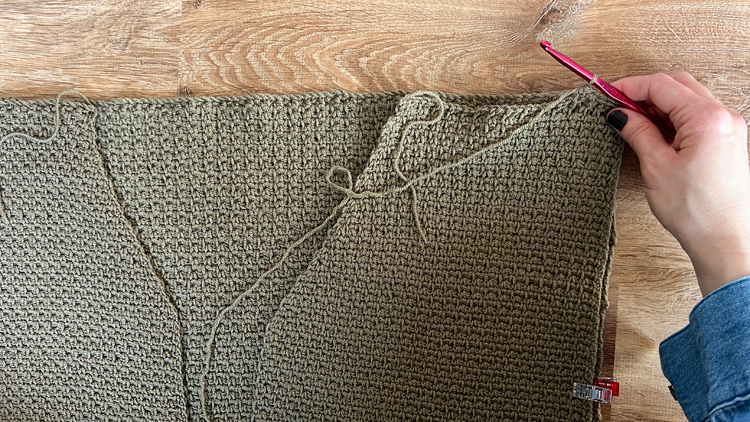
SHOULDERS: Seam the shoulders together with sc, matching chain gap with chain gap.
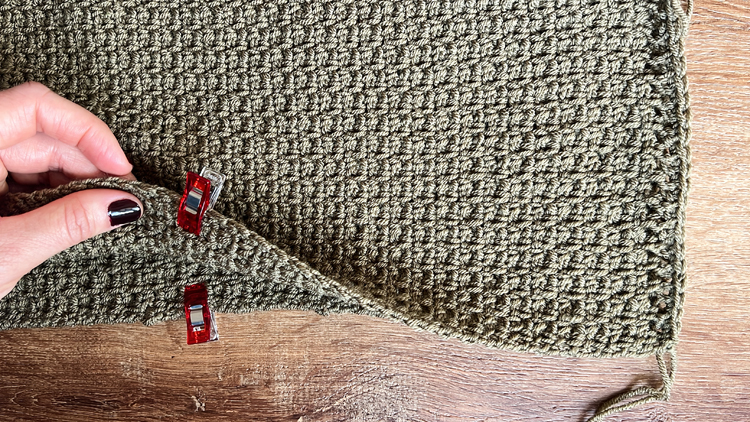
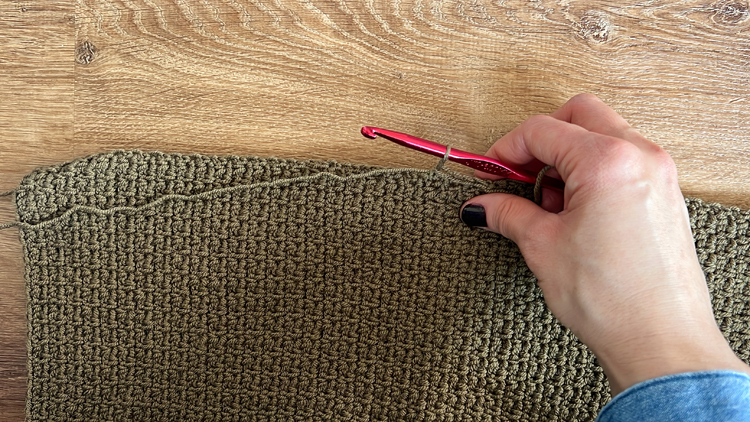
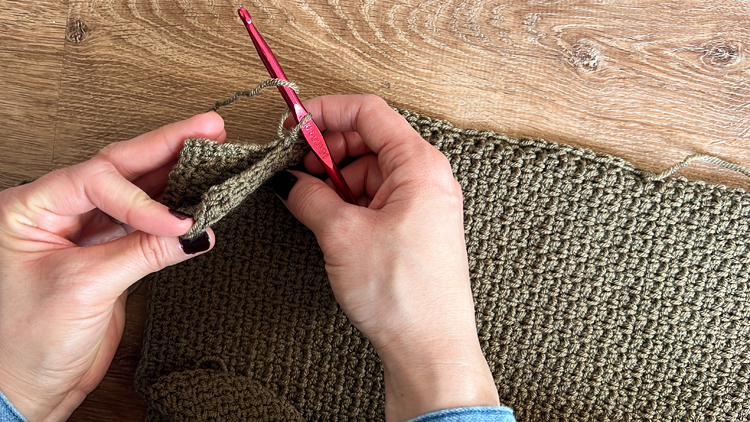
SIDES: Count the number of rows indicated below for each size, down from the shoulder seam and mark the side edge with a clip or stitch marker for both the front and back layers and on both sides.
Size – Rows (from shoulder seam to underarm seam):
XXS – 38, XS – 39, S – 40, M – 42, L – 44, XL – 48, XXXL – 51
Starting at the marked “underarm” spot, tie a slip knot with a new piece of yarn, insert your hook through both front and back layers, and sc the side seam together, matching row for row like you did the sleeves. Tie off and leave a 5 inch tail.
Repeat for both sides. You now have a cardigan bodice.
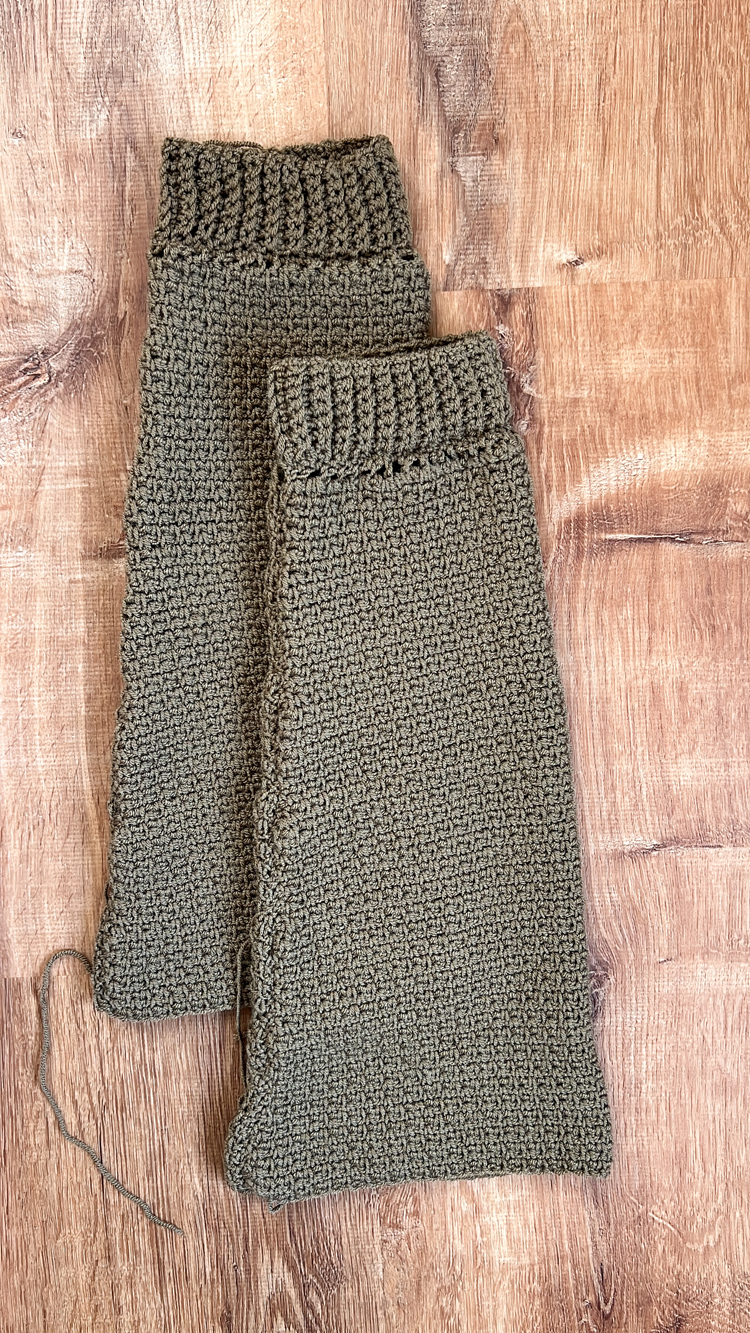
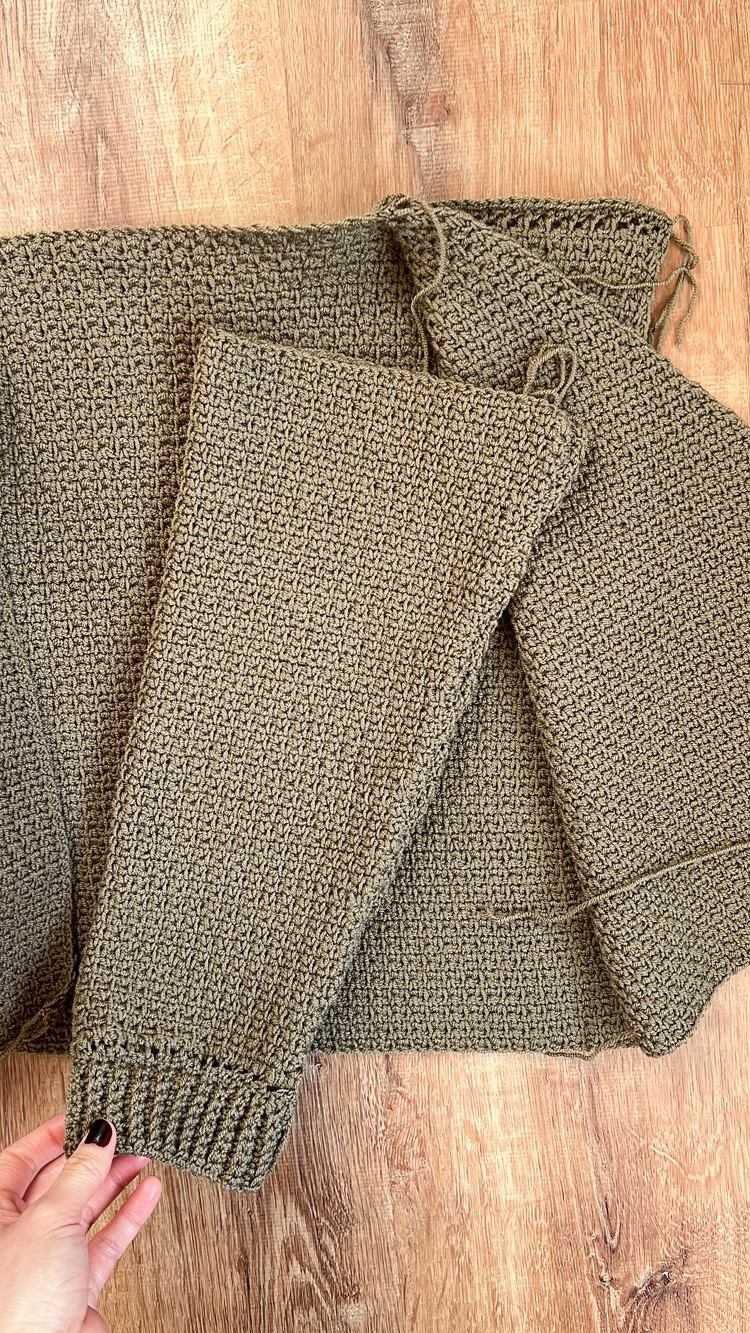
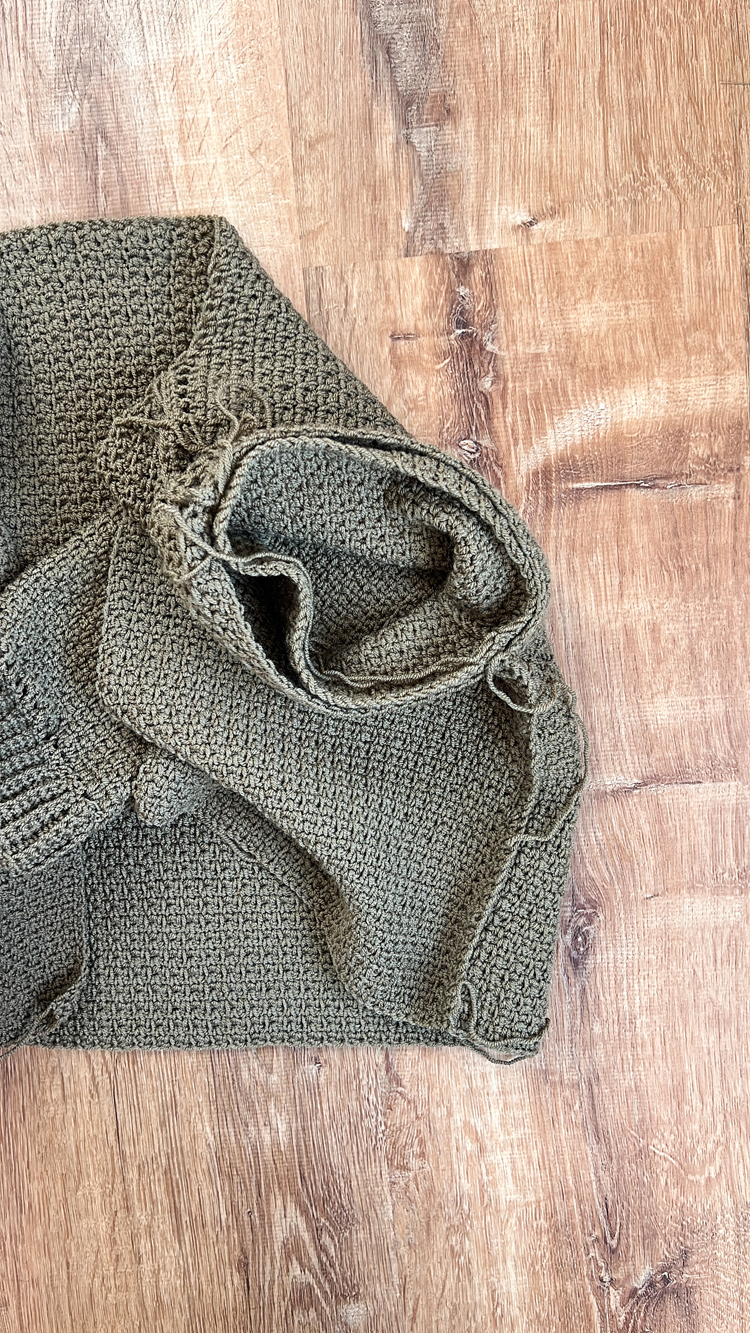
Sleeves to Cardigan Bodice
Turn the cardigan bodice inside out and the sleeves right side out. Open the front of the cardigan bodice and insert the wide end of the sleeve into the newly created arm hole in the cardigan bodice. Matching sleeve seam with side seam, pin or clip the sleeve around the arm hole opening evenly, with only minimal stretching and only as needed.
Sc around the sleeve to the cardigan bodice armholes in the same way as you seamed the other pieces. The only difference is that there is no strict prescription on where to insert your hook to work the seam. As long as the seam is without puckers and lays flat, work the seam how it best makes sense to you.
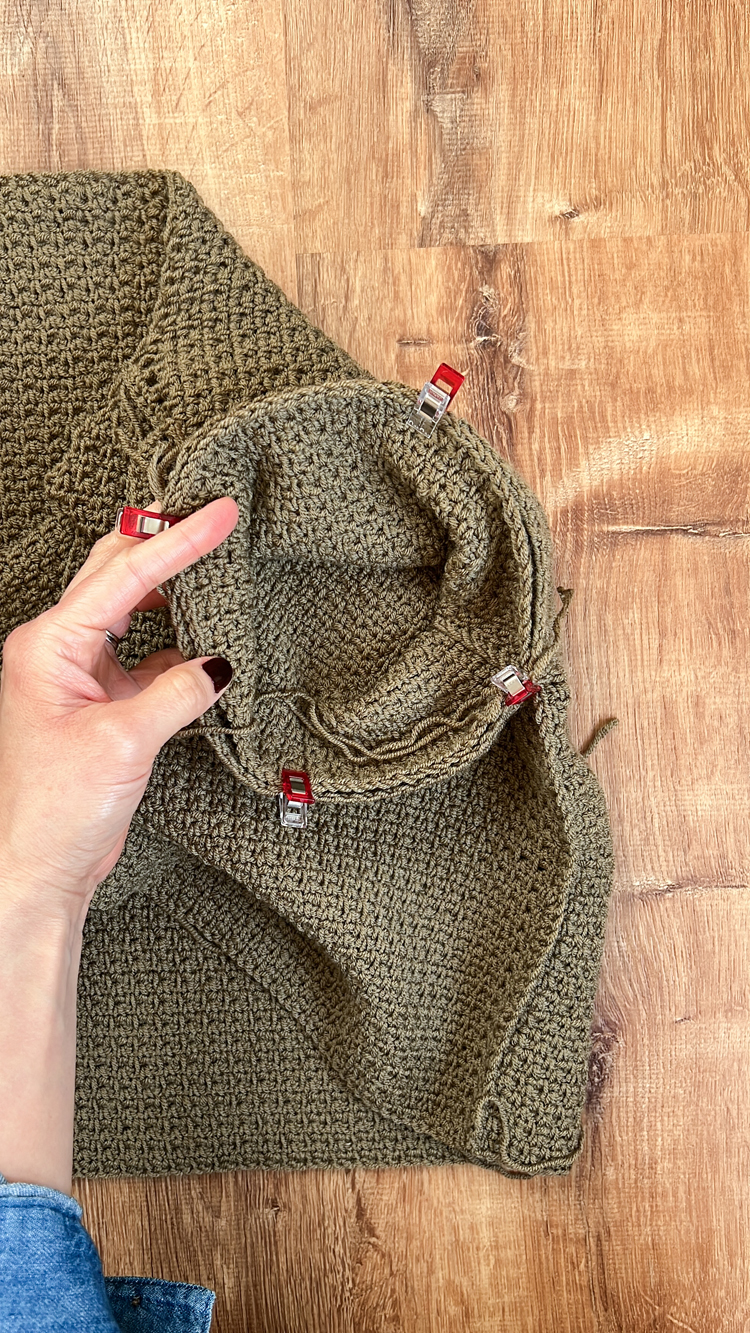
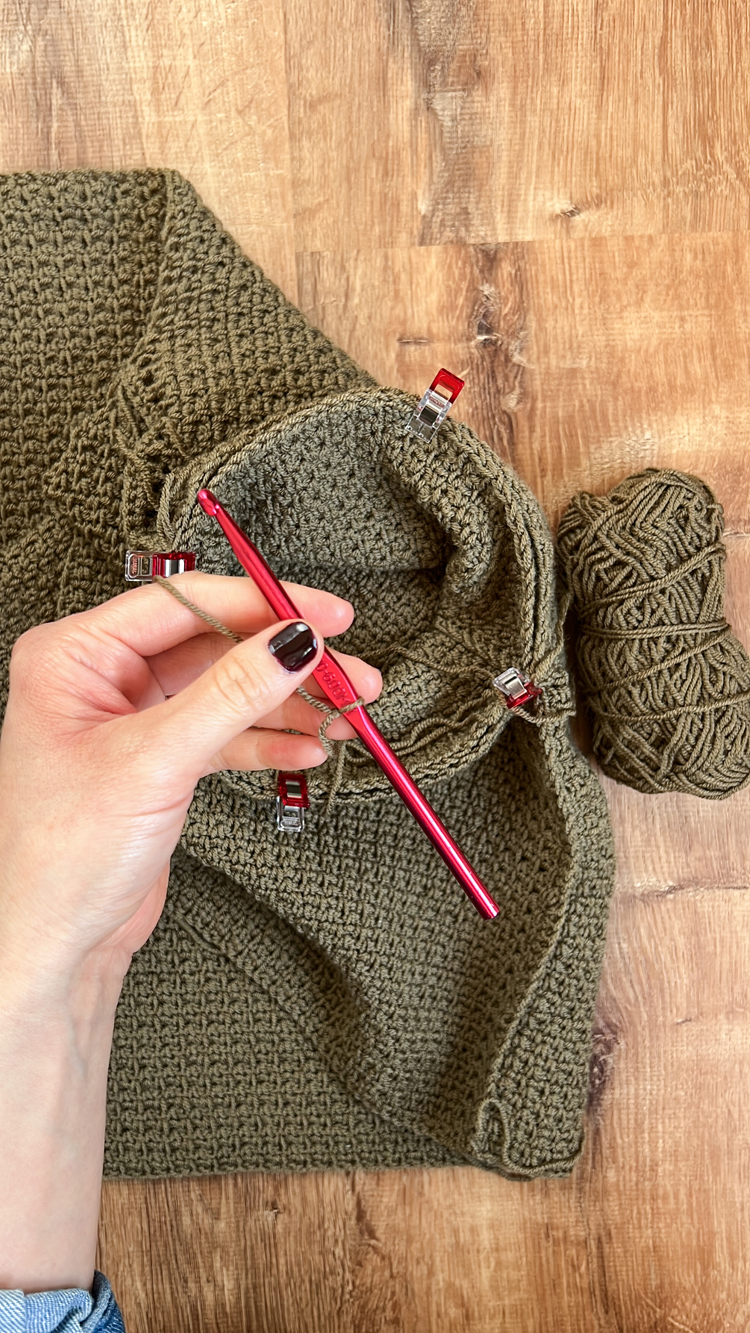
Work around the entire opening and then tie of the end and repeat for the other side.

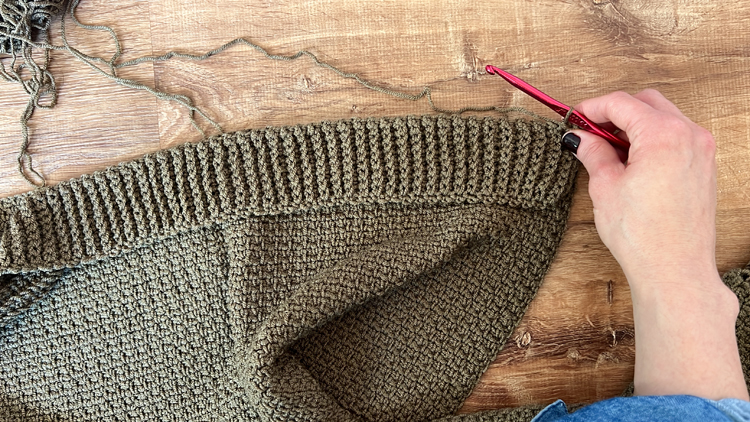
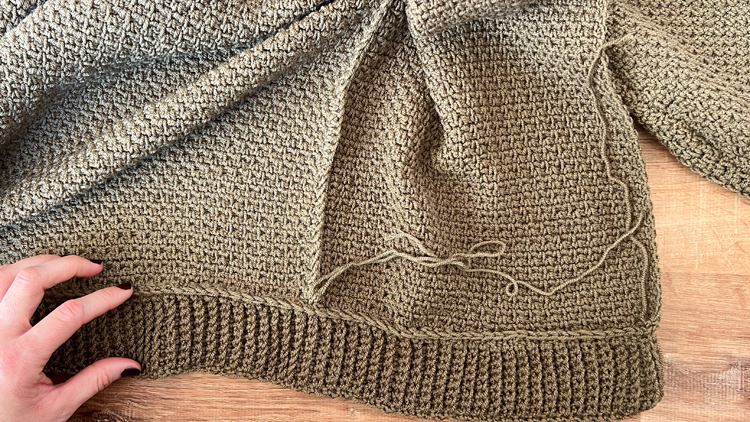
Hem Band to Cardigan Bottom
Seam the hem band to the bottom of the cardigan bodice with sc as you have the other pieces. It should not be stretched to fit, but should be the same length at the bottom of the cardigan.
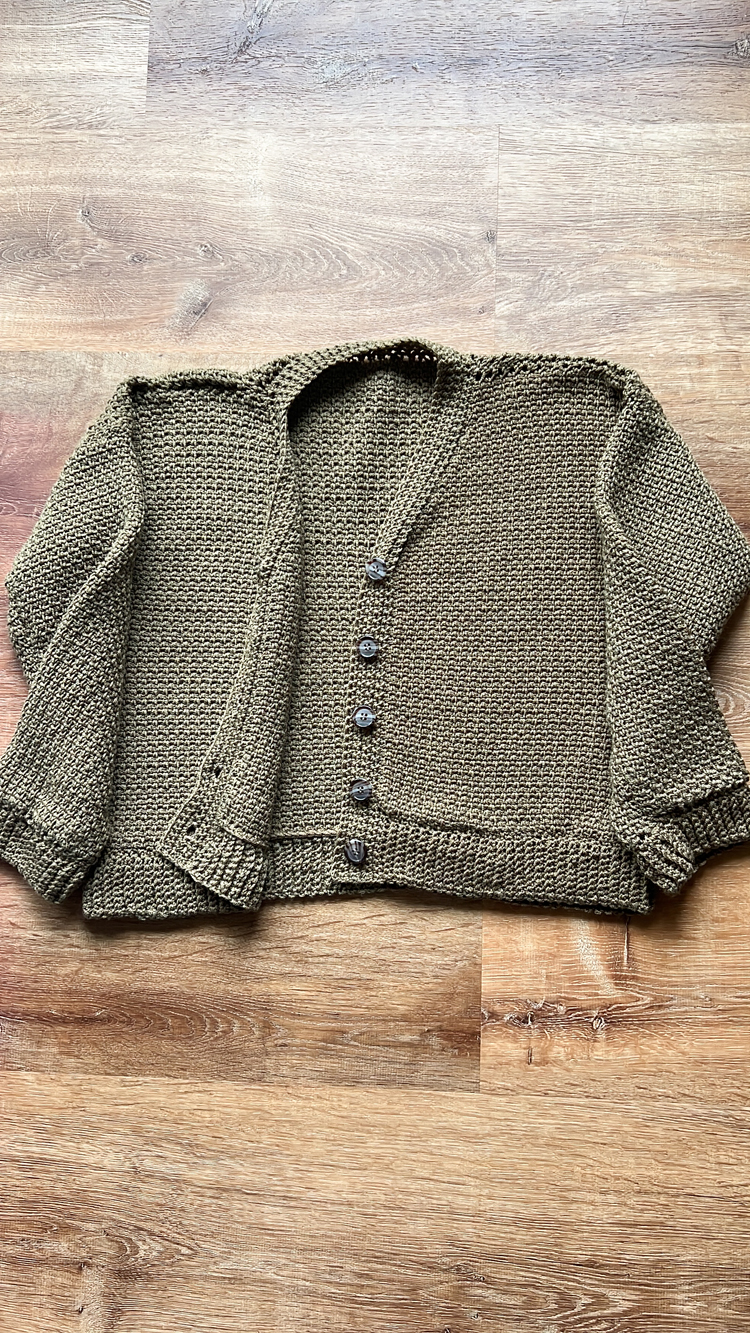
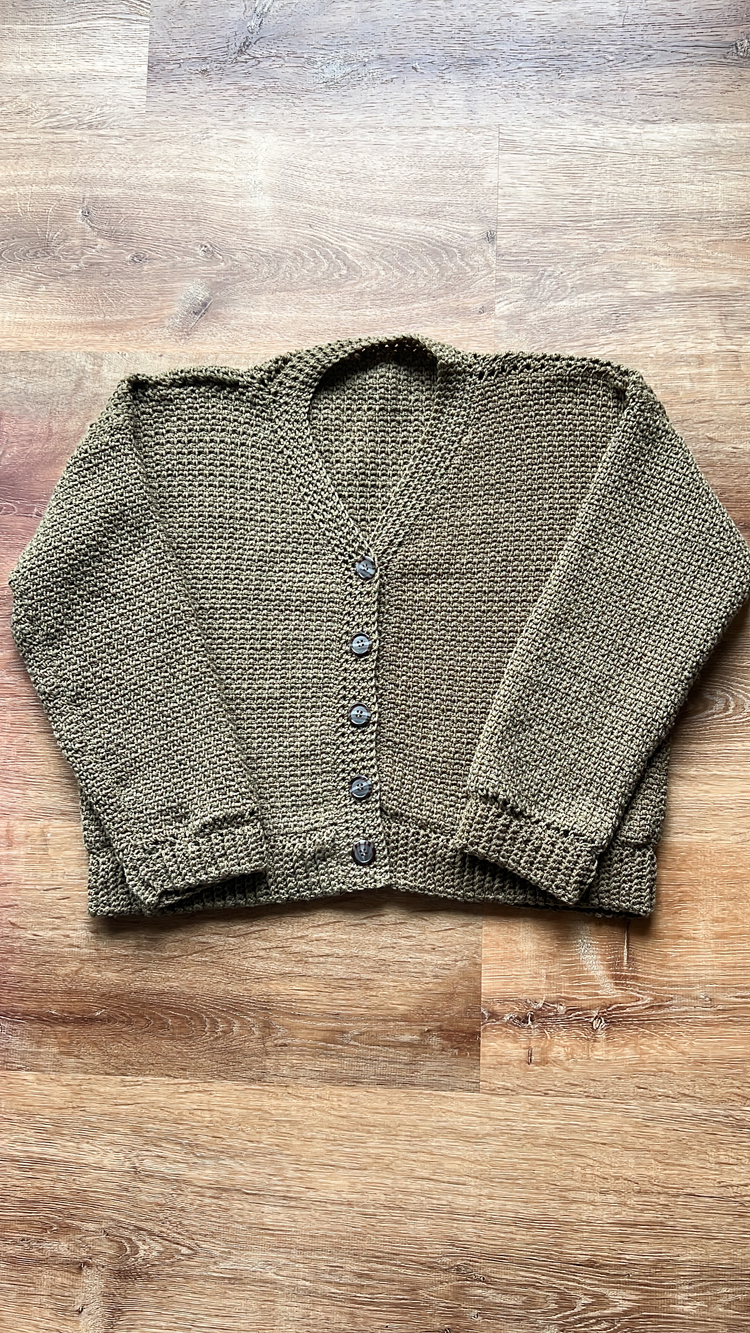
NECKBAND/BUTTON PLACKET
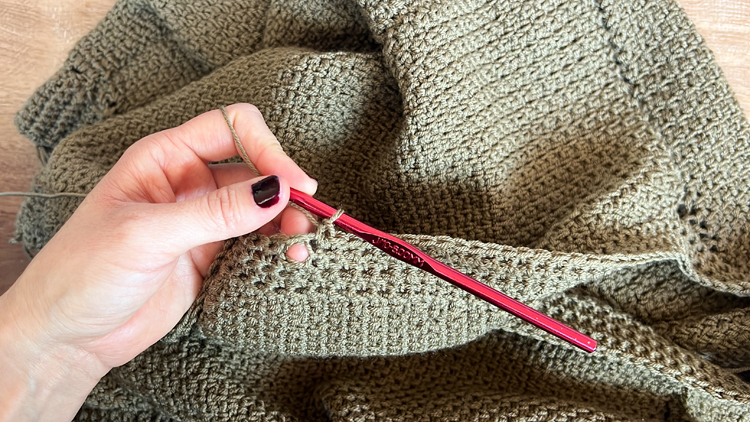
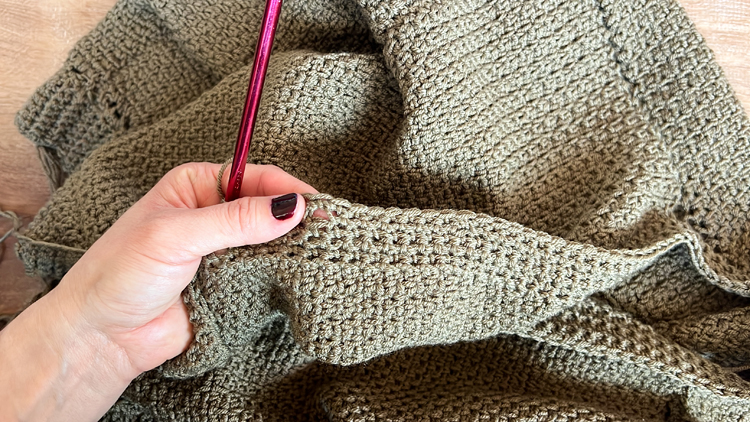
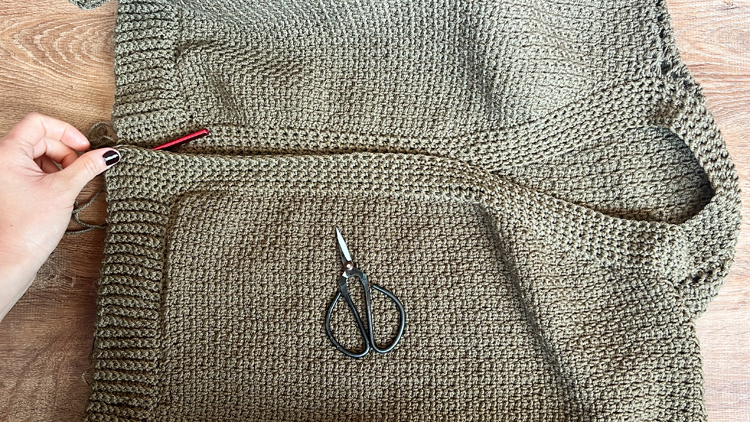
ROW 1: Starting at the inside bottom corner of the right hand front piece of the cardigan (right hand while being worn), tie a slip knot, insert your hook into the slip knot and then into that corner. Ch 1, and then sc around the opening of the cardigan keeping your tension loose. The goal is to cinch in the opening somewhat to make it secure, but not to make it pucker.
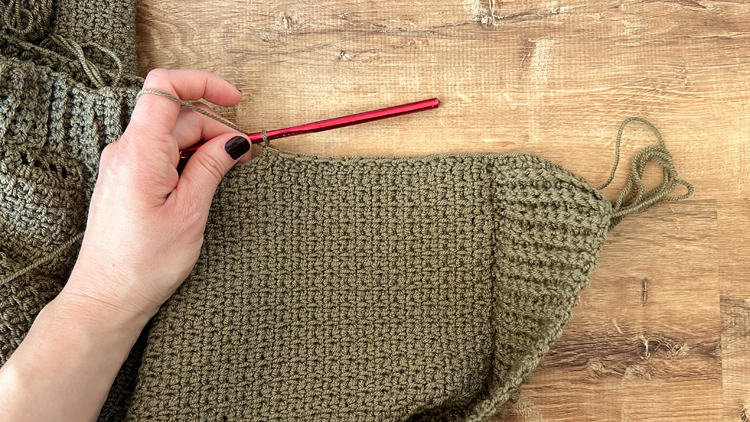
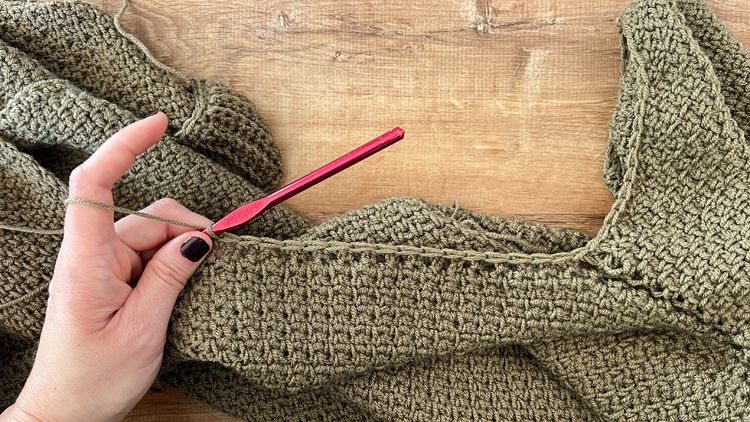
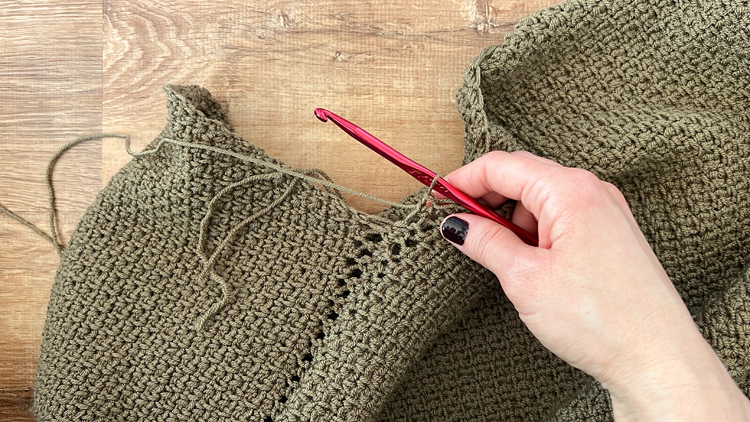
Work into each stitch of the hem band. When you get the the sides of the linen stitch rows, work into every other row, skipping the really tight chained sides. For the back of the neck, work into each chain gap or space. Follow the total stitch count listed below for a guide to how many stitches to work around the opening:
XXS (XS, S, M, L, XL, XXL)
Work 34 sc from the hem band to the curved portion of the neckline for every size, except for XXL which needs 35 sc. Then work 60 (66, 72, 78, 84, 90, 94) up the curved portion, around the back of the neck, and down the curved portion on the other side. Then work 34 sc back down to the hem.
Total stitch count for neckband opening = 128 (134, 140, 146, 152, 158, 164) – or as close to this as makes sense for you.
ROWS 2-4: Turn, ch 1, sc into each stitch in the row. Total stitch count = 128 (134, 140, 146, 152, 158, 164)
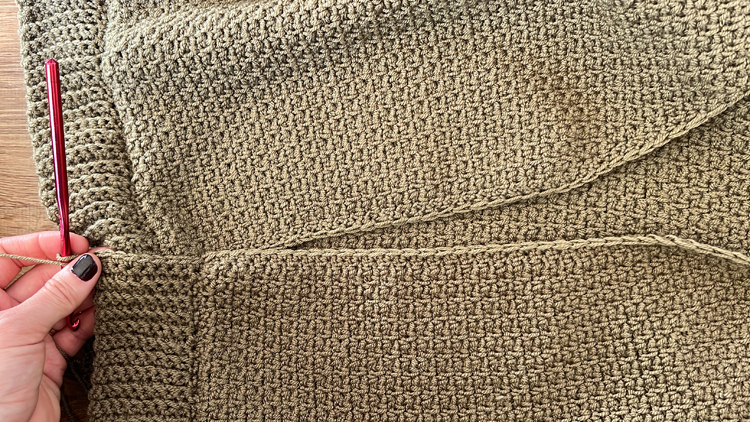
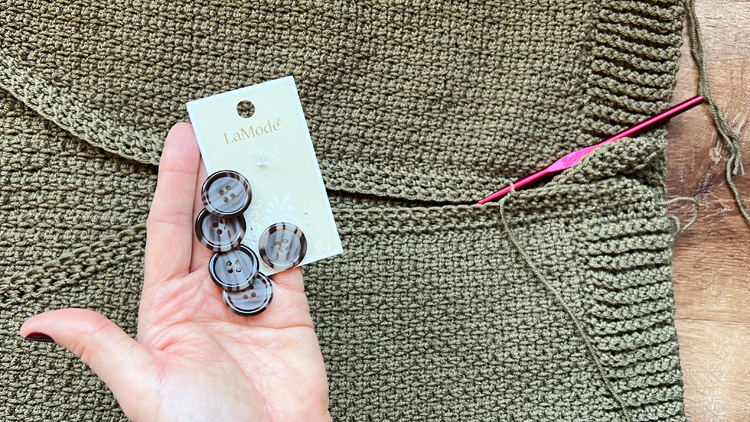
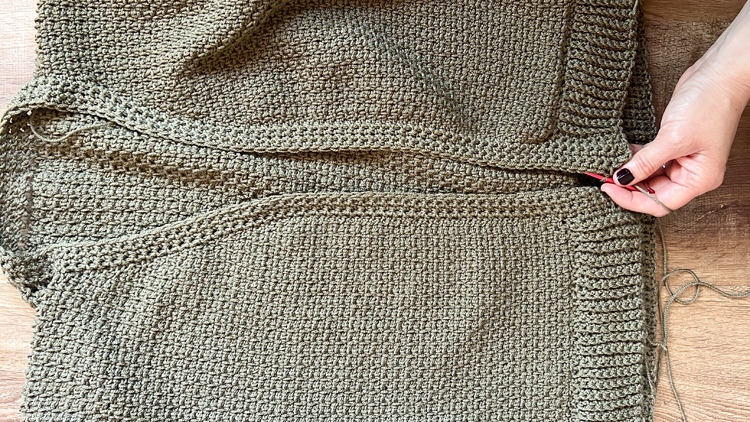
All sizes except for XXL:
ROW 5: (button holes) Turn, ch 1, work 4 sc,* ch, skip a stitch, work 7 sc,*, repeat 3 more times. Ch, skip a stitch, sc into the next and for the rest of the row as normal. Total stitch count = 128 (134, 140, 146, 152, 158, see below)
Size XXL only:
ROW 5: (button holes) Turn, ch 1, work 5 sc,* ch, skip a stitch, work 7 sc,*, repeat 3 more times. Ch, skip a stitch, sc into the next and for the rest of the row as normal. Total stitch count = 164.
ROW 6: Turn, ch 1, work sc into each stitch. When you get to the skipped chain spaces, work 1 sc into each chain space or gap.
ROW 7: Repeat ROW 2. Tie off the end and leave a 5 inch tail.
BUTTON HOLES + BUTTONS
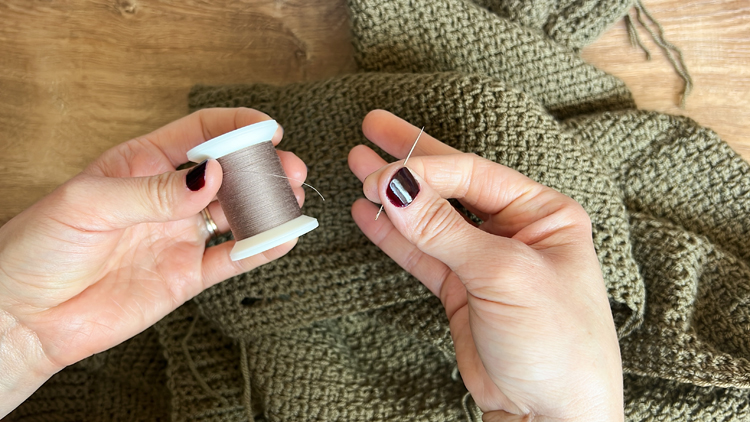
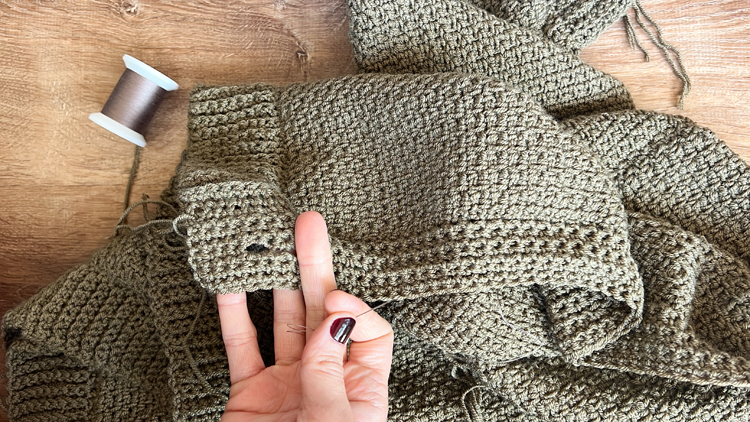
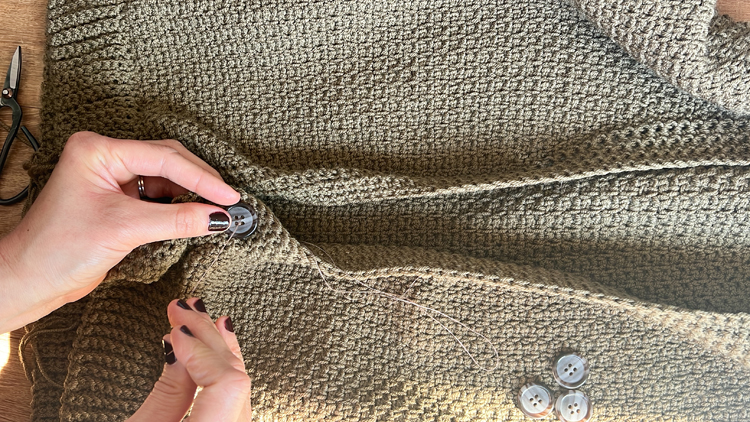
Using a hand sewing needle and matching thread, sew a whip stitch about a dozen times around each buttonhole opening from the inside of the button placket. I don’t like to sew it so much that you can see the thread, but enough to make it easier to find the button hole and to help it keep its shape.
Double knot the ends and trim off the rest. Make sure the button can pass through snugly.
Use the guide below to determine button placement. Sew the buttons slightly off center, away from the edge, so that when the cardigan is buttoned up, and the button holes pull the buttons over to the inside edge, the buttons will look centered.
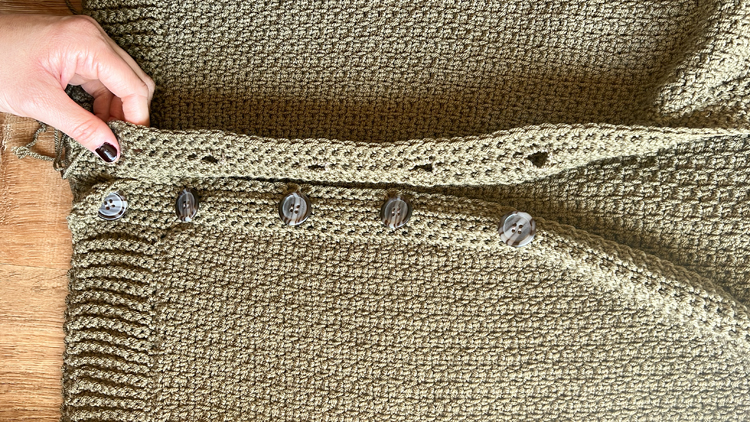
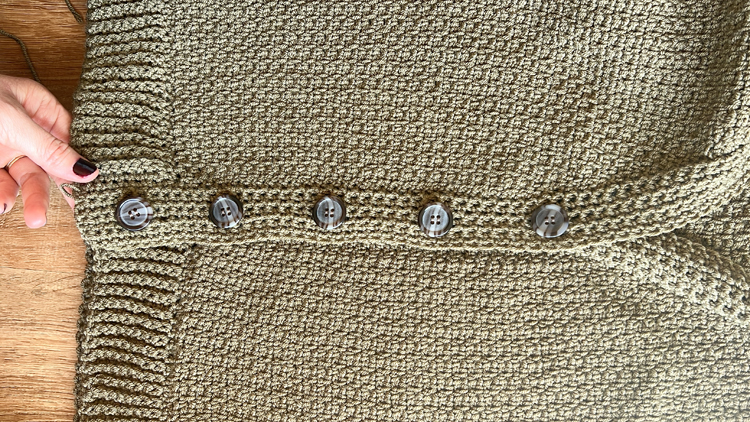
Weave in all the ends, I like to use them to help clean up edges and seams…
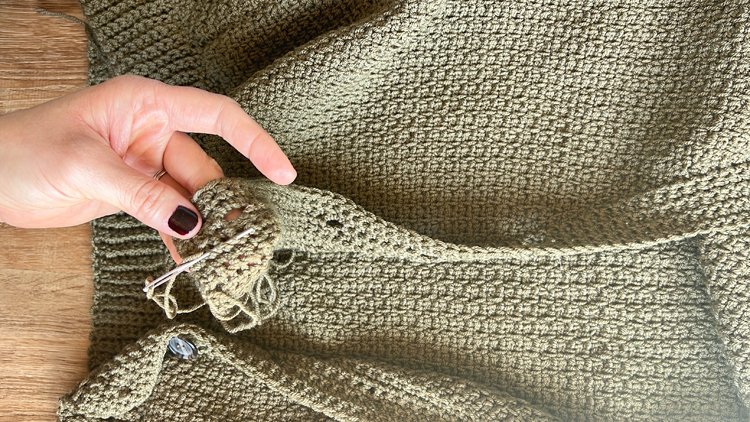
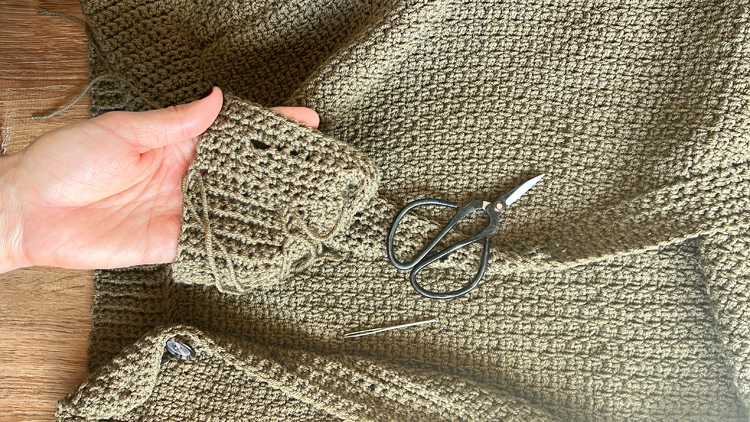
You’re almost done…
Optional: You can wet block the pieces so that they lay flat before you seam them together. Wet blocking is getting your work damp/wet, pinning it flat, and letting it dry. It’s basically crochet’s version of ironing.
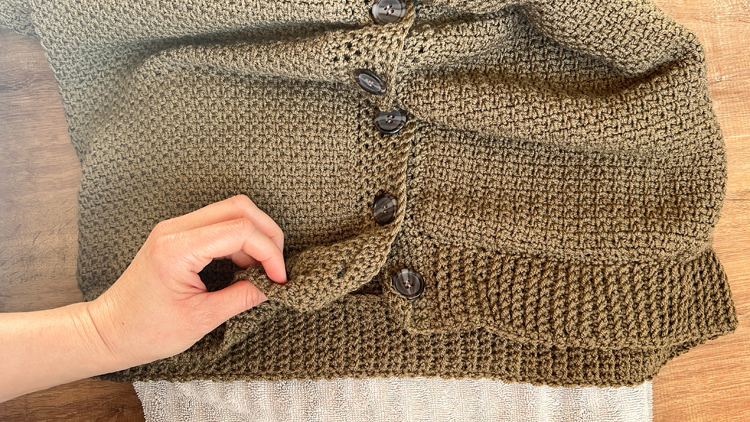
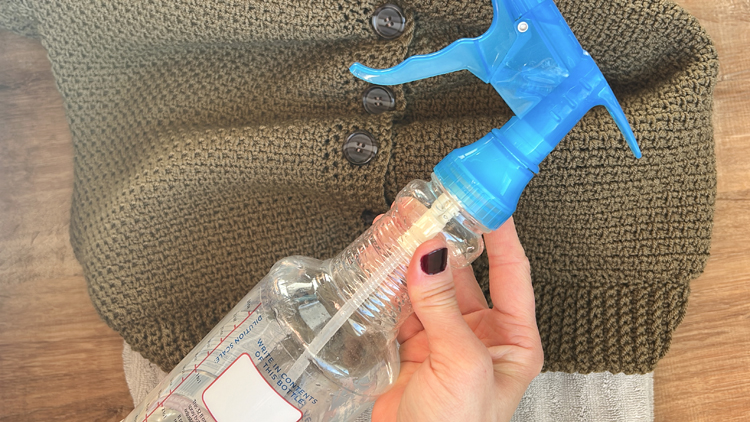
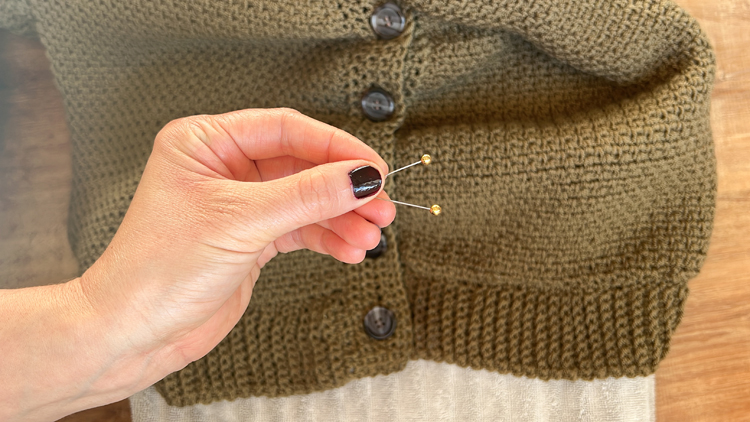
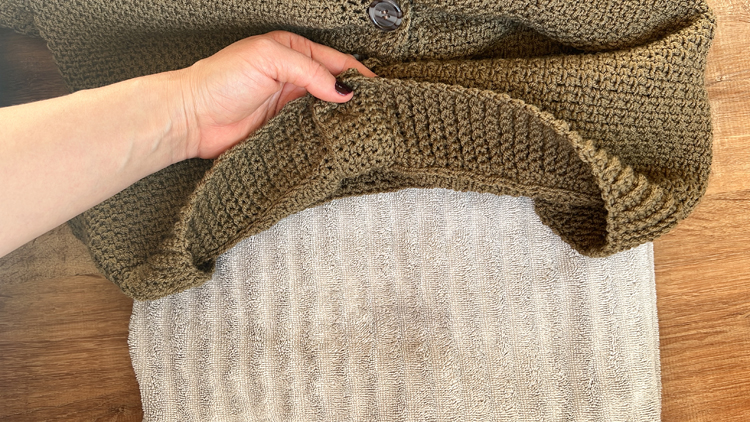
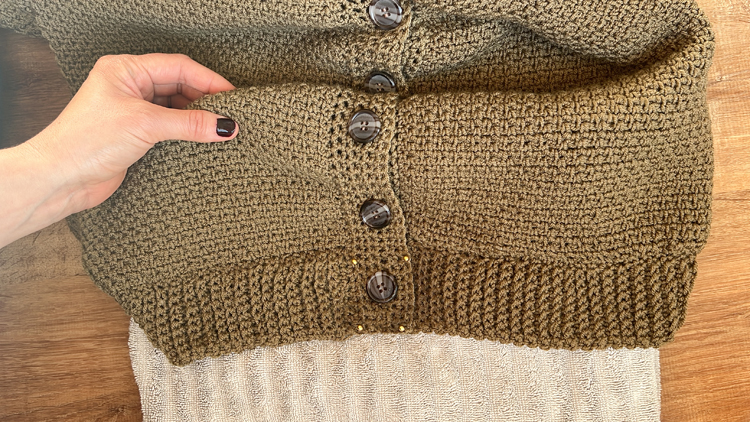
I don’t wet block most of my projects, but the corners of this cardigan were very curly, so wet blocking was a must. To wet block the bottom inside corners:
- Button up the button placket so that the sides will dry evenly and in line with each other.
- Place on a folded up towel.
- Wet with a spray bottle until very damp.
- Pin flat/in place. Let it dry.
Now you’re done!
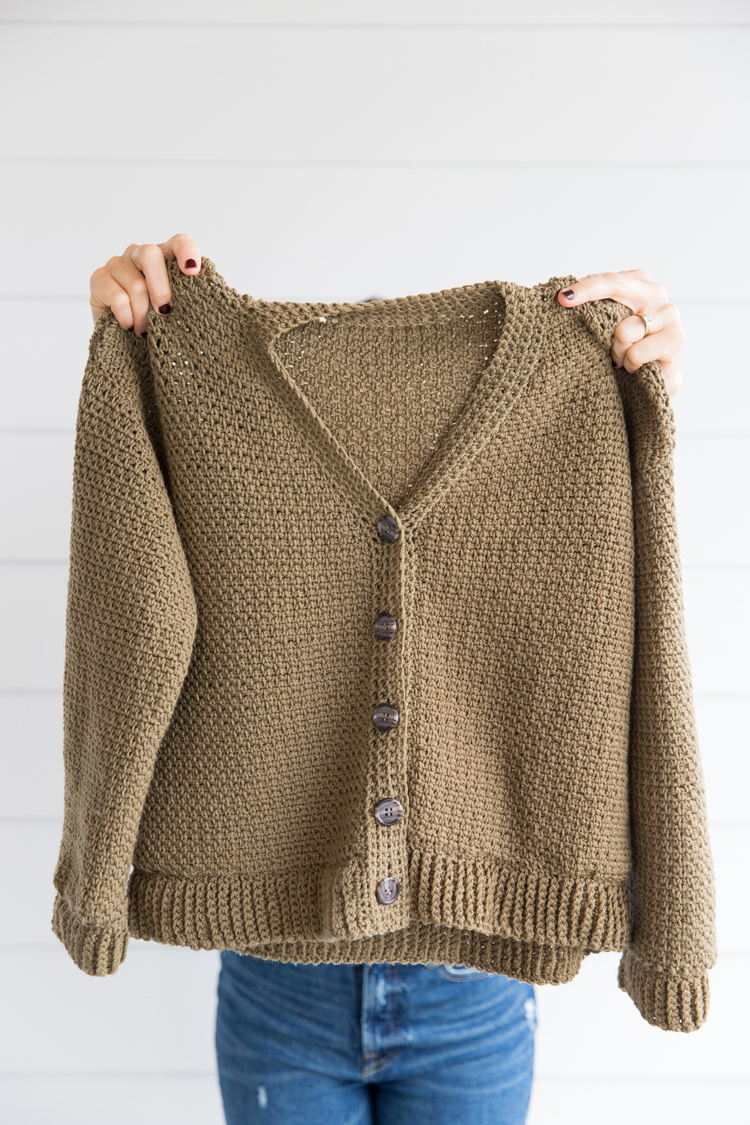
If you make one, I would love to see it! Message me on instagram (I’m @deliacreates over there) and I’ll share your finished projects in my stories.

Click here for more free crochet cardigan patterns.


how to make the Guage?
I didn’t really understand how to make the gauge.
do I start with 21 chains? and into that kind of make a miniature linen stich pattern
To make a test swatch, chain a few more than 21 chains. I’d go with 30. Then work 25 or so rows. Then work a small version of what you will do when you make the cardigan.Yes with linen stitches. I like to make the test swatch slightly larger than the 4 x 4 inches so that I can get more of a true measurement. I hope that helps?
Thank you that helps
Now I started the back piece in size XL I saw that the total circumference of the cardigan is ment to come out 127 cm . I’m confused because I have started making the back piece and just the back piece width is coming out about 100 cm. I even went down a size in the hook to a 5mm. And it still coming out about 100 cm .
Theoretically that would mean that the final products circumference will come out 200cm.
I don’t want it to be too large. I would appreciate your help, thank you !