Often when a sewing or crafting space has to coexist with a bedroom, it can be a disaster. I know, because we lived in a mess for years that I was always “promising” to clean up. Sorry honey! 😉
For a long time I thought the answer was a bigger house, renting an office space, or building an out building/she-shed on our property. After much research and pondering we decided against all those options. We liked the benefits of living small and no longer saw our 1750 square foot rambler as a “starter” home. I felt like the inconvenience and cost of the second office location would outweigh any privacy or storage benefits, and the funky layout of our property presented some design and permitting challenges that would be hard to build around. So, we decided to stay put and work with what we have. It’s strange to see all these decisions and revelations fit in a neat and tidy paragraph, because it represents years of frustration and research! Ha!
Thankfully, renting for the first 12+ years of our marriage, we had plenty of experience making the most out of our limitations. I threw my heart into making our space fit our needs, and now I am no longer tempted to upgrade. It feels good to realize I truly have everything I need! More space, would just mean more things to hoard that I likely wouldn’t use.
As much thought work as all this took, I knew thought work alone wouldn’t be enough to make my sewing space and our master bedroom reach a level of sustainable sympatico. It was going to take some serious reorganization as well. The goal was to have a functioning sewing space but still have a bedroom that feels like a bedroom. Here are four key changes we implemented that made it possible:
ONE: I purged my supplies, and then I purged them again.
I got all Marie Kondo, Konmari up in my stuff before we reorganized, and then I combed through everything again as I put things away in my new storage spaces. I find that I do a better job of accurately assessing the need and value of things when I take a second look after an initial purge.
Don’t get me wrong. I still have A LOT of stuff, and arguably stuff I could still purge even now. My rule of thumb was to only keep things that I use regularly or that I could envision a future project for. If it was just nice to have on hand but I didn’t have a specific use in mind…I donated it.
TWO: We revamped our bedroom closet organization.
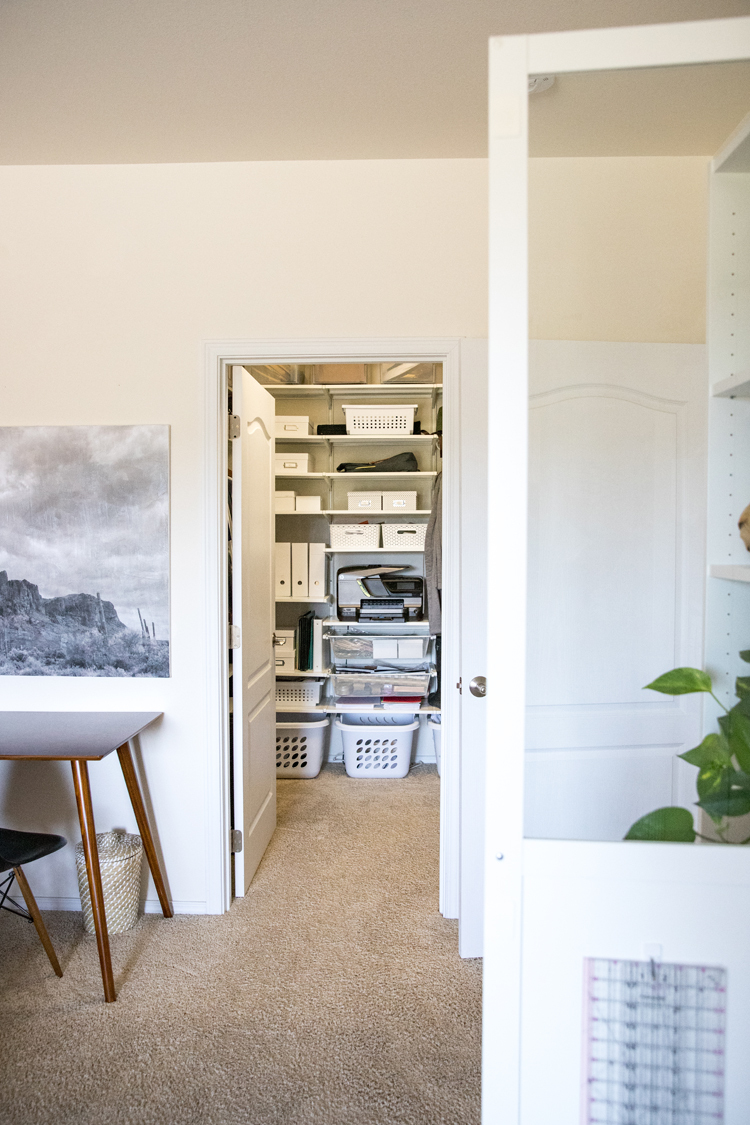
This was absolutely instrumental in making everything work because it freed up space in our bedroom for craft storage. We installed Algot shelving and drawers from IKEA in our small walk-in closet.
As a result, we were able to get rid of two dressers, a bulky set of desk drawers, and more than double the storage space in our closet. We actually installed Algot shelving in three other closets as well. I highly recommend it as a sturdy, budget friendly storage solution. It’s really easy to install and I like that it’s easy to customize and reconfigure as needed.
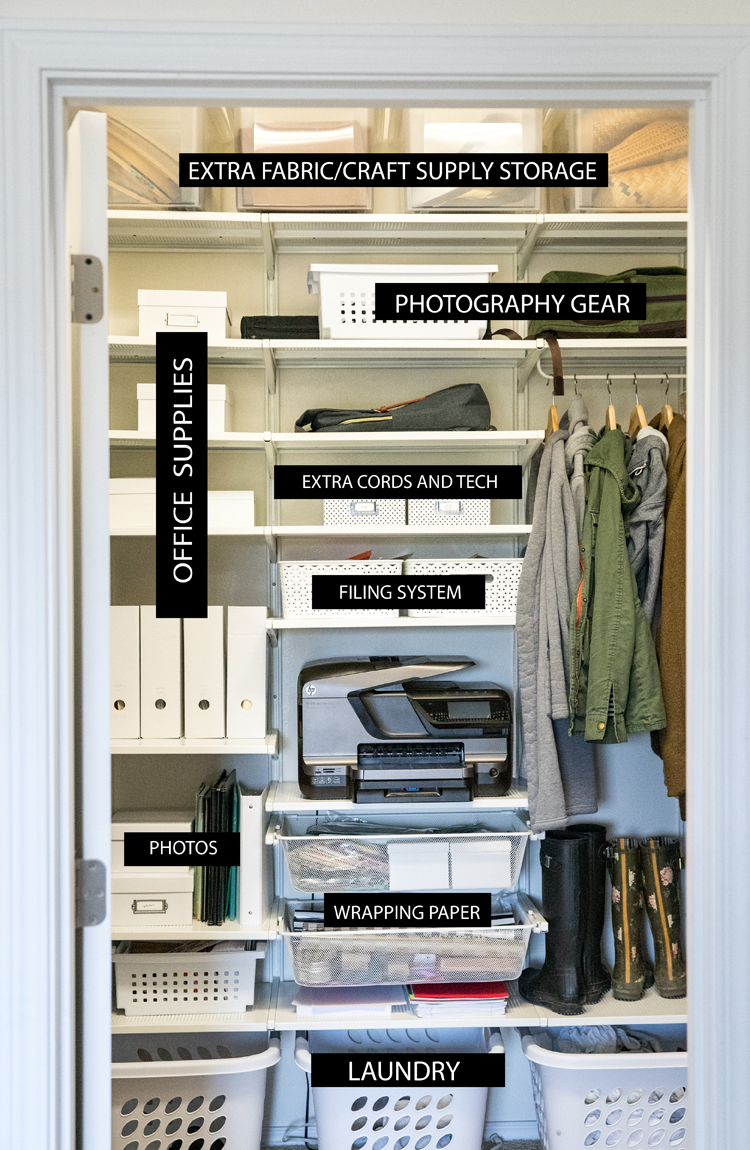
Our closets house ALL of our clothes and shoes on either side, his stuff on the left and my stuff on the right with mine overflowing into the middle a little bit, and the center holds home office things like our printer, extra cords, extra paper, wrapping paper, family photos, and our filing system. Yes…pretty much all of our physical filing system is contained in just those two open bins. I have a whole post on how we went paperless. Papers needing to be scanned and filed get dropped into that bin on the left, and our high efficiency scanner is housed in the bin on the right. We shred and recycle everything after it’s scanned. School keepsakes get narrowed down several times a year and are stored in a bin at the top of the closet in the same way as my overflow craft storage. One bin per child.
Speaking of, I’ll talk more about the overflow craft storage in number 4.
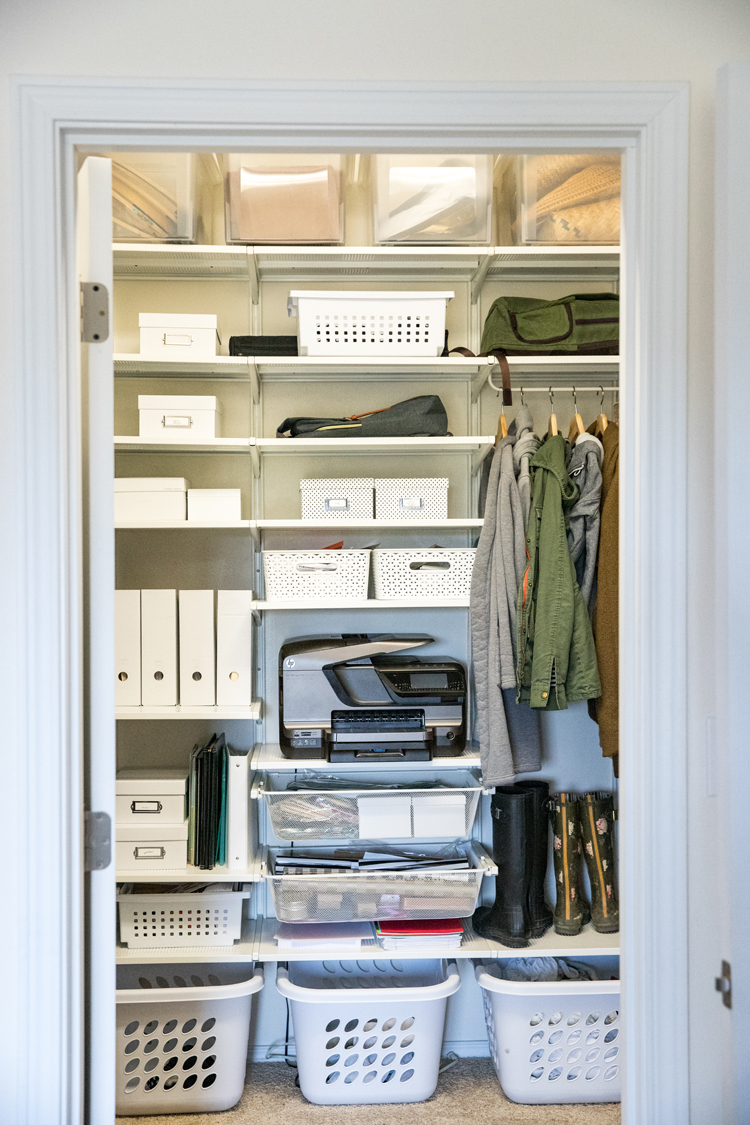
Underneath it all, we have three inexpensive laundry baskets (from Walmart) that allows us to sort our dirty laundry. We had a cute rolling cart laundry sorter before, but it took up too much space. The smaller, easy to remove baskets have been much more efficient. You can see the printer cord behind the middle basket. We are looking to put in an outlet in here (and move our router in here! Woot!) but for now we use an extension cord to plug it in when we need it.
If you’re wondering why we have a such a big printer…I wonder that all the time too! Ha! The reviews on smaller ones haven’t given us incentive to get a new one just yet, but eventually, the plan is to get a smaller one and then we can move the shelves around and have even more storage space if we need it.
THREE: We got a smaller desk.
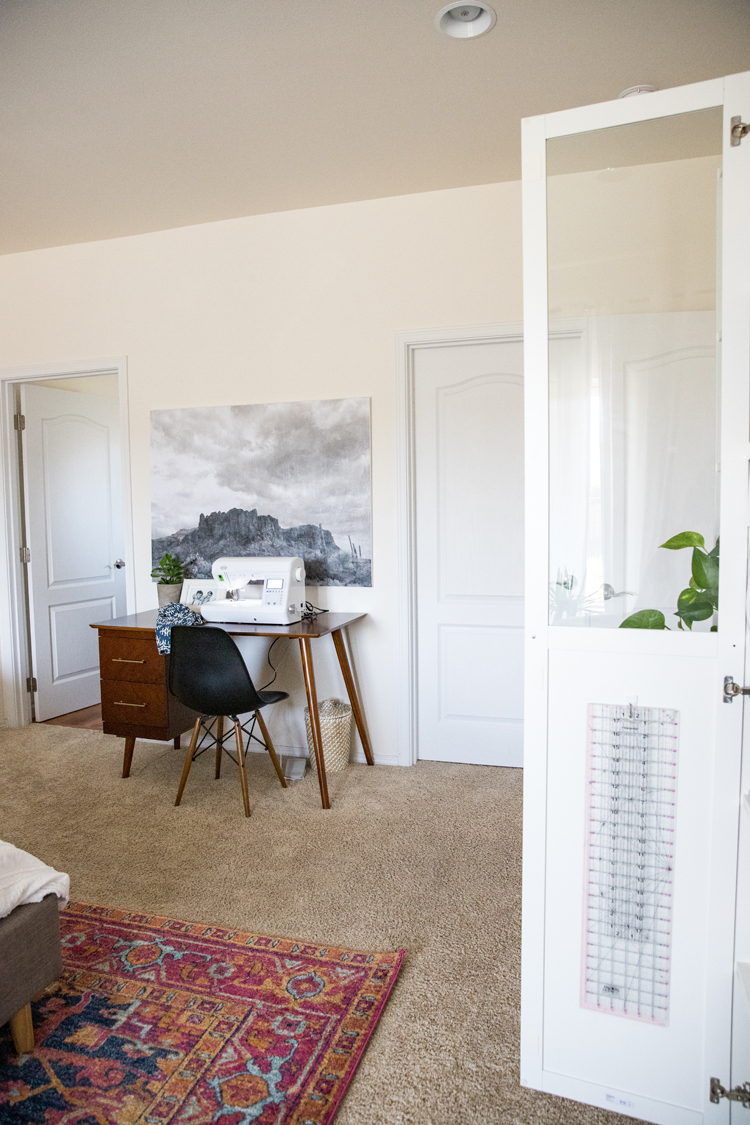
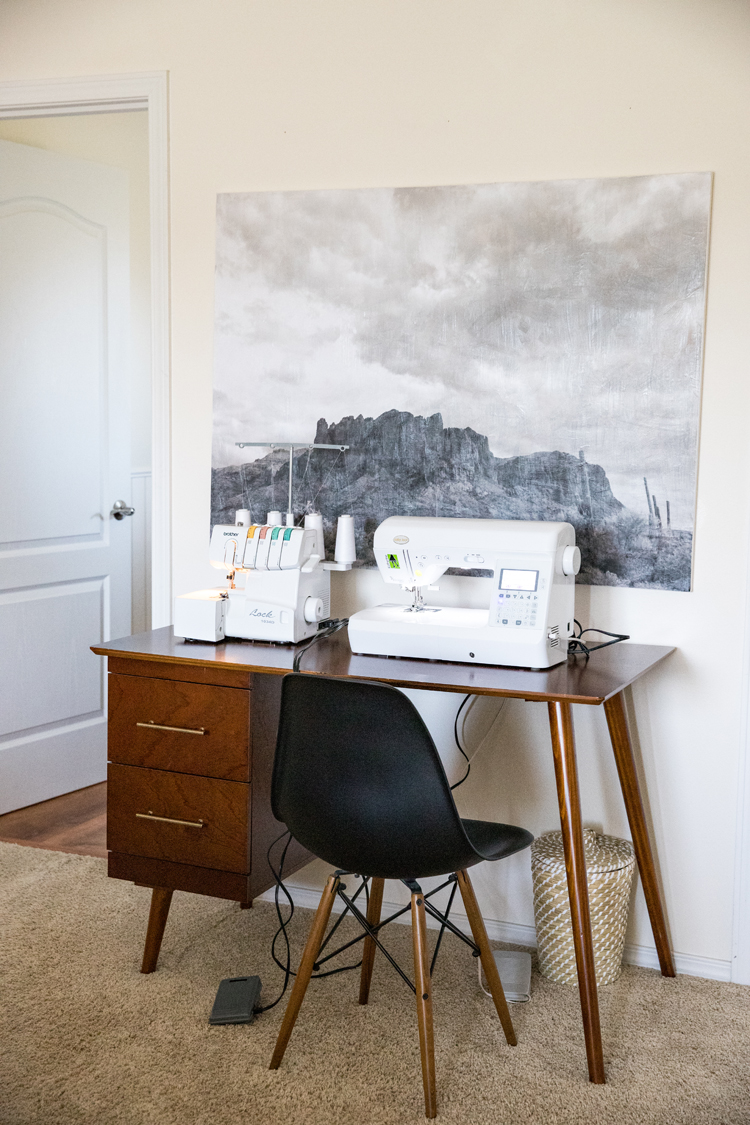
What? I know…it sounds counterintuitive. For our old set up, I had built a 7 foot long work table out of plywood that I used as a desk (much like this dining table that I built). I had my sewing machine and serger out on it all the time even though I wasn’t always using them. For a dedicated office space, I think that works great. For our bedroom, it became the dumping ground for dirty clothes and junk. I am convinced, that the more flat surfaces you have in a bedroom, the more piles of stuff that will accumulate. We moved the long desk into our boys’ room and that has definitely proved true for them. 😉
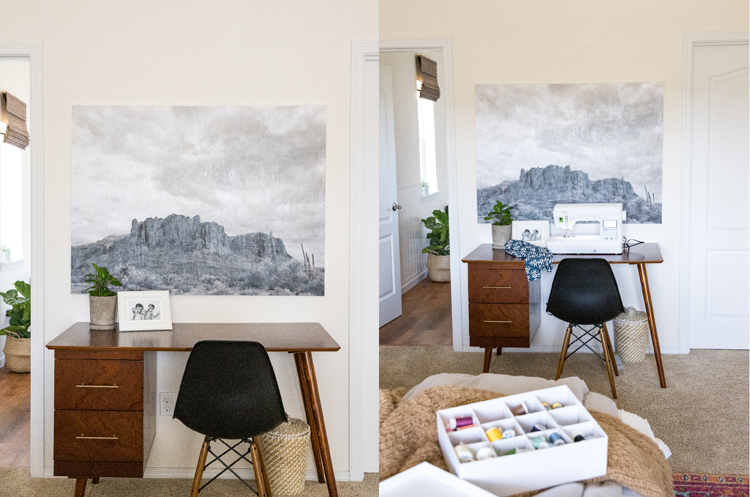
With only one standard size desk to work with, I have been able to fit both machines on it just fine. I have to stand to use the serger, but I prefer to stand and serge anyway. This has also kept most of the junk at bay. There’s just no where to put it when my machines are on there, so we put it away or find a proper home for it. When the machines are put away in my bookcase, we put our lap tops on there…or as you can imagine…it sometime still piles up with junk…ha! But it’s a much more manageable pile and it always gets put away when I get my machines out again, which is often.
As for what’s in those desk drawers. They house all our regularly used home office supplies: tape, scissors, batteries, pens, etc. all sorted in small white boxes I got from Michaels. That way my kids know they can dig into those drawers to find what they need and not get into my craft storage. 😉
FOUR: Craft Storage.
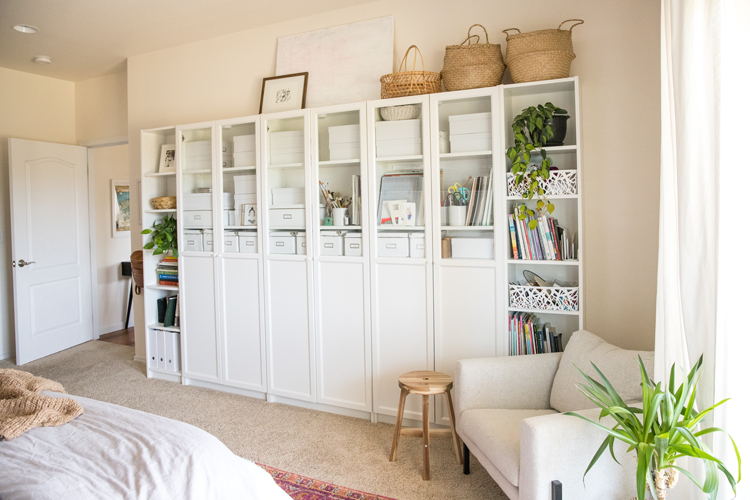
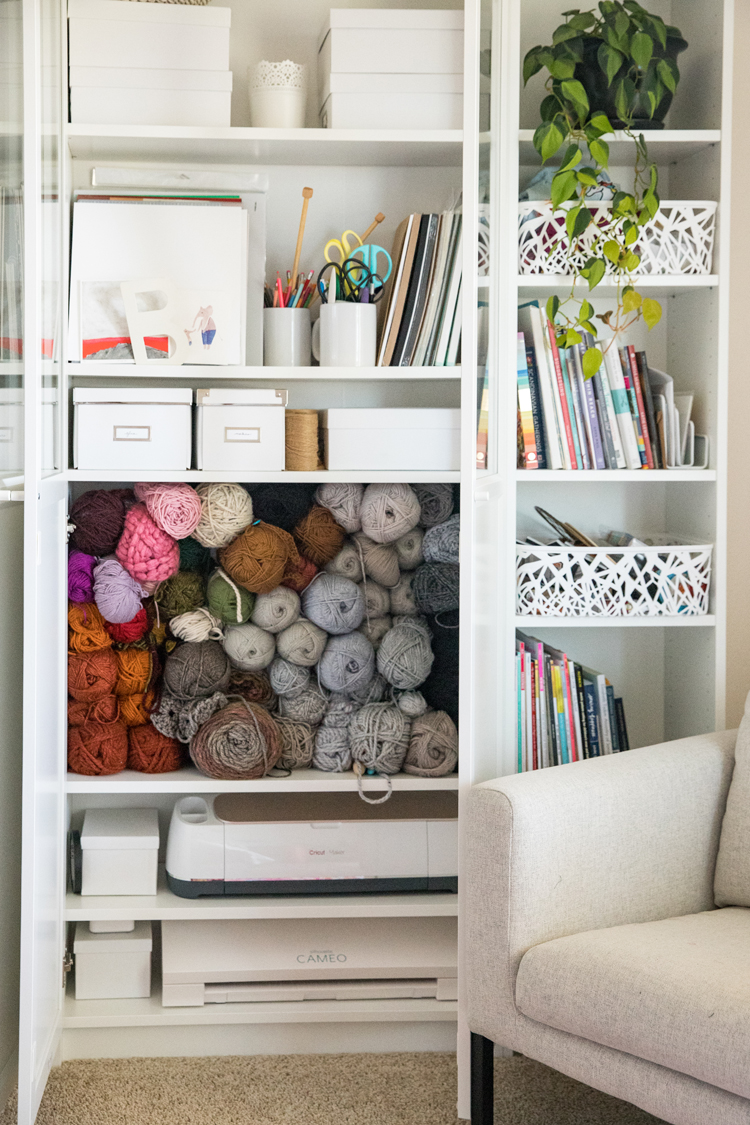
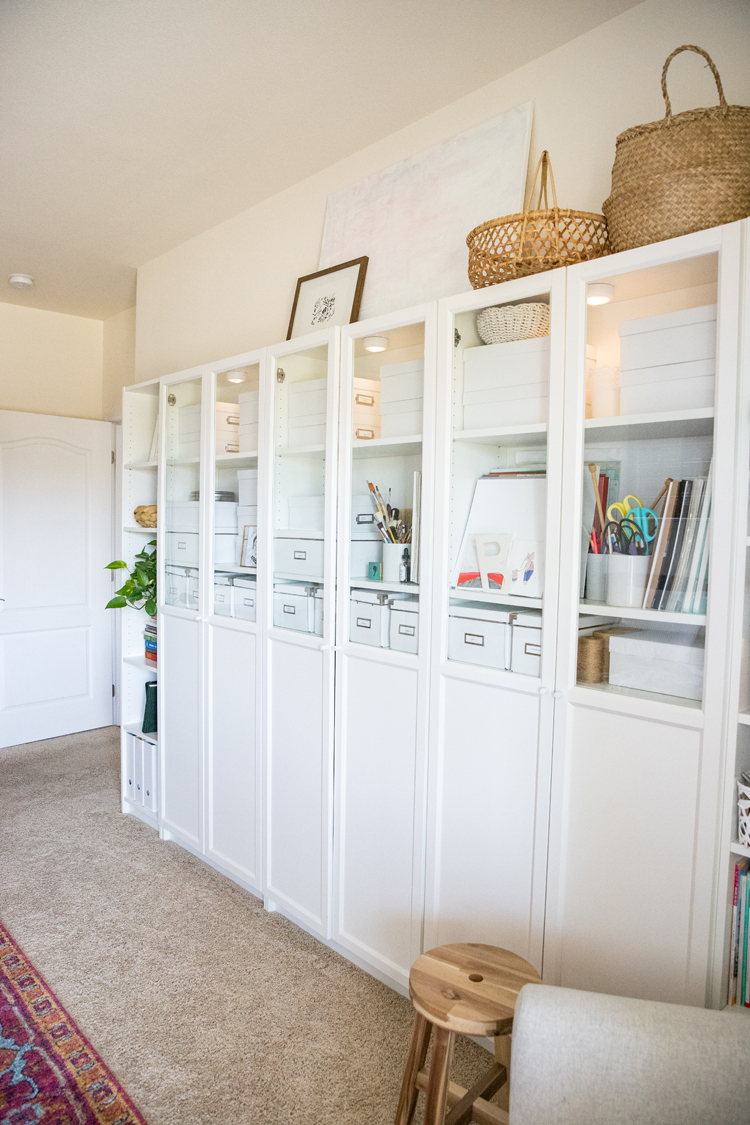
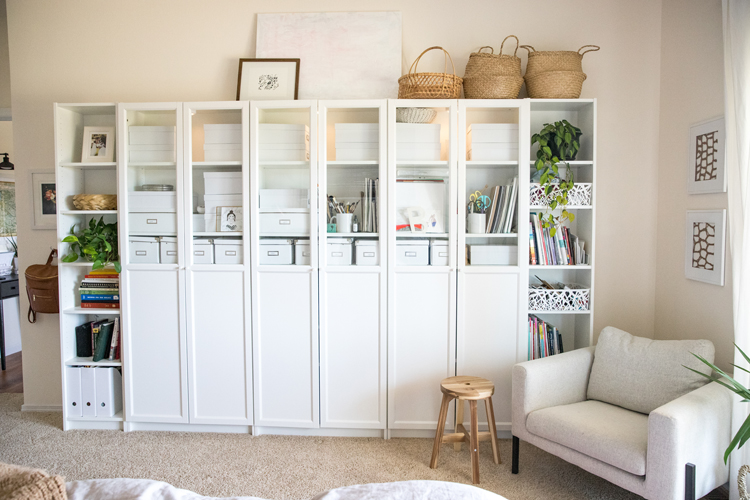
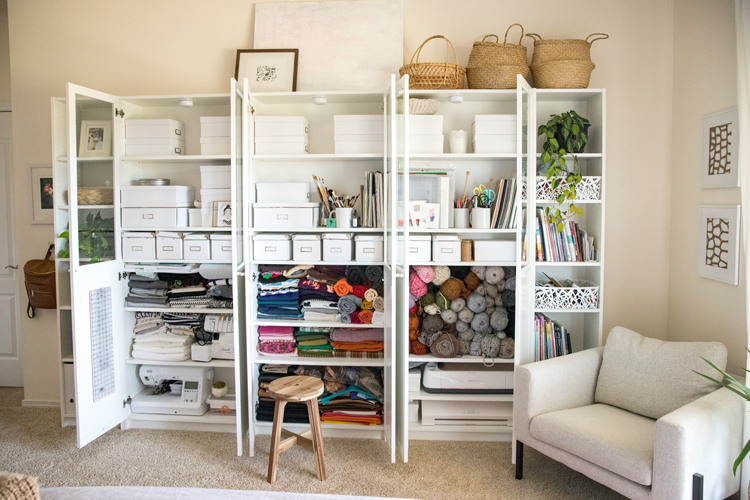
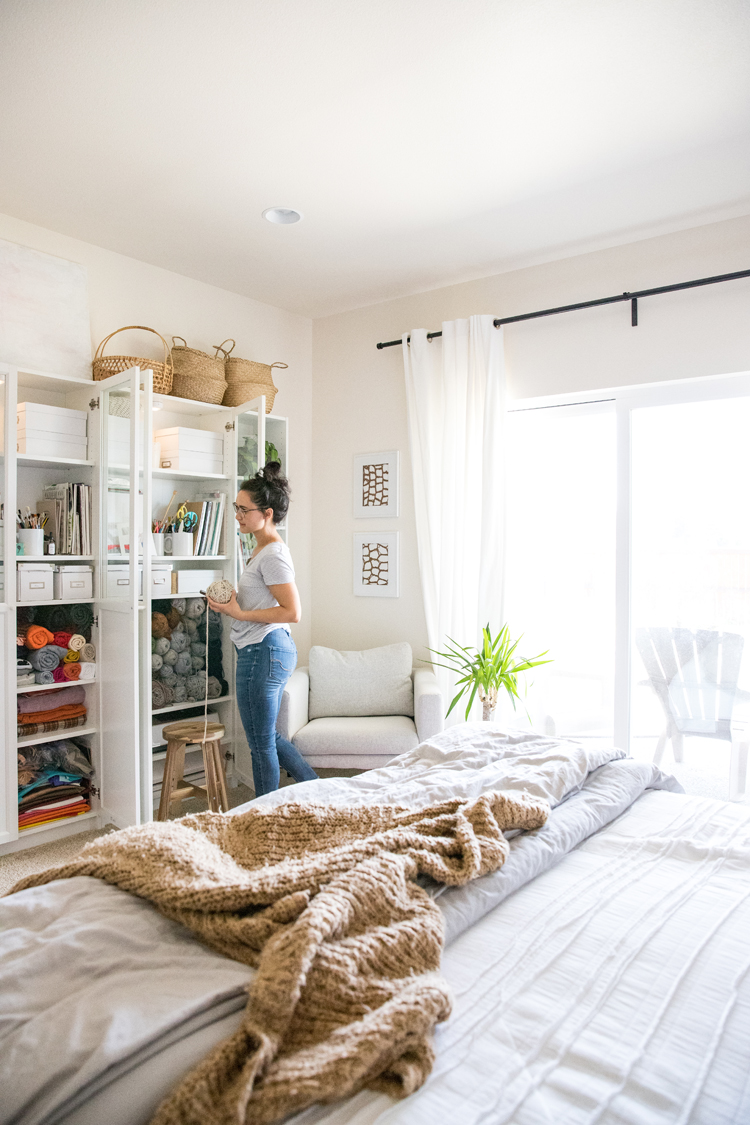
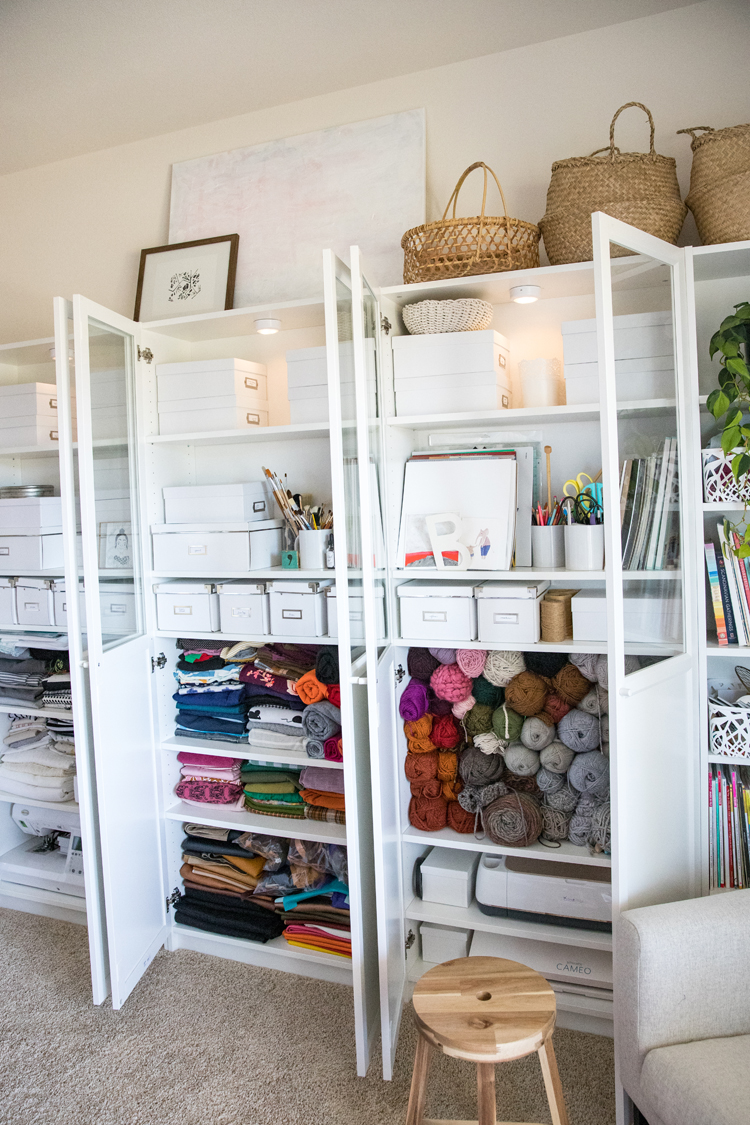
Yes…more IKEA furniture! We took a few too many trips to IKEA last year to be sure! 😉 We built a row of Billy Bookcases with Oxberg doors. The bulk of my whole sewing/crafting “office” fits in these three bookcases. For the top half of the shelves that show through the glass portion of the doors, I organized everything in labeled white cups or white boxes I found at IKEA and Michaels. That way it looks clean but it’s still efficient.
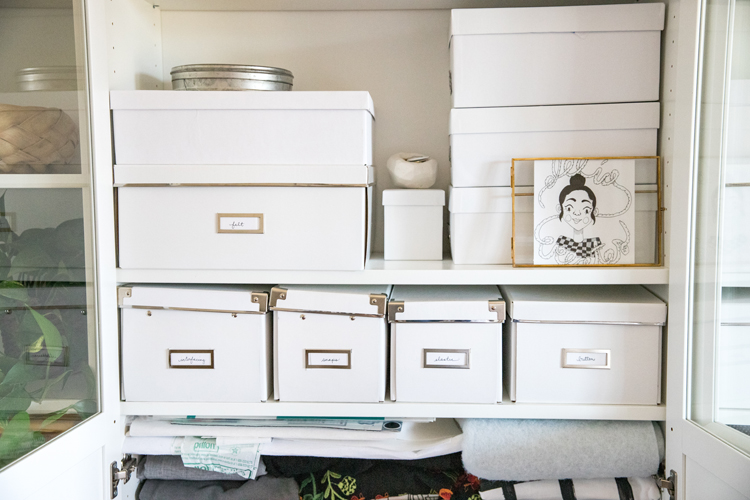
Framed artwork by Taylor Willis, @itsthespacebetween.
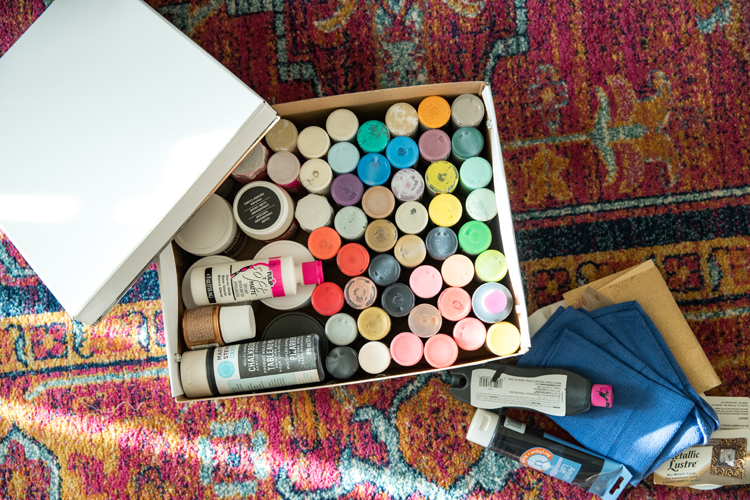
To make my paint easier to find, I put them in a large box with the bottoms up so you can easily find each color.
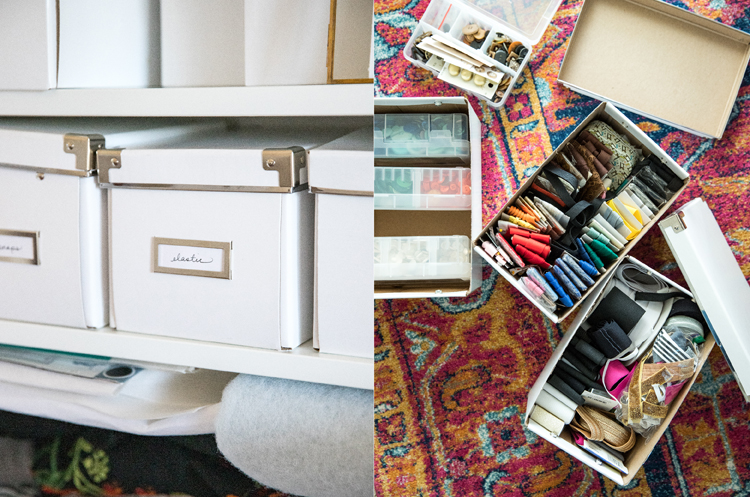
Buttons are organized in small plastic totes (from Michaels) by color and then filed neatly into a box.
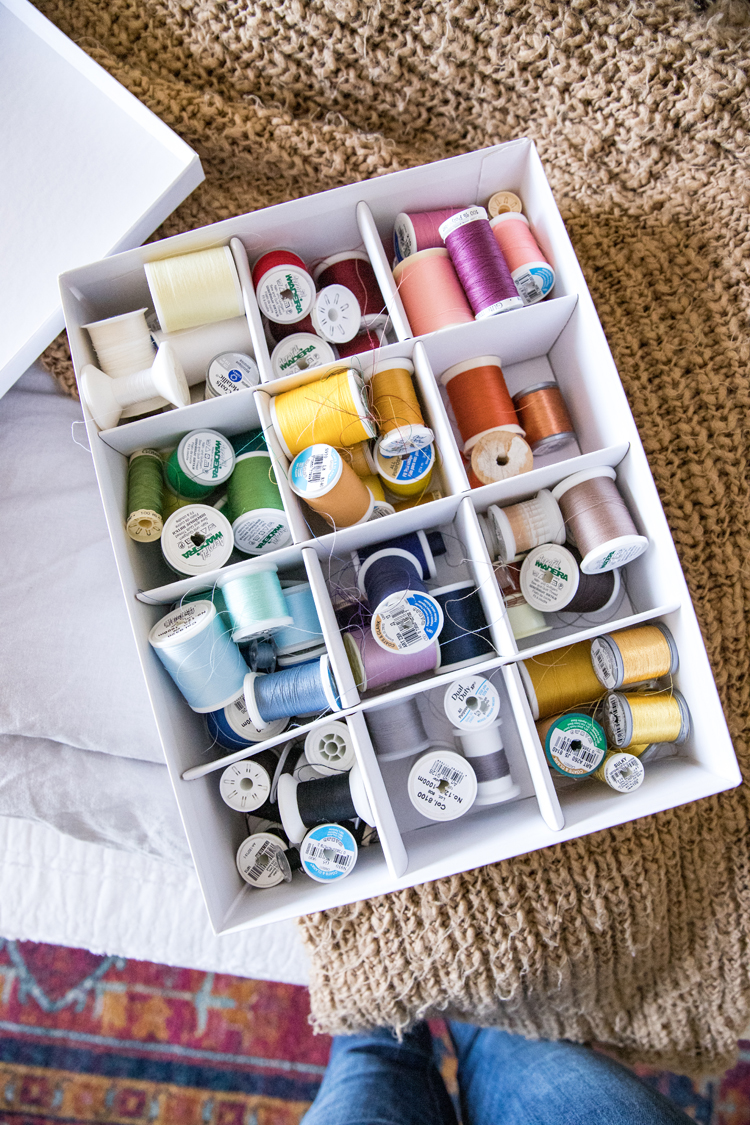
I found this segregated box at IKEA (which I think has sadly been discontinued). It works great at keeping my thread and bobbins sorted by color.
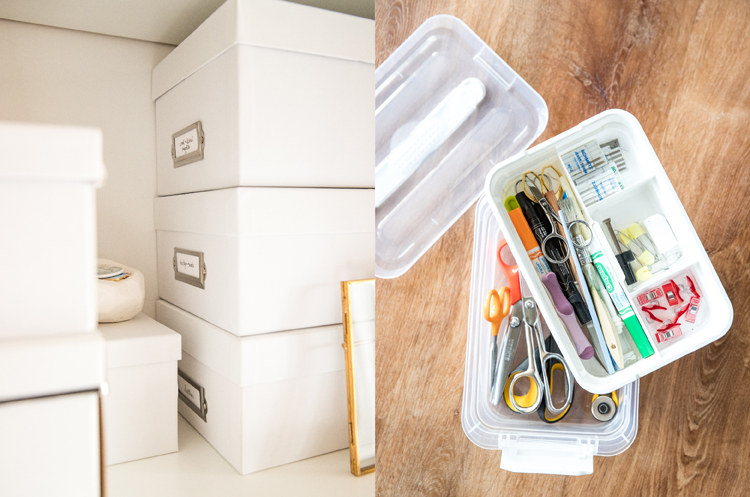
Other supplies fit nicely in these white photos boxes from Michaels. I also use this plastic storage tote from Michaels as my sewing caddy. It holds all my sewing scissors (craft scissors are stored in a cup by the paper), sewing machine needles, marking tools, and clips. I still use my cactus pin cushion for pins (click here for tutorial). For hand sewing supplies, I have a separate storage container.
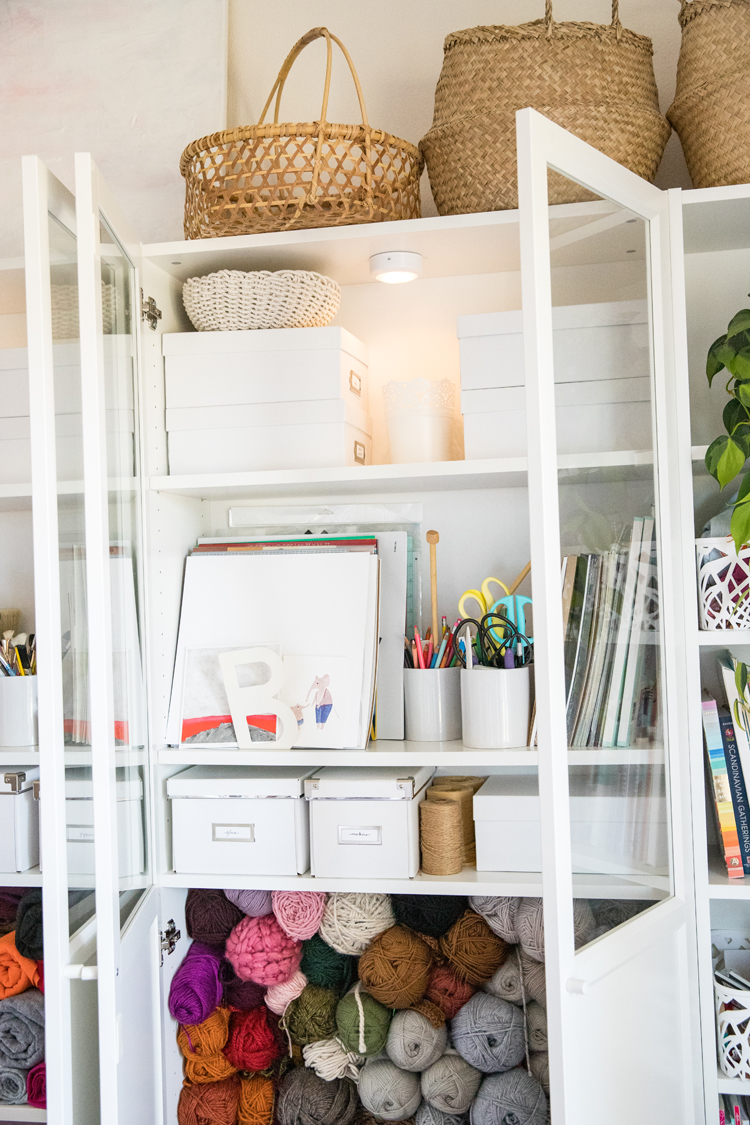
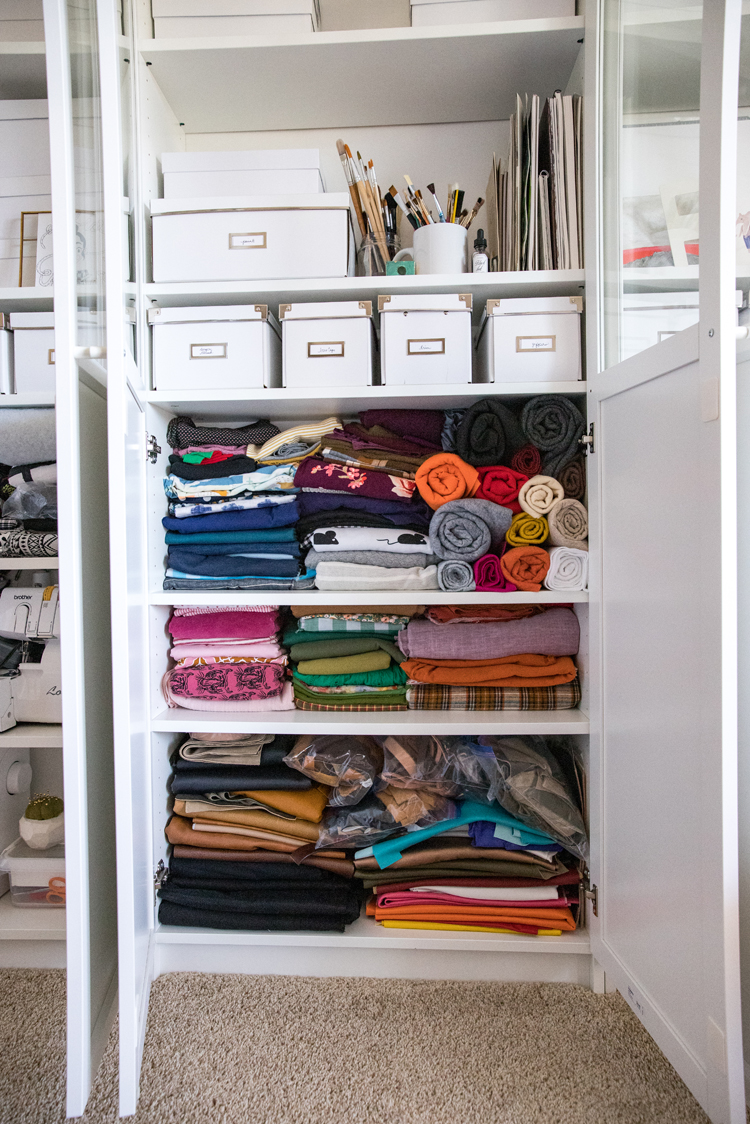
Paint brushes, craft tools, and scrapbooking paper is filed away in cups and mail sorters or is held in place by book ends.
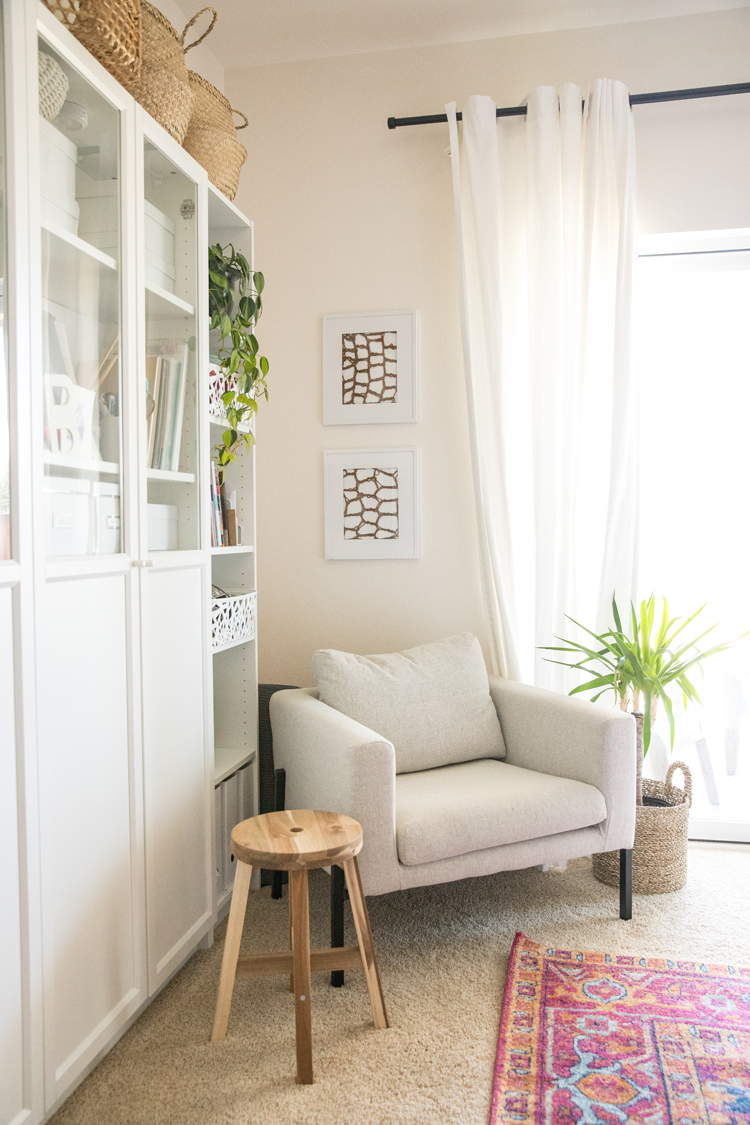
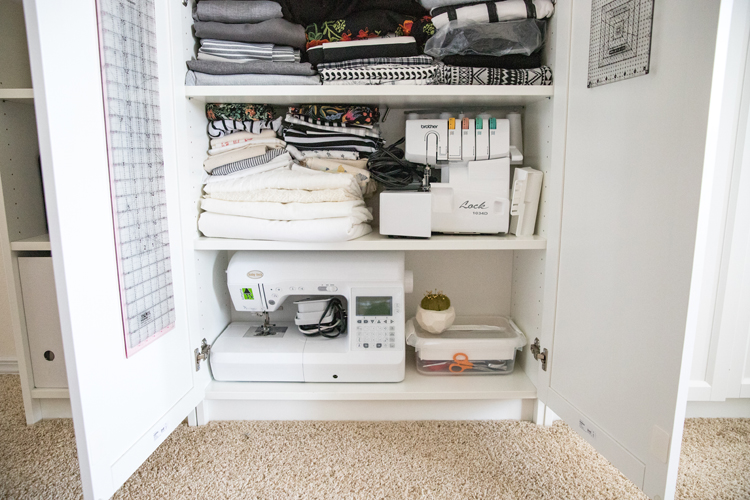
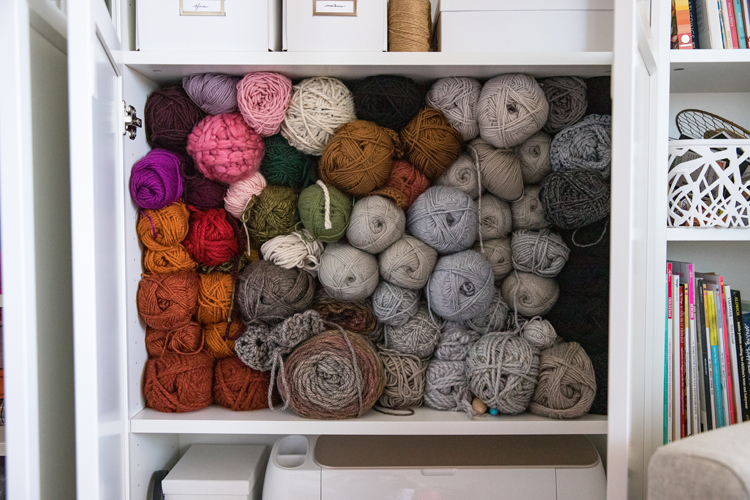
The solid bottom half of the bookcase doors allow me to shut out the visual noise that crafting spaces usually create. That’s where I put all my folded fabric, yarn, sewing machines, cutting machines…basically anything that looks busy and doesn’t fit in a white box.
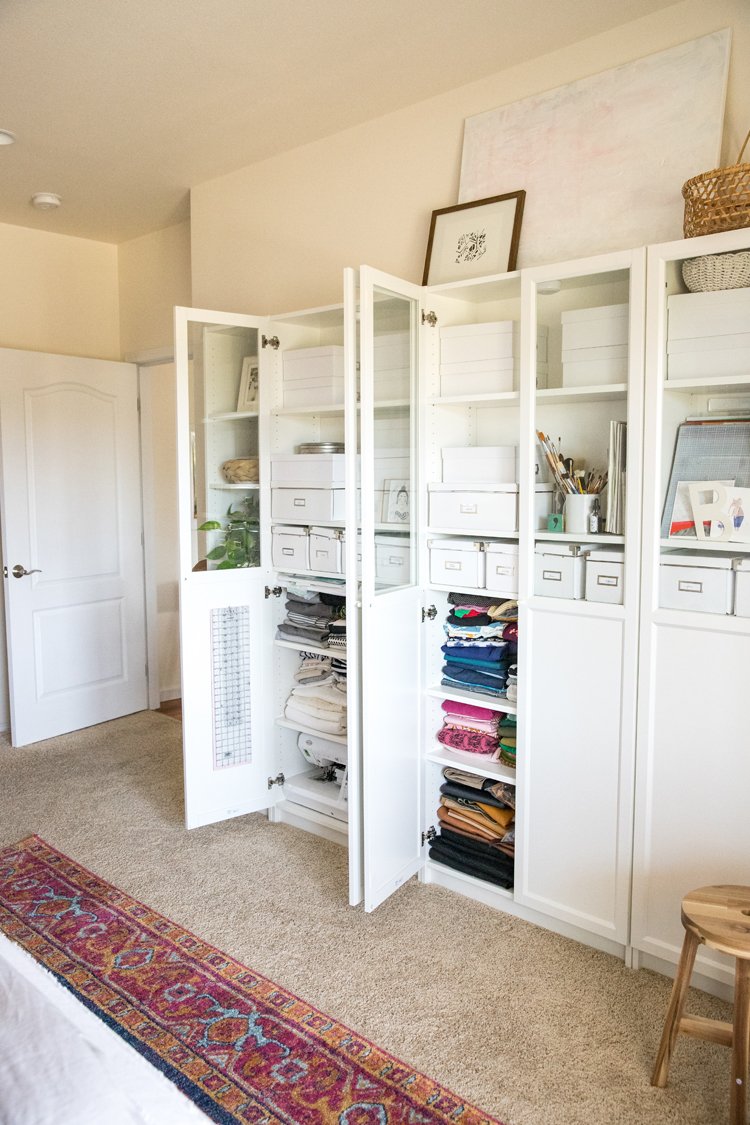
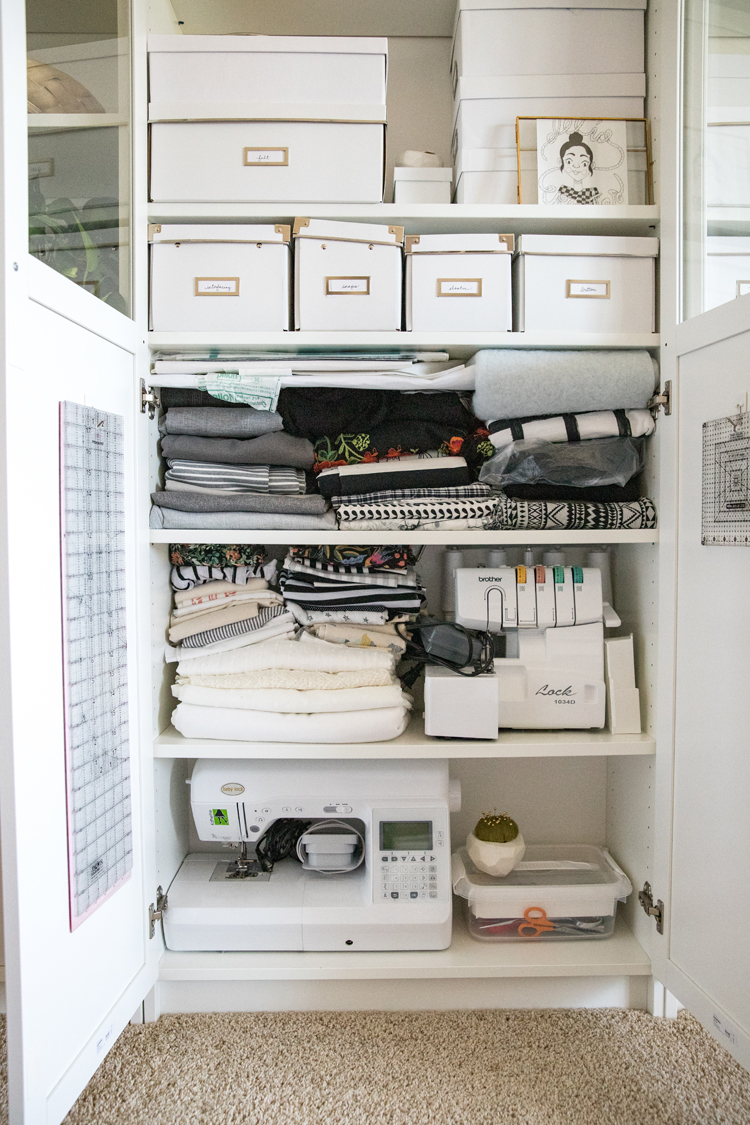
I also adhered some small 3M hooks on the inside of two of the doors so I could hang my quilter’s rulers.
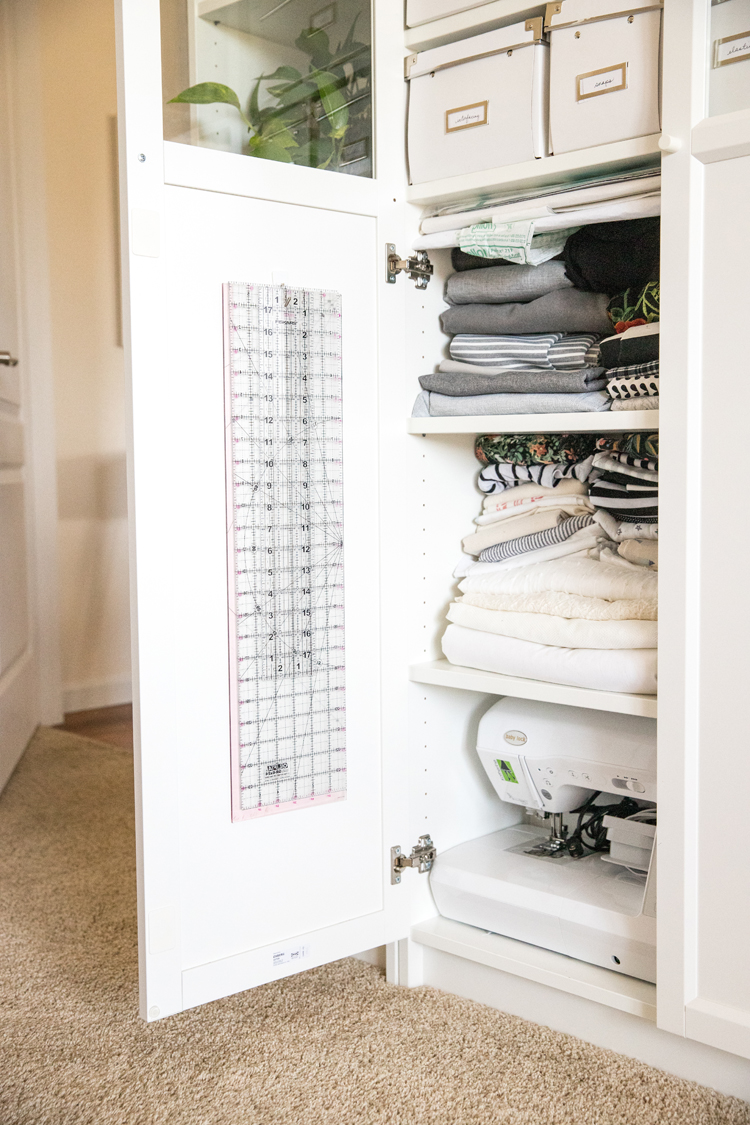
If you’re wondering if it stays this tidy, I wondered the same thing as I was setting it up. Could this be sustainable? Almost a year later, I can say that it IS easy to keep neat and clean. For the most part, I didn’t have to do any special tidying up for these pictures. Having limited space makes me constantly evaluate if supplies are worth keeping and helps me make sure everything has a home. If it doesn’t fit, something has to go.
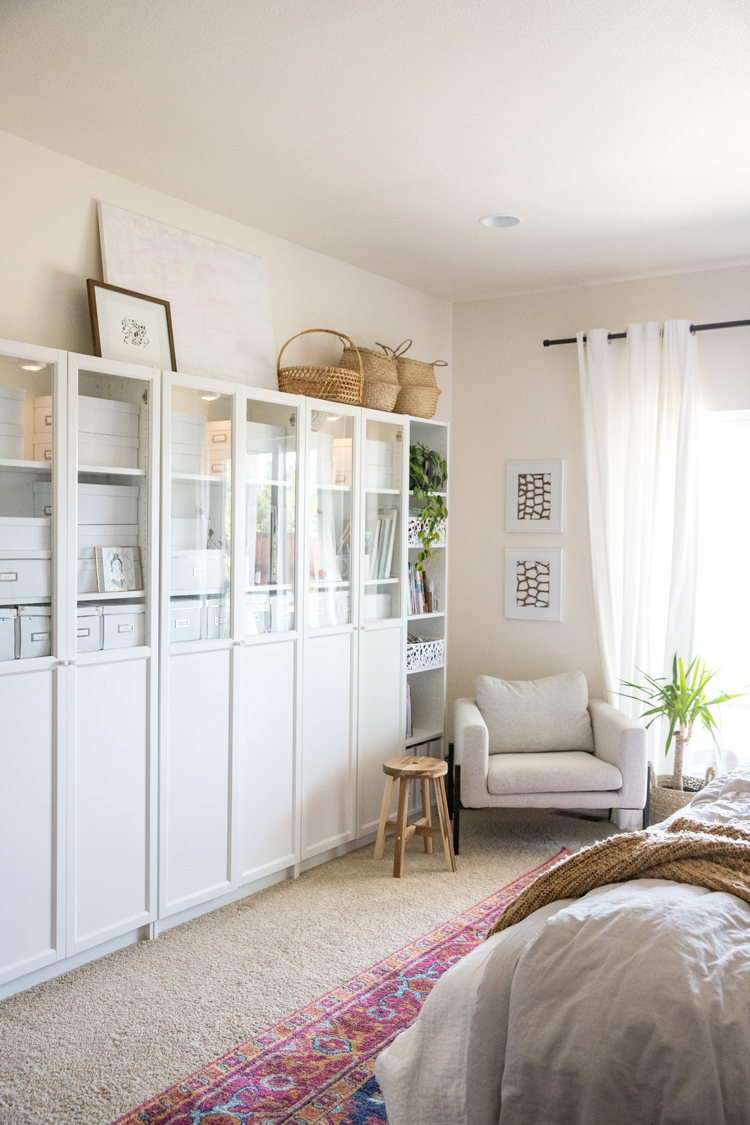
I thought about using all solid doors which I think would look nice too. But I think the glass helps the room look bigger and airy-er (that’s not a word but you know what I mean ;)) than it really is.
Either way, I think any kind of door is key. It helps the room still feel like a bedroom, and it keeps the dust off my supplies.
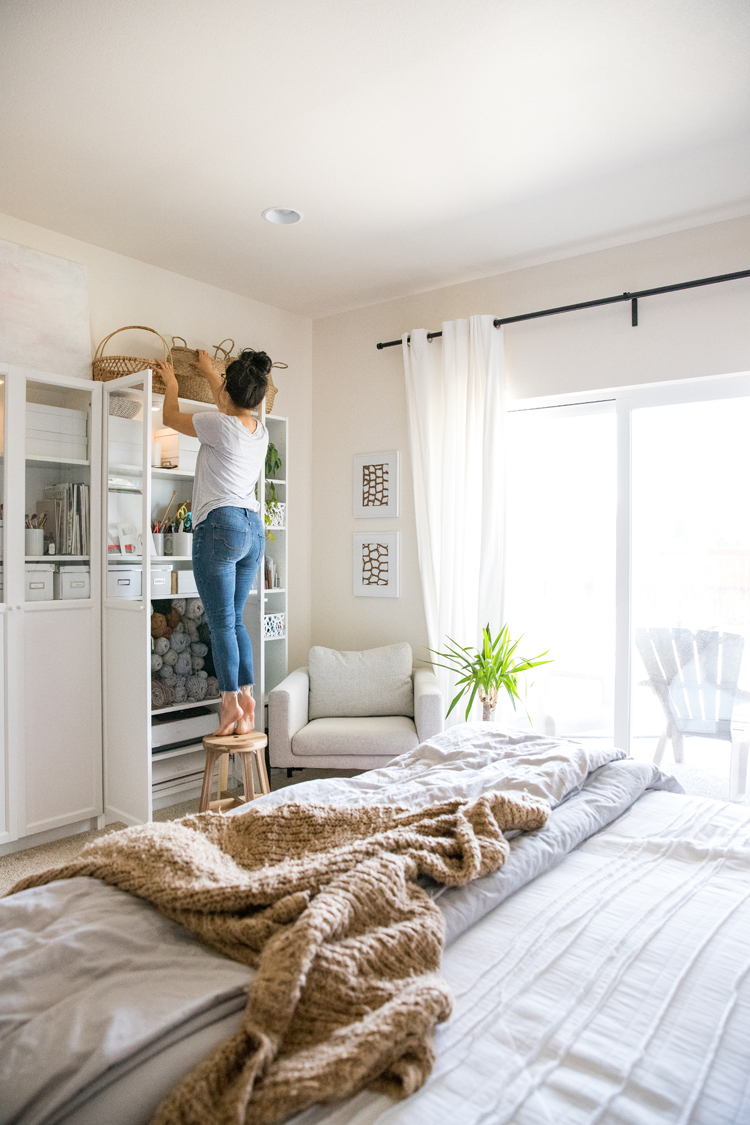
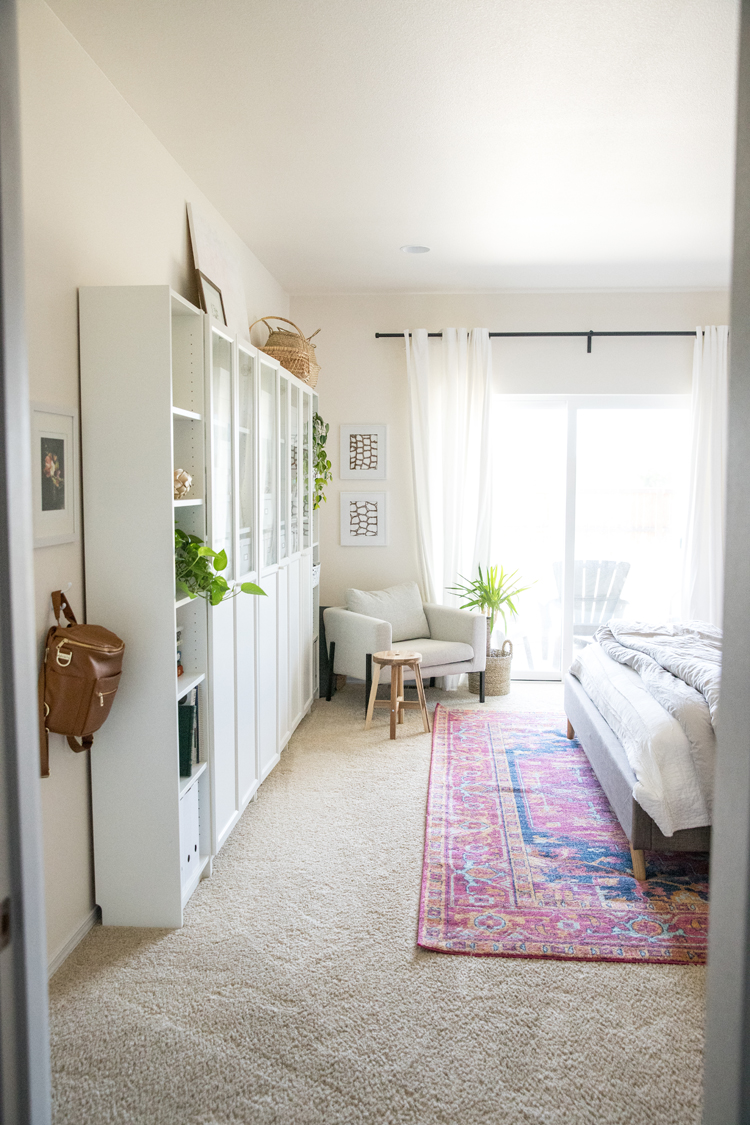
The skinny Billy Bookcases on the sides are where I store my books and works in progress, and where my husband has a space to hold his books.
The baskets at the top also store works in progress. This helps me keep our bedroom tidy (well…tidier than before! ;)), because, even if I am in the middle of a project, I can gather it up and tuck it away in a basket at the end of the day.
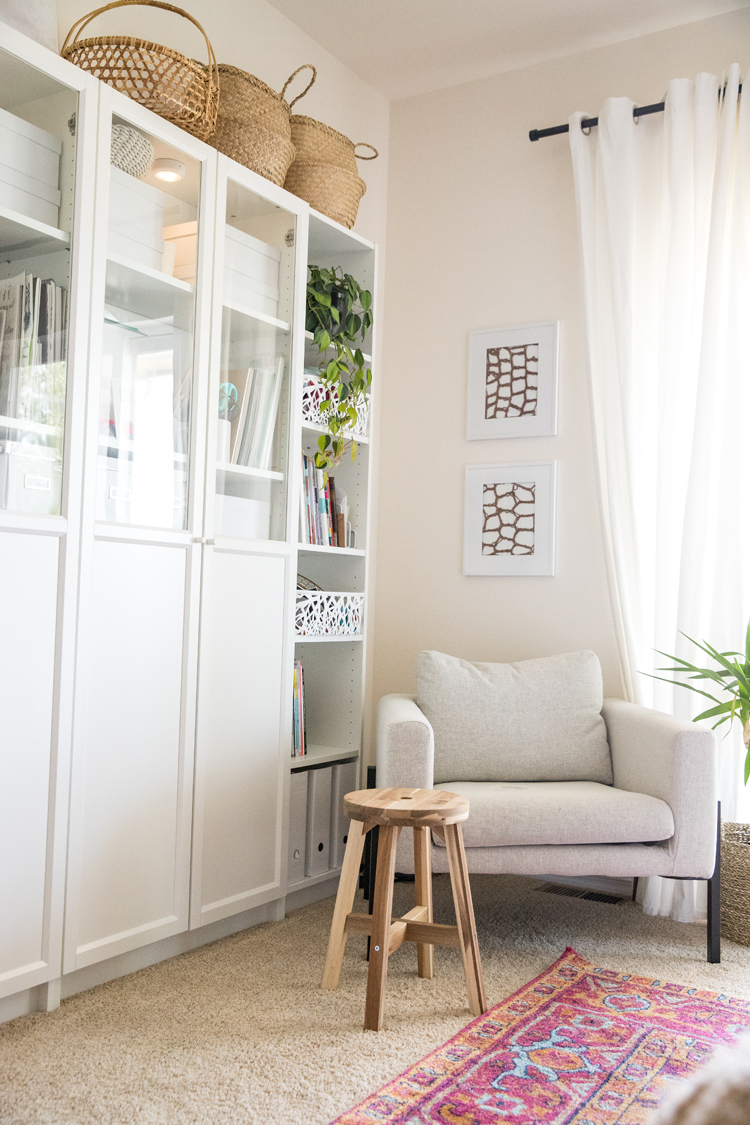
The little side stool makes a cute, flexible end table for when I’m reading in the chair, and also doubles as a “ladder” so I can access the tops of the bookcases.
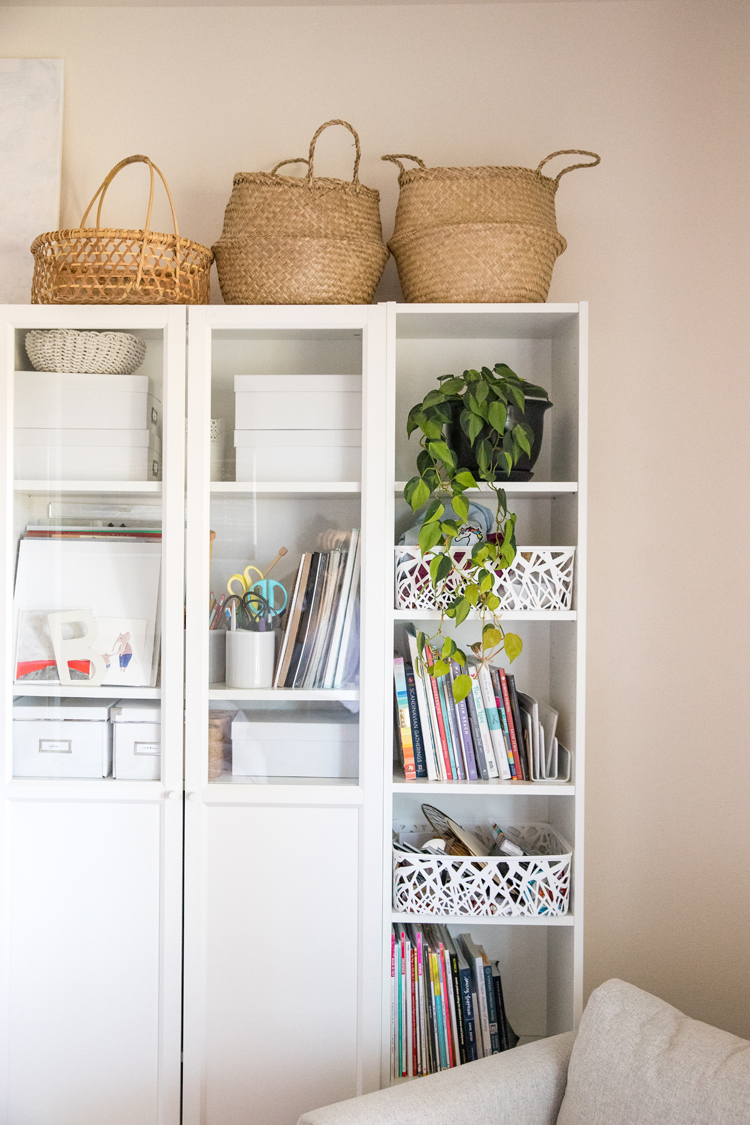
To keep my paper patterns and my husband’s random papers looking tidy, I put them in inexpensive white magazine boxes. I personally don’t love the clash of colors from our books, but my husband wasn’t keen on putting books elsewhere… and since I have already taken so much of the real estate in OUR bedroom, I wanted to honor that.
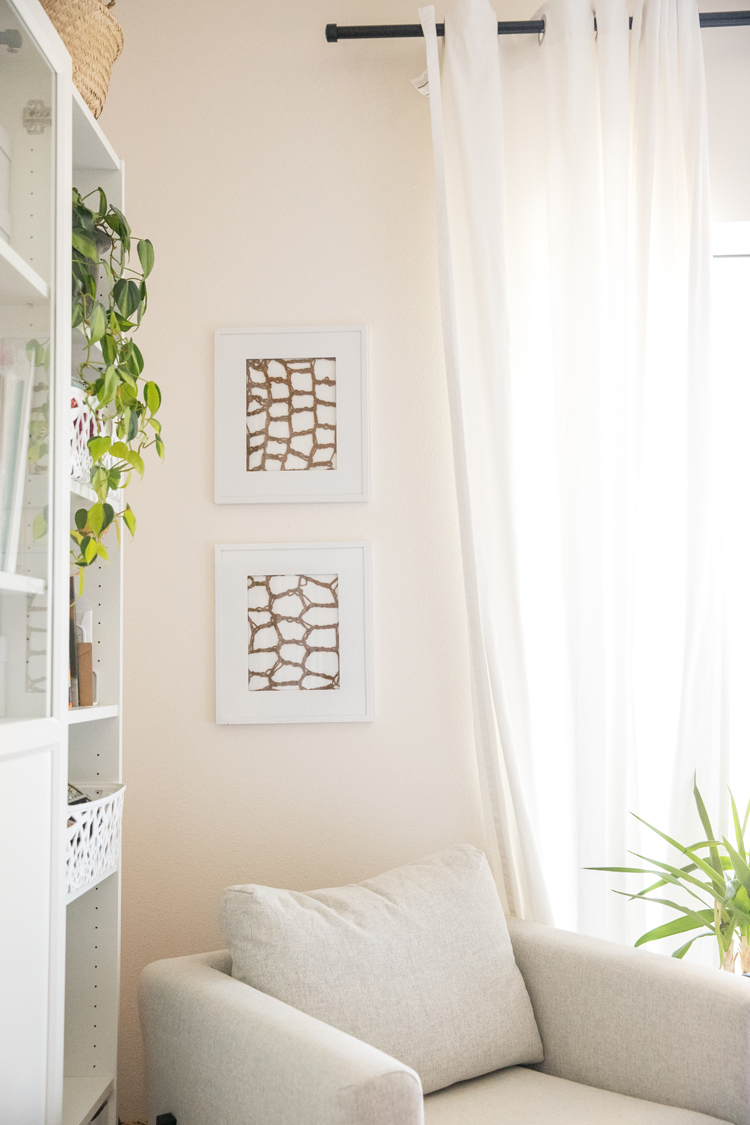
There are still some things I’m sorting out…like the art. I needed to fill these frames above this arm chair, so I finger crocheted some swatches and stretched them into the frames. I love the bottom one, but plan on switching the top one for a denser swatch.
I have a canvas on the top of the bookcase that is still a question mark and my framed tide pool block print, which I am keeping, leans against it. I kept putting off taking pictures of this space, because I wanted my art to be all figured out, but I knew that would take forever and a half…so you get a work in progress.
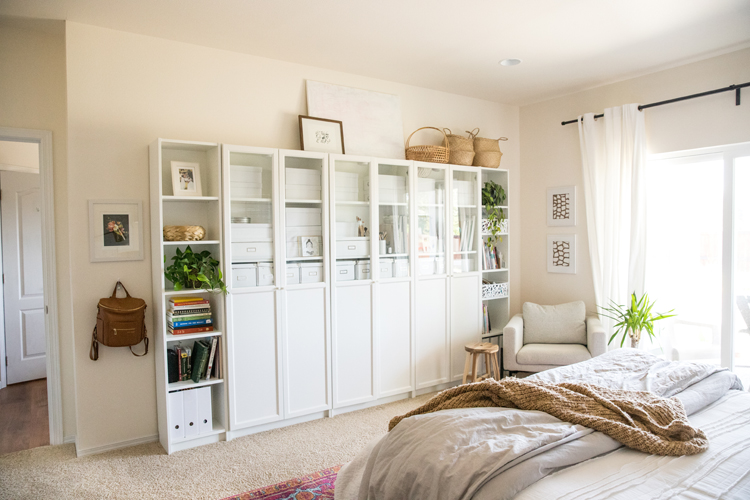
I do love the dark floral print from Tara Faul that sits above my purse hook. That will be staying!
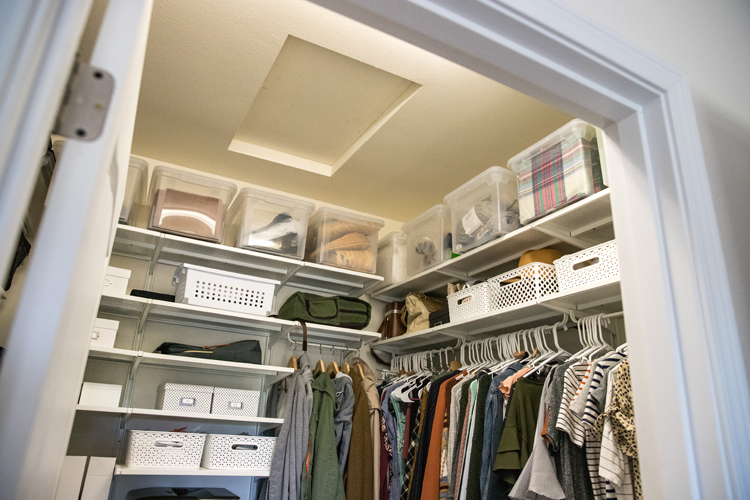
While the bulk of all my supplies is found in these bookcases, there were some materials that were just too big and bulky to store in them. I got some clear filing bins from Office Depot that I lined the top shelf of my closet with for overflow craft storage. I chose clear bins so that I can see what’s in them from the ground without needed to dig through them or create a label, since the contents are always in flux.
We actually installed these closet shelves about a year ago, so for a long while this top shelf was mostly empty. That is always my goal when I organize: To purge until I have just what I need and a little room to grow. Once I wrap up some projects, some of them should be empty again.
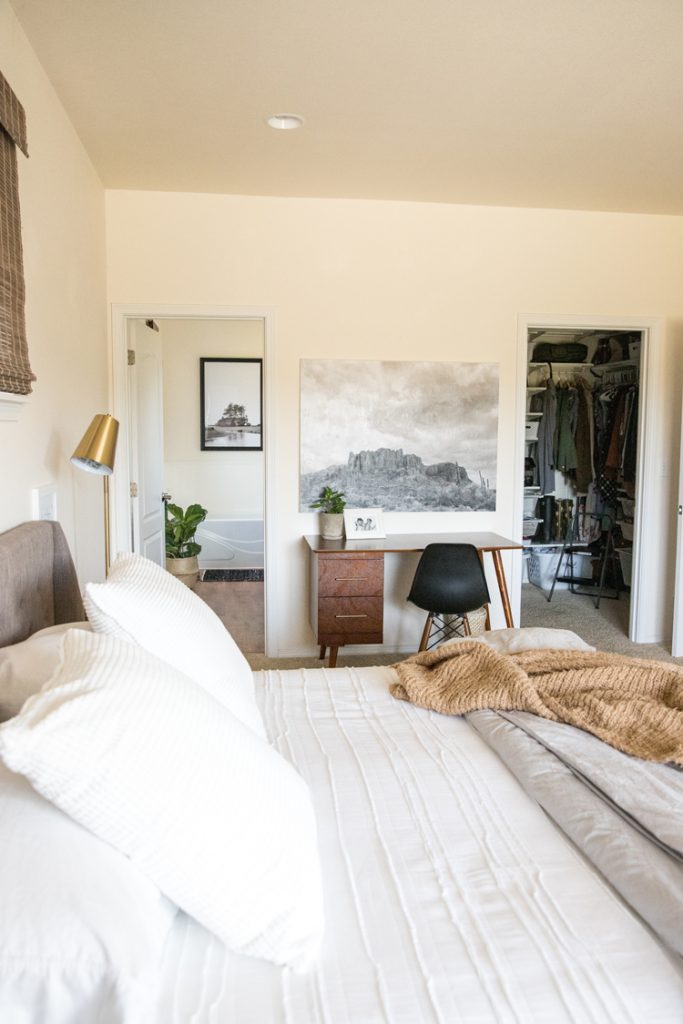
My next goal for this space is to get new carpet and brighten up the walls. Everything is painted in this very warm white and I’ve been wanting to repaint for a loooong time. I also very much dislike painting and it’s at the bottom of my long list of projects I’d rather be doing, so we will see if it happens. 😉
I just recently added these battery operated puck lights that I bought on a recommendation from Nesting with Grace. They work off a remote and a timer. Honestly…they don’t serve any crucial function, but they make my cheap bookcases feel a little nicer.
Sometimes people accuse me of being a clean freak…if they knew how often I actually clean my house, they would change their mind. 😉 I am just a big fan of creating systems that naturally lead to tidiness. I hope this helps you create a system that works for you and your space!
Sources:
IKEA: Algot closet storage system, Billy Bookcases, white storage boxes, sea grass baskets on top of the bookcase, wooden stool by reading chair, white magazine boxes, reading chair.
Michaels: White photo boxes, sewing caddy, button organizers, white frames, canvas.
Office Depot: Clear filing boxes used as storage on the top row of the closet.
Target: Open white bins in the closet.


Love this! And it feels doable for me. I’m going to take a second look at our master closet now! I know we can use it for more – super inspiring! Thank you!
I am so glad you found this helpful! <3
Thanks for posting this. I live in 1500 square feet and I have trying to think of ways to use my space better. About 6 months ago I got kicked out of my crafting area, so that my daughter could have her own room. This is an answer to my small space problem.
I am so glad this helps!
It’s so lovely! I love all your ideas. Did the Billy bookcases come with the doors or did you install your own?
Thanks Karen! You have to buy the doors separately. They are called Oxberg. Why? I have no idea, because they just fit the Billys. ha!
Delia, you’re amazing!! This all looks fantastic!! I wish (and my husband too 😉 that I could effectively purge and keep organized. I love creating systems, but I can’t seem to keep to my well intended systems organized. And my homeschooled kids are always getting into them too! You inspire me! xx
Thank you Jessica! It’s so good to hear from you! Our systems are definitely always a work in progress. I can imagine it’s extra tricky with homeschooling kids!
Looks great! Love the desk for sewing. Is it new or a vintage piece?
I find hanging art very difficult as well. The painting and purse hook look great. Good luck with the rest!
Thanks Kathleen! The desk is actually new from Wayfair. The reviews were not that great when I bought it (but they look better now) and the drawers do stick, but it was just the look I was going for so I risked it. We’ve had no big issues and we have really loved it. It’s not on sale right now. If you can hold out, I think we only paid maybe $170 for it. Here’s a link: https://www.wayfair.com/furniture/pdp/george-oliver-beckley-mid-century-writing-desk-golv5852.html
Thanks, Delia!
Wow, Delia! I am impressed and jealous of your absolutely amazingly organized craft/sewing space! Well done!
Thanks Julie! It’s been quite a process trying to figure out what works for us, but it’s paid off. I appreciate your encouraging words!
reading your articles from long time always you are best delia love you I am using your trick on my bedroom
Your craft and sew space and cupboard looks perfect! I love how you have organized everything and how it still look uncluttered when it is not in use.
Thank you Jolene!
SWOON!
Wow! What a great space, seriously well done! We’ve lived in limited spaces as well and I love how you’ve combined everything. I was wondering how did you do your lighting for the cabinets? Thanks again for sharing your space it’s really inspiring!
Thanks Stephanie! I put battery operated/remote controlled puck lights at the top of the bookcases.
I love it. And the closet! I have a similar setup in my 6-1/2′ x 13′ sewing room for storing supplies. One question: where do you cut? Right now, I have a tabletop on legs raised to the right cutting height for me after years of having cut on the floor. We’re about to downsize again, and would love to know your solution.
Good question! That is my one thing that I have just resigned to using the dining table for…or the floor. It’s not the best solution, but I don’t have room for a cutting table. It works though!…and it forces me to tidy up between projects.