Hello Delia fans!
My name is Cherie and I blog over at you & mie. I am pretty new to the blogging neighborhood so I’m BEYOND thrilled to be here today. The second I stumbled onto Delia’s blog I. was. hooked. Her style, her creativity, her eye for all things beautiful – it all just spoke to me (as it probably does to many of you)! And to be her guest here today is a dream! So thank you, Delia! I’ve been loving the entire Nesting series and all the amazing projects being shared. My favorite part of nesting was decorating the nursery, so I’m going to share how to make your own fabric wall decals to personalize your baby’s space.
I can’t say that this is an original idea of mine. I first saw it on How About Orange, and she had seen it on another blog and so forth.
But today I’m going to show you how perfect these decals are for a sweet little nursery.
When we found out we were having a baby we moved into a 2 bedroom apartment so our daughter could have her own room. But our building has strict rules about painting the walls so I knew removable decals were the way to go. There are some amazingly cute ones out there, but they can be pricey and I thought it’d be fun to make my own. Not only do you have the freedom to create any image you want, but it’s easy and cheap!
You probably already have all the materials you need and it’s super safe for your little one. And it’s completely removable. Perfect for renters OR people who want to have the option of changing up their decor every once and awhile.
I’m going to show you two ways to do it. I’ll call one, “the easy way” and the other, “the easier way.” 🙂
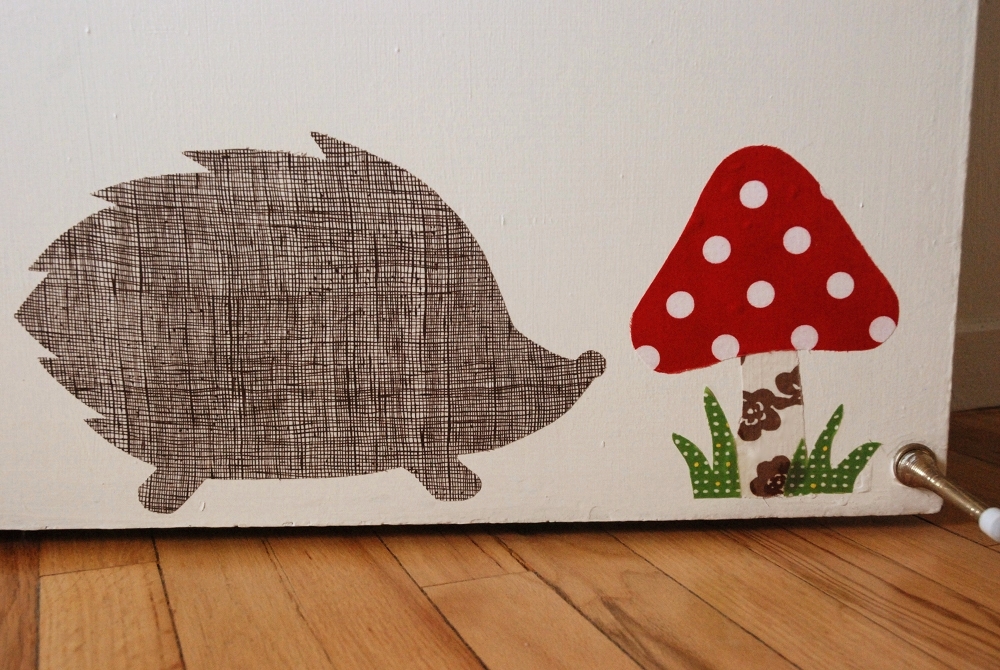
Here’s what we’ll be making today . . .
and here’s what you’ll need:
Paper, pencil, and scissors for making your pattern (or you can download this hedgehog, mushroom and grass one I made HERE)
Fabric (lightweight cotton works best)
Fabric scissors A tub, tray or baking sheet Towels (to protect your floor)
Disappearing ink pen (optional)
Sponge brush (optional)
And lastly, for the easy way: cornstarch for the easier way: heavy starch spray (used for ironing)
The first step (and hardest, in my opinion), is deciding what you want to make and where you want to put it. Once you’ve decided, measure out the wall space. Mark the placement on the wall with pencil if necessary. On a piece of paper, measure out the appropriate size and draw out your pattern.
If you need help with the design, you can do an image search and it helps to use the word “silhouette” in your search, for example, “squirrel silhouette.”
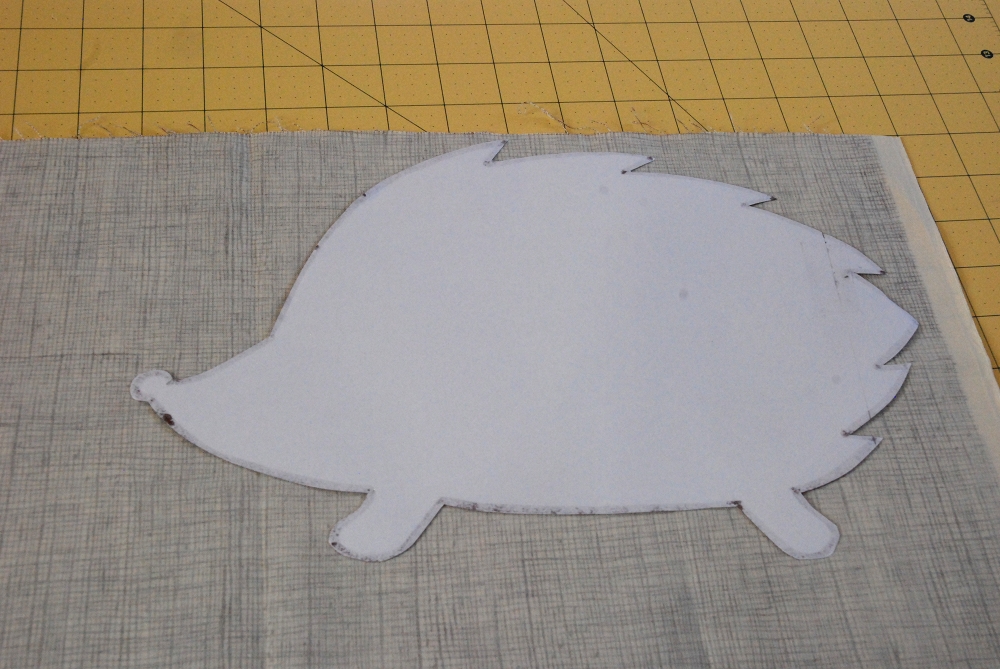
Once you’ve drawn out your pattern, cut it out and trace it onto your fabric. Remember, if you are drawing it onto the wrong side of your fabric, you need to turn your pattern around too!
Cut out your decal pieces and you’re ready to make it stick!
First wipe your wall clean of any dirt or oil and dry it. Place towels on the floor under where you’ll be working to catch any drips. I’ll start with “the easier way” because, well, it’s easier!
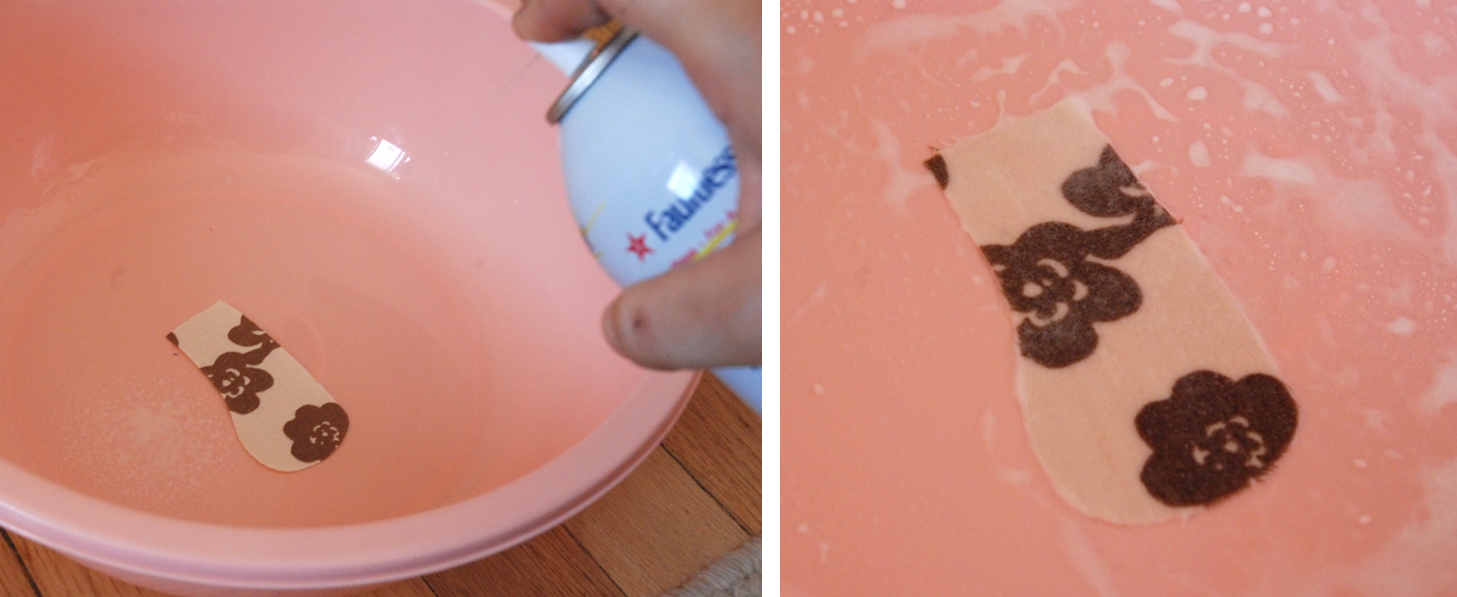
This method requires the heavy starch spray. Place your fabric onto your tray, baking sheet or small tub. Just use whatever you have around your house, but for bigger pieces of fabric, you’ll want a bigger surface. Lay it out flat and spray it with the starch spray. You want it to be well saturated.
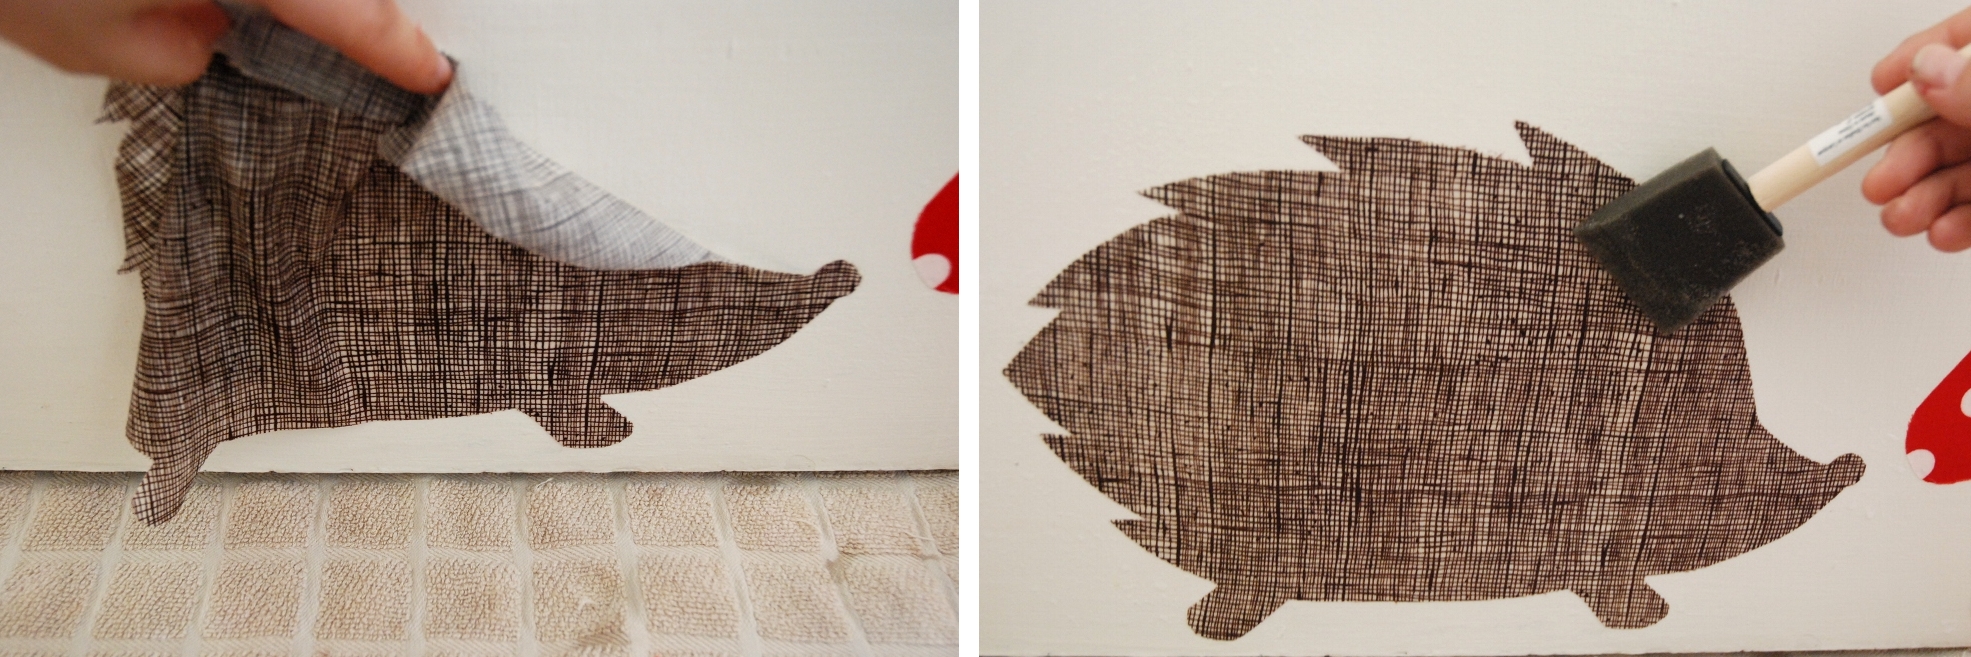
Using your brush (or your fingers), spread the liquid and remove any excess starch (you want it to be wet, but not necessarily dripping wet). For small pieces of fabric, you’ll be able to just place the entire decal on the wall and then move it slightly if you need to adjust. Smooth it out using your brush or fingers. Using some of the excess spray on your tray, brush over the entire decal.
For larger pieces, start with one corner or edge and slowly work to the other side smoothing the fabric and pressing out any air bubbles with your brush or fingers. For REALLY large pieces (like the tree), see the helpful hints below.
Your fabric may start to fray a bit around the edges. Just use your brush or fingers to gently push the threads back along the edges of your fabric.
Repeat with all your decals. Use a damp towel or sponge to wipe any excess cornstarch away from around the decal (it may leave a white residue if it dries on the wall). Let it dry for a few hours or overnight, depending on the size of the decal and voila! You’re done!
Now, for “the easy way,” the only difference is that you’ll be making your own corn starch solution out of water and corn starch instead of using the spray.
There are a few extra steps involved, but there are some great benefits.
1) You probably have cornstarch at your house and it’s cheap!
2) This method is totally natural! If you are concerned at all with unnatural products around your baby, this is perfect for you. You know, if you’re afraid that your child will, say . . . lick the wall (what!? whose child would do that!?). I don’t know if the starch spray is actually bad for you, but there are ingredients listed that I don’t recognize. There’s no question with corn starch and water.
3) And avoiding aerosol cans is better for the environment!
To make the solution:
Mix 3 teaspoons of corn starch with 2 tablespoons of cold water in a medium bowl.
Add 1 cup of boiling water, stir and let cool.
The solution will be cloudy and very thin. The rest of the process is the same.
Brush the solution onto the fabric and place it on the wall making sure to smooth out any wrinkles or air bubbles. Wipe away any excess drippings and you’re done!
Step back and enjoy your unique wall decals!
TIPS AND TRICKS:
Fabric – Lightweight cotton fabric will be the easiest to adhere and will stick to the wall the best. Medium weight fabrics can work too, but it might be a bit trickier.
Placement – These are removable, even for little fingers. My daughter enjoyed peeling any leaves she could reach from the crib off the wall, but she hasn’t messed with any of the other ones that she can reach. Just something to consider when deciding where to place your decals.
Extra large decals – For large images, cut your fabric into several smaller pieces. It will make it MUCH easier to put up. Just try to line up each piece right up against each other so it looks continuous and no one will be able to tell! The large tree was cut into 5 pieces and the deer was 3.
Removal – You can easily peel the decal off with your fingers when they are dry and then use a wet towel to wipe away any starch residue. This may cause the fabric to fray. For even cleaner removal, dampen the decal with water and it’ll slide right off. These decals CAN be used again if you remove them gently. Rinse the fabric, pat dry and then adhere them the same way you did before!
And really, the possibilities are ENDLESS! I’m already brainstorming new ideas for when I get tired of these. I hope you have fun making yours! Thanks so much for having me, Delia! I can’t wait for your little one to arrive! And I know that she is one lucky baby to have a mama like you.
And Cherie’s daughter…how adorable is she? Oh so cute. 🙂


I fell in love with You & Mie as she participated in the at home Flickr Group – she was truly FANTASTIC!!! So happy to see her getting some exposure here, and LOVE these wall fabric art animals- so stinking cute!!!
How adorable! I love the deer you showed also. Thanks for sharing!
Great tutorial, Cherie, I can’t wait to try this! So, so cute. You rock!
Oh i love the tutorial and the website. Thank you for sharing 😉
I had no idea you could do this! Great solution!
Okay, this is awesome! I sort of like the look of decals, but totally can’t commit. This option makes them much more appealing: free=nothing to lose! Thanks for the great tutorial!
Adorable! ~Stephanie
Thank you so much, this is just too fabulous of an idea! I had never seen anything like it before and had no idea you could do such a thing. I pinned this project for future reference.
I need to try this! It's a great use of some smaller pieces of fabric too. But I think you're right, the hard part will be deciding what to make!
http://resolvingcrazy.wordpress.com
I have those exact same ABC cards up in my girl's room, in the exact same way! Little clothespins on string. Love them!
Has anyone tried this on painted wood or wallpaper? Would it stick on the wood? Would it harm the wallpaper?
@katkadu: I haven't actually tried this on painted wood or wallpaper, but I'd love to know the results if someone tries it! My GUESS is that it would work on painted wood (since it works on painted walls). It would probably stick fine on wallpaper too and I can't imagine it would cause damage, but it would probably be best to do a test in a small hidden place first. Sorry I can'
I LOVE this idea & tutorial. I just tried it and as my pieces are drying they are falling off. I used spray starch so I'm wondering what I may have done wrong. I did just notice that it does not say heavy starch on the container. Do you think that may be the problem? I am using a lightweight cotton fabric.
Help! this is so cute & I really want it to work.
thanks so
Hi Kara! I'm so sorry that it's not working for you!! My best guess (since you're using a lightweight cotton), is that your spray doesn't have enough starch in it. I'd try a heavy starch spray OR if you don't want to go out and buy a new can and you already have corn starch at home, try spraying your other starch spray in a bowl and adding a bit of corn starch to it,
I am so happy to visit this blog post. The baby is adorable and idea you have shared for wall decals is amazing. Rate-me
very informative article and I love the design’s, bookmarking your website as we speak lol xx
Love it xx
I'm thinking of making LEGO minifigure decals for my son. Would it work if I have to place another layer of fabric on top of my base fabric layer such that I put on the extra "designs" on the figures? Do I just apply more corn starch to adhere them together?
Love this idea. Would this work if I have to put another layer of fabric on top of the base layer of fabric? I want to make Lego minifigures for my son and I need to put on the designs on the shirt. Do I just put another layer of cornstarch solution and paste it on top?
Very usefull manual. Many thanks. Greetings from Poland.
great,you can diy it by yourself ,you are a better home decorer
Your girl is so cute and wall decal is great, too.
Great designs, just loveee it!