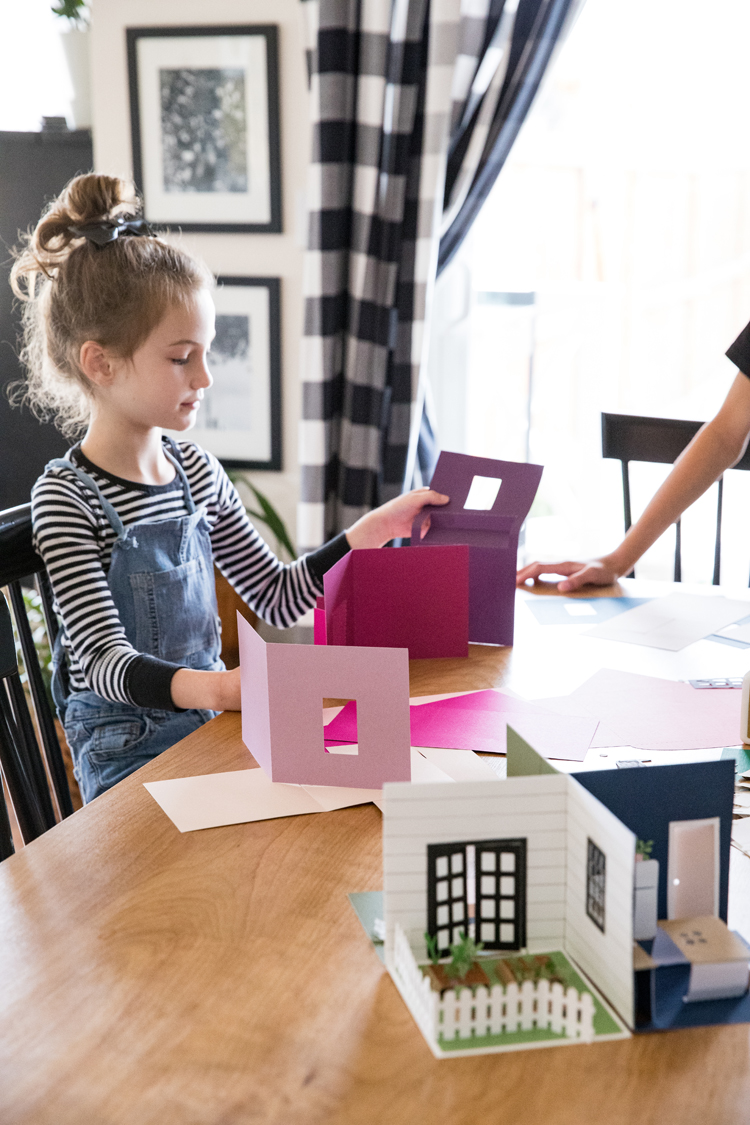
If you’ve been around here awhile then you know I adore little paper houses. I usually use them as decor around the holidays, but this time I put a playful twist on the decor element and made it a toy you can decorate!
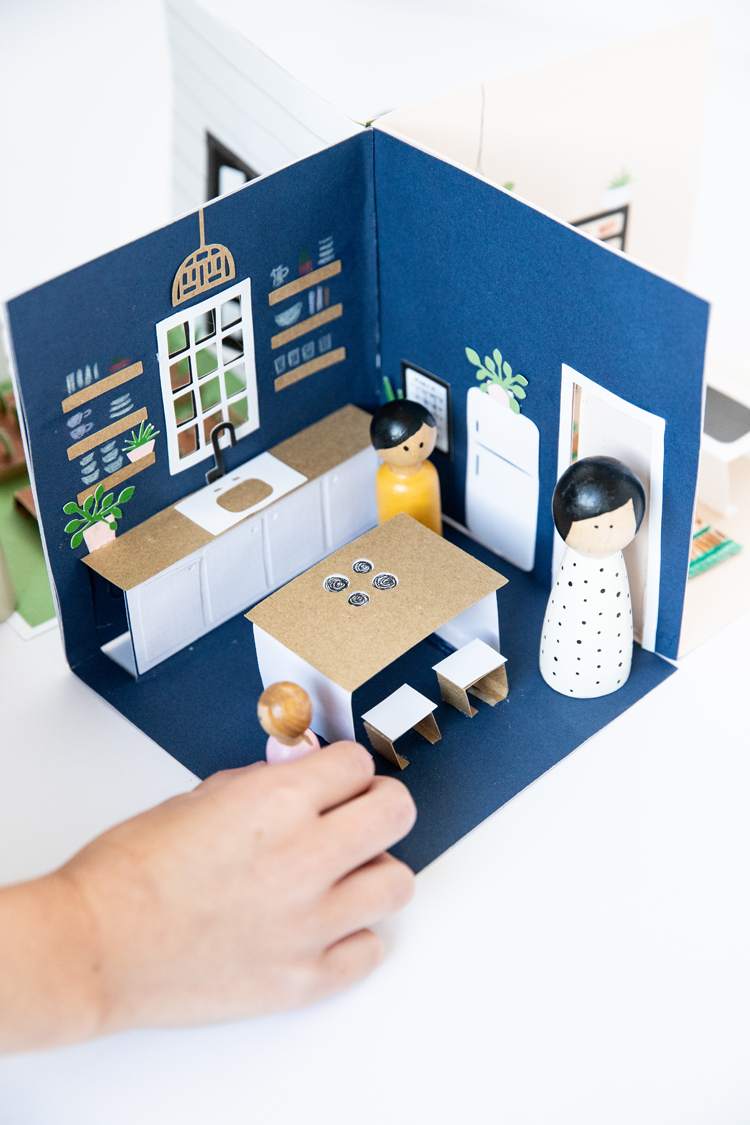
I’ve teamed up with Silhouette to create a pop up paper doll house that kids can design and accessorize to their hearts content and then bring with them to play with on the go. I use the term “kids” loosely, because I ended up having way too much fun with it myself. I did have to test out the first one after all. 😉
Note: This post includes affiliate links. All the cut files are at the end of this post.
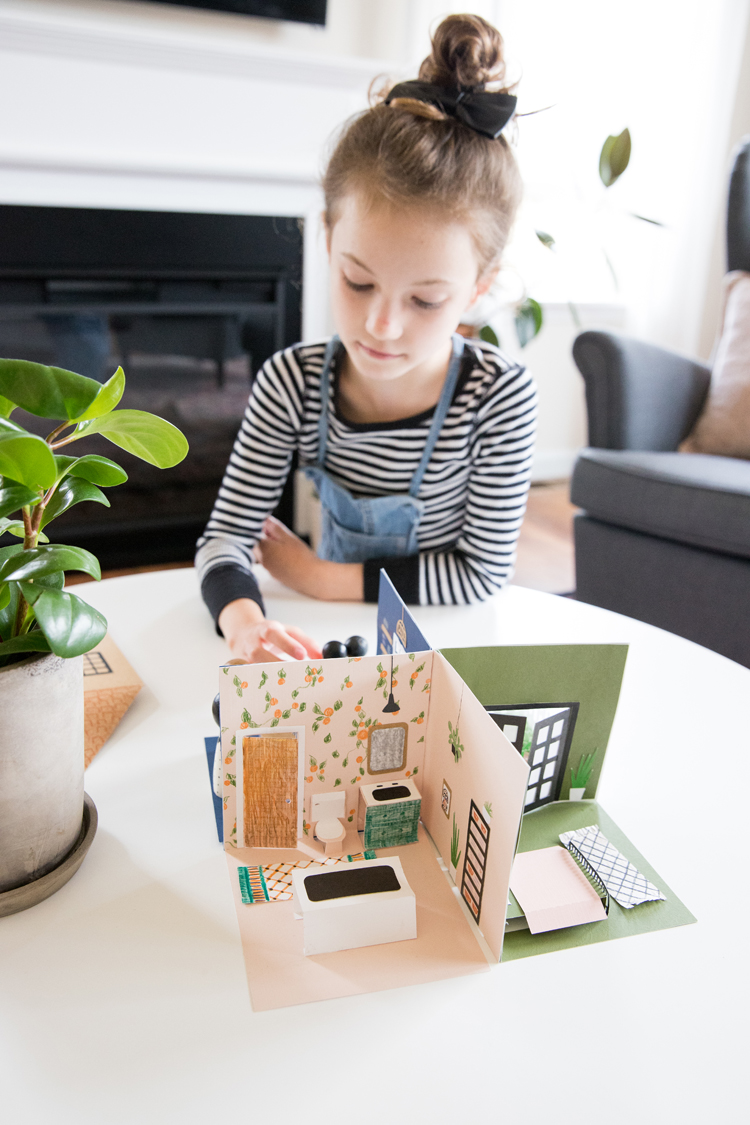
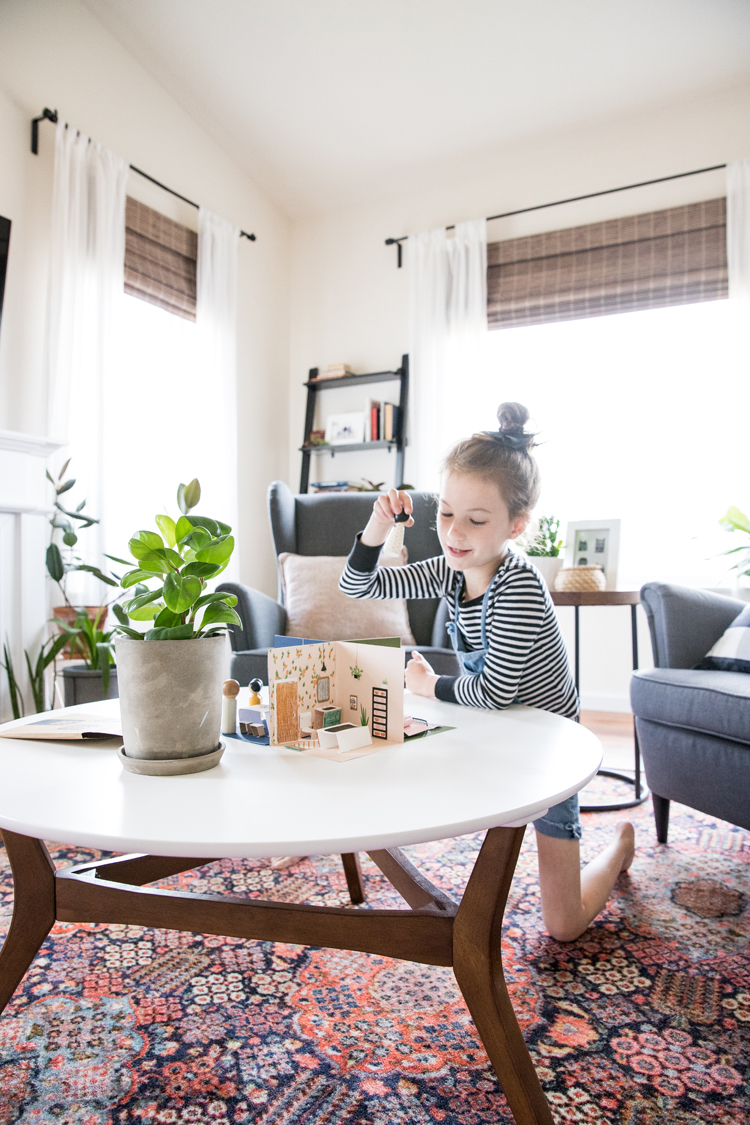
It’s a great answer to that inevitable “I’m bored” you’re sure to hear many times this summer. It offers hours of quiet time entertainment that you can take with you while you travel.
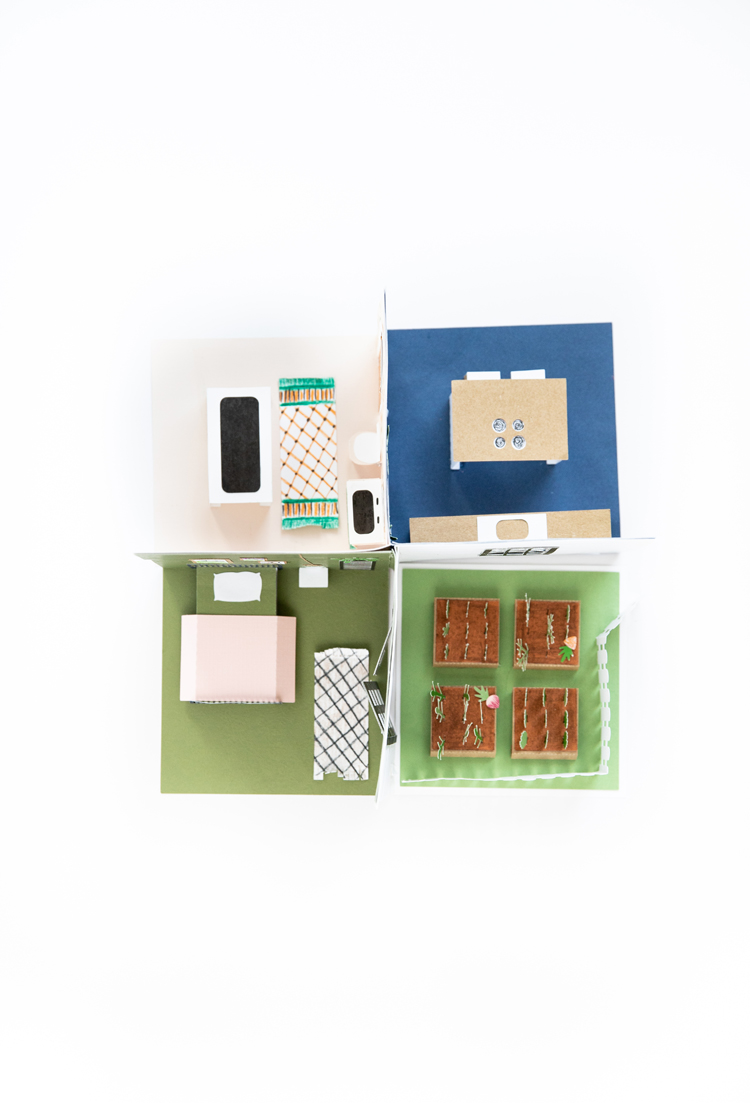
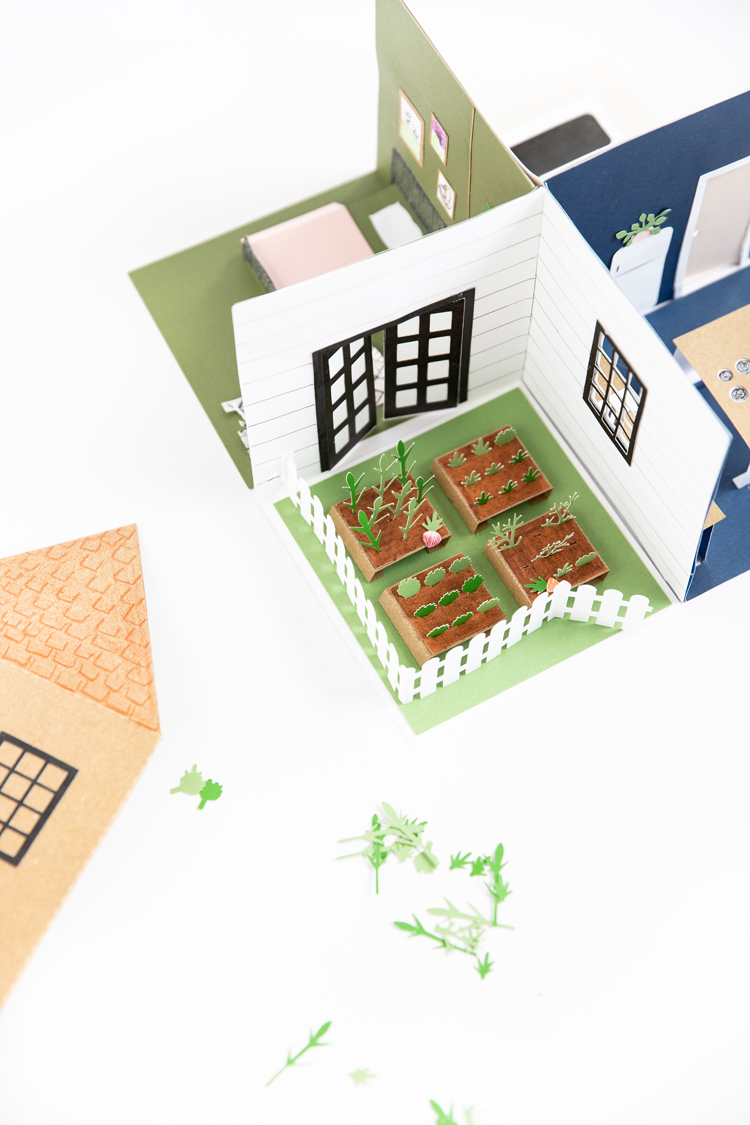
There are four rooms: a kitchen, a bathroom, a bedroom, and my favorite…the garden area.
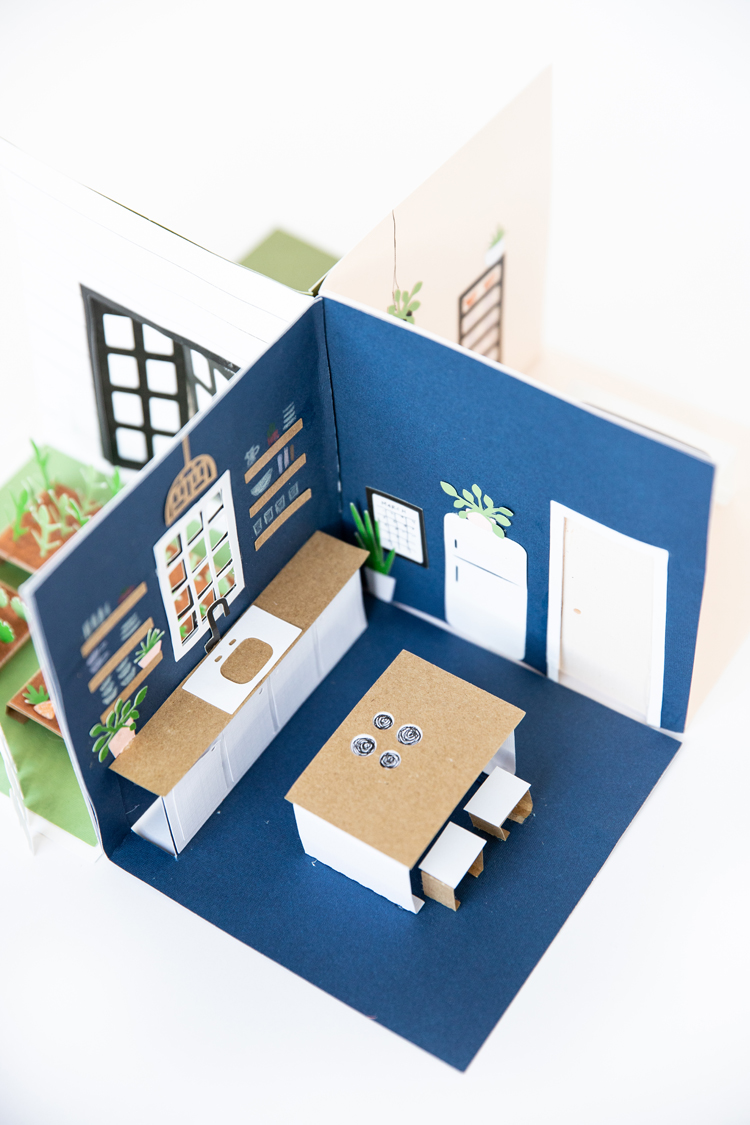
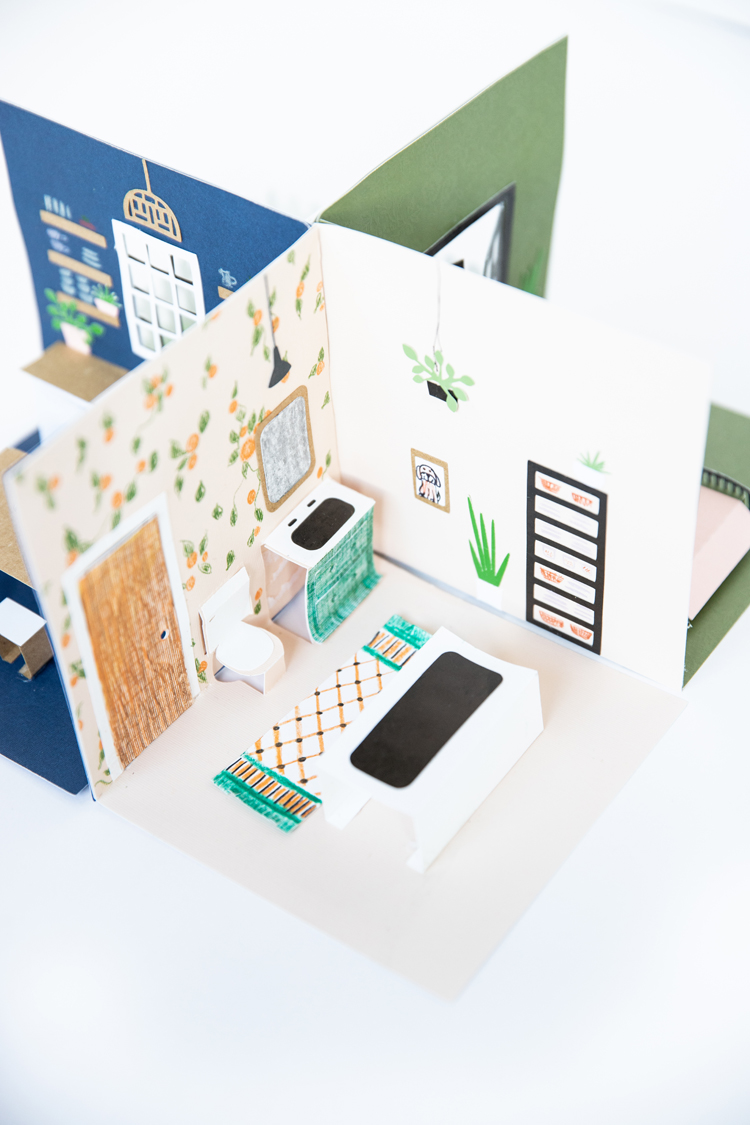
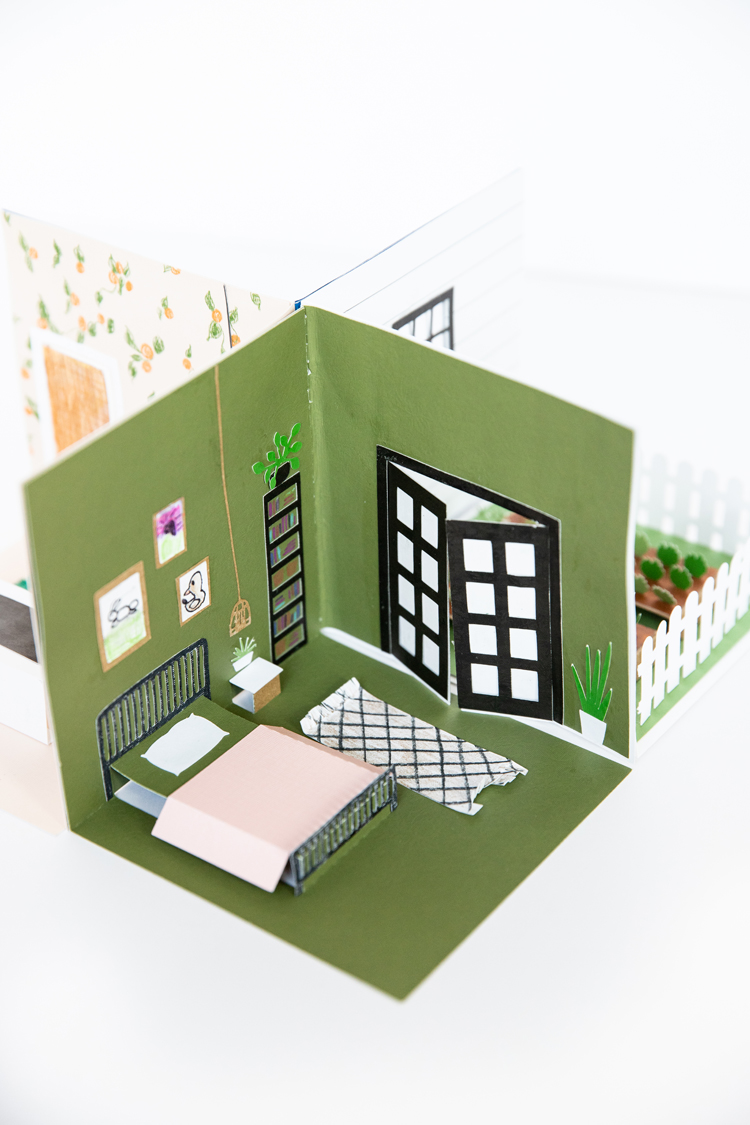
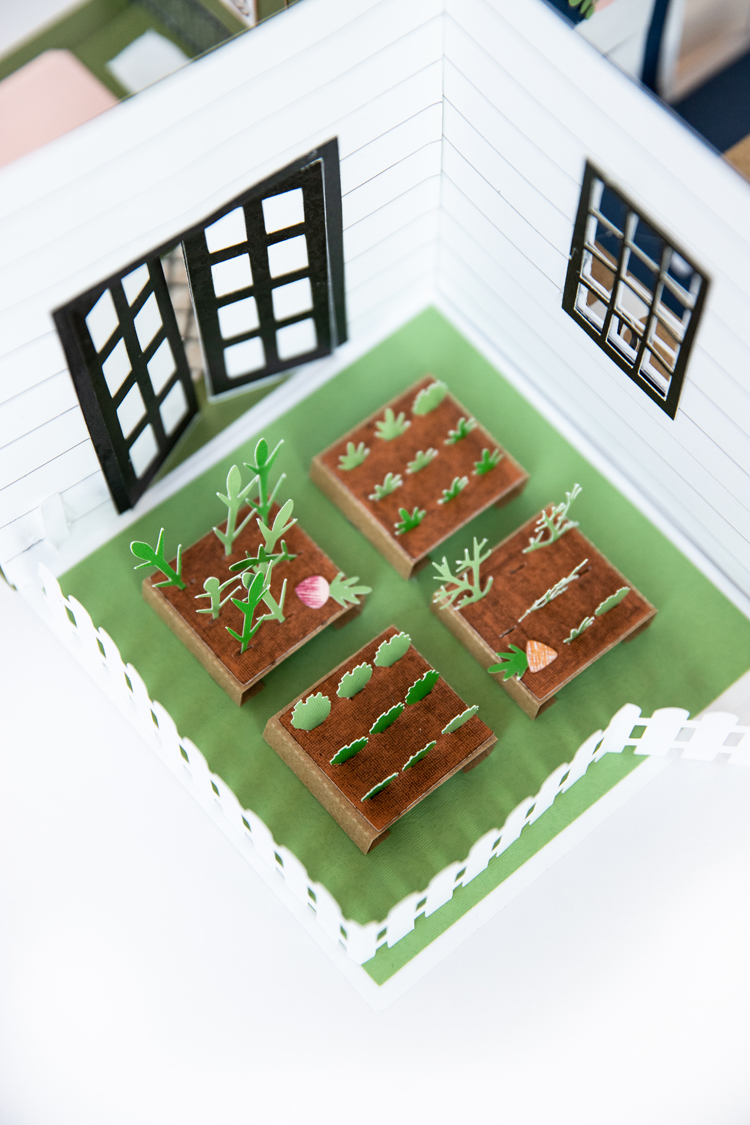
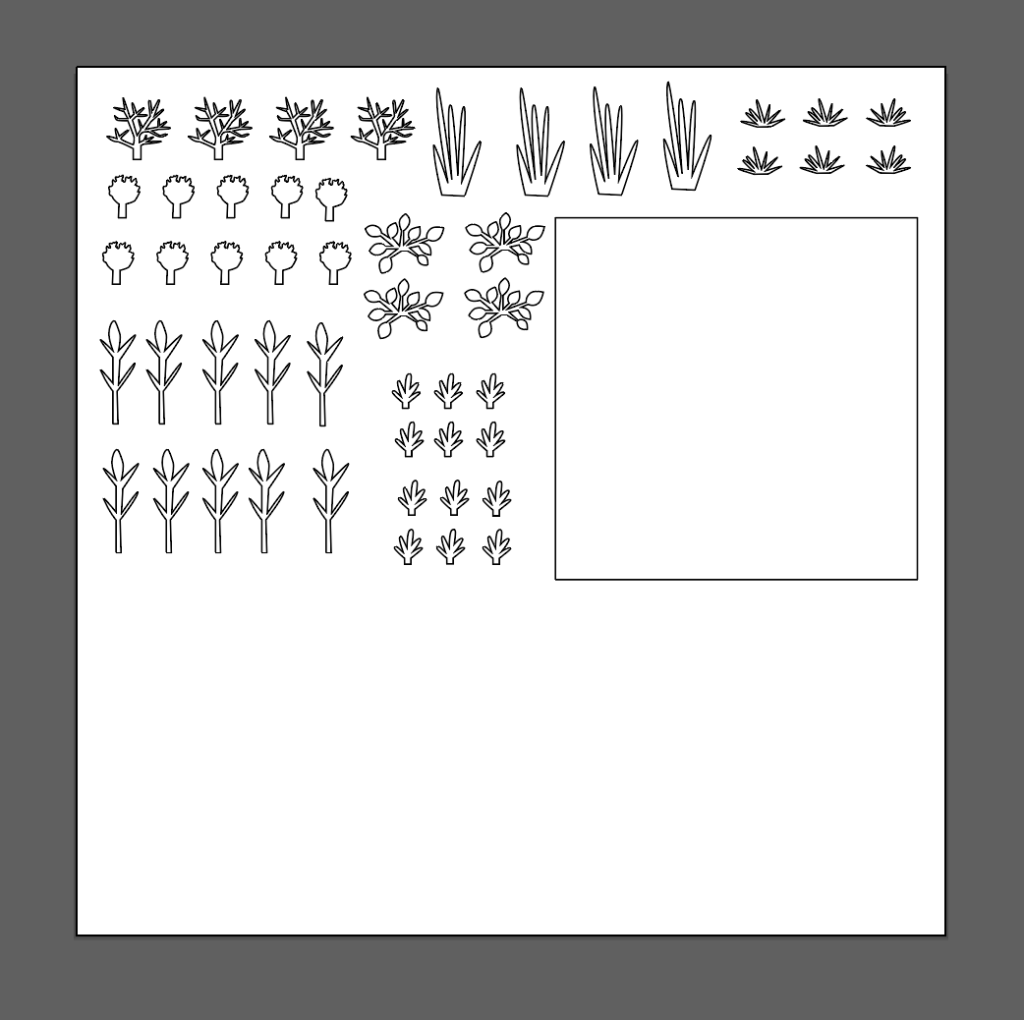
Complete with removable plants! I created corn stalks, heads of lettuce/cabbage, tomato plants (sans the tomatoes), and little food pieces that you can add to the greens to look like veggies or fruit.
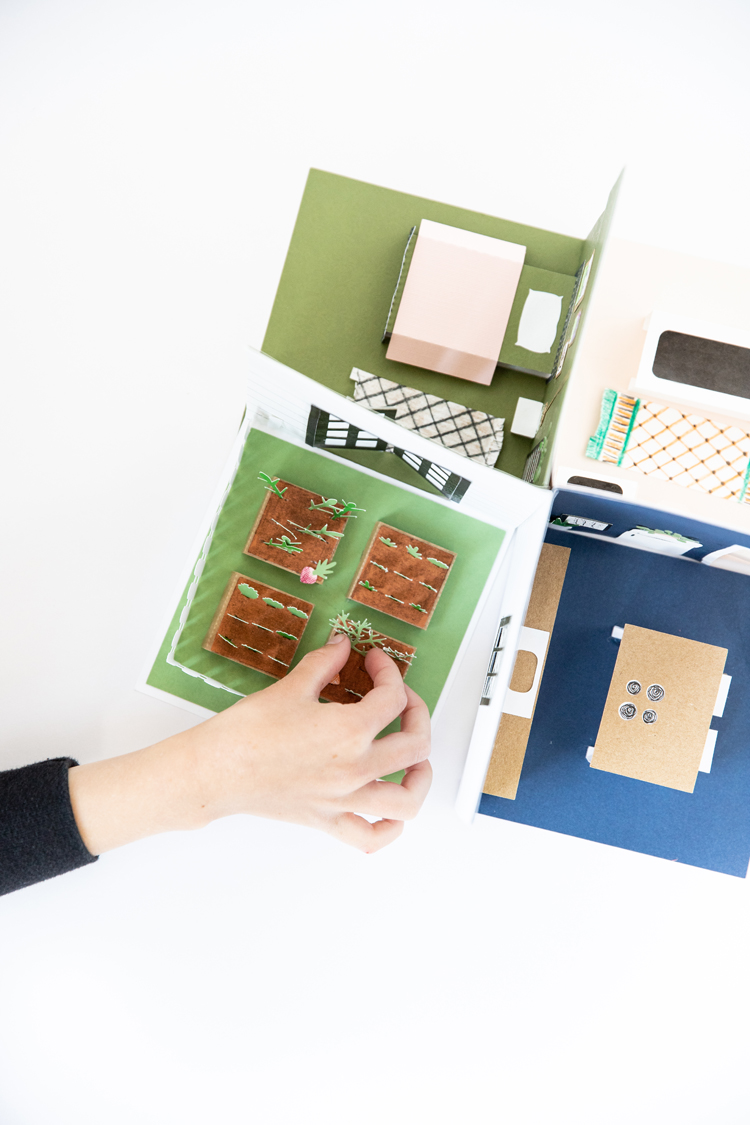
Each room comes with loads of accessories: a faucet (that folds in and out), sinks, cabinet doors, free standing tub, toilet seat, frames, bookcases, etc…and lots of house plants. This #plantlady couldn’t resist. 😉
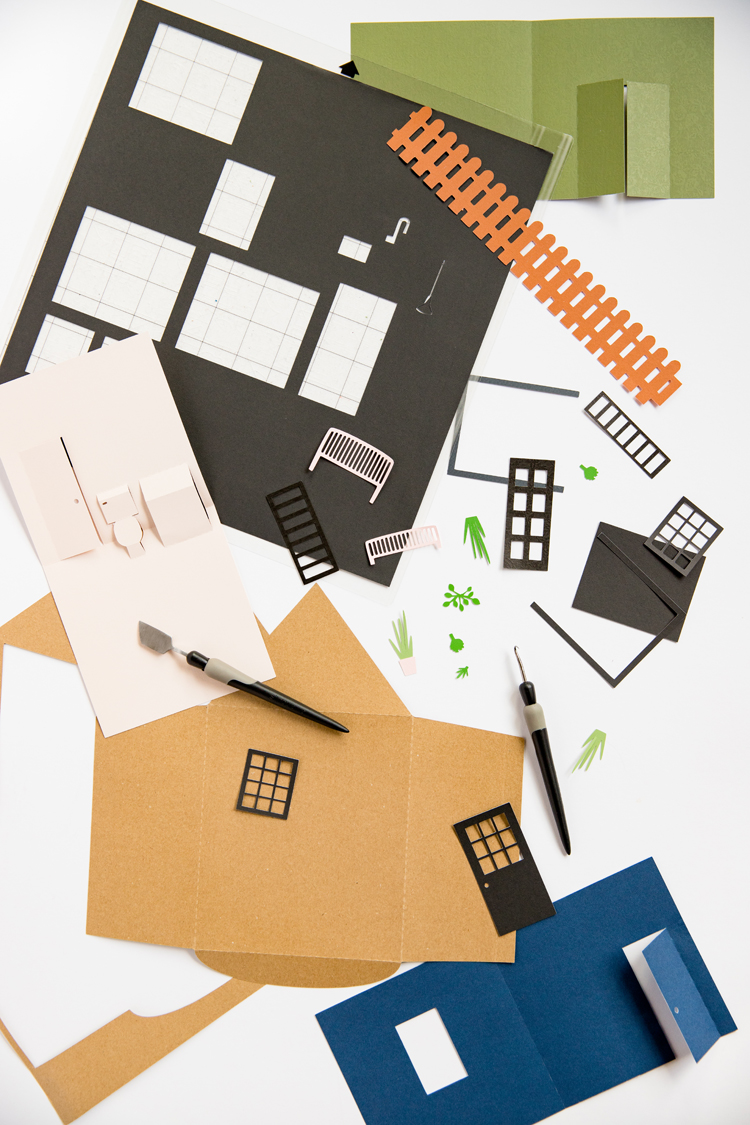
Once the “house” is assembled, it folds up in a little 5.5 x 6.5 inch envelope that is great for travel, or just compact toy storage.
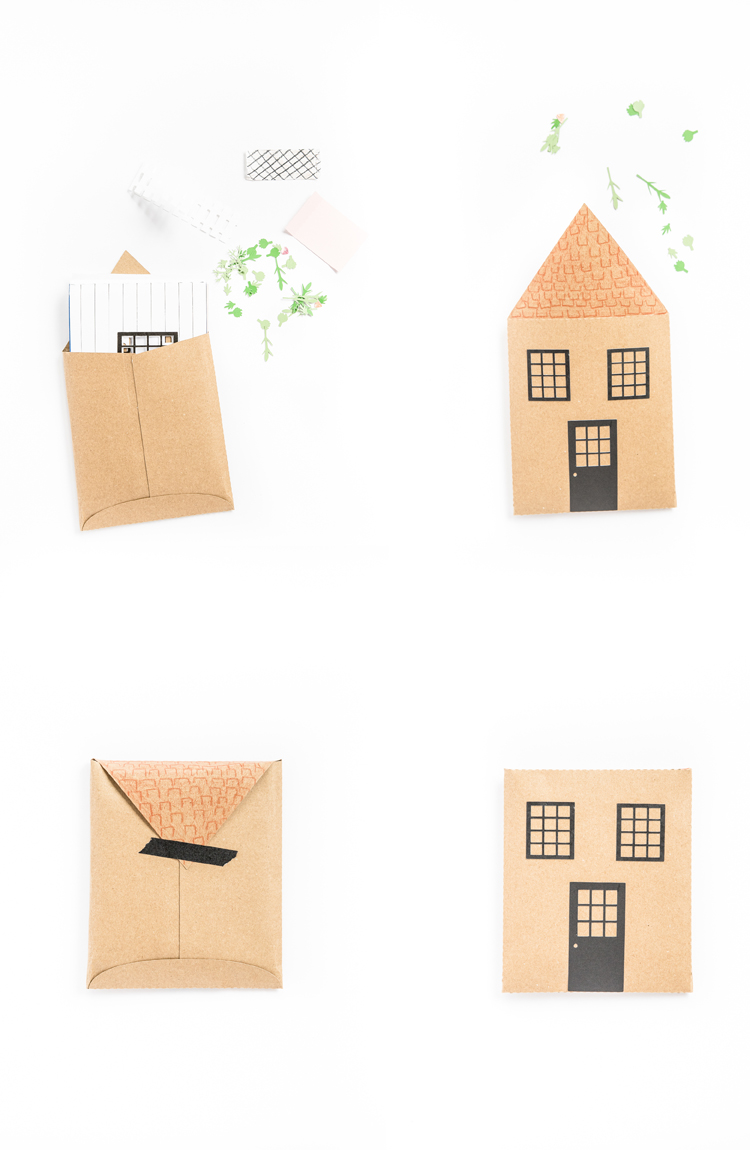
It only takes eight pieces of 12×12 inch scrapbooking card stock to make a house, nine if you include the envelope…which is like $2! No sweat if you lose it or if you want to make a new one with different decor later.
When I first envisioned this idea, I took to google to see if it already existed and I found a few cute pop doll house books with connected floors that fold up within the walls. While, I knew that would create a cleaner look when the house was folded up, I decided to separate the floors from one wall so that I could include elements like the kitchen island and the garden boxes. I also wanted it to be something that would be easy to add to even after it was assembled. That way you can lay it flat and add murals or “wall paper” as it suits you …or ahem your kids can. Whatever… 😉
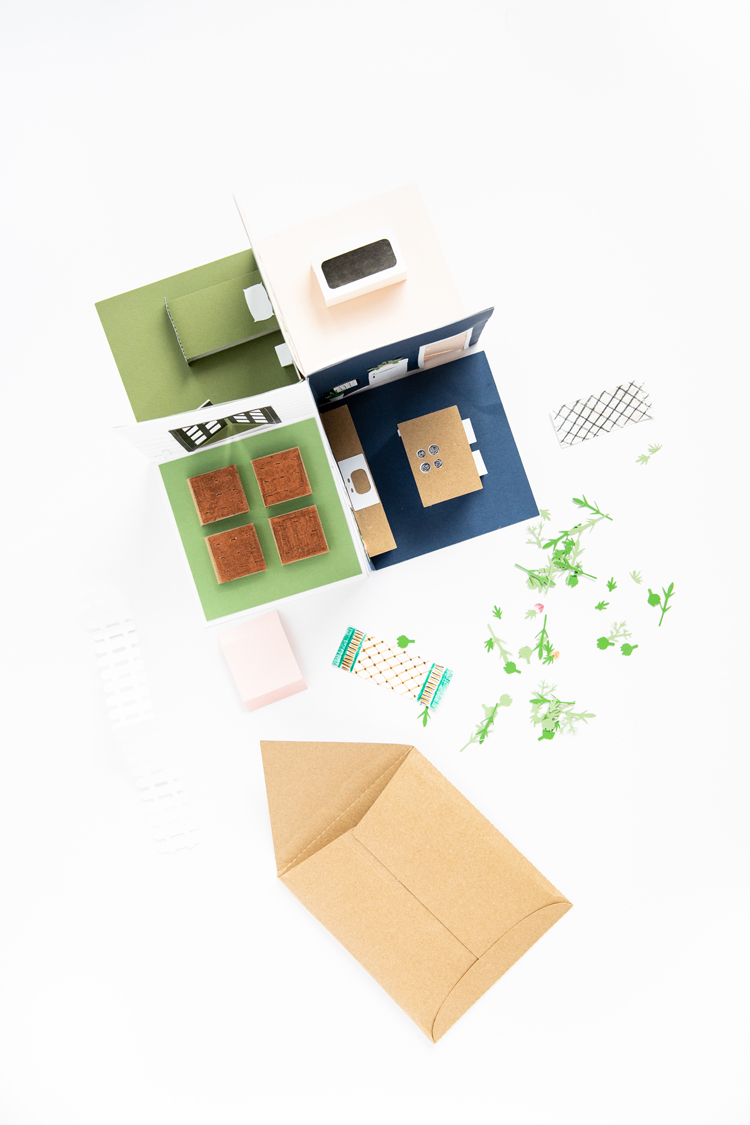
It can end up looking a little “stuffed” and untidy when folded up after you add all the accessories. The accessories are what make it SO fun to play with though, so function won over form and I opted to put the doll house into an envelope. This keeps all the removable accessories (plants, rugs, blanket, etc.) in check and tidies up the stuffed appearance of the house when it’s folded.
MATERIALS
- 12 x 12 inch scrapbooking card stock – 8 pieces for the house, 1 for the envelope
- Silhouette Cameo, cutting mat, blade (there is a fantastic sale going on right now. For the July sale CLICK HERE and use my code: DELIA at check out to access the discounts and deals. You can also click my affiliate button in the right side bar and enter code: 10off at check out to get 10% off regular priced items anytime).
- glue – hot glue, glue stick, liquid glue (it helps to have a variety for different pieces, glue stick for delicate and hot glue for structural pieces)
- markers, colored pencils, etc.
- washi tape – to seal the envelope
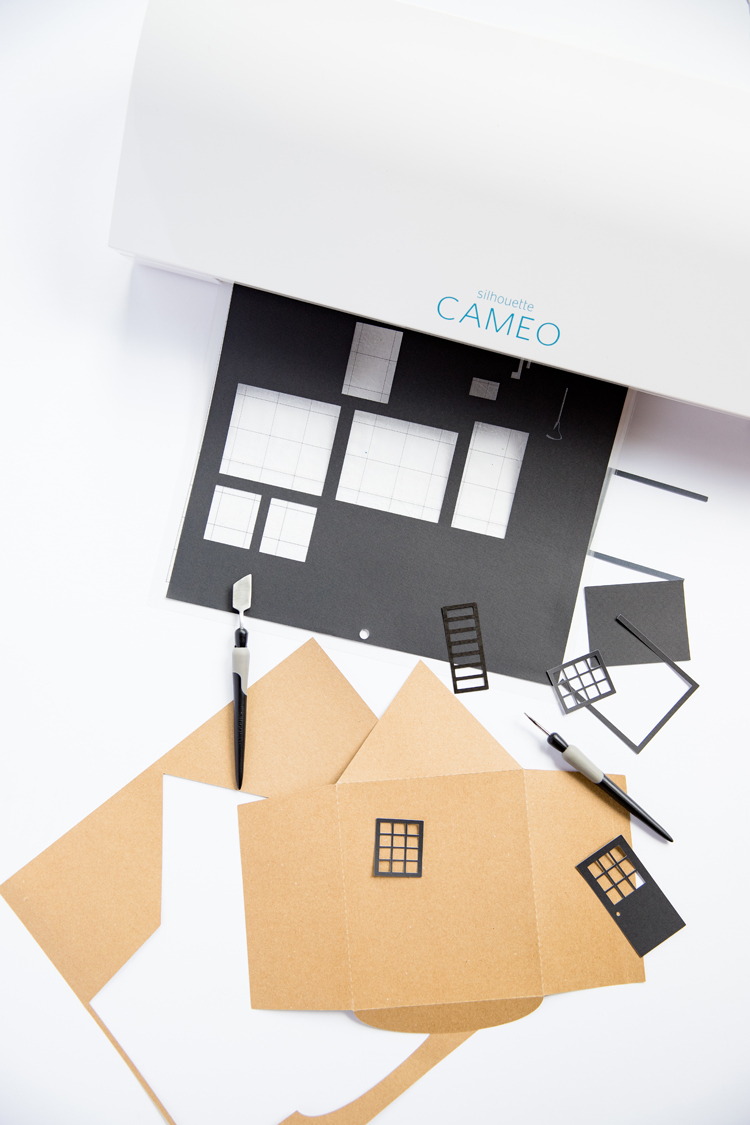
SVG CUT FILE Notes:
CLICK HERE to access the Google Drive folder with all the SVG files.
NOTES
- You need the Designer Edition of Silhouette Studio to use these .svg files. Click HERE to get it if you don’t have it.
- The suggested colors for the accessories are listed in the title. You can of course use different colors, or add/move the elements around to suit your preferences. I like to cut most of them on white because they are easy to color and customize by piece.
- There are A LOT of little pieces in the accessory files. Expect cut time to be around 10+ minutes per page for those files.
SCREENSHOTS
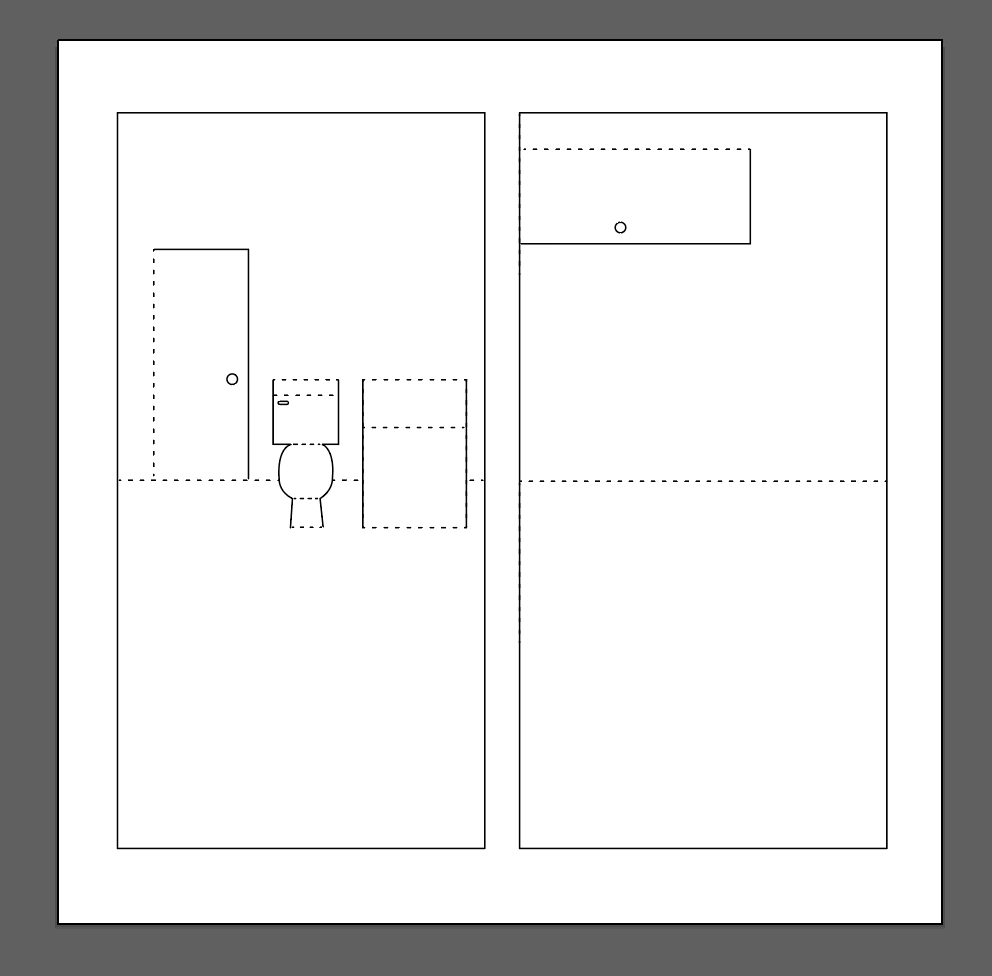
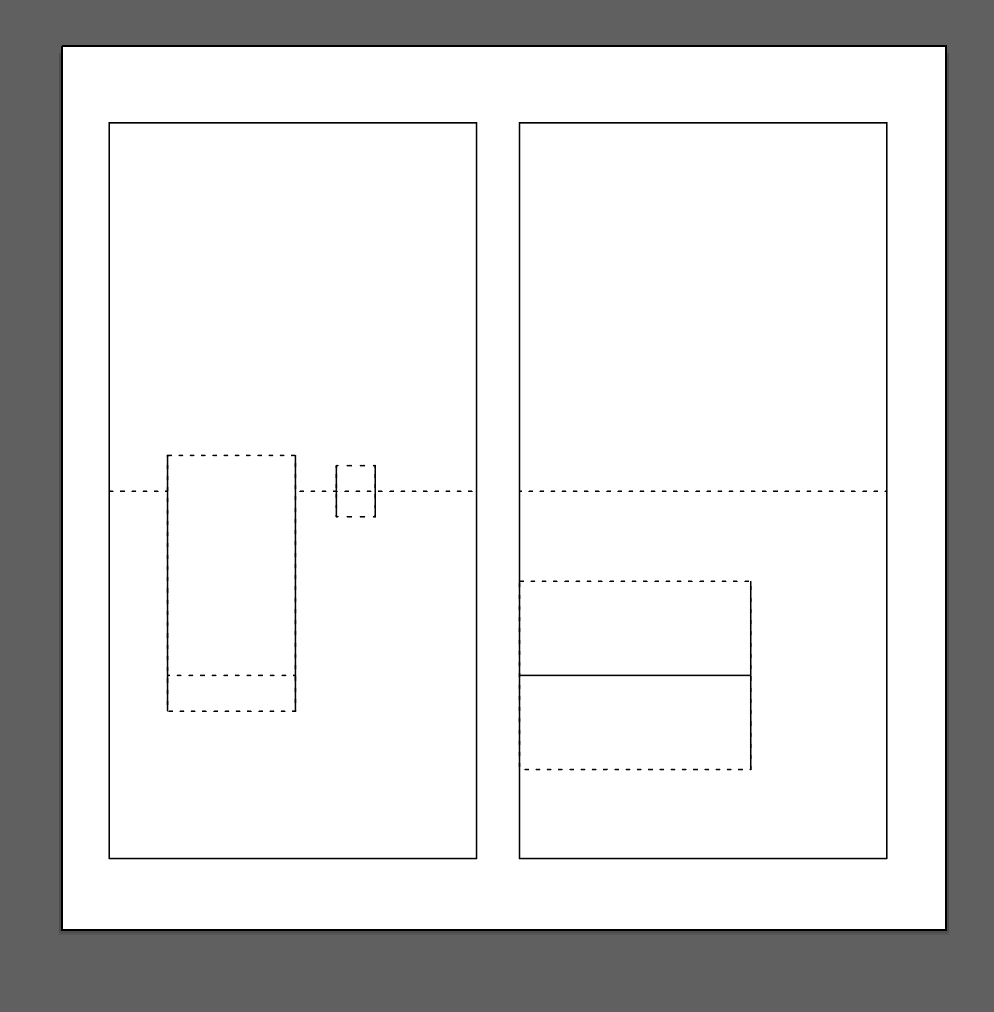
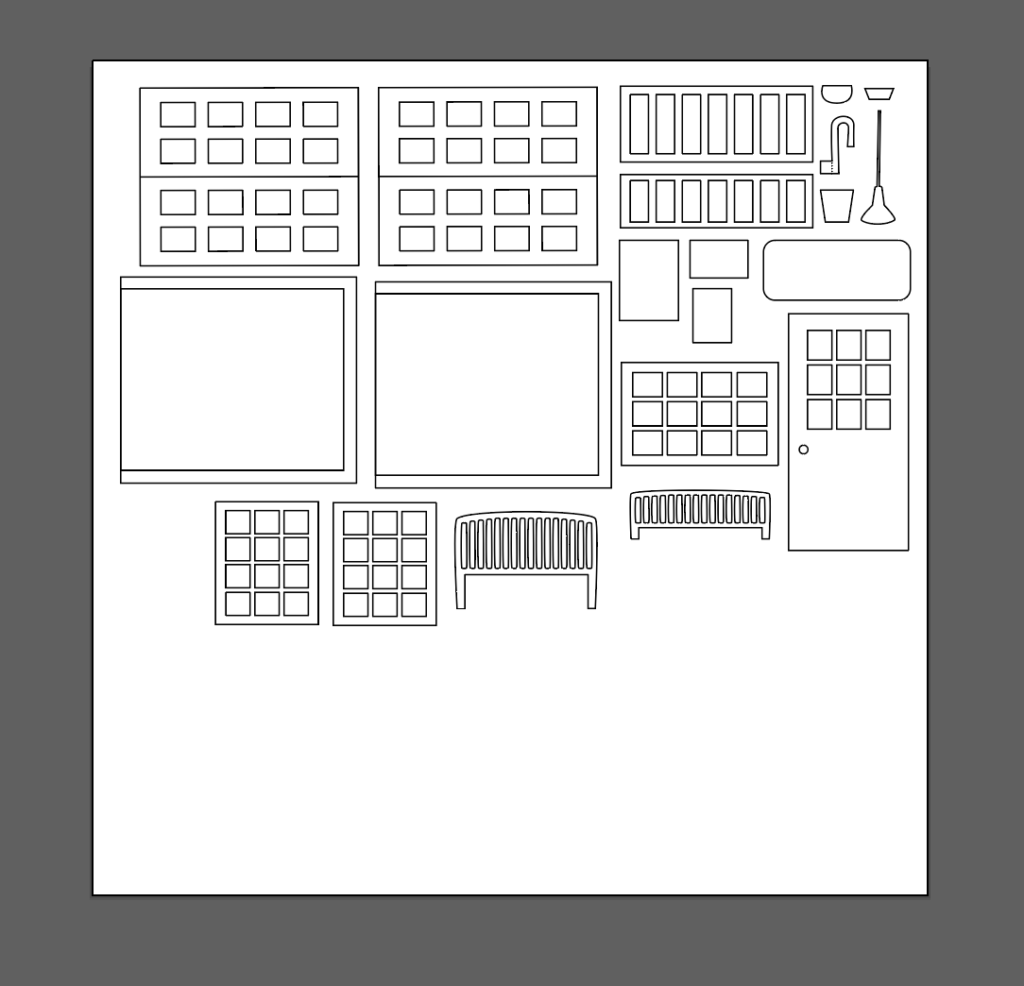
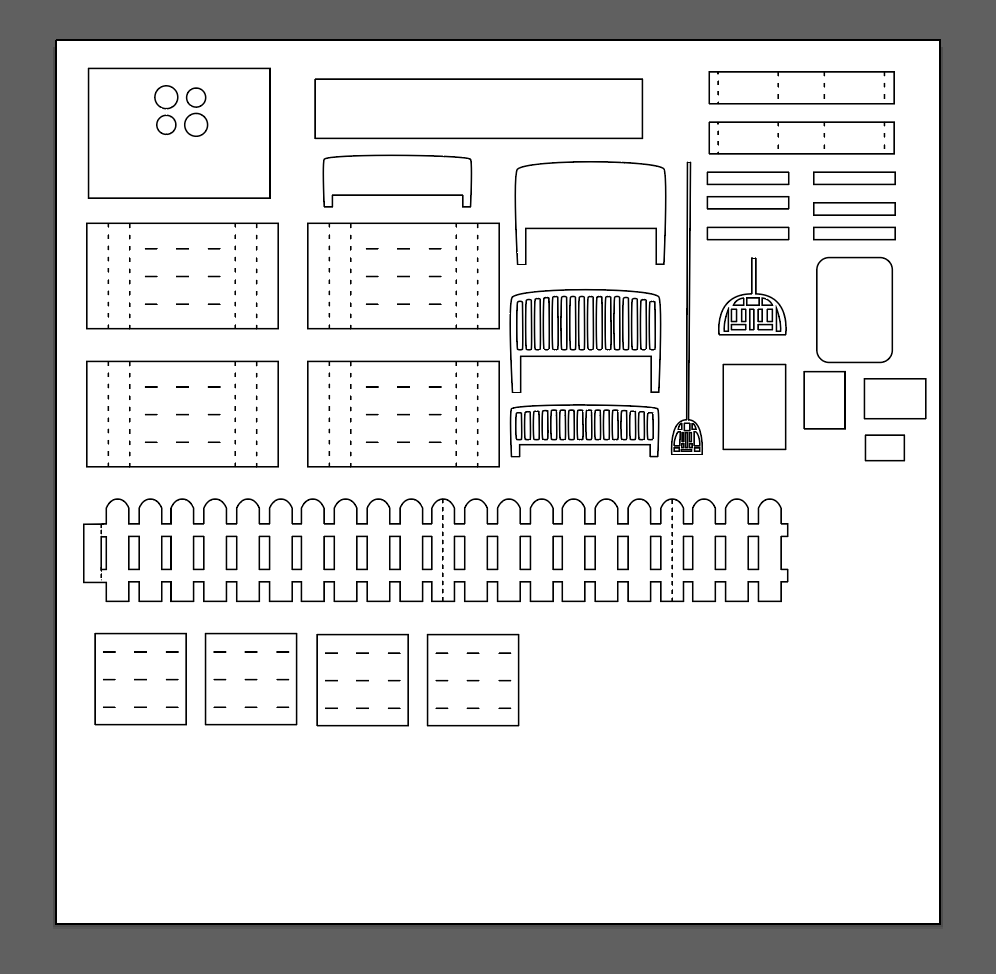
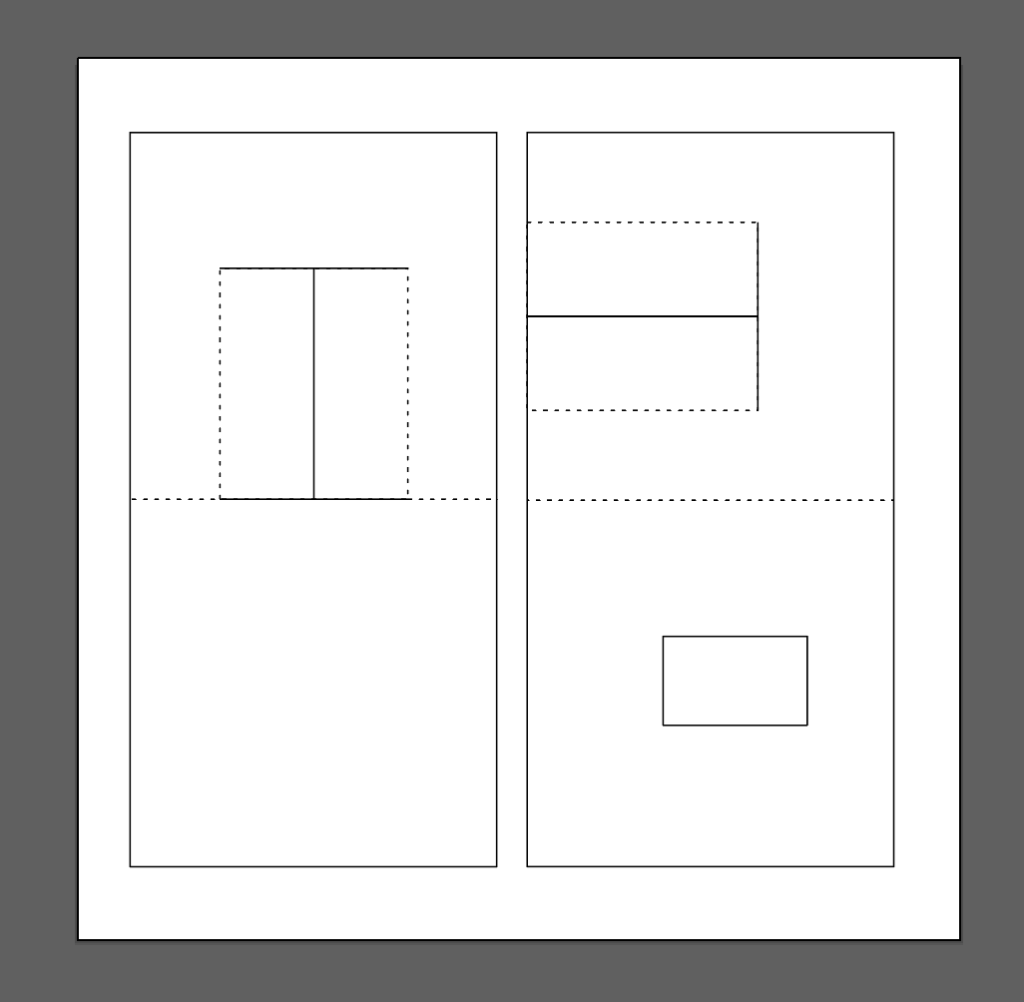
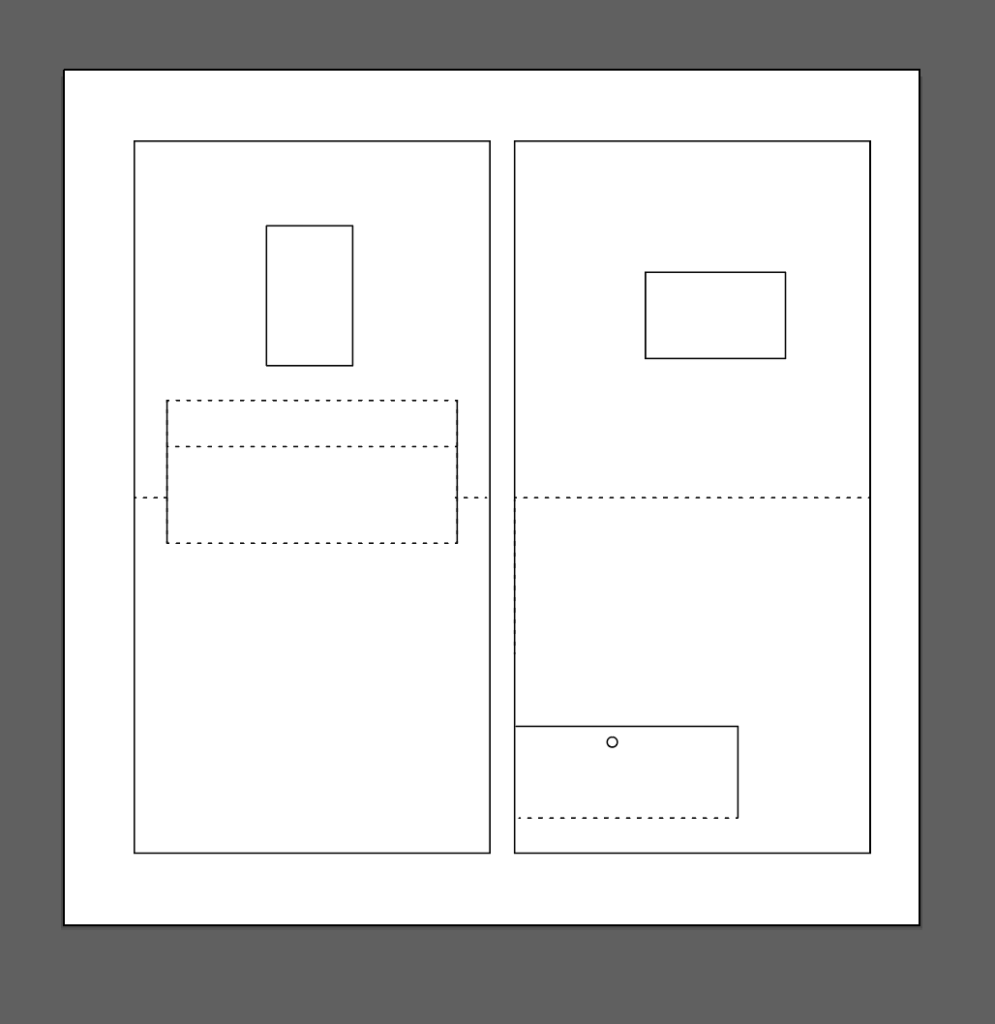
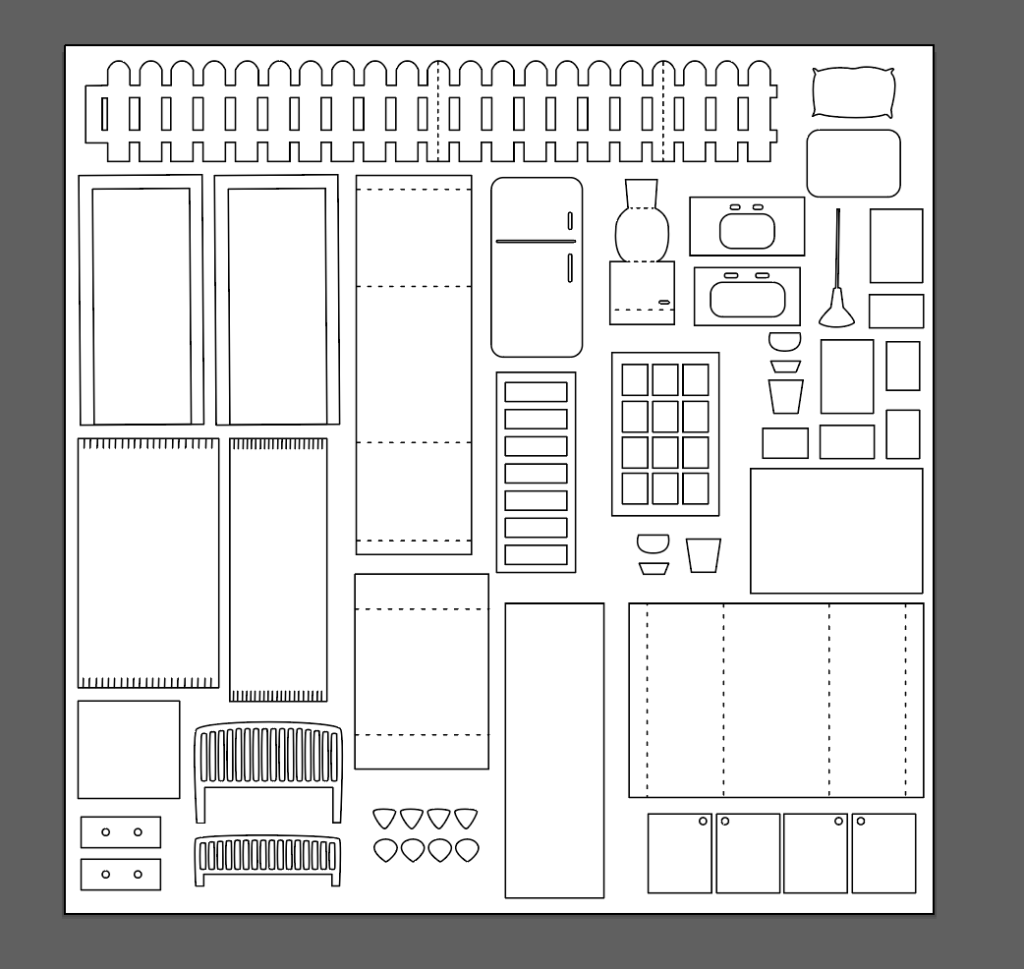
I got some feedback that the files get jumbled in Cricut software so here is a screenshot of the files if you need them:
TUTORIAL
First, assemble each room. The piece in on the left includes one wall and the floor. The second piece aligns with the wall portion of the first piece and creates the adjoining wall. Take care to not glue down the cabinets, bed, toilet, nightstand…things that fold away from the wall.
You can color walls and floors now, or wait until later.
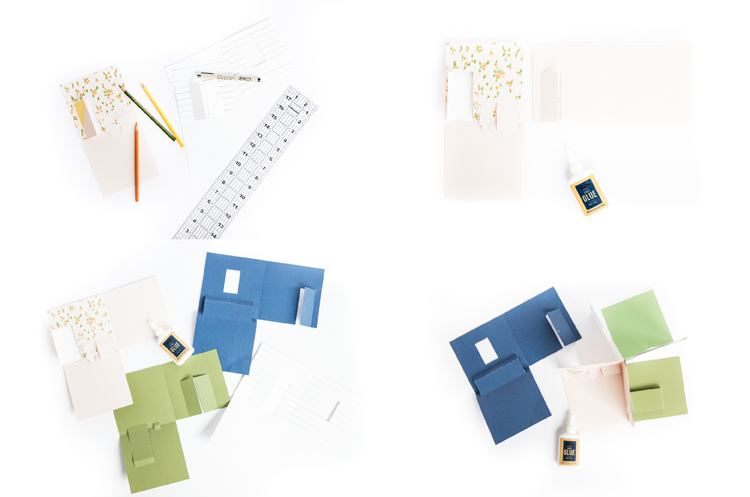
Second, glue the rooms together. Each wall should now be three pieces of paper thick.
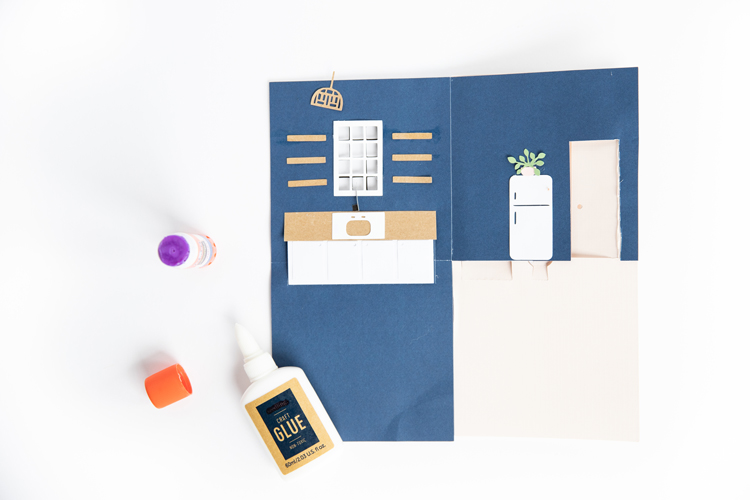
For the walls with doors, you can make the doors three pieces thick as well, or cut away the excess doors. I find that they swing open better when only one or two sets of doors is left. If the wall looks rough where you cut out the door, don’t worry, I included door frame pieces that cover that up and help the doors look more complete.
Third, fold up your house to ensure it was glued and folded properly. The backyard or garden room best serves as the outside walls for the folded house. Open and fold your house several times to establish a fold memory, so that it cleans up easily later.
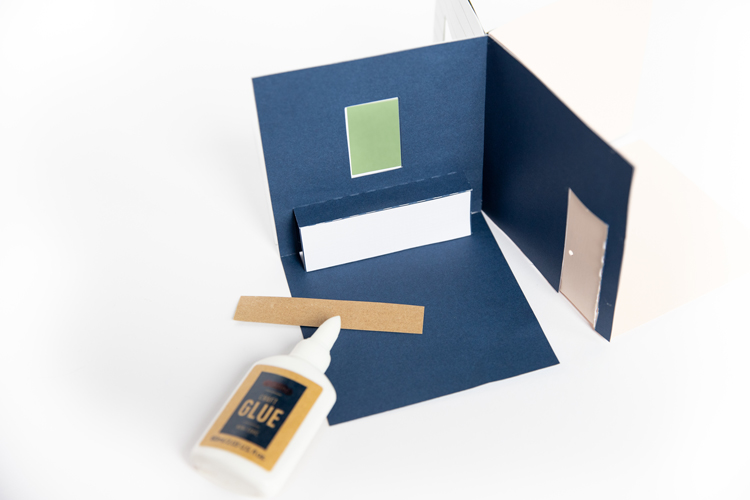
Fourth, decorate!
Glue on accessories, change the color of your cabinets, color on the walls (yes, I said color on the walls kids! ;)), create miniature works of art to hang on the walls, color in books for the book shelves, add floating shelves to the kitchen and stock it with dishes…whatever you want to do!
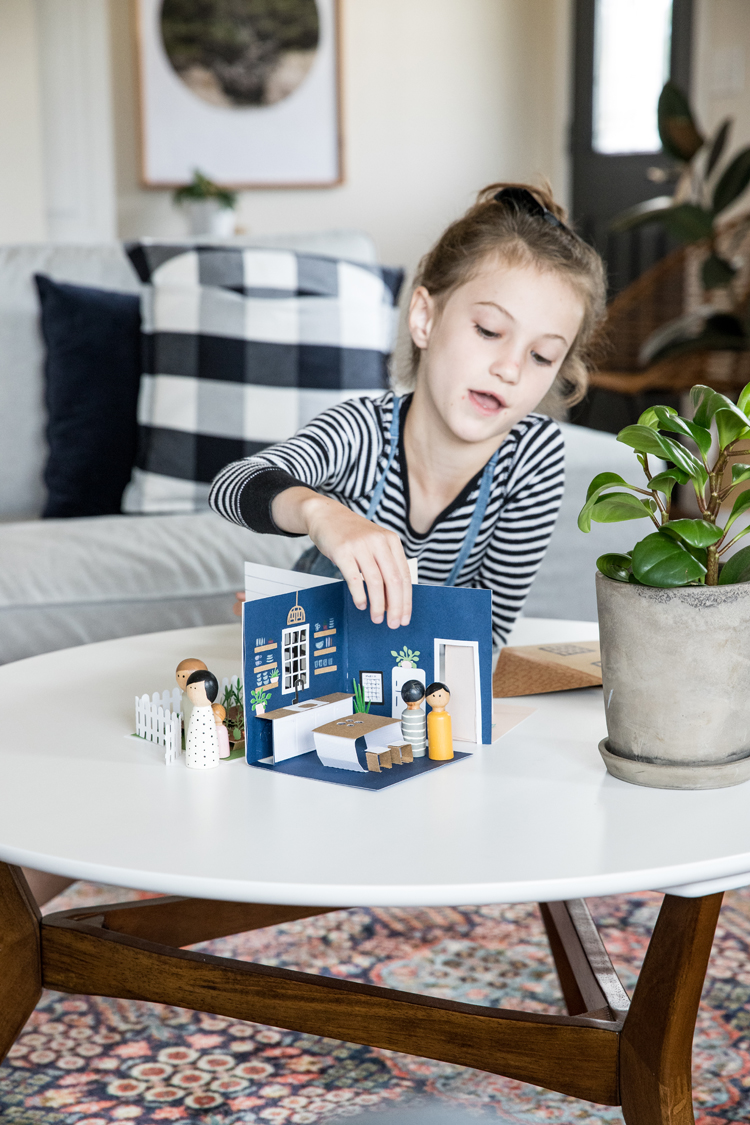
I tried to economize the cut sheets so all the accessories are mixed together rather than being assigned a room. I think that also makes the design process more fun. This encourages your kids to let their imagination lead their designs. They can also hand cut out their own vision.
I do have a few tips for the accessories in case you run into questions:
- There is a picket fence that I originally designed to attach to the garden wall, but it got snagged on the raised beds too often so I made it removable. You’ll notice that it has serrated lines in it. One is for the corner of the fence and the other is so that it opens as a gate.
- There are a lot of random little triangles. Some are floating shelves, some are countertops, a couple of them are the front and top of the nightstand so you can change its colors, and others are the frames for pictures (they will be slightly larger than white rectangles that will act at the art).
- If you see serrated lines through them they are either the raised garden beds, bathtub, the kitchen island, or the stools.
- There are blank rectangles to make the kitchen and bathroom cabinets different colors. The kitchen cabinet has doors and the bathroom cabinet has drawers, with tiny holes that act as hardware.
- I included a white toilet piece so your toilet won’t have to match the walls.
- I included a square of green to act as grass in the garden.
- The raised garden beds have a square piece of “soil” with matching cuts for plants that you can make a different color.
TIPS:
- It helps to wiggle an exacto knife into the cuts in the raised beds and soil to make it easier to put the plants in.
- When attaching the island or anything that pops up from the floor, I learned to attach it while it is folded flat. That way you know you have the spacing between the sides correct for when it needs to be folded up. My island is a little bent because I didn’t do that, so it creases the middle of the sides as it folds. By the time I got to the bathtub and raised beds, I had figured it out and they fold and stand perfectly every time.
Fifth, create the envelope.
Fold at the serrated lines. Overlap the side flaps by only 3/8 of inch so that the envelope poofs outward a bit and can better accommodate a stuffed house.
Glue side and bottom flaps in place. Add a door and windows to the front if desired. These windows and door are included in the “black” accessories file. The windows are smaller than the kitchen paned window pieces.
Color the top flap of the envelope to look like a roof.
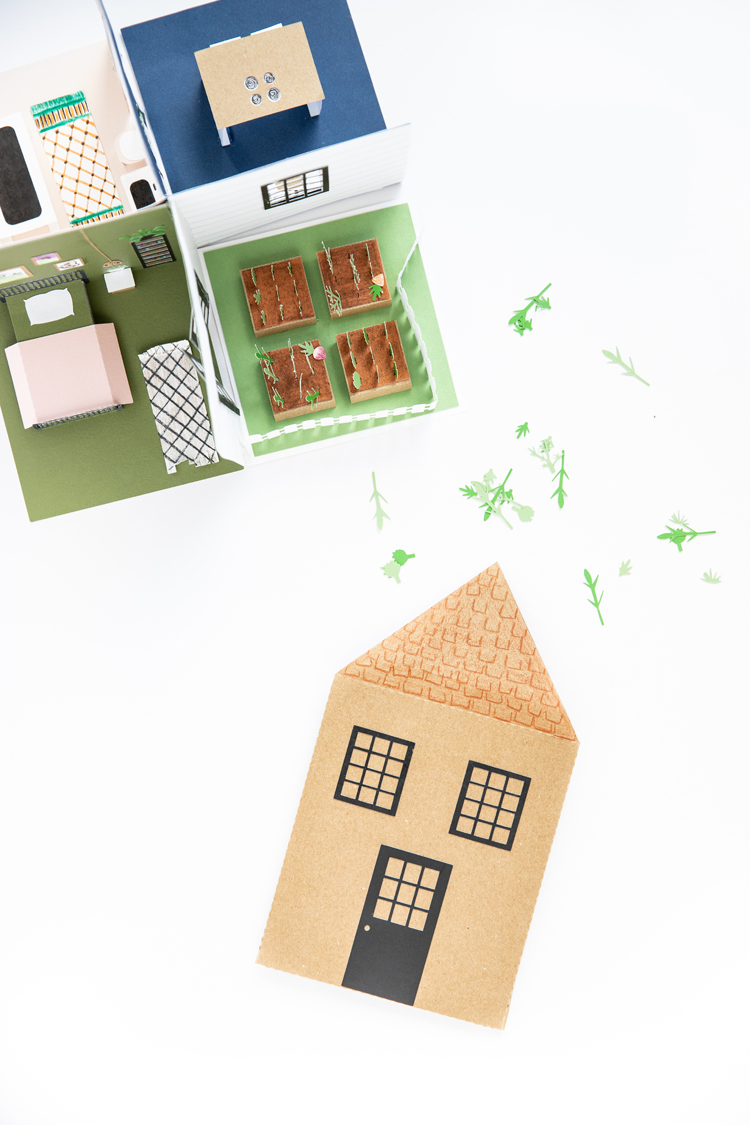
And it’s ready for play!
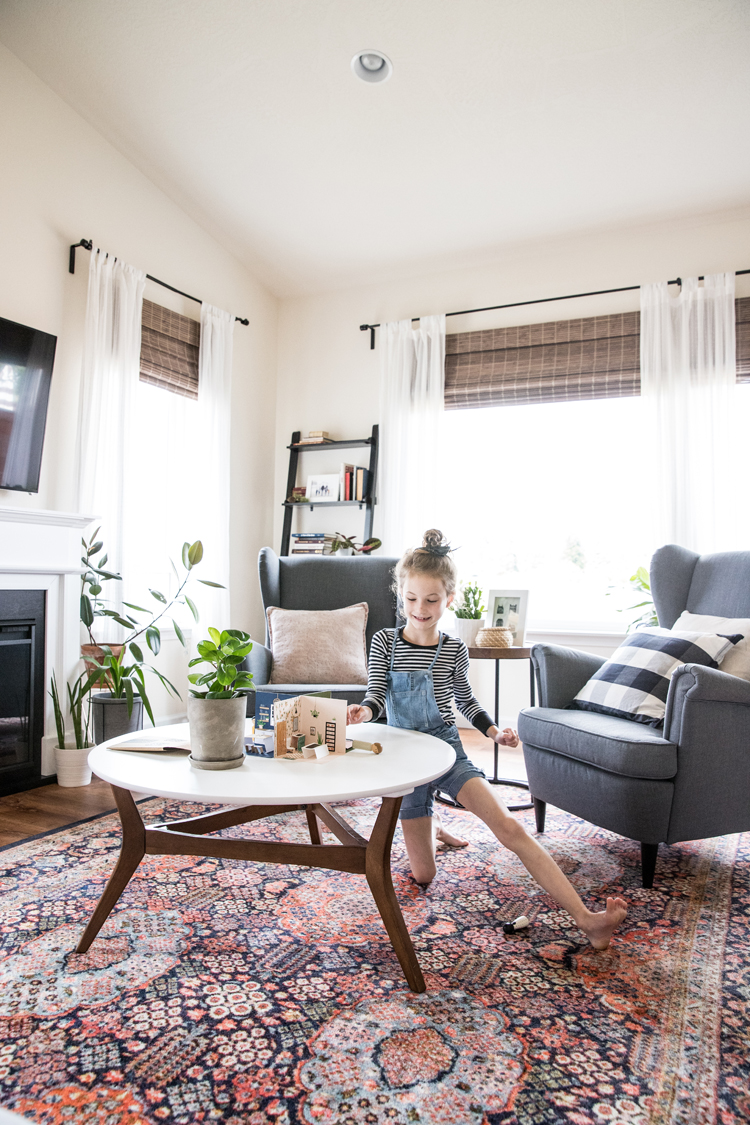
Let your budding interior decorator play with the decor, or add small wooden peg dolls for imaginative play.
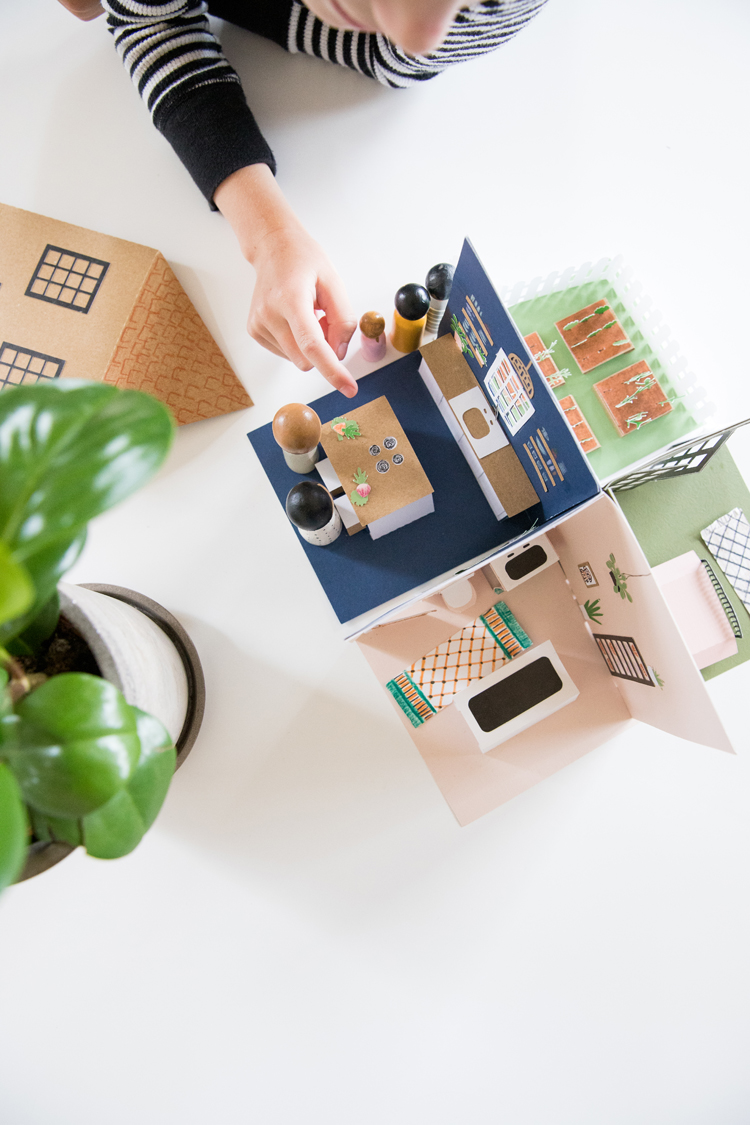
I made Nat’s dolls using pegs from Michael’s years ago (see this other travel doll house post). The smaller ones work best, but the larger ones can get around okay.
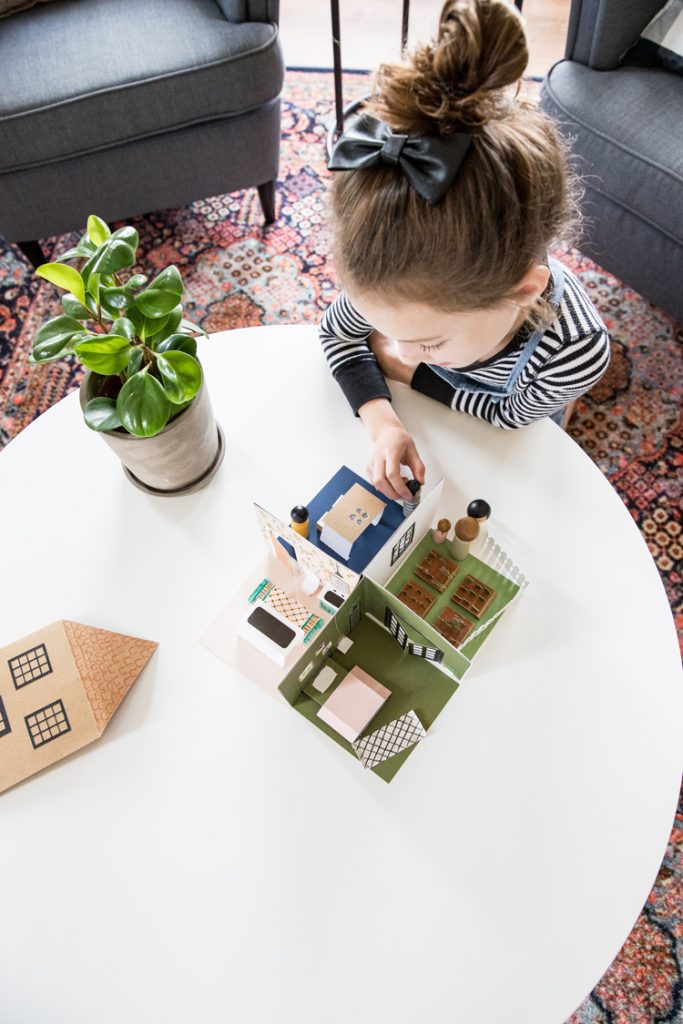
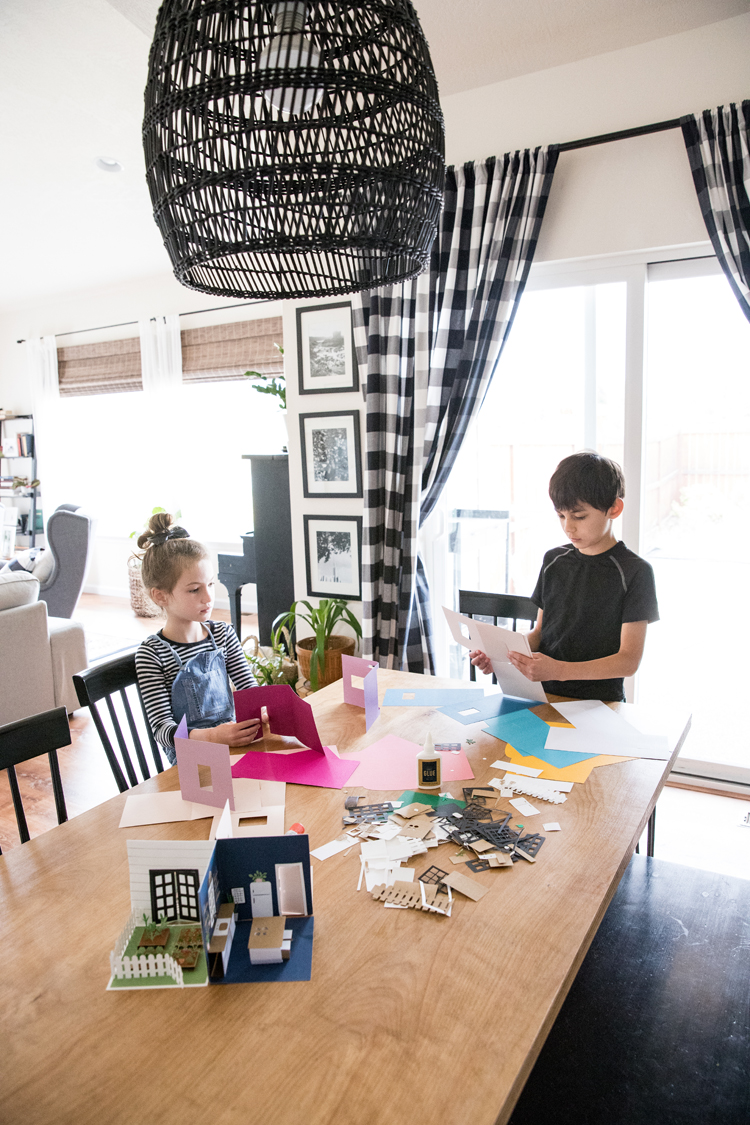
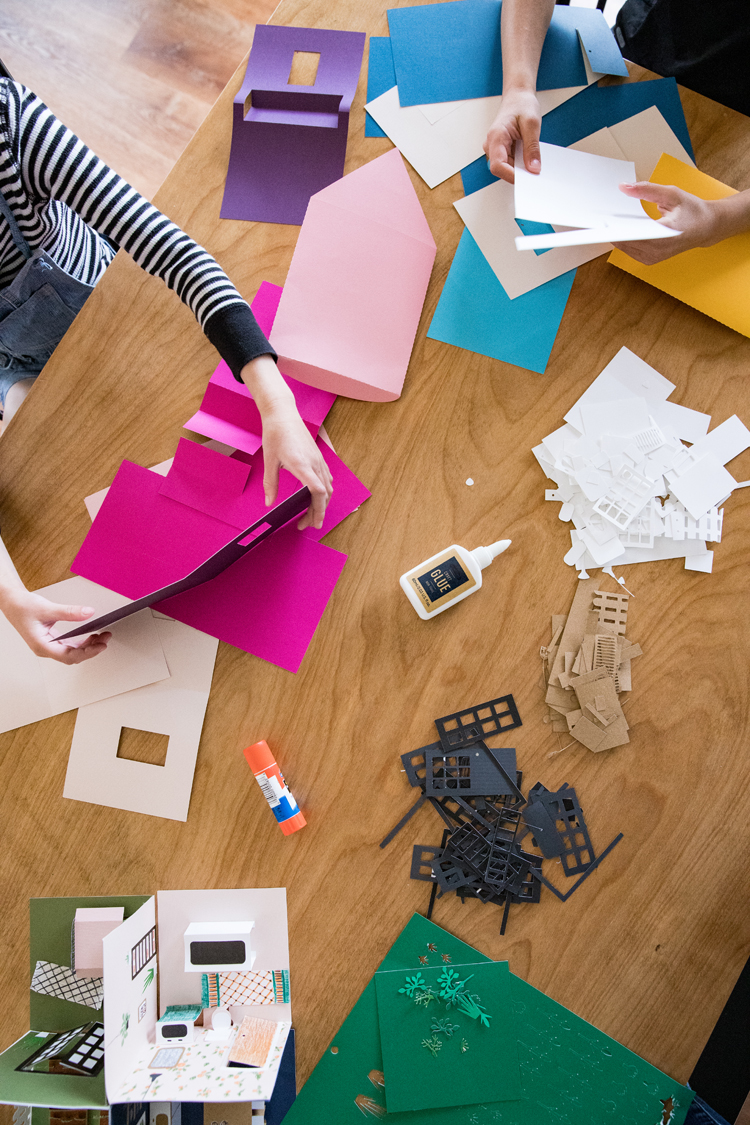
After I finished the first one, my two younger kids were chomping at the bit to design their own houses. I let them choose all their colors, and was not surprised when my girly girl chose all pinks and purples.
If you’re in a holiday mood… I have another paper house activity for kids that is all about decorating the exterior. Go here to get those free cut files as well!
Disclaimer: This post is sponsored by Silhouette.
Check out the great sales and bundles they have going on July 1 – 15, 2019 by clicking HERE! (Remember to use my code: DELIA at check out!)


These are so cute! I wish I had a Cameo machine, but I bought a Cricut Maker because in the end, I knew I would use it more for fabric than anything else and it made the most sense to spend my money that way. (I guess if I had known at the time that Silhouette was going to come out fairly soon with a comparable machine, I would have waited.) Oh well, maybe I can save up for a Cameo as well. I’m sure my husband will understand that I need both machines!
In any case, you are so talented, Delia. These are so creative and such a fun thing for kids to do.
You can use the SVG files with the Cricut! That’s what I have and it works wonderfully.
Delia, these are amazing! I’m going to have some fun with them. Oh, and I guess my kids too.
Yes! I hope you and your kids 😉 have fun making a doll house! <3
The file says its too big when I tried it with my cricut.
I’m sorry to hear you’re having trouble. You may have to resize the file to fit your mat. I created this for Silhouette but it should work with Cricut too. Have you played around with sizing? How can I help?
Adorable house pattern, thanks for sharing your work!❤️ Quick question, such a beautiful rug under your daughter, where is it from??
Thank you so much! The rug is from Rugs USA. Here’s a link: https://www.rugsusa.com/rugsusa/rugs/rugs-usa-clementine-printed-floret-emblem-sa01/orange/200DISA01A-7100910.html?utm_source=bronto&utm_medium=email&utm_term=All+Dynamic+Links&utm_content=Rugs+USA+-+Order+Confirmation+%23WS1296979&utm_campaign=Order+Confirmation+-+V3&_bta_tid=40975002675476387199191918460868647751802896485688720861857254296274865307688783295835967996386872437876&_bta_c=1lkchz3kw4ku2tmhft3hyhnc9svh8
Is this file still available ? The link doesnt work
It is. I tested the link and it’s working fine on my end. I’m so sorry it’s giving you trouble. If you email me: [email protected], I can email you the files as well
I’d love it if you could email them. [email protected]
Will do! I’ll email them right now. 🙂
Did you have to do any adjustments with your Cricut for these? I can’t seem to get them to cut right. I’m still fairly new to the Cricut.
Good question Annette. Sorry it took me a while to get back to you. I honestly have only cut these with my Silhouette, but it does work with both cutting software programs because it’s an .svg file. May I ask what’s giving you the most trouble? Maybe I can help you troubleshoot.
Thank you for your reply. I finally figured it out. I had to change some cut lines to score lines. Thanks!
Hi Delia,
I love the paper dollhouse and can’t wait to make it for my 6 year old niece.
However, I can’t access the link. Can you please send me the files?
I would greatly appreciate your help.
Thank you.
Julie
I’ll email them now. Sorry for the delay. I can’t remember if I got your request by email and already sent them, but I’ll send them now anyway just in case.
How do you upload the svg files to the cricut design software..
Sorry i am new to cricut too
No worries. Download the files to your computer. When you open the Cricut software, go to “open” and you should be able to open up the .svg files from there. I hope that helps!
I would love it if someone could post an image of what the SVGs SHOULD look like. Cricut kind of jumbles everything (especially on the accessory files) and I can’t tell what should be cuts and what should be folds.
That must be frustrating. My apologies. I took some screenshots and will add a gallery of them to the post right now.
gracias es un hermoso trabajo, jugaremos un ratito a la casita, muchas gracias
Can you email me instructions how to download cut files for this project? Pretty please😍
Sure! Would you like the files emailed or just the instructions? Would you mind emailing me at [email protected]? That way I can reply with attachments.
Bonsoir, je n’ai pas la machine Cricut et je voudrais faire la maison pop-up. Comment puis-je avoir le patron couleur? Je ne trouve que celui en noir et blanc.
Merci à l’avance. Nicole, Varennes, Québec, Canada
Unfortunately, I don’t have a color version of the pattern. You can print it on white cardstock and color it by hand, or print it on colored card stock. I hope that helps.