I know I know…some of you live in places where you might be saying “Summer? Sweater? What? ” If you live in the Pacific Northwest though, you know it’s pretty much sweater weather year round depending on the time of day. 😉
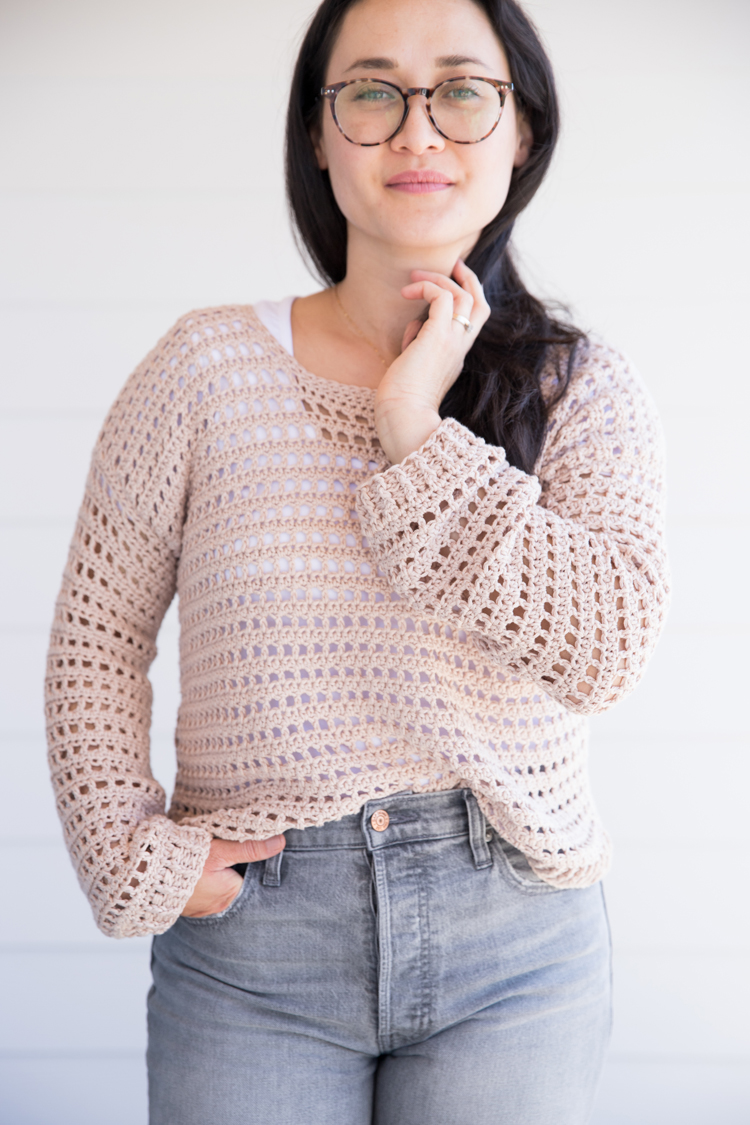
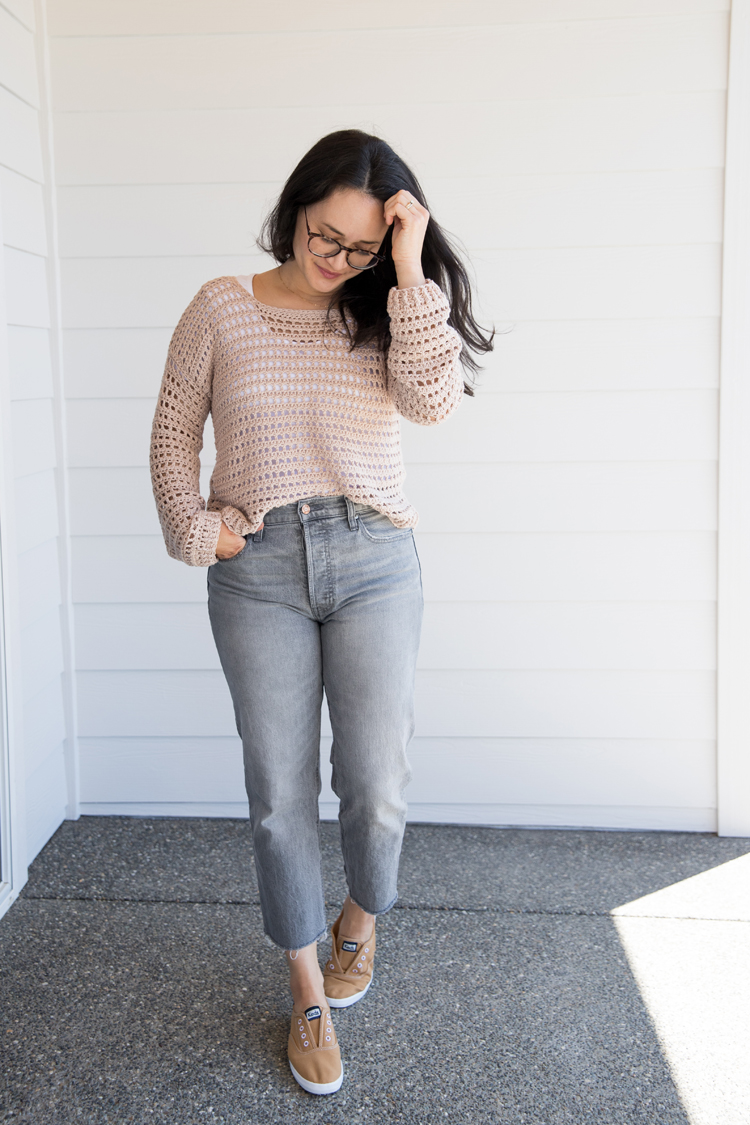
Plus, this sweater is breezier than most, with a mesh pattern and cotton-bamboo yarn. It makes the perfect late summer (or fall or spring) layer.
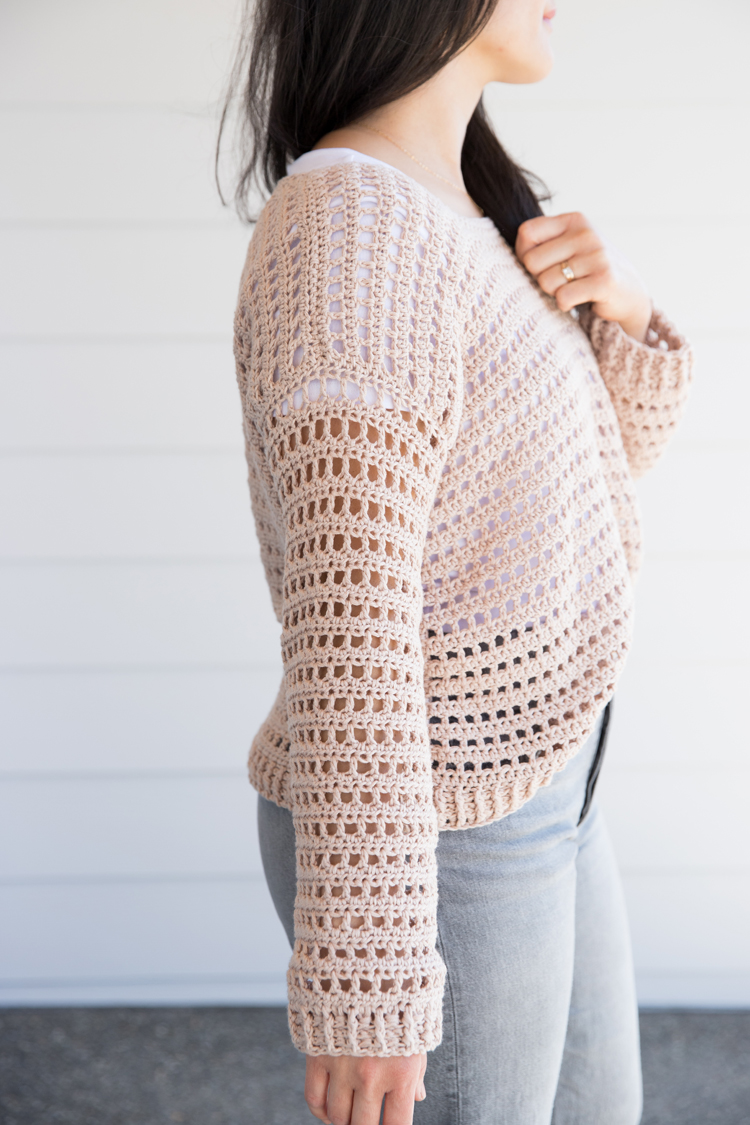
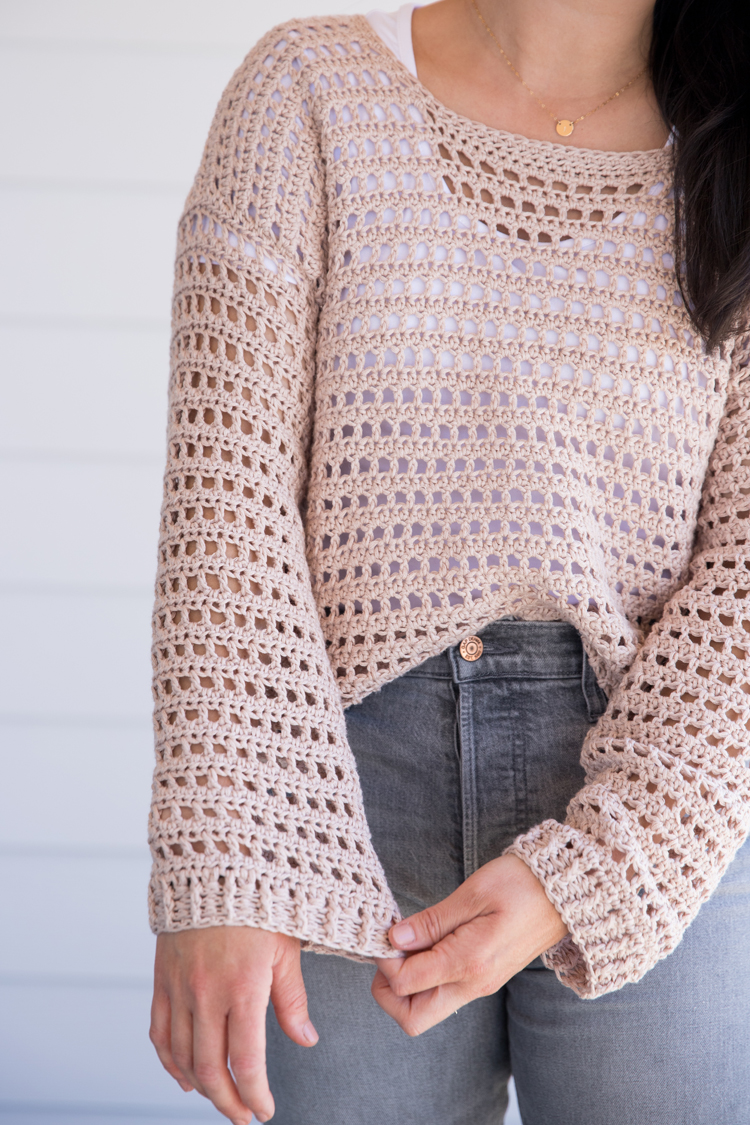
This free pattern is sized for adult XXS-XXL, but I really include the smallest sizes because they may be suitable for older children and teens. Be sure to check your measurements against the sizing chart.
The pattern mostly uses basic stitches (sc, hdc, dc), but I’ve thrown in some variations of dc that make this appropriate for an adventurous beginner. Maybe not recommended for your first project, but definitely doable if you’ve gone through my Crochet Basics series or if you’ve made my free Rectangle Cardigan pattern which uses a lot of the same stitches and methods.
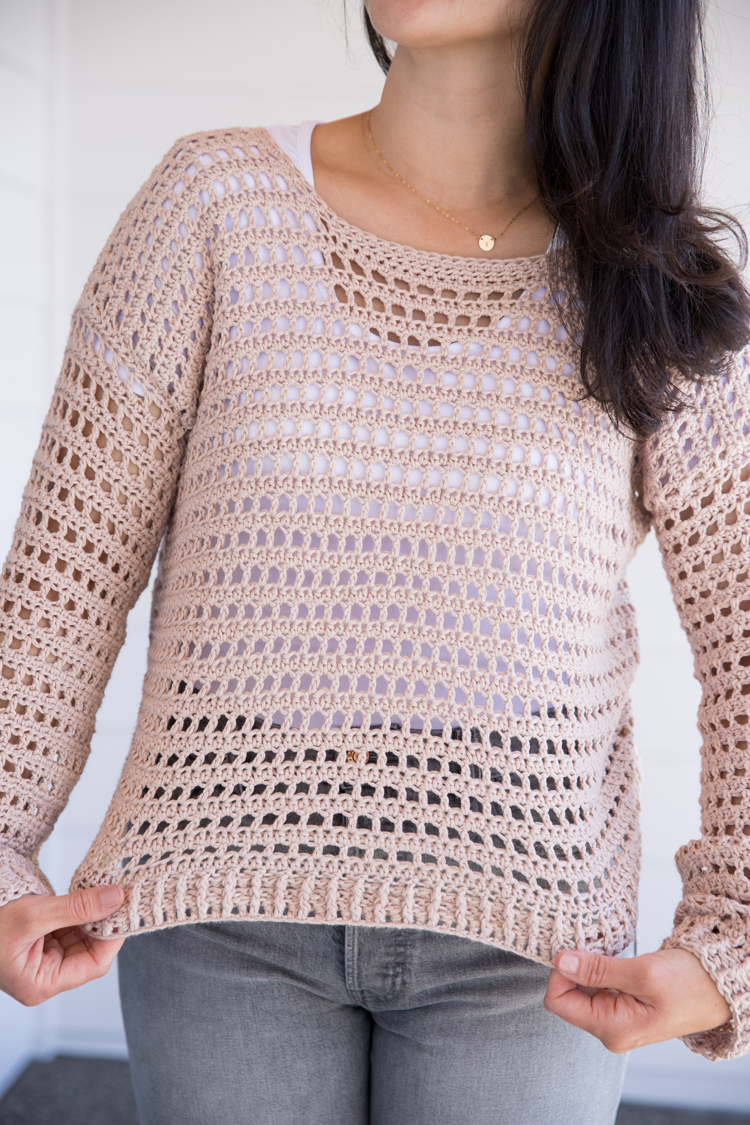
Two other factors that make this project a small step above beginner is the use of cotton-bamboo yarn, which tends to split if you’re not careful, and the shaping of the neckline which goes beyond making a rectangle, but is actually easier than you might think. The video will walk you through every step. Let’s get started!
MATERIALS
- G/6 or 4.25 mm hook
- Size 3 or DK cotton blend yarn – 400-600 g or 928-1,392 yds*
- yarn needle, scissors, stitch markers
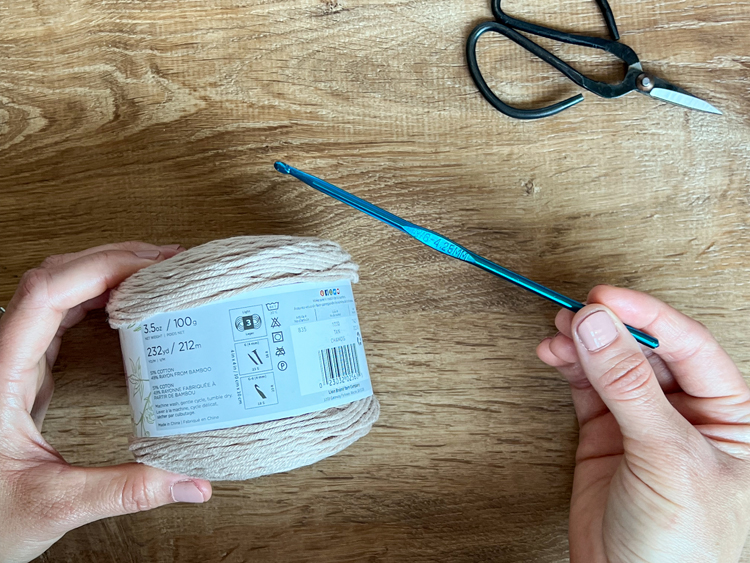
Material Notes:
*I used Coboo yarn in “tan” from Lion Brand which is made up of about half cotton and half rayon derived from bamboo. This makes for a soft yarn with fantastic drape that is perfect for apparel. You can use a different kind of cotton blend yarn, but make sure the cotton is not too stiff or the fit and look of the sweater may be different than designed. Just like when sewing with fabric, the type of yarn you use can affect the look and fit of the finished garment in crochet.
*About the amount of yarn needed, it’s always better to get a little more than you think you will need and return the overage so that you can ensure your yarn looks the same (you want them in the same dye lot). The smallest sizes will probably only need 4 cakes (they are called cakes because of the way that they are wound. I have more information about that here). I made a size small and I used about 4.5 cakes.
READ BEFORE YOU BEGIN
It is imperative that before you buy yarn or do anything, that you read the section below on sizing and fit. Measure your body to help you select the right size and keep in mind that you can adjust anything as you go. You can measure it against your body as you make each piece, but know that it will likely fit differently than you imagine once it’s seamed together. Cotton yarn tends to be heavy so it will slink, stretch, and hang on you differently than wool or strictly acrylic yarn. Please read the sizing adjustments section below the sizing chart for alteration instructions.
Also important to keep in mind…..
DISCLAIMER: This FREE pattern has not been tested in all sizes. Instead of hiring a pool of testers and putting this out as a paid pattern, I’ve decided to put it out for free and update it as needed. Please send feedback to [email protected]. Email or instagram dm (@deliacreates) is the best way to get a hold of me and I do actively update patterns as I hear from you.
GAUGE
4 x 4 inch square = almost 12 rows of hdc and dc mesh stitches x 16 hdc
To ensure proper sizing, I recommend making sure your gauge matches mine. If it is too loose, consider going down a hook size. If it’s too tight, consider going up a hook size. The gauge can change if you use a yarn with different fiber content, especially if it’s wool or solely acrylic.
SIZING
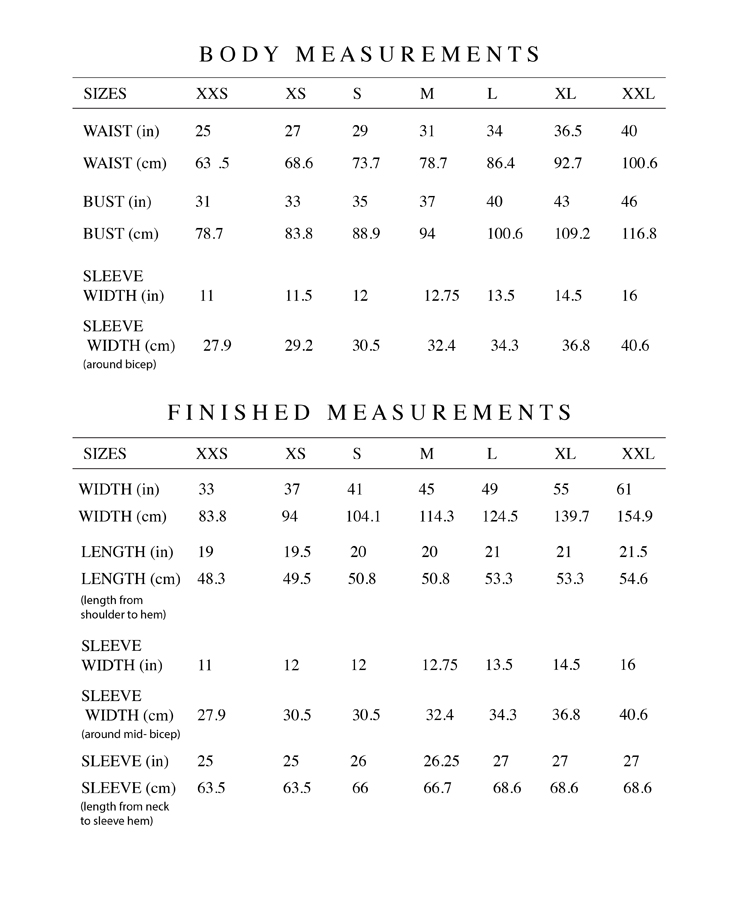
Consult the size chart below to determine your size.
NOTES:
- IMPORTANT: Remember that crochet creates a material with some stretch. Consider this when determining your size and the fit you want.
- The bust and waist is listed in body measurements but just width is listed for finished measurements because the sweater is the same width at the bust and the waist. When choosing a size, choose for the widest part of your torso.
- For the sleeve width you may notice that there is little to no difference between the body measurement and the finished sweater measurement. The finished measurement is taken with the sleeve laying flat off the body. When worn, the cotton yarn will make it stretch some and hang a little wider/longer. Again, remember crochet creates a material with some stretch.
ADJUSTMENTS:
- Don’t tie anything off until the end. This will allow you to make changes and pull out anything that’s not working out.
- To shorten or lengthen the sweater or sleeves, add or remove rows of mesh stitching. Avoid adding or removing rows at the hem or the neckline. Hold the pieces up to your body so that gravity can pull the yarn down to where it will hang when worn, to make sure you can make accurate changes.
- For lengthening or shortening the sweater: make the front and back piece, seam just the shoulders together and then place it over your head before adding the neck ribbing. If you need to make changes, remove the shoulder seaming, pull out your work until just before the neckline splits for each piece, add or remove rows, and then resume following the pattern for splitting the neckline.
- For lengthening or shortening the sleeves: If you are unsure of sizing I would complete just one sleeve first. Seam it to the bodice after it’s been seamed together at the shoulders and sides, and try it on. If you need to remove or add rows, undo the seaming from the bodice and the seaming that formed it into a tube. Then remove the cuff stitches before adding or removing length to the sleeve. Redo the cuff stitches and the seaming.
ABBREVIATIONS
- ch = chain
- sc = single crochet
- sl st = slip stitch
- hdc = half double crochet
- fpdc = front post double crochet
- bpdc = back post double crochet
VIDEO TUTORIAL
The video should have already popped to the side or top of your screen. If it has not, it will show in this section.
The video covers refreshers on how to complete each stitch and sweater construction/seaming. For the exact number of stitches you need to work for your size, please refer to the written pattern below.
NOTE: I try to balance making a clear and easy to understand tutorial without making it too long, which can become overwhelming. Some of the skills shown might go too fast (or too slow). Pause and replay as needed. For a more detailed tutorial on fpdc and bpdc, watch my Easy Rectangle Cardigan pattern video starting at 4:44.
EDIT: At 6:35 I tell you to secure the shoulder seam with a sc. That is wrong. Work through the shoulder seam with hdc as you have been for the entire neckline. That’s actually what I show in the video but my voice over and caption are incorrect.
WRITTEN PATTERN & TUTORIAL
This pattern is organized into:
- Front Bodice – with splits to the shoulder to form the neckline, listed as “Front Shoulder“
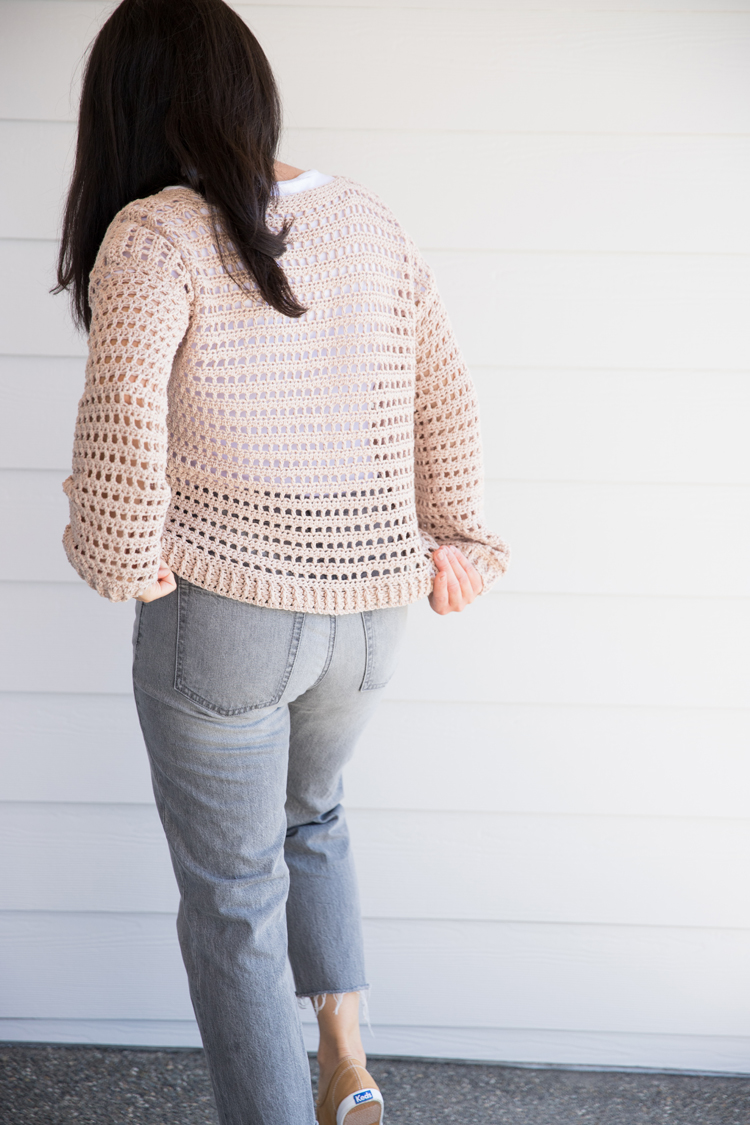
- Back Bodice – with splits to the shoulder to form a shallower back neckline, listed as “Back Shoulder“
- Sleeve – with a separate pattern for the cuffs for each size.
- Seaming Instructions
- Neckline – This pattern will cover how to work ribbing around the neckline to give it a more finished look.
NOTE: Be aware that the pattern will sometimes split into variations for each size but will otherwise be as follows XXS (XS, S, M, L, XL, XXL). Follow the number indicated in the same position as your size. So if you are a size L, you would use the starred number: 1(2, 3, 4, 5*, 6, 7). Sometimes it helps reduce confusion if you copy and paste the pattern into a word document so you can print it and highlight the number for your size.
FRONT BODICE – make one
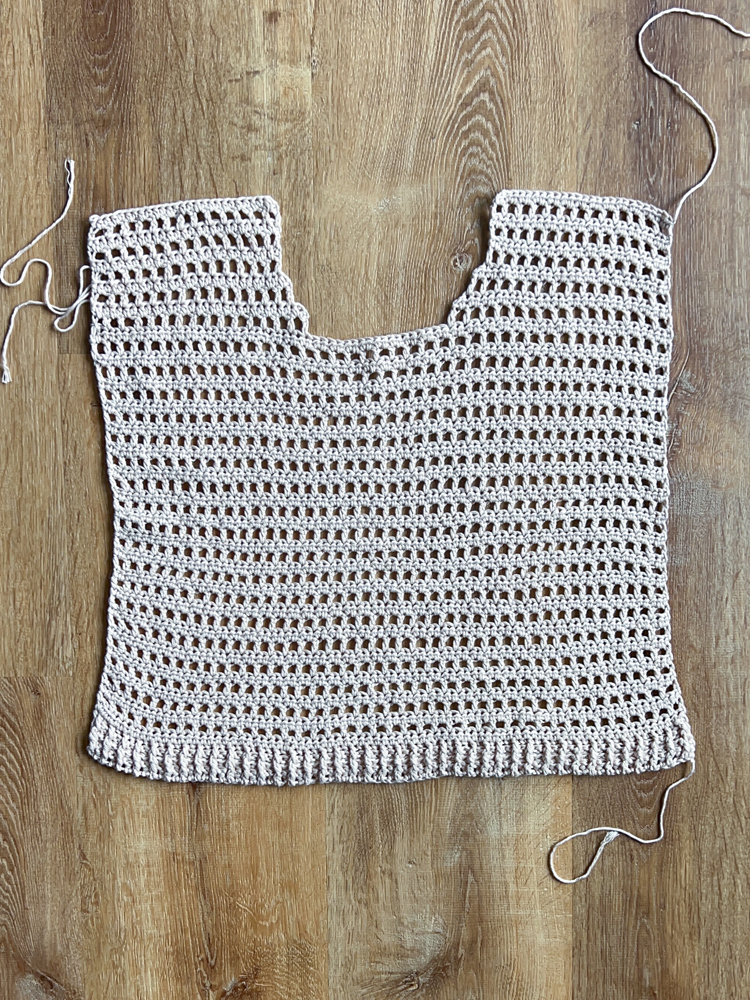
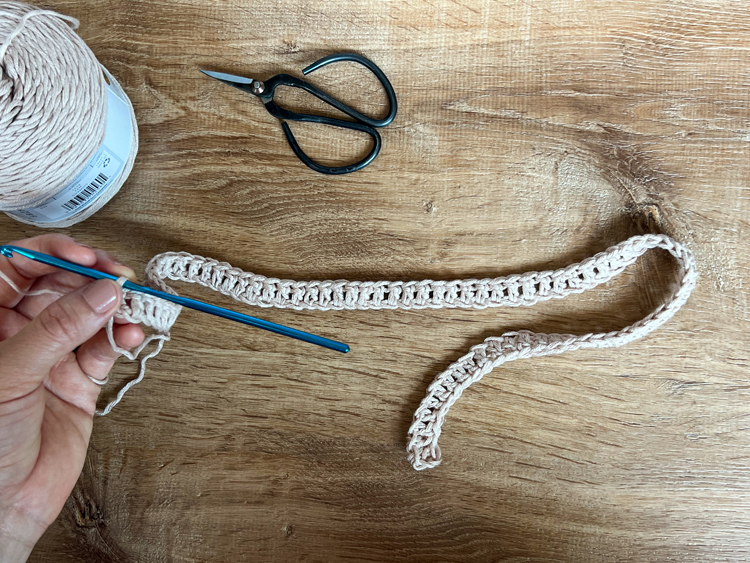
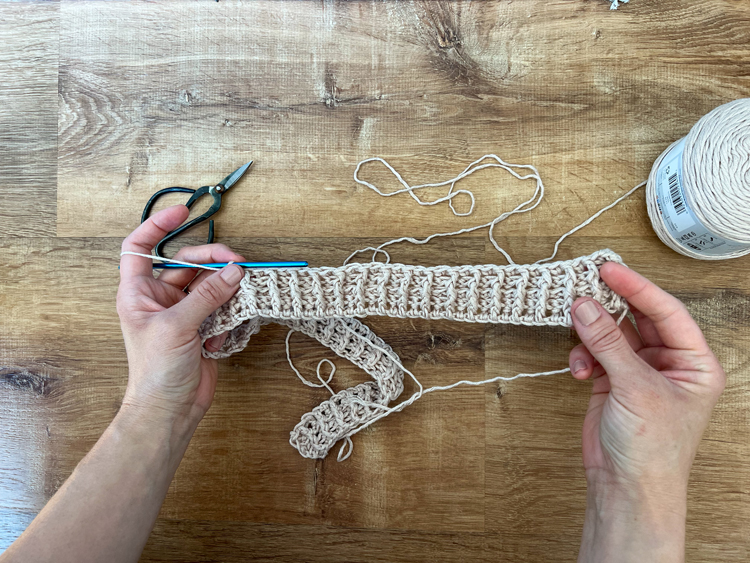
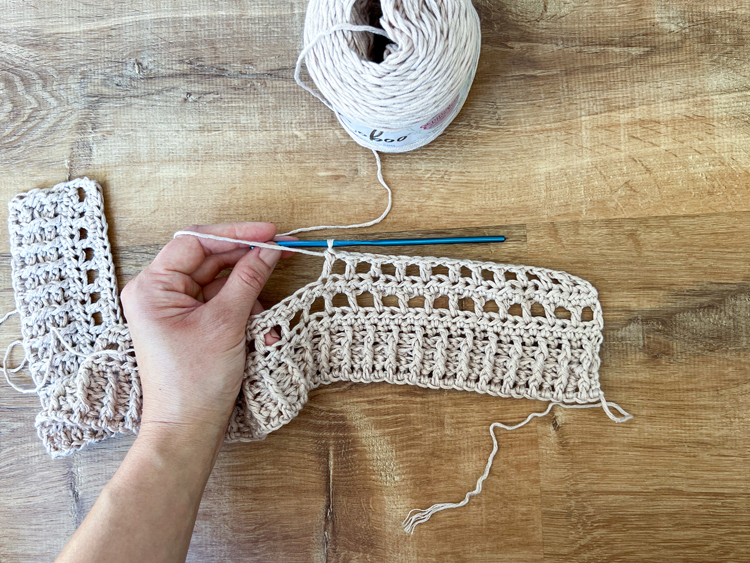
XXS (XS, S, M, L, XL, XXL)
Chain 66 (74, 82, 90, 98, 110, 122).
ROW 1: Skip 2 and dc in 3rd ch from the hook. Dc in each ch. Total stitch count including 2 skipped ch as one dc stitch = 65 (73, 81, 89, 97, 109, 121)
ROW 2: Turn, Ch 2. *Fpdc, bpdc*, repeat from * to * 30 (34, 38, 42, 46, 52, 58) times. Work a fpdc, then work a regular dc in the last stitch. Total stitch count = 65 (73, 81, 89, 97, 109, 121)
ROW 3: Turn, Ch 2. *Bpdc, fpdc* repeat from * to * 30 (34, 38, 42, 46, 52, 58) times. Work a bpdc, then work a regular dc in the last stitch. Total stitch count = 65 (73, 81, 89, 97, 109, 121)
ROW 4: Repeat ROW 2.
ROW 5: Turn, Ch 2. Hdc in the top two loops of each stitch. Total stitch count = 65 (73, 81, 89, 97, 109, 121)
ROW 6: Turn, ch 3, skip 1, dc into the next. *Ch 1, skip 1, dc into the next.* Repeat from * to * 29 (33, 37, 41, 45, 51, 57) times. Ch 1, skip 1, dc into the side of the ch 2 from the previous row which is the last “stitch.” By working in the side of the ch 2 instead of the top loops, it creates a straighter side to your rows. Total stitch count = 65 (73, 81, 89, 97, 109, 121), including starting ch 3 as 1 dc and 1 ch = 2 stitches
ROW 7: Turn, Ch 2. Hdc into the each space and the top of each dc in the row. Total stitch count = 65 (73, 81, 89, 97, 109, 121)
ROW 8: Repeat ROW 6. (Mesh stitch pattern)
ROW 9: Repeat ROW 7. (Hdc)
Continue working an alternating pattern of ROW 6 and ROW 7 until you get to the row listed for your size below:
XXS, XS: End on ROW 40 (should be a mesh stitch pattern row)
S, M: End on ROW 41 (should be a hdc row)
L, XL: End on ROW 42 (should be a mesh stitch pattern row)
XXL: ROW 43 (should be a hdc row)
Now, we split for the neckline.
FRONT SHOULDER – work 1 for each side of the bodice
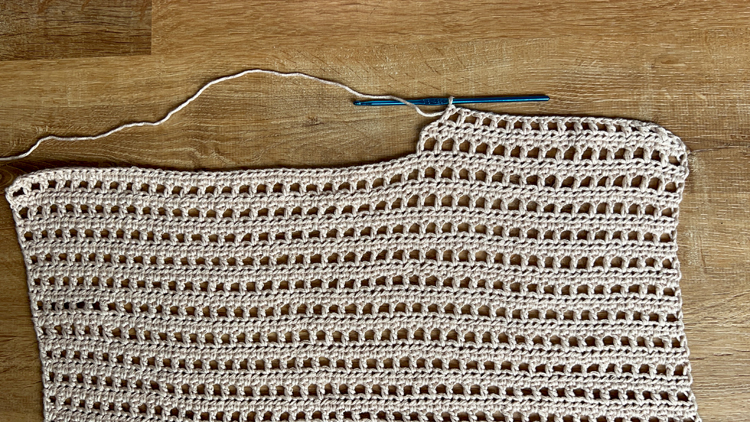
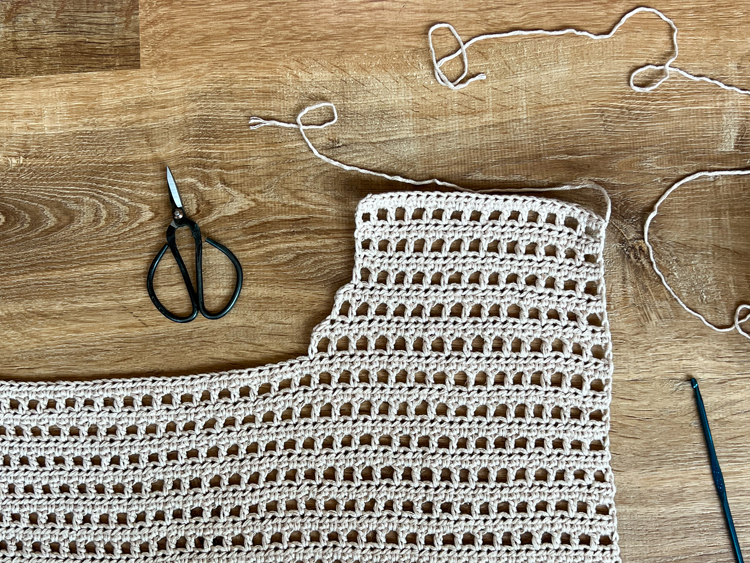
XXS (XS)
Row 41: Turn, Ch 2, hdc 26 (30) times, then STOP. Total stitch count = 27 (30), including ch 2 as one stitch
Row 42: Turn, Ch 3, skip 1, dc in the next. *Ch 1, skip 1, dc in the next.* Repeat from * to * 11(13) times. Total stitch count = 27 (30)
Row 43: Turn, ch 2. Hdc 24 (28) times, then STOP. Total stitch count = 25 (29)
Row 44: Turn, Ch 3, skip 1, dc in the next. *Ch 1, skip 1, dc in the next.* Repeat from * to * 10(12) times. Total stitch count = 25 (29)
Row 45: Turn, Ch 2, hdc 22 (26) times, then STOP. Total stitch count = 23 (27)
Row 46: Turn, Ch 3, skip 1, dc in the next. *Ch 1, skip 1, dc in the next.* Repeat from * to * 9 (11) times. Total stitch count = 23 (27)
Row 47: Repeat Row 45.
Row 48: Repeat Row 46.
Row 49: Row 45. Size XXS, stop here and tie off end, leaving a 6 inch tail.
Row 50: For size XS only, repeat row 46, then stop here and tie off end, leaving a 6 inch tail.
Turn front piece over and slip stitch into the top corner of the other side. Repeat the pattern to complete the second shoulder.
S (M)
Row 42: Turn, ch 3, skip 1, dc in the next. *Ch 1, skip 1, dc in the next.* Repeat from * to * 14 (15) times. Then STOP. Total stitch count = 33 (35), including starting ch 3 as 1 dc and 1 ch = 2 stitches
Row 43: Turn, ch 2, hdc in each stitch. Total stitch count = 33 (35)
Row 44: Turn, ch 3, skip 1, dc in the next. *Ch 1, skip 1, dc in the next.* Repeat from * to * 13 (14) times. Total stitch count = 31 (33)
Row 45: Turn, ch 2, hdc in each stitch. Total stitch count = 31 (33)
Row 46: Turn, ch 3, skip 1, dc in the next. *Ch 1, skip 1, dc in the next.* Repeat from * to * 12 (13) times. Total stitch count = 29 (31)
Row 47: Turn, ch 2, hdc in each stitch. Total stitch count = 29 (31)
Row 48: Repeat Row 46.
Row 49: Repeat Row 47.
Row 50: Repeat Row 46.
Row 51: Repeat Row 47.
Tie off, leaving a 6 inch tail. Turn front piece over and slip stitch into the top corner of the other side. Repeat the pattern to complete the second shoulder.
L (XL)
Row 43: Turn, ch 2, hdc 38 (42) times, then STOP. Total stitch count = 39 (43), including ch 2 as one stitch
Row 44: Turn, ch 3, skip 1, dc in the next. *Ch 1, skip 1, dc in the next.* Repeat from * to * 17 (19) times. Total stitch count = 39 (43)
Row 45: Turn, ch 2, hdc in each stitch. Total stitch count = 37 (41)
Row 46: Turn, ch 3, skip 1, dc in the next. *Ch 1, skip 1, dc in the next.* Repeat from * to * 16 (18) times. Total stitch count = 37 (41)
Row 47: Turn, ch 2, hdc in each stitch. Total stitch count = 35 (39)
Row 48: Turn, ch 3, skip 1, dc in the next. *Ch 1, skip 1, dc in the next.* Repeat from * to * 15 (17) times. Total stitch count = 35 (39)
Row 49: Repeat Row 47.
Row 50: Repeat Row 48.
Row 51: Repeat Row 47.
Row 52: Repeat Row 48.
Row 53: Repeat Row 47.
Tie off, leaving a 6 inch tail. Turn front piece over and slip stitch into the top corner of the other side. Repeat the pattern to complete the second shoulder.
XXL
Row 44: Turn, ch 3, skip 1, dc in the next. *Ch 1, skip 1, dc in the next.* Repeat from * to * 21 times. Then STOP. Total stitch count = 47, including starting ch 3 as 1 dc and 1 ch = 2 stitches
Row 45: Turn, ch 2, hdc in each stitch. Total stitch count = 47
Row 46: Turn, ch 3, skip 1, dc in the next. *Ch 1, skip 1, dc in the next.* Repeat from * to * 20 times. Total stitch count = 45
Row 47: Turn, ch 2, hdc in each stitch. Total stitch count = 45
Row 48: Turn, ch 3, skip 1, dc in the next. *Ch 1, skip 1, dc in the next.* Repeat from * to * 19 times. Total stitch count = 43
Row 49: Turn, ch 2, hdc in each stitch. Total stitch count = 43
Row 50: Repeat Row 48.
Row 51: Repeat Row 49.
Row 52: Repeat Row 48.
Row 53: Repeat Row 49.
Row 54: Repeat Row 48.
Tie off, leaving a 6 inch tail. Turn front piece over and slip stitch into the top corner of the other side. Repeat the pattern to complete the second shoulder.
BACK BODICE – make one
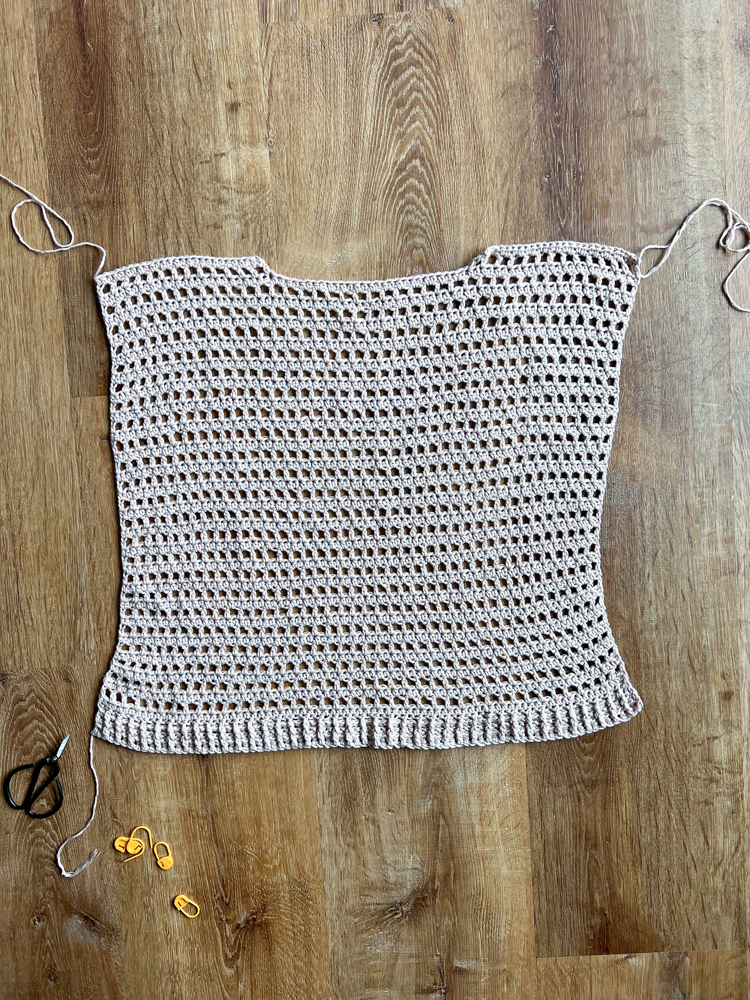
XXS (XS, S, M, L, XL, XXL)
Note: This is worked almost exactly the same as the front piece but the neckline is shallower.
Chain 66 (74, 82, 90, 98, 110, 122).
ROW 1: Skip 2 and dc in 3rd ch from the hook. Dc in each ch. Total stitch count including 2 skipped ch as one dc stitch = 65 (73, 81, 89, 97, 109, 121)
ROW 2: Turn, Ch 2. *Fpdc, bpdc*, repeat from * to * 30 (34, 38, 42, 46, 52, 58) times. Work a fpdc, then work a regular dc in the last stitch. Total stitch count = 65 (73, 81, 89, 97, 109, 121)
ROW 3: Turn, Ch 2. *Bpdc, fpdc* repeat from * to * 30 (34, 38, 42, 46, 52, 58) times. Work a bpdc, then work a regular dc in the last stitch. Total stitch count = 65 (73, 81, 89, 97, 109, 121)
ROW 4: Repeat ROW 2.
ROW 5: Turn, Ch 2. Hdc in the top two loops of each stitch. Total stitch count = 65 (73, 81, 89, 97, 109, 121)
ROW 6: Turn, ch 3, skip 1, dc into the next. *Ch 1, skip 1, dc into the next.* Repeat from * to * 29 (33, 37, 41, 45, 51, 57) times. Ch 1, skip 1, dc into the side of the ch 2 from the previous row which is the last “stitch.” By working in the side of the ch 2 instead of the top loops, it creates a straighter side to your rows. Total stitch count = 65 (73, 81, 89, 97, 109, 121)
ROW 7: Turn, Ch 2. Hdc into the each space and the top of each dc in the row. Total stitch count = 65 (73, 81, 89, 97, 109, 121)
ROW 8: Repeat ROW 6. (Mesh stitch pattern)
ROW 9: Repeat ROW 7. (Hdc)
Continue working an alternating pattern of ROW 6 and ROW 7 until you get to the row listed for your size below:
XXS: End on ROW 47 (should be a hdc row)
XS: End on ROW 48 (should be a mesh stitch pattern row)
S, M: End on ROW 49 (should be a hdc row)
L, XL: End on ROW 51 (should be a hdc row)
XXL: ROW 52 (should be a mesh stitch pattern row)
Now, we split for the neckline which is only rows deep for the back piece.
BACK SHOULDER – work 1 for each side of the bodice
XXS
Row 48: Turn, Ch 3, skip 1, dc in the next. *Ch 1, skip 1, dc in the next.* Repeat from * to * 9 times. Then STOP. Total stitch count = 23, including starting ch 3 as 1 dc and 1 ch = 2 stitches
Row 49: Turn, Ch 2, hdc in each stitch. Total stitch count = 23
Tie off, leaving a 6 inch tail. Turn front piece over and slip stitch into the top corner of the other side. Repeat the pattern to complete the second shoulder.
XS
Row 49: Turn, Ch 2, hdc 26 times, then STOP. Total stitch count = 27, including ch 2 as one stitch
Row 50: Turn, Ch 3, skip 1, dc in the next. *Ch 1, skip 1, dc in the next.* Repeat from * to *11 times. Total stitch count = 27
Tie off, leaving a 6 inch tail. Turn front piece over and slip stitch into the top corner of the other side. Repeat the pattern to complete the second shoulder.
S (M)
Row 50: Turn, Ch 3, skip 1, dc in the next. *Ch 1, skip 1, dc in the next.* Repeat from * to * 12 (13) times. Then STOP. Total stitch count = 29 (31), including starting ch 3 as 1 dc and 1 ch = 2 stitches
Row 51: Turn, Ch 2, hdc in each stitch. Total stitch count = 29 (31)
Tie off, leaving a 6 inch tail. Turn front piece over and slip stitch into the top corner of the other side. Repeat the pattern to complete the second shoulder.
L (XL)
Row 52: Turn, Ch 3, skip 1, dc in the next. *Ch 1, skip 1, dc in the next.* Repeat from * to * 15 (17) times. Then STOP. Total stitch count = 35 (39), including starting ch 3 as 1 dc and 1 ch = 2 stitches
Row 53: Turn, Ch 2, hdc in each stitch. Total stitch count = 35 (39)
Tie off, leaving a 6 inch tail. Turn front piece over and slip stitch into the top corner of the other side. Repeat the pattern to complete the second shoulder.
XXL
Row 53: Turn, Ch 2, hdc 42 times, then STOP. Total stitch count = 43, including ch 2 as one stitch
Row 54: Turn, Ch 3, skip 1, dc in the next. *Ch 1, skip 1, dc in the next.* Repeat from * to *19 times. Total stitch count = 43
Tie off, leaving a 6 inch tail. Turn front piece over and slip stitch into the top corner of the other side. Repeat the pattern to complete the second shoulder.
SLEEVES – make two
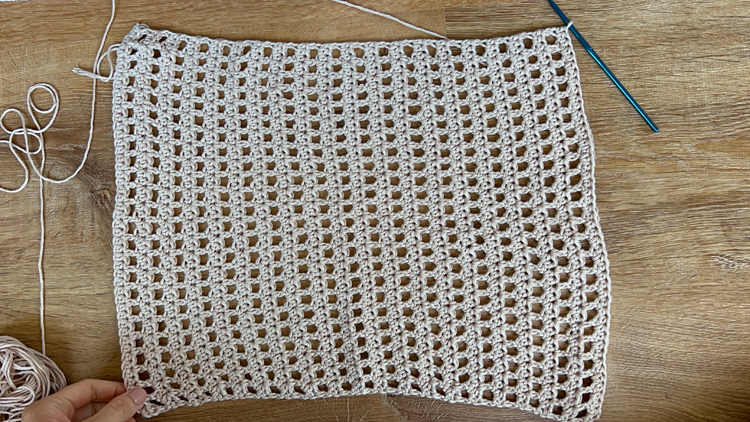
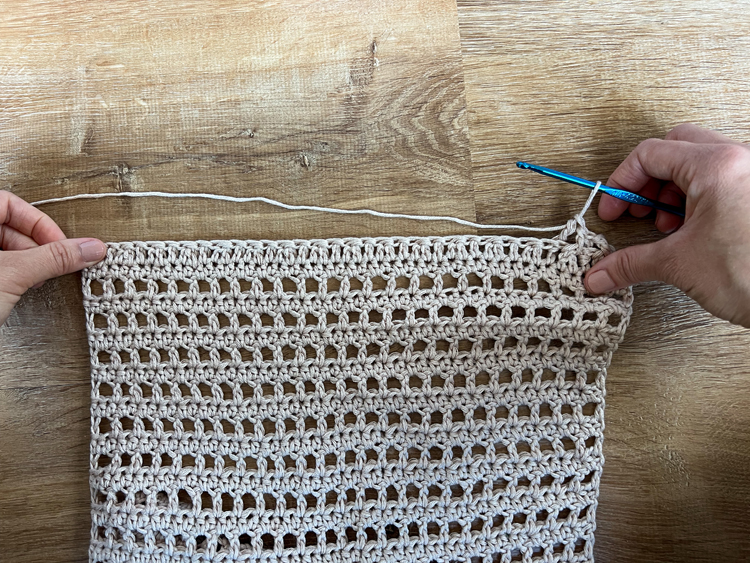
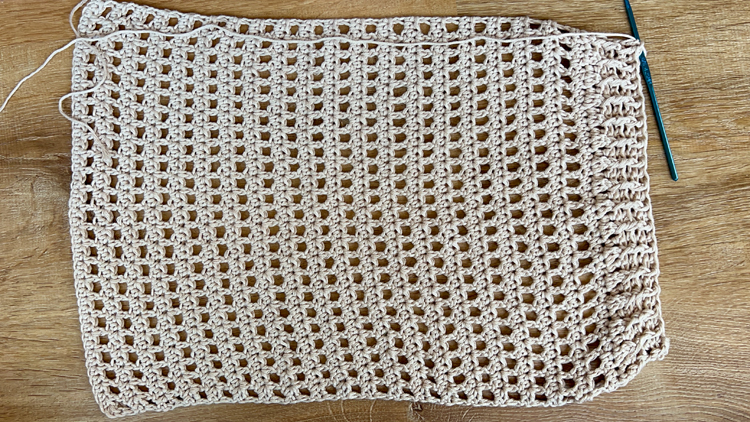
XXS (XS, S, M, L, XL, XXL)
Ch 46 (50, 50, 54, 56, 60, 66)
ROW 1: Hdc in 3rd ch from the hook, hdc in each ch. Total stitch count including 2 skipped ch as one dc stitch = 45 (49, 49, 53, 55, 59, 65)
ROW 2: Turn, ch 3, ski 1, dc in the next. *Ch 1, skip 1, dc in the next.* Repeat from * to * 20 (22, 22, 24, 25, 27, 30) times. Total stitch count: 45 (49, 49, 53, 55, 59, 65), including starting ch 3 as 1 dc and 1 ch = 2 stitches
ROW 3: Turn, Ch 2. Hdc into the each space and the top of each dc in the row. Total stitch count = 45 (49, 49, 53, 55, 59, 65)
ROW 4: Repeat Row 2.
Row 5: Repeat Row 3.
Continue working an alternating pattern of ROW 2 and ROW 3 until you get to the row listed for your size XXS (XS, S, M, L, XL, XXL) = Row 41 (39, 39, 37, 37, 35, 33)
Note: You may be wondering why the sleeve rows get shorter/smaller rather than larger. This is because some of the bodice is part of the sleeves and it gets wider with each size, adding to the length of the sleeves. The sleeve will be slightly shorter and longer from XXS – XXL but not by a significant amount, because people usually don’t have longer or shorter arms based on their bust size.
Once you have reached the number of rows you are supposed to work for your size, work the cuff pattern as follows:
SLEEVE CUFF – for each sleeve
XXS (XS, S, M, L, XL, XXL)
Note: The first row uses decreasing dc to help cinch the circumference of the sleeve inward for your wrist. See the video for a tutorial on how to work a decreasing dc.
Cuff Row 1: Turn, ch 2. *Dc, decreasing dc.* Repeat from * to * 12 (15, 15, 16, 17, 18, 20) times. For sizes XXS, M, XL, and XXL only, work one more regular dc to complete the row. Total stitch count = 32 (33, 33, 37, 38, 41, 45).
Cuff Row 2: Turn, ch 2. *Fpdc, bpd.* Repeat * to * 15 (16, 16, 18, 18, 20, 21) times. For sizes XXS, L, and XXL work one more regular dc. Total stitch count = 32 (33, 33, 37, 38, 41, 45).
Cuff Row 3: Turn, ch 2. *Bpdc, fpdc.* Repeat * to * 15 (16, 16, 18, 18, 20, 21) times. For sizes XXS, L, and XXL work one more regular dc. Total stitch count = 32 (33, 33, 37, 38, 41, 45).
Cuff Row 4: Repeat Row 2.
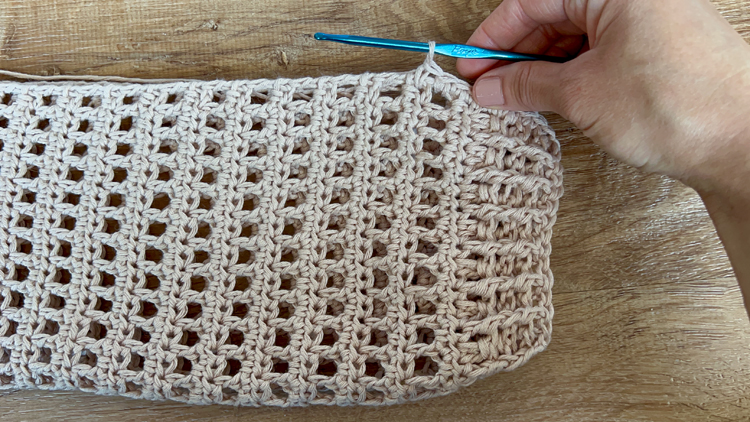
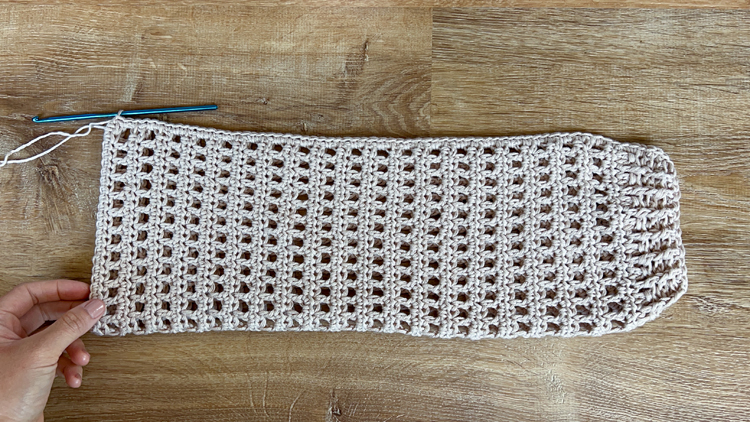
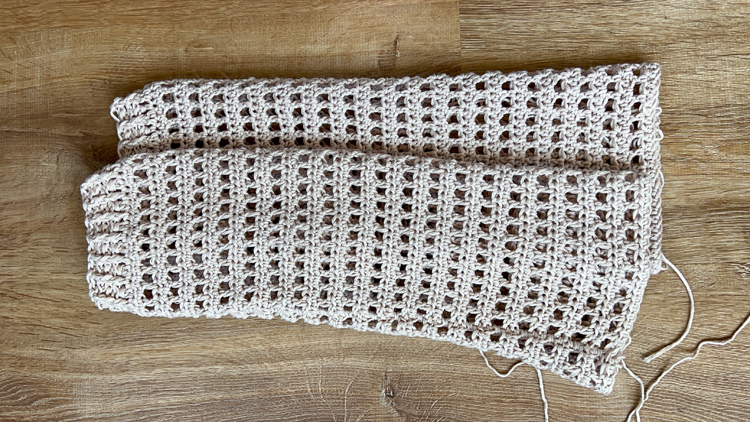
Do not tie off. Fold the sleeve in half width-wise and seam the sleeve into a tube with sc stitches. For an even seam, I recommend working 2 sc into the side of each dc or mesh stitch row and 1 sc into the side of each hdc row.
Then tie it off leaving a very long tail, 2-3 yards long. We will use this tail to attach the sleeve to the body of the sweater later.
SEAMING THE BODICE
Lay the front piece onto the back piece.
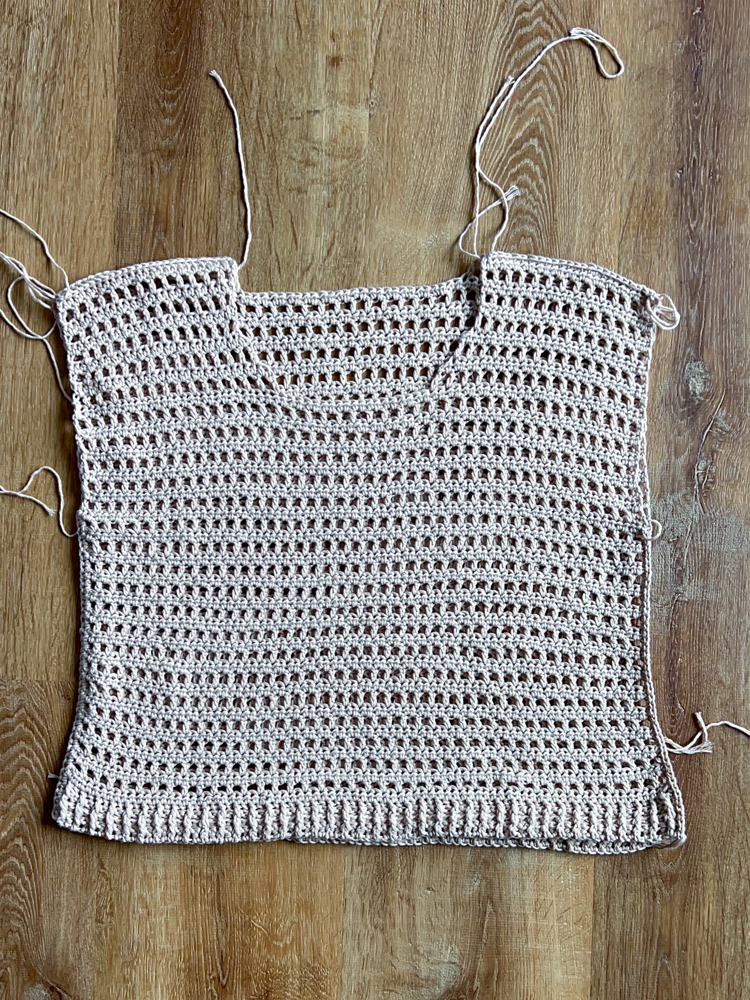
Shoulders
Tie a new slip knot, and slip stitch into the side of one shoulder. Seam the shoulders together with sc. They should match up stitch for stitch. Tie off, leaving a 6 inch tail.
Armhole and Sides
Starting with the front piece, count the following number of rows for your size, from the shoulder downward, to determine where to start your side seam.
11 (11, 15, 19, 19, 23, 27) rows
Mark with a stitch marker. Repeat for the back piece. They should be perfectly aligned.
Then seam together each side with sc stitches, starting from the bottom hem. Just as you did the sleeves, I recommend working 2 sc into the side of each dc or mesh stitch row and 1 sc into the side of each hdc row for a smooth seam that won’t pucker. Then tie off, leaving a 6 inch tail.
Attach Sleeves
Turn sleeves right side out. With seamed bodice still wrong side out, insert sleeves into the bodice and line the sleeve up with the arm opening. Match the seam of the sleeve with the side seam, stretch the sleeve to fit the arm hole opening, and clip in place with stitch markers or quilter’s clips.
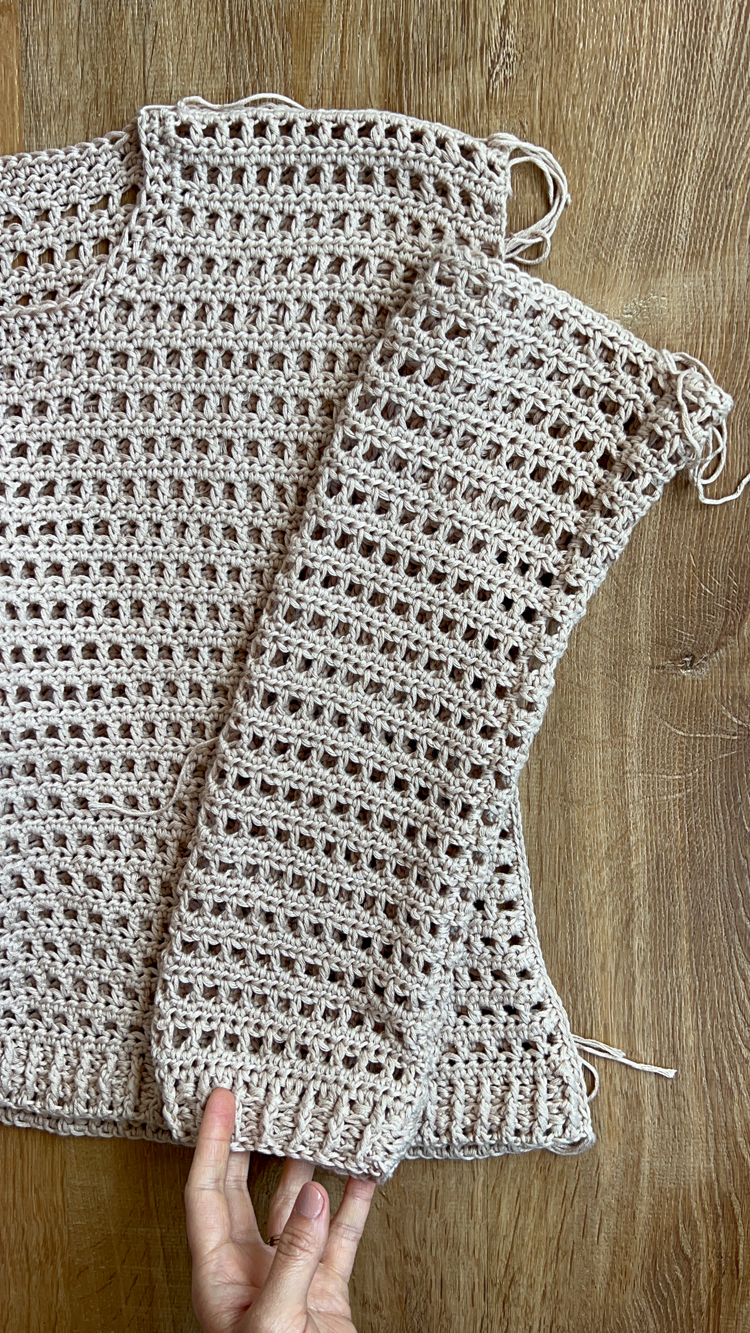
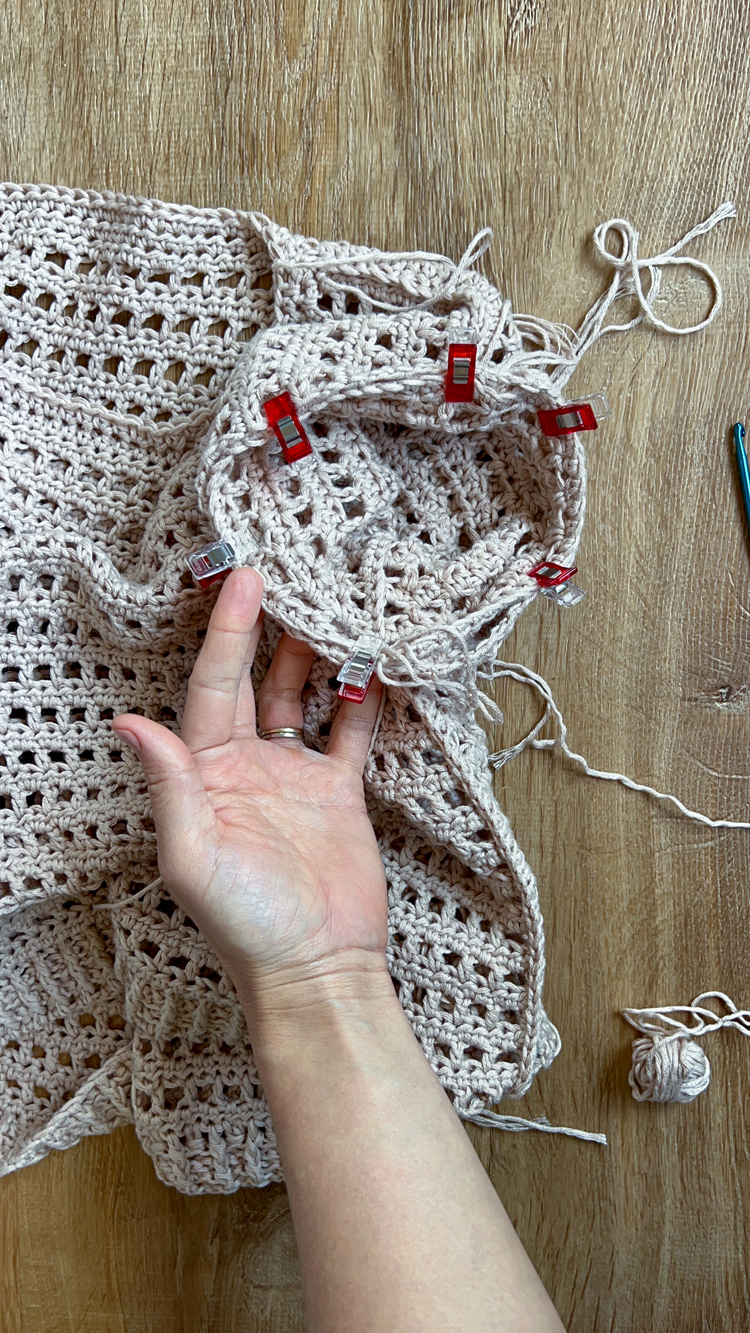
Use the very long tail you left when creating the sleeve to attach the sleeve to the sweater bodice. Slip stitch into the side seam and sc around the opening. It doesn’t matter how many sc you work into each stitch or row, just use as many sc needed to keep the seam laying flat and even. When you make it back around to where you started, tie off the end.
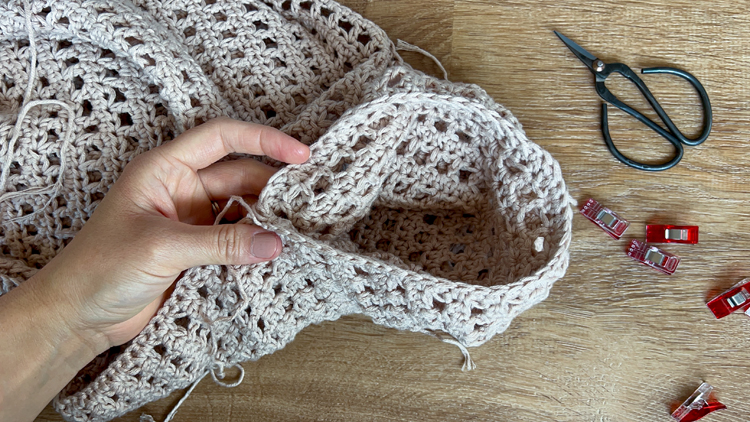
NECKLINE – make one
XXS (XS, S, M, L, XL, XXL)
For the neckline you will be working in the “round” (which means no turning), around the neckline opening for 2 rounds of hdc.
ROUND 1: With the bodice still turned wrong side out, tie a new slip knot and slip stitch into the right shoulder seam (when looking at it) at the neckline.
Ch 2. Work 1 hdc into the side of each row, and each stitch. Take care not to work a hdc at the base of the row that transitions from rows to stitches (see the video for more clarification). This will make the neckline too wide if you do. We want it to cinch in a little bit.
When you get back to where you started, slip stitch to the top of the starting ch 2.
Total stitch count = 56 (62, 68, 74, 80, 88, 96).
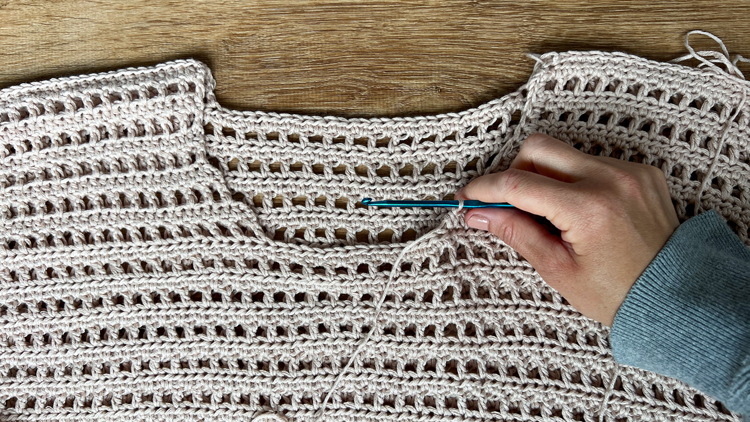
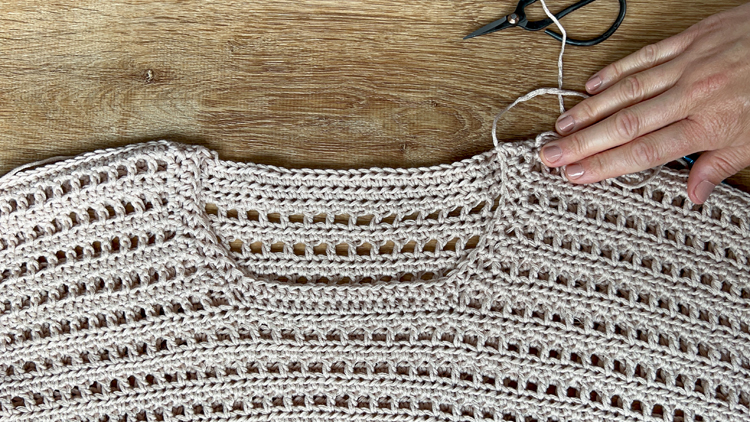
ROUND 2: Ch 2, work a hdc into each stitch, slip stitch to the top of the starting ch 2. Total stitch count = 56 (62, 68, 74, 80, 88, 96). Then tie off, leaving a 6 inch tail.
Weave in all the ends. I like to use some of the ends to help clean up any seams that need reinforcing, especially at the hem and cuffs.
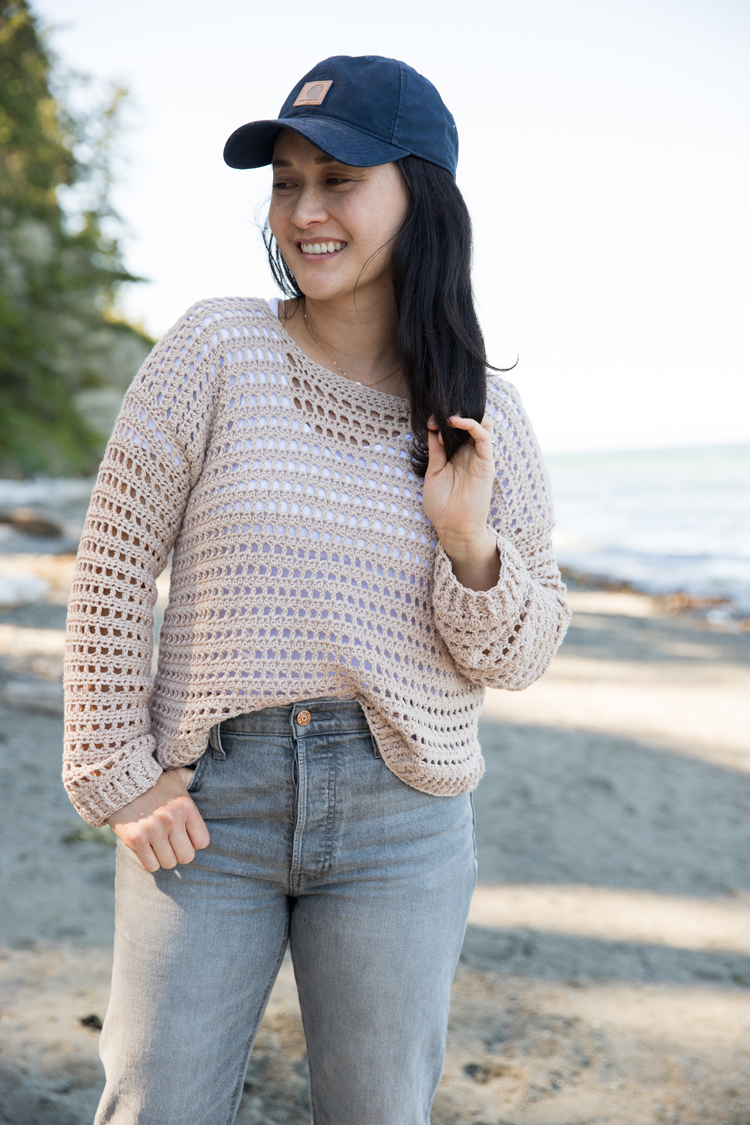
And you’re done!


Looks like a nice quick crochet. Is the pattern written in UK or US terms?
It is written in US terms.
Hi Ana!
All of my patterns are written in US terms.
Hi Delia. Can you give a “guesstimate” to how many cakes would be needed for a size Large? Thank you
I would guess close to 500 g (cake sizes vary, so I can’t speak to how many you’d need).
Can I purchase the pattern without ads?
Not at this time. I like to leave the pattern completely free and only available in this format for awhile so that it’s easier to edit any kinks from reader feedback. The edits are usually typos but I like to also be sure the fit is good for all sizes (even though I haven’t had feedback that has altered the sizing – yet). I will make it an ad free pattern for purchase once it looks like it won’t need more edits. I am getting ready to do that for my Easy Rectangle Cardigan.
This is so cute! You should post it on Ravelry.
I keep meaning to be active there but just haven’t. Thank you for the encouragement.
Yes, that would be great if you added it to Ravelry! I posted my finished piece there, but wasn’t able to link it to the pattern.
Question,
Could you please explain how to make the gauge swatch
How many chains do you start with for it and such
I just saw how many rows and stitches in 4×4 in square but how exactly is the swatch started and made
Thank you
I really like this pattern
Sure! I would crochet a square a little larger than what you need to ensure the sizing is accurate.
ROW 1: Chain 20, turn and hdc into the third ch from the hook (the skipped 2 ch will count as 1 hdc). Hdc in the rest of the ch for a total of 19 stitches.
ROW 2: Turn, Ch 3, skip 1, dc into the next. Repeat this mesh pattern until the end where you will finish the row with a dc.
ROW 3: Turn, ch 2, and hdc into each stitch and ch space.
Repeat ROWS 2 and 3 until you have worked 13 to 14 rows. Then measure the 4 by 4 inch square within the swatch to see if your gauge matches.
Hi. I have started making this one for my daughter. Thank you very much for the free pattern, it looks beautiful. She wants the neckline to be wide as is shown on the pictures when you are wearing the sweater. But I feel like the neckline is way tighter /smaller as it is shown on the step by step picture for the neckline (the last step by step picture). Do I have to worry that the neckline is going to be tight or do I have to make any different measurements for it to be as wide as it looks on you?
So sorry for just now seeing your comment. Good question. Cotton yarn drapes and stretches as it’s worn. The neckline may look small but it will stretch when you put it on. If you’re worried, I would not tie off the end after working around the neck opening, have your daughter try it on, and then you can decide if it’s too tight. If it is, you can remove the neckline stitching altogether or work less rounds. If that happens, you can DM me on instagram (@deliacreates) and I can help you troubleshoot as well. I am much faster at responding on instagram. You may have to tag me in the comments of one of the posts a couple times if your dm request gets tied up in approvals. I hope that helps.
Delia
Bonjour. Est ce que vous avez les explications de ce très beau tricot en français
Merci d’avance pour votre reponse
Is there a possibility of printing the pattern ?
Thank You
I haven’t yet made it into a pdf for purchase, but I plan to do that this summer. Thank you for your patience and for asking so I remember to make it a priority.
beautiful pattern. can you send me the written pattern.
thank you,
I don’t yet have the ad-free pdf version available for purchase. I hope to soon though.
Hello! I’ve tried this pattern twice and I’m wondering how you are working around the natural tendency of the hdc slant here? My work keeps going on a diagonal. Thanks!!
Good question. When you work a row of mesh dc stitches it should pull the hdc stitches, which naturally slant, the other way. I’m not sure if I’m misunderstanding your issue. I’m happy to help you troubleshoot in instagram DMs when we I can respond more quickly and with photo or video responses. I’m @deliacreates over there.
Hi Delia. Thanks so much for the lovely pattern. I’m almost done, but struggling to understand how the sleeves (size xs) will fit into the armhole if I only leave 11 rows open in the side seam as per the instructions. The sleeve is quite a bit wider than that. Am I missing something?
So sorry that I just now saw this comment. So it would be 11 rows per piece (front piece and back piece). So it’s more like 22 rows total for the arm hole…give or take because of the shoulder seam. I hope that helps.
Is there any way the L/XL instructions are slightly off for the front bodice? When I followed the pattern as written, I was getting the square edge on the outside, not making a scoop in the center. I ended up doing a slip stitch row to correct the neckline, but it also seems to be a significantly more pronounced scoop than the one pictured (almost as if it should have started with doing 18 for the L, not 17). I’ve been adjusting mine as I work and making notes on the changes I’ve made so that my other shoulder and back pieces can be modified to match, but I just wanted to check if I am reading this wrong or if it might be incorrectly written here. Any help you can offer would be amazing. Thank you!
I think I first got your feedback in and email and then fixed it. I am so sorry that I am just now seeing this comment. You’re right that there was a typo that threw off the scoop though. I believe I have fixed that. I hope that helps. Thank you for the feedback and so sorry for the pattern issue.
Sorry to bother you but I was trying to find the video for this pattern (because it wasn’t playing automatically) and it doesn’t appear to be listed on your YouTube channel anymore?
Hi! Sorry for the video trouble. This video is not yet on YouTube. On this page the video is a pop up. If you are on a mobile device it should pop to the top of your screen. If on a desktop or laptop it should pop to the right hand side. It runs several ads before the tutorial plays. If you “x” out of the pop up video you have to refresh the page to get it back. If you use an ad blocker, the video won’t play. I hope this helps. If you are having additional issues, please email me at [email protected] and I’ll try to troubleshoot the issue with you.