Did you save those twigs from yesterday?
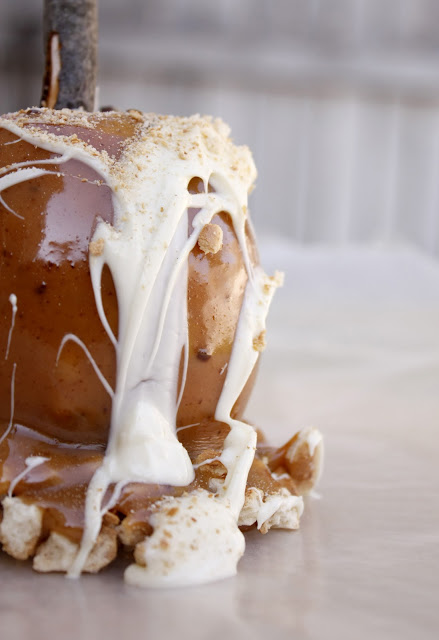
Well…today we are making caramel apples with them!
I sometimes have a hard time with caramel apples because the caramel is so sticky and hurts my teeth. So I decided to make it with homemade caramel which is much softer and easier to eat.
I am not a master candy maker so bear with me. 🙂
First…Take those extra twigs from this wreath.
Soak them in a mild soapy bleach water solution {hot water with about 1 tsp. bleach and 1 tsp. soap} for a few minutes and then sun bleach/sun dry them….if you are a germ weirdo like me. I am sure it doesn’t matter…but…peace of mind is worth a lot. 🙂
Okay. Wash dem apples and start making your
Homemade Caramel Sauce
This a recipe for regular caramels if you want to make those. You just don’t cook it quite as long for caramel apples or for caramel sauce.
Ingredients:
2 c. light Karo syrup
1 can sweetened condensed milk
1 1/2 c. milk {I used 1 %}
1 c. whipping cream
1 c. butter
4 c. sugar
2 tsp. vanilla
****I halved this recipe.
In a 6 qt. pan combine the first six ingredients {all but vanilla}. Now because I halved this recipe I thought I could use my 3 qt. pan. Ha ha hahaha. Save yourself some stress and use a bigger pan. It bubbles up and makes you freak…if you are like me.
Bring it to a boil. I stirred it a lot but I am sure that is why there are some dark flecks in my caramel because I scraped up some burnt pieces that can stay stuck to the pan until you are done. So…whatever you feel comfortable with. Like I said…too small pan…freaking out…stirring a lot.
Cook to a soft ball stage…almost. Get a candy thermometer for this. I know you can test it with dropping it in water but for $4 at Walmart you can save yourself some sanity and not waste ingredients because you will get it right.
So for caramels soft ball stage is 240 degrees F.
Cook your sauce to 235 degrees F.
Remove from heat and stir in the vanilla.
If you are making caramels stir in nuts, etc., pour into a buttered 9×13 pan without scraping the pan and let it set overnight before cutting and wrapping.
Now back to the apples. I let the caramel cool for a bit while I inserted the sticks into the apples and prepared my toppings.
Then I dipped in the caramel using a spoon to help me coat most of the apple and then dipped it into the toppings…er…bottomings 🙂 – I used crushed pretzels, chopped peanuts, and chopped walnuts.
Drizzle chocolate on the top {just melted chocolate chips in a bowl set over a pan of boiling water}.
So, so yummy!
This caramel is a bit goopier than just buying the caramel candies in the store and melting them. It is also a lot easier to eat and in my opinion…much yummier.
Enjoy!
* One note. If you aren’t planning on eating these the same day I would refrigerate them. You have punctured the apple so it will keep things fresher.
EDITED to add: I got some advice from someone who knows more about candy making than me that:
1. Don’t stir the caramel! Use a larger pan and let it bubble up. Don’t stir.
2. You reduce the finished temperature of the candy about 2 degrees for every 1000 ft. you are above sea level.
3. When you pour the caramel out, don’t scrape the pan.
So there you go… 🙂 Basically don’t do what I did. Yep. 🙂


These pictures are gorgeous, as are the apples. Absolutely beautiful!
Ooh yum! I love caramel apples!! 🙂
wow looks fantastic! this would take me the entire day to do though:(
:)gina
oh those photos! Those twigs are the perfect touch. Love it Delia
These are awesome. I made similar apples with twigs for my kids and their friends only I covered it in peanut butter and granola, then added sprinkles.
I'm sure yours tasted way better. I'll be posting my recipe on my blog soon and will definitely link to this recipe of yours.
Nice to meet you!
Just when I was about to ask you for the recipe, voila, here it is on your craft blog. I just love you Delia!