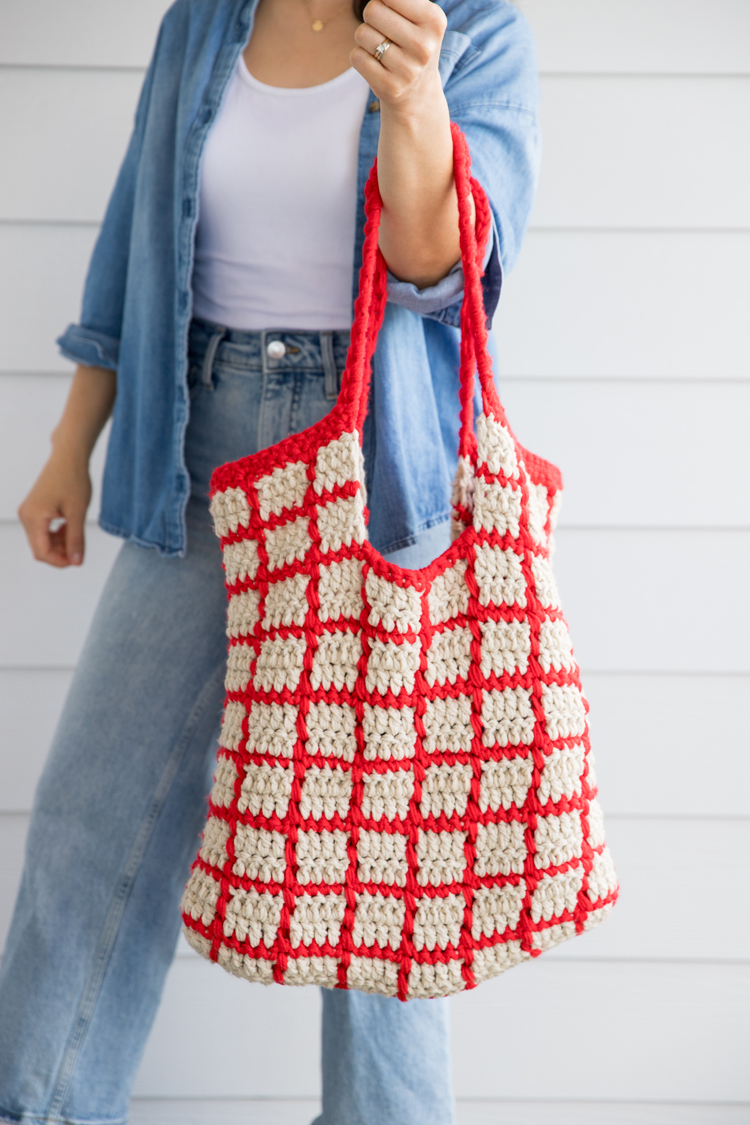
I’ve partnered with Hobby Lobby to bring you an easy crochet tote pattern similar to my four strand crochet tote, but with a splash of color and a windowpane design!
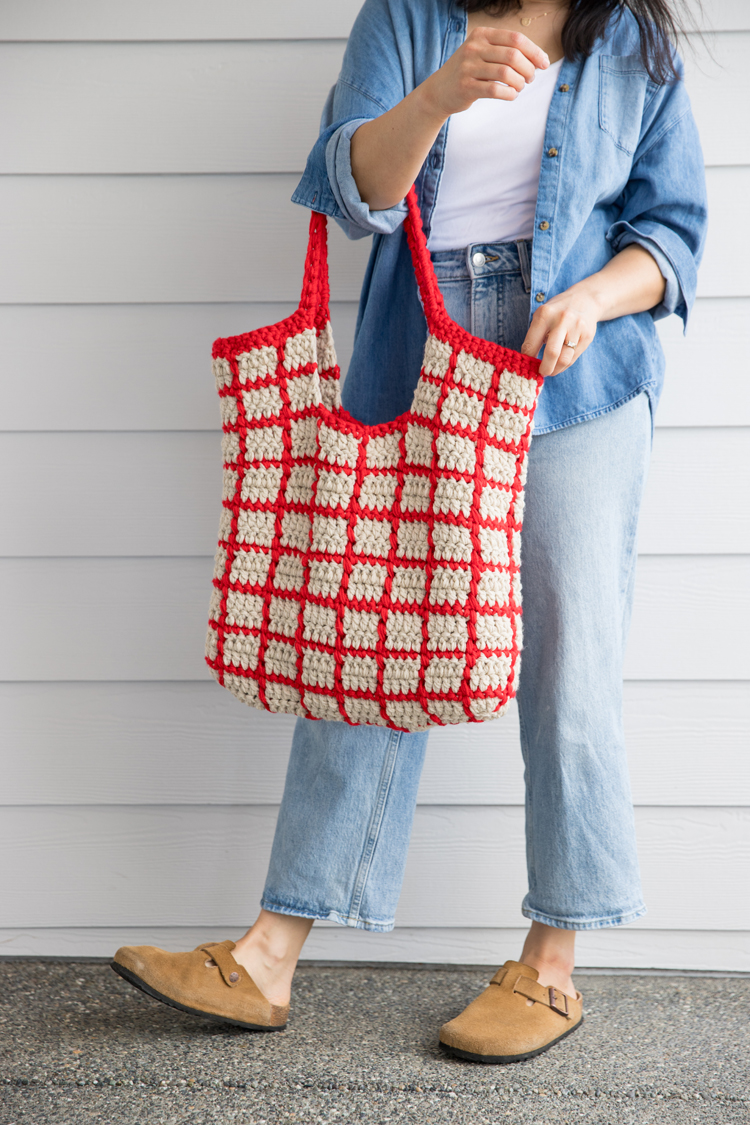
It still uses exclusively beginner friendly, basic stitches: chain (ch), single crochet (sc), double crochet (dc), and slip stitching…but it’s like a level up after you master the basic tote. It combines skills of working in the round and surface crochet and then teaches you how to change colors. (Which, honestly is not hard at all. It just requires some more weaving in later, which is tedious, not difficult.)
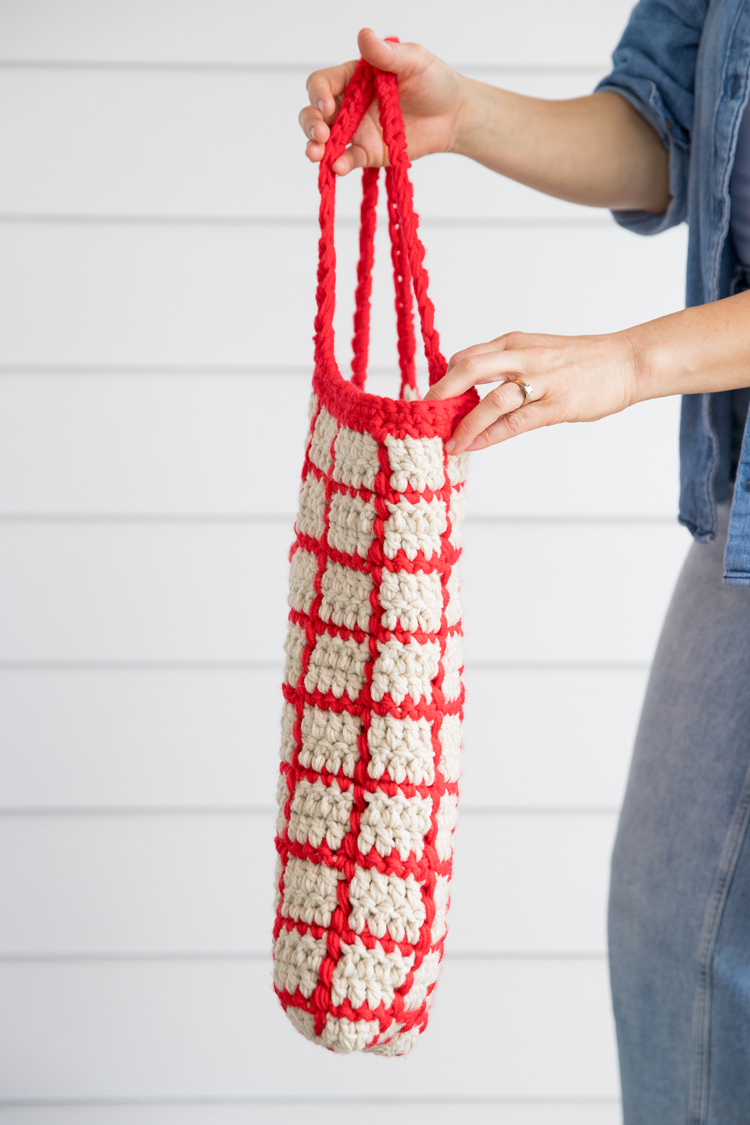
Another difference is that this bag uses three strands instead of the four that I use in the basic version. Using multiple strands together is what gives the bag its strength. Four is strongest, but it can also be bulky. So I used three strands and then added strength back into the design with lines of surface crochet worked perpendicular to the rows. I love it when design is functional too!
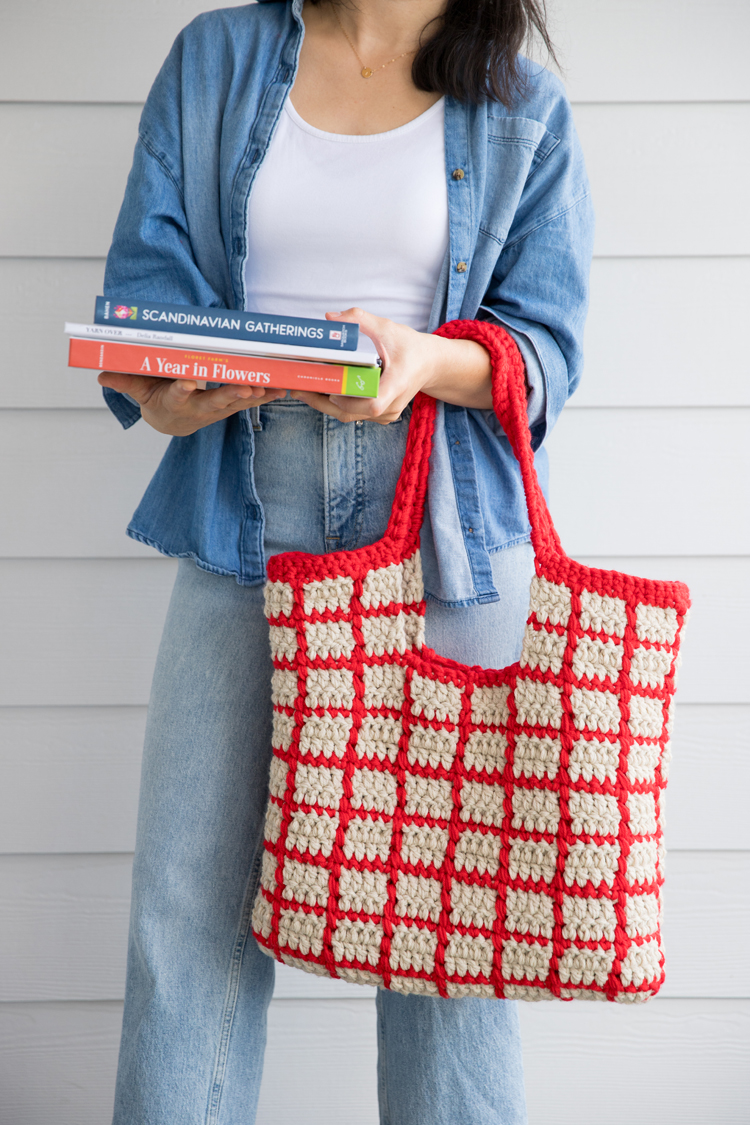
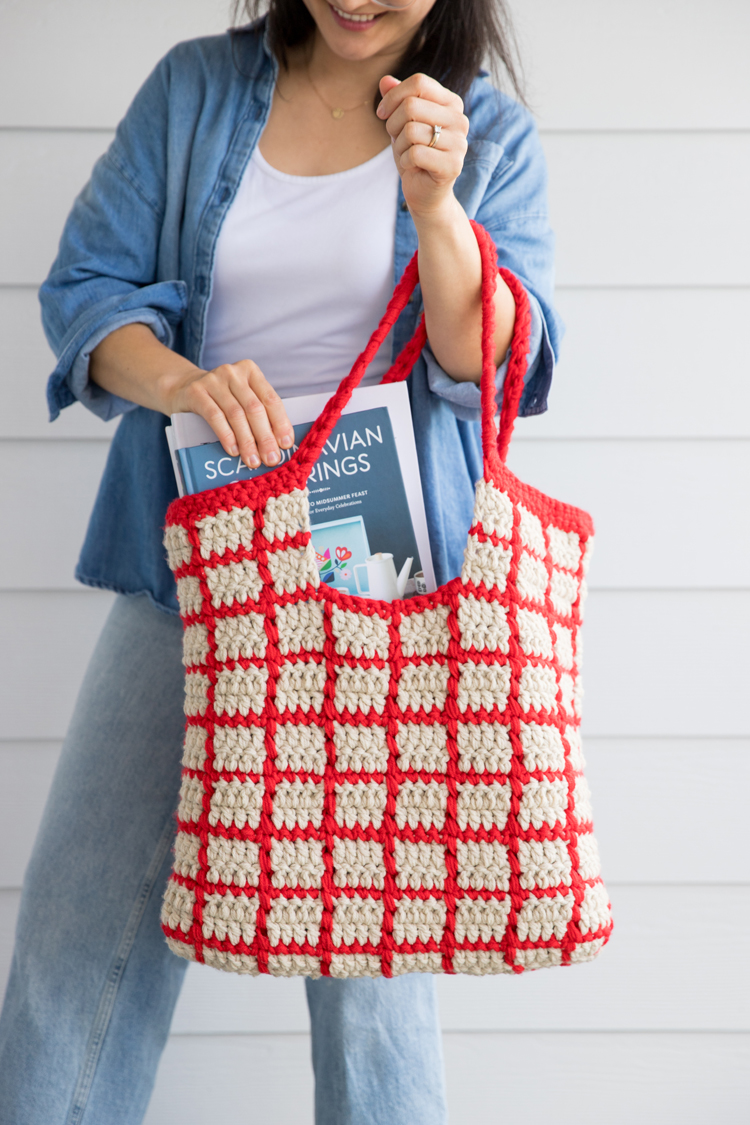
Let’s get started.
MATERIALS
- 660 yards of main color yarn, worsted weight *
- 450 yards of accent color yarn, worsted weight **
- N/9.00 mm hook ***
- Yarn needle and scissors
Material Notes:
VERY IMPORTANT – Please read this section before gathering supplies.
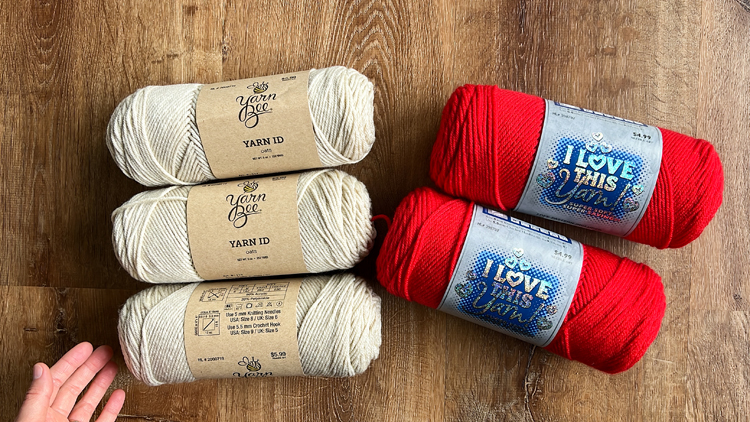
*I used 3 skeins of “Yarn ID” from Yarn Bee in the color “oats” from Hobby Lobby. I really like the matte finish and the colors in the Yarn ID line. Many acrylic yarns have even just a slight shiny finish, so I think the matte look gives it a touch of luxe usually associated with wool. Because you are using three strands at a time, you need 3 different balls of yarn at least 220 yards each. So that I wouldn’t have to piece any strands together, I just used three separate skeins.
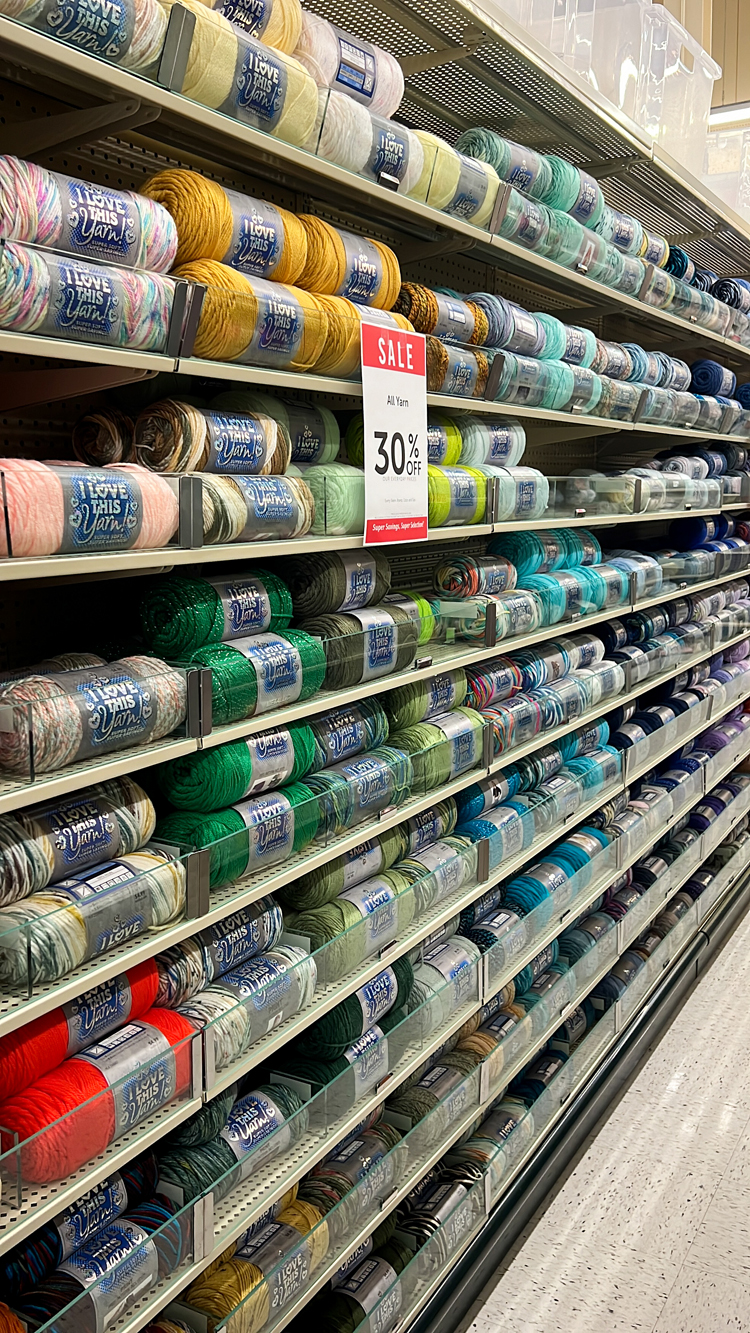
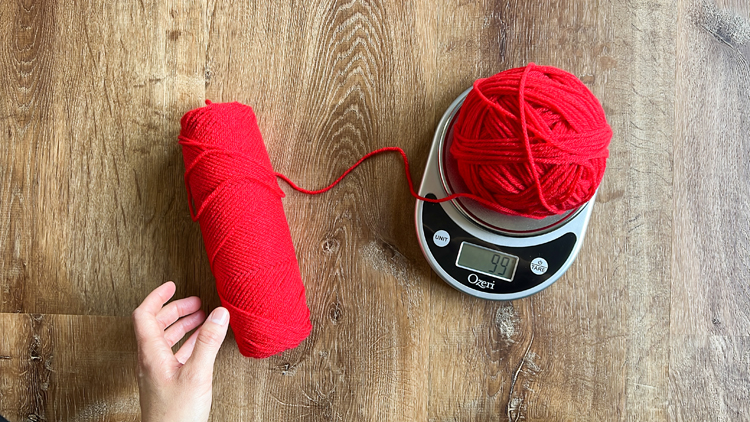
**For the accent color, I used “I Love This Yarn” in the color “fire red” also from Hobby Lobby. It’s a great orangish/cherry red that seems really bold on it’s own, but makes a classic statement when you combine it with a neutral color. It does have a bit of a sheen, but it’s not noticeable as an accent yarn. You need three balls of yarn about 150 yards each. I used a small kitchen scale to divide up two skeins, but you can skip the scale by overshooting the yarn amount and eyeballing it.
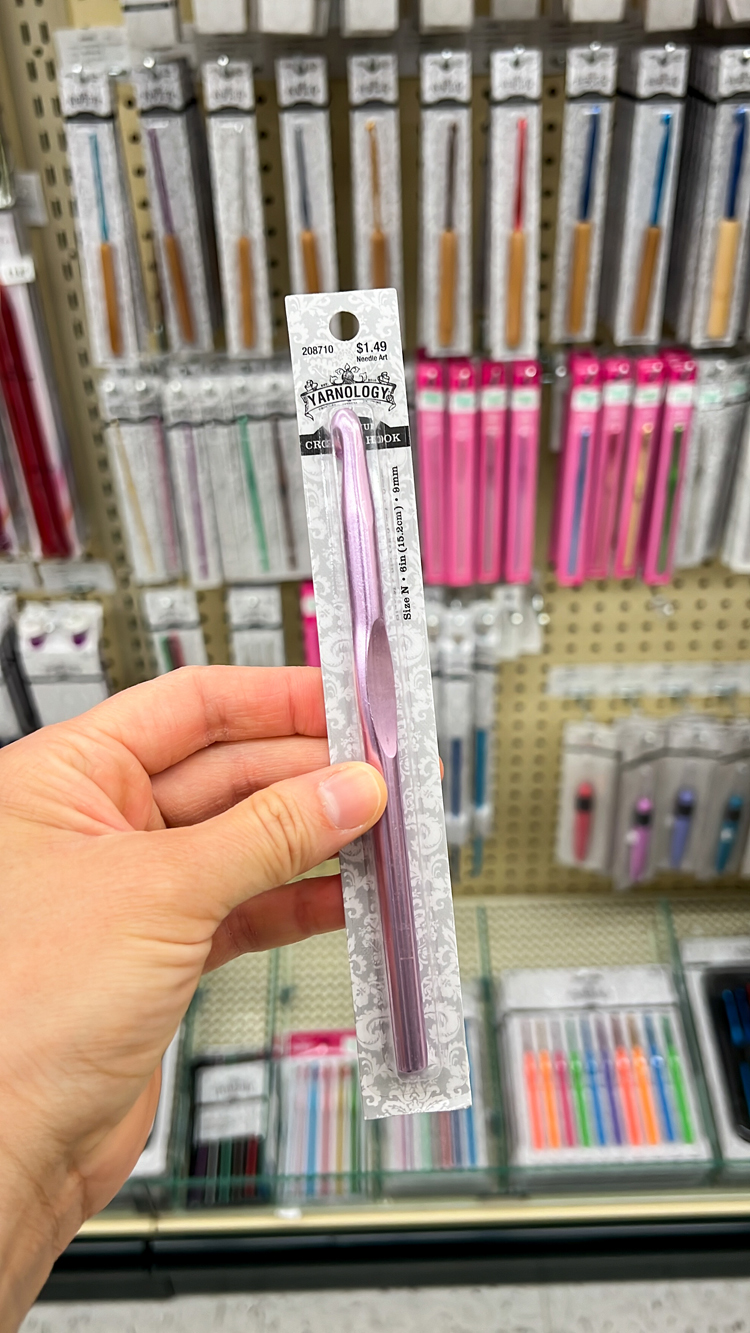
***I have only found the N/9.00 mm hook at two major stores, Hobby Lobby being one of them. Not sure why it’s not a more popular size, because I love it! It’s the hook size I use for most of my multi-strand projects. If you want to get it online, you have to search for off brand listings for a “9.00 mm hook”. Don’t include the letter N when you search the hook size. Some brands list it as an M hook, or an N/15 10.00 mm hook. Neither of those are the correct size.
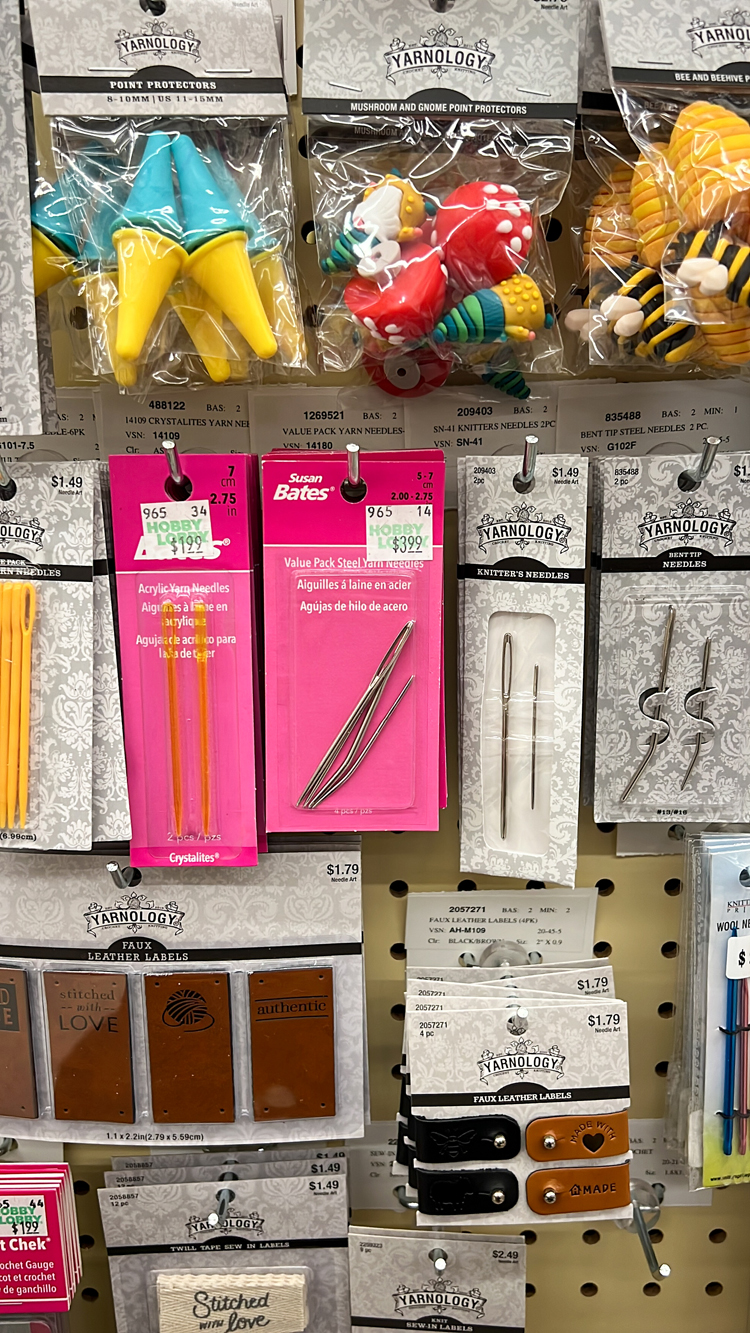
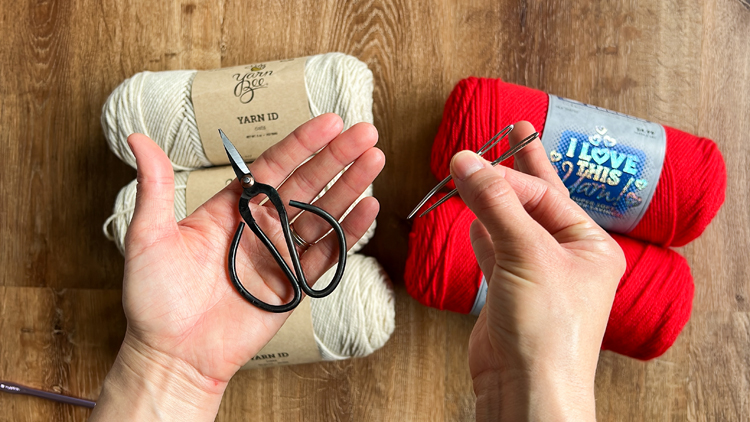
****Quick note about yarn needles: I prefer metal ones with large eyes and blunt tips. They seem to be the easiest to use and can slide through plys of yarn without splitting it in messy ways.
GAUGE
4 x 4 inch square = 9 dc x about 4.5 rows of dc
Swatch pattern:
- Row 1: Ch 10, dc in the third ch from the hook. Dc in remaining chains. (Stitch count = 9)
- Row 2: Turn, ch 2. Dc in each stitch. (9).
- Repeat Row 2, 3 more times.
ABBREVIATIONS
- ch = chain
- sc = single crochet
- dc = double crochet
VIDEO TUTORIAL
The video will play here, if it hasn’t already popped to the top or side of your screen, and will play after the initial ads. If you “x” out of the video pop-up, you will need to refresh the page to get it back.
WRITTEN PATTERN & TUTORIAL
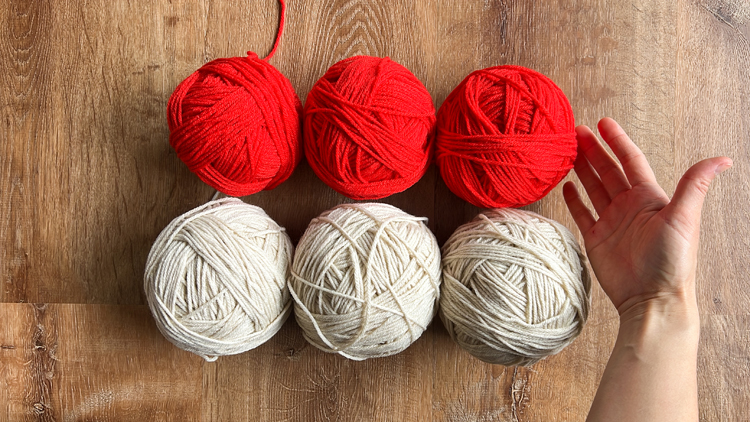
BEFORE YOU BEGIN: Prepare your yarn.
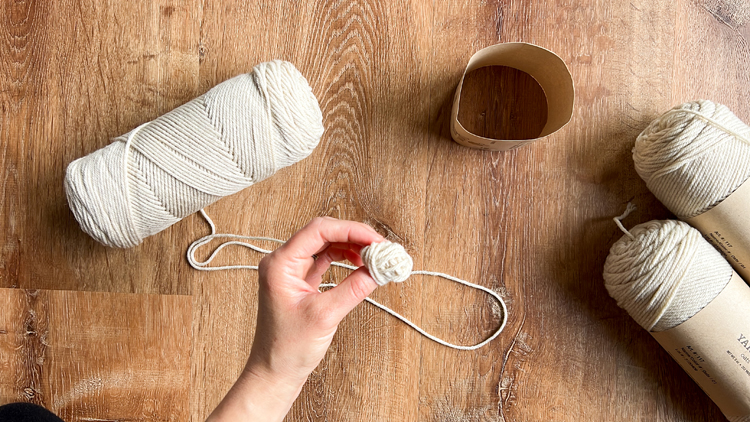
Even if you’re not dividing a larger skein in order to get three balls, rolling them in advance really does make a difference when using three strands. It makes for a smoother process with less tangles. You can also wind them into cakes. I’ve tried this and I would sometimes still end up with a knotted mess, whereas rolling balls, using no special tools, has been more reliable.
For the accent yarn, I divided two skeins into three halves, and put the fourth half into my stash for later.
FORM TOTE BAG
NOTE: Usually when working in the round, we work in the same direction with no turning. Because we are creating lines of chain spaces to work our surface crochet into and we want them to stay straight, we will be turning our work between each round. See the video for a visual explanation.
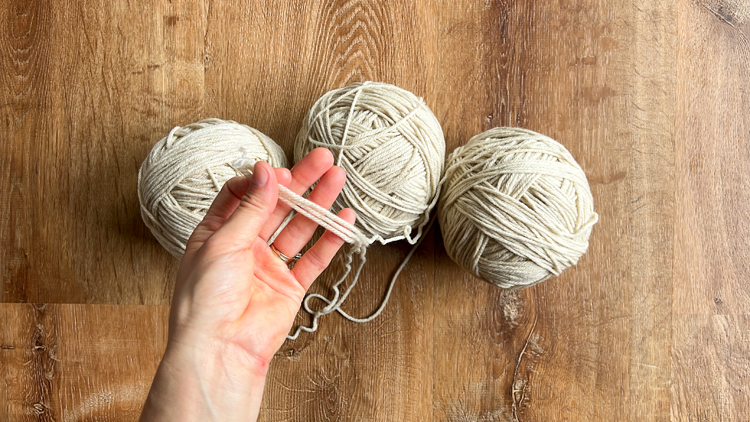
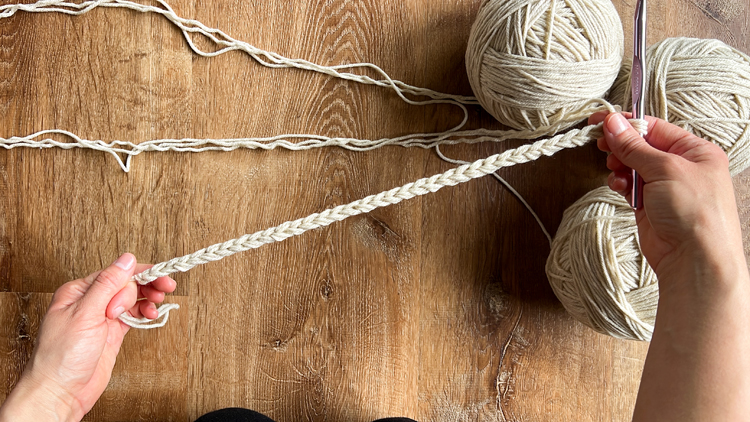
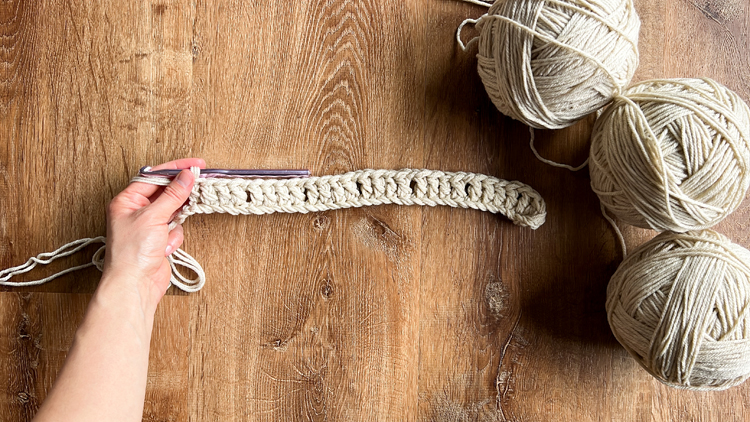
Using three strands together of the MAIN color yarn, ch 34.
ROUND 1: Skip the first two ch, which will count as 1 dc, and work a dc into the third ch from the hook. Work two more dc into the same ch. Then ch 1. Work 1 dc into the next four ch. *Ch 1, skip 1 ch, then work 1 dc into the next four ch.* Repeat from * to * five more times. Ch 1, skip 1, then work 4 dc into the last ch. Ch 1, turn so that we are working into the bottom of the stitches you just worked. Dc into the ch space made from the previous side. Work 1 dc into the next 3 stitches. *Ch 1, skip 1. Work 4 dc * Repeat from * to * four more times. Ch 1, skip the last stitch. Slip stitch into the top of the 2 skipped ch from the beginning of the round. (Total stitch count including ch spaces = 70)
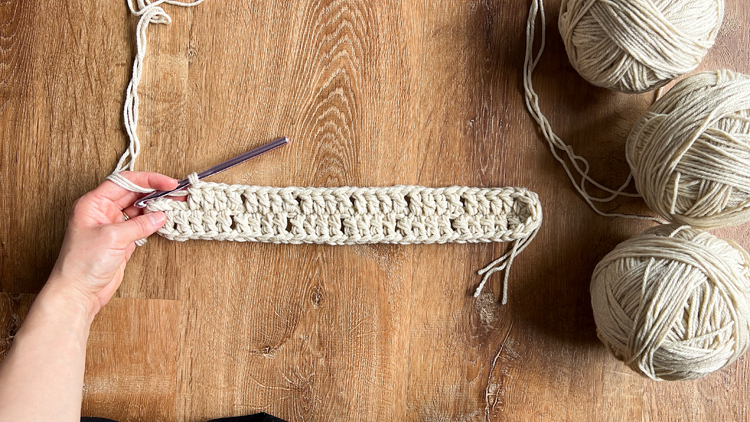
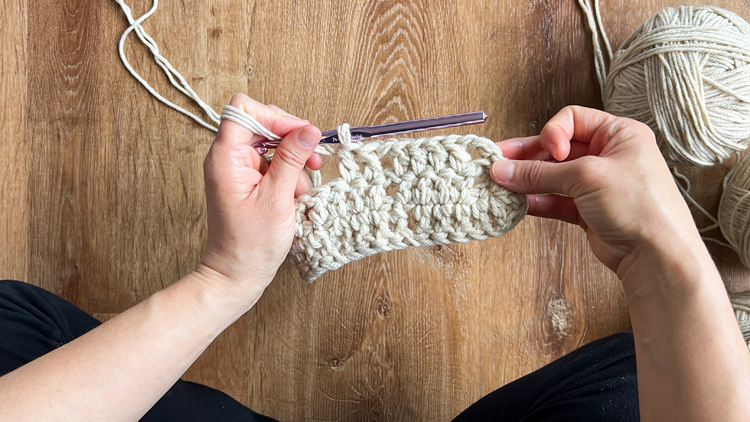
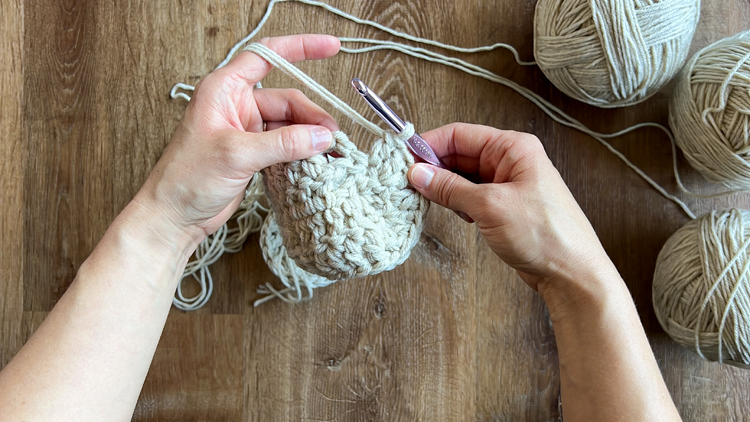
ROUND 2: Turn, Ch 3 and skip the ch space from the previous round. *Work 1 dc into the next 4 stitches. Ch 1, skip over the ch space.* Repeat from * to* five times until you get to the curved end of the oval shaped bag bottom you’re creating. To increase, we will be working 2 stitches in each of the 5 stitches at the end (4 dc + 1 ch, which counts as a stitch). So even though you worked a ch to skip over the ch space from the previous round, now work a dc into the same ch space. Work 2 dc into the next stitch. Then work 1 dc into the next and ch 1. Work 2 dc into the next two stitches. Ch 1 over the ch space from the previous round. Then repeat the * to * pattern 6 times. Work the second curved end the same way as the first. Dc into the ch space. Work 2 dc into the next stitch. Then work 1 dc into the next and ch 1. Work 2 dc into the next stitch. Two of the chains at the start of the round count as 1 dc already worked, so you only need to work 1 more dc at the base of the starting chains. See the video for clearer instruction if needed.
COLOR CHANGE: Insert your hook into the top of the ch 2 to begin your slip stitch, drop the working yarn in the main color, then lay the accent color yarn over the hook leaving a 3-4 inch tail, pull it through to complete the slip stitch. (Total stitch count including ch spaces = 80).
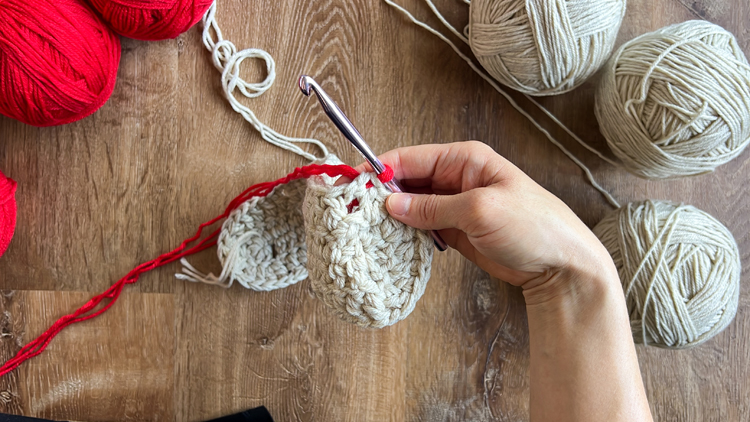
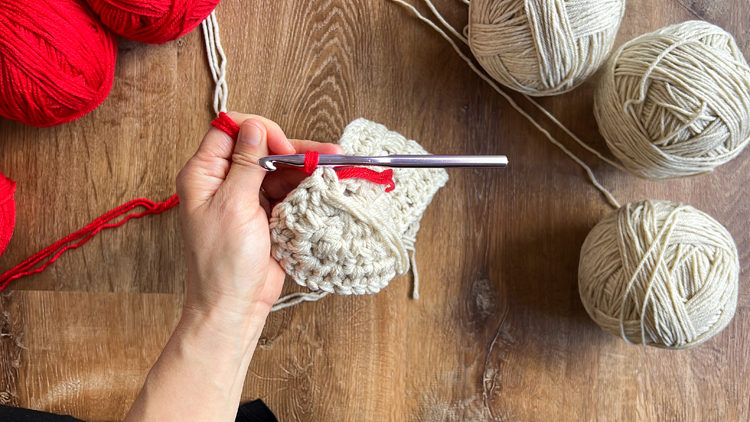
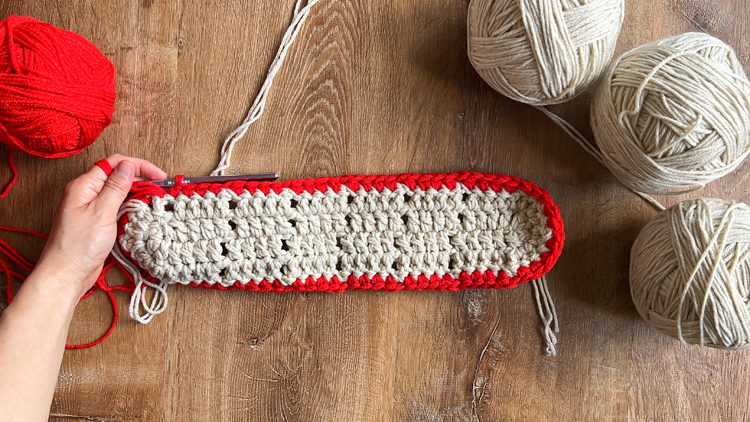
ROUND 3: Work a chain to secure the accent color yarn to your bag. This ch doesn’t count for anything, it just makes sure the yarn is attached. Turn, insert your hook into the same space that you worked the ch and work a sc. Sc into the next 3 stitches, ch 1 and skip the chain space. *Sc 4 times, ch 1, and skip ch space.* Repeat from * to * 14 times. When slip stitching to close the round, insert your hook from BEHIND the first stitch in the round (do this for all accent color rounds), drop the accent color and cut a 3-4 in tail. Then yarn over with the main yarn color (should still be attached), and pull it through to complete your slip stitch. (80)
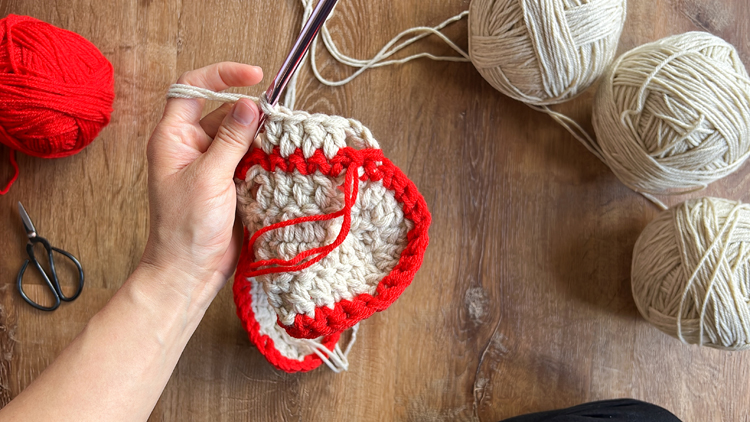
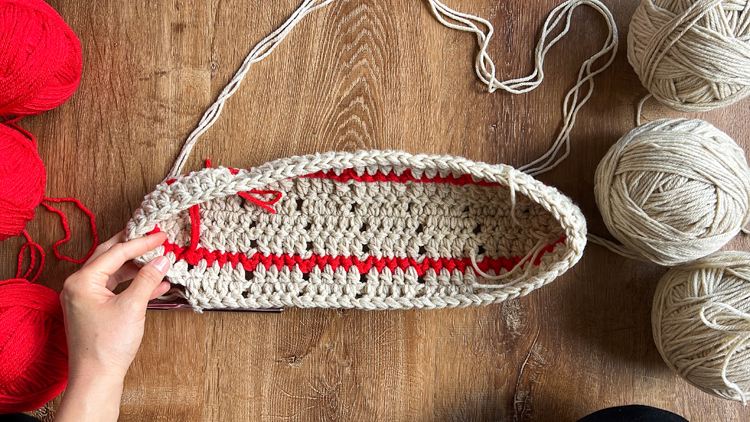
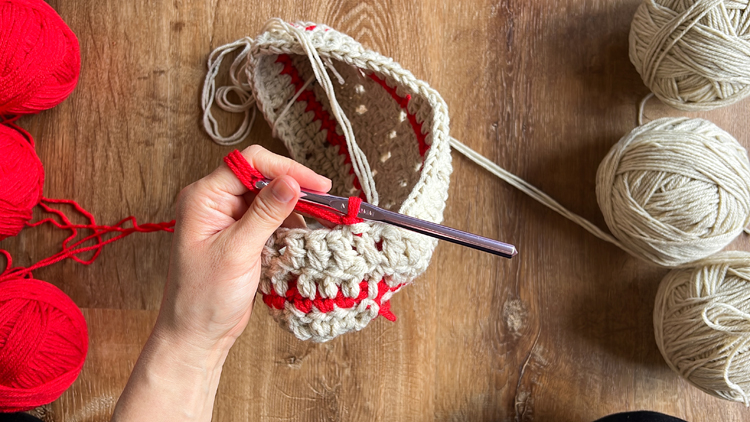
ROUND 4: Turn, ch 3, skip the chain space from the previous round. *Work 4 dc, ch 1, and skip the ch space.* Repeat from * to * 14 times. Work 3 more dc into the remaining three stitches. Slip stitch to the top of the ch 2 (the third ch is for skipping over the first ch space). (80)
ROUND 5: Turn, ch 2. Work 1 dc into the next 3 stitches. Ch 1, skip the ch space. *Work 4 dc, ch 1, and skip the ch space.* Repeat from * to * 14 times.
COLOR CHANGE: Insert your hook into the top of the ch 2 to begin your slip stitch, drop the working yarn in the main color, then lay the accent color yarn over the hook leaving a 3-4 inch tail, pull it through to complete the slip stitch. (80)
ROUND 6: Work a ch to secure the accent color yarn. Turn, work a sc into the same space. Ch 1 and skip over the ch space. *Sc 4 times, ch 1, and skip ch space.* Repeat from * to * 14 times. Work 3 sc into the last 3 stitches. Insert your hook from BEHIND the first stitch in the round, drop the accent color and cut a 3-4 in tail. Then yarn over with the main yarn color and pull it through to complete your slip stitch. (80)
ROUND 7: Turn, ch 2. Work 1 dc into the next 3 stitches. Ch 1, skip the ch space. *Work 4 dc, ch 1, and skip the ch space.* Repeat from * to * 14 times. Slip stitch to the top of the ch 2. (80)
ROUND 8: Turn, ch 3, skip the chain space from the previous round. *Work 4 dc, ch 1, and skip the ch space.* Repeat from * to * 14 times. Work 3 more dc into the remaining three stitches.
COLOR CHANGE: Insert your hook into the top of the ch 2 to begin your slip stitch, drop the working yarn in the main color, then lay the accent color yarn over the hook leaving a 3-4 inch tail, pull it through to complete the slip stitch. (80)
ROUND 9: Work a chain to secure the accent color. Turn, insert your hook into the same space that you worked the ch and work a sc. Sc into the next 3 stitches, ch 1 and skip the chain space. *Sc 4 times, ch 1, and skip ch space.* Repeat from * to * 14 times. When slip stitching to close the round, insert your hook from behind the first sc in the round, drop the accent color and cut a 3-4 in tail. Then yarn over with the main yarn color, and pull it through to complete your slip stitch. (80)
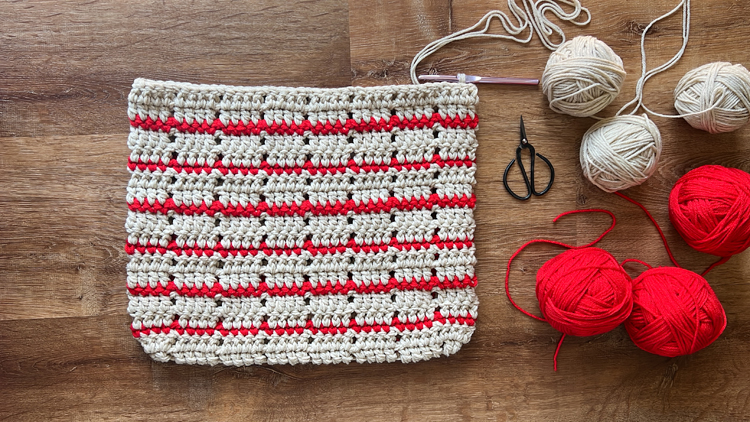
ROUND 10: Repeat Round 4.
ROUND 11: Repeat Round 5.
ROUND 12: Repeat Round 6.
ROUND 13: Repeat Round 7.
ROUND 14: Repeat Round 8.
ROUND 15: Repeat Round 9.
ROUND 16: Repeat Round 4.
ROUND 17: Repeat Round 5.
ROUND 18: Repeat Round 6.
ROUND 19: Repeat Round 7.
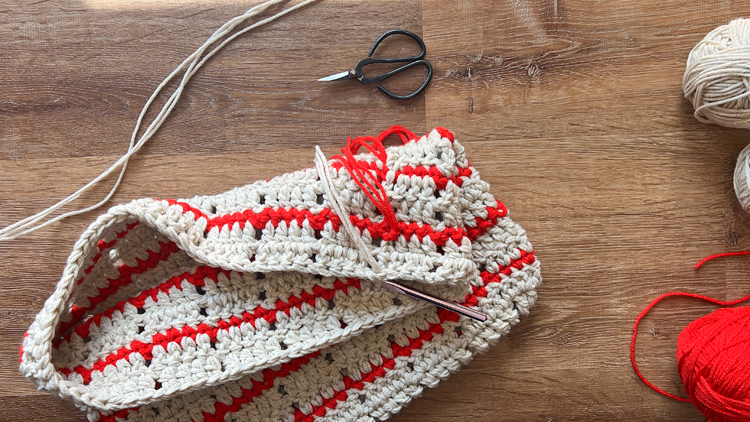
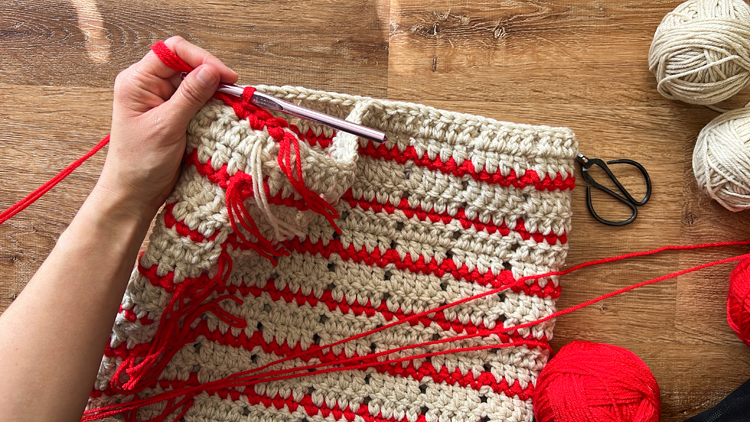
ROUND 20: Repeat Round 8, but cut the main yarn color as well.
ROUND 21: Repeat Round 9.
FORM TOP SIDES OF TOTE BAG
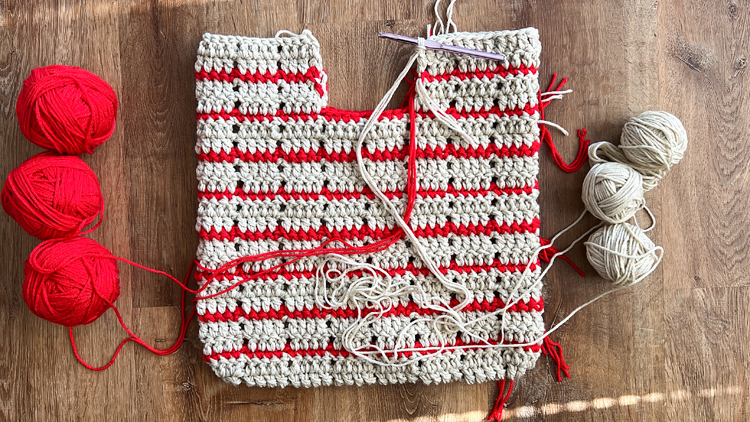
The top sides of the bag will be worked in rows rather than in the round. There should be 8 clusters of 4 dc on each side of the bag. We will be working into three clusters on each edge, with six total as it connects to the other side, leaving 2 clusters open in the center on each side.
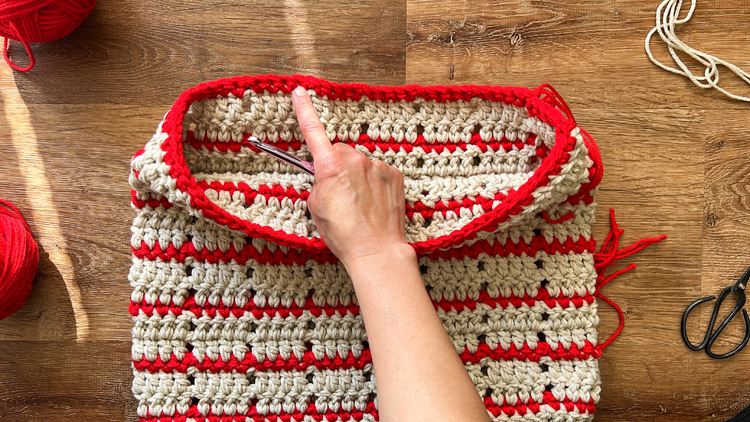
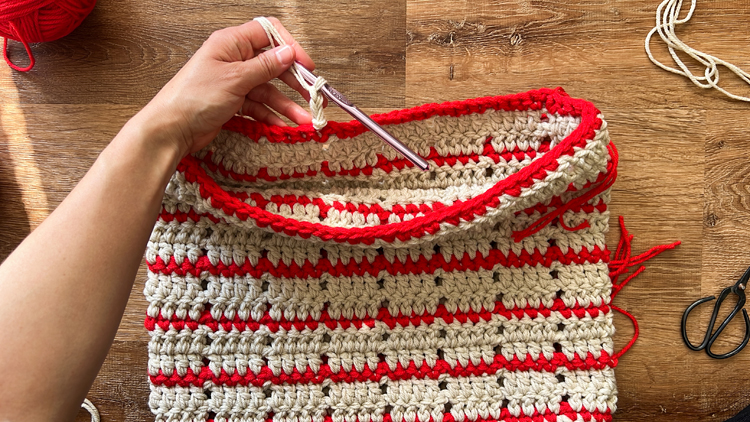
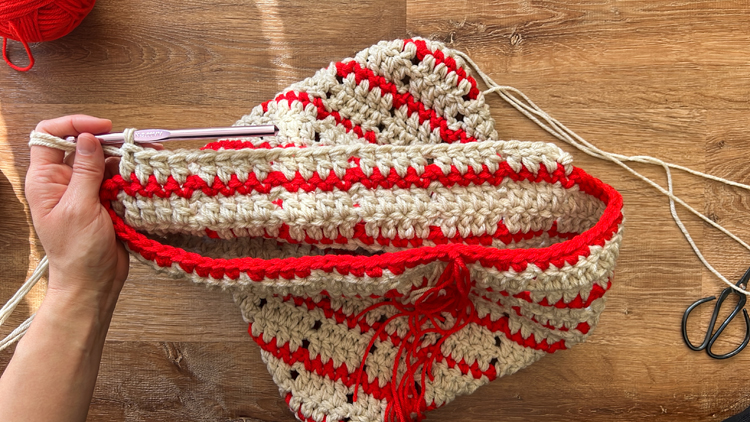
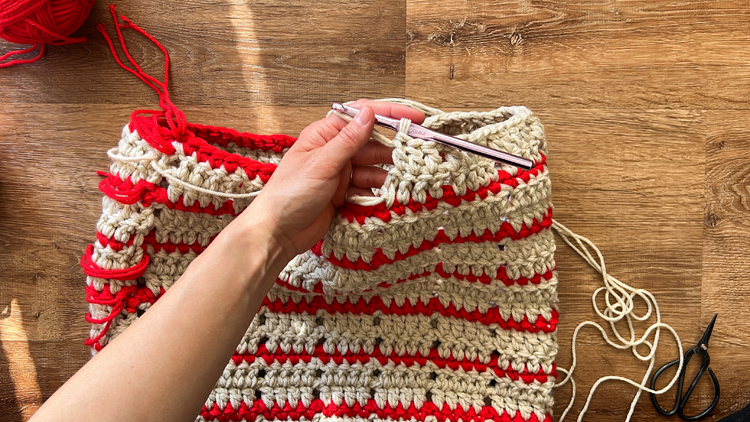
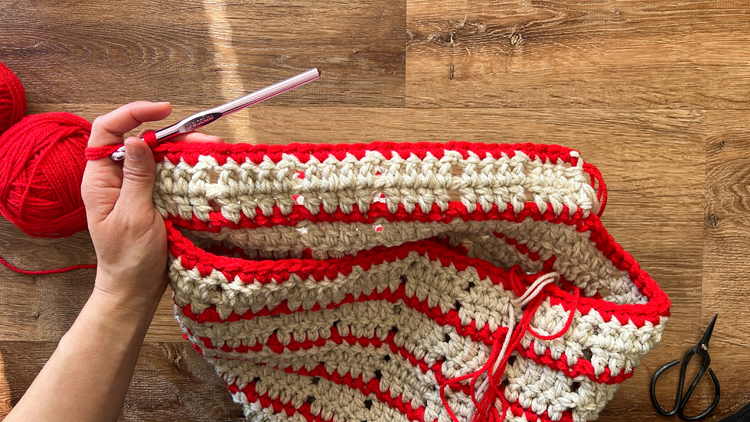
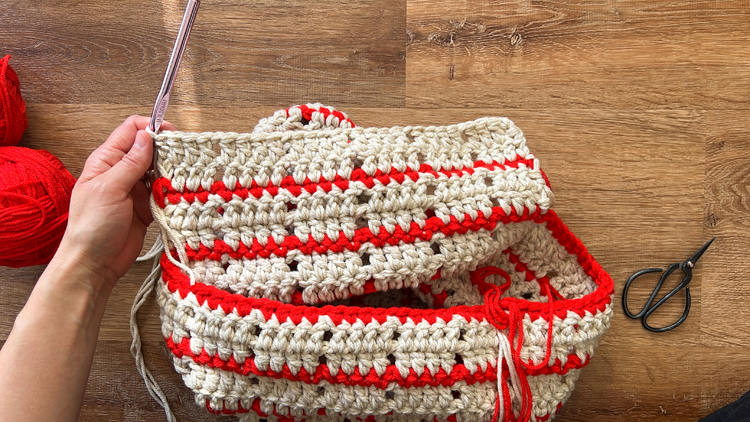
Count inward, three clusters from the side of the bag. Attach the main color yarn to the top of the fourth stitch on the third cluster.
ROW 1: Ch. 2 (which counts as a dc), work 3 more dc, ch 1, skip the ch space. *Work 4 dc, ch 1, skip ch space.* Repeat from * to * 3 more times. Work 4 more dc. (Total stitch count, including ch spaces = 28)
ROW 2: Turn, ch 2. Work 3 more dc, ch 1, skip the ch space. *Work 4 dc, ch 1, skip ch space.* Repeat from * to * 3 more times. Work 3 more dc.
COLOR CHANGE: Start the 4th and last dc in the row, but before yarning over and pulling through the last two loops, drop the working yarn of the main color and replace it with the accent color yarn. Ch 1 to secure the accent color. Cut and tie off the main color leaving a 3 inch tail. (28)
ROW 3: Turn, sc into the same spot you worked the ch to secure it to the bag. Work 3 more sc, ch 1, skip the ch space. **Work 4 sc, ch 1, skip ch space.* Repeat from * to * 3 more times. Work 3 more sc. Insert your hook into the last stitch. Before yarning over and pulling through both loops to complete the sc, drop the accent yarn, and replace it with the main color yarn. Ch 1 to secure the main color to the bag. Cut and tie off the accent color.
ROW 4: Turn, repeat Row 1.
ROW 5: Repeat Row 1. Cut main color yarn and tie off.
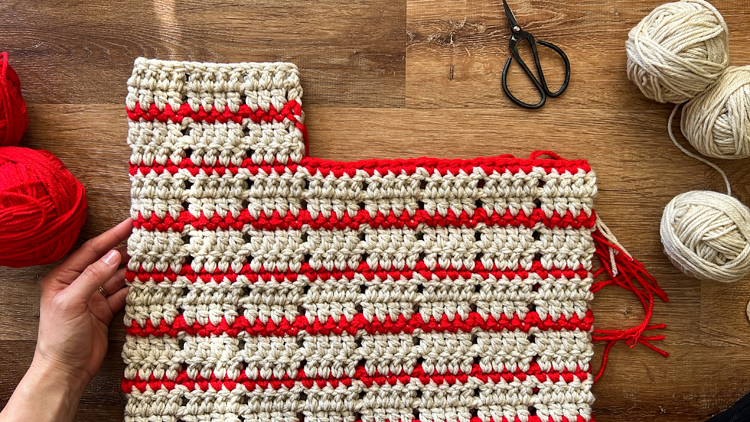
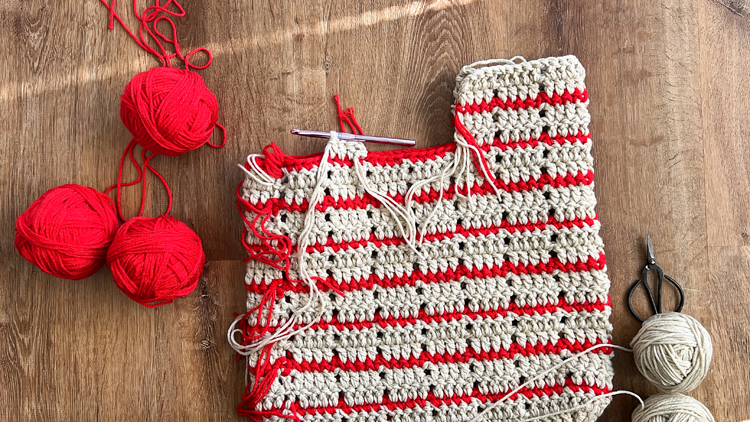
Repeat for the other side of the bag.
HANDLES
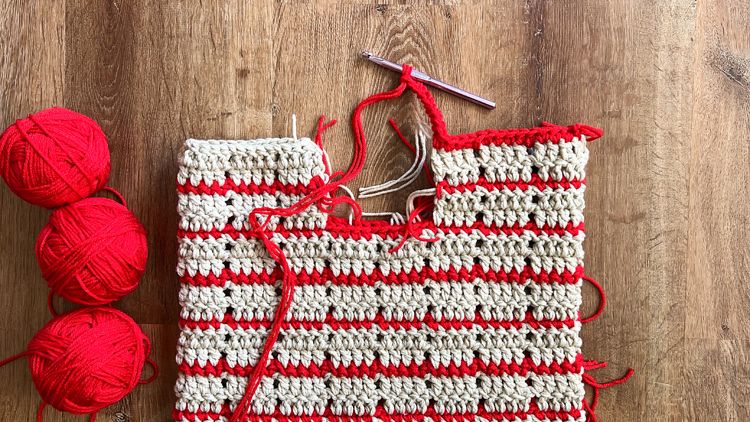
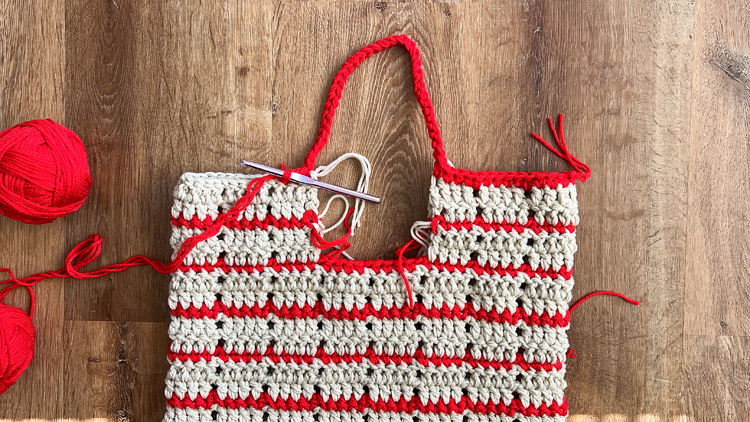
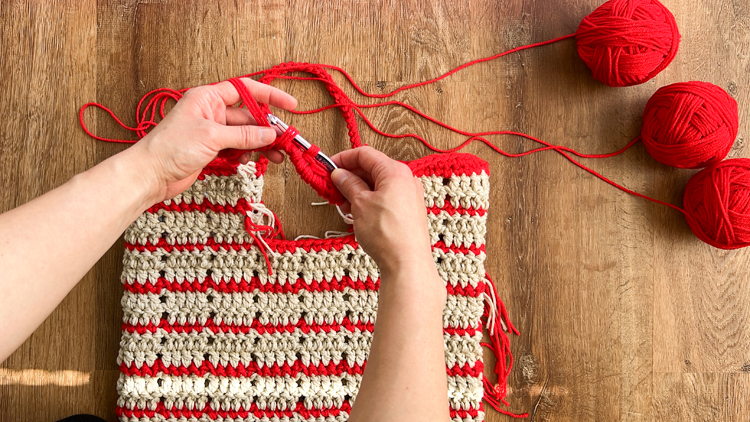
ROUND 1: Starting at the side the bag, attach the accent yarn by inserting your hook into the last stitch in a cluster of 4 dc. Yarn over and pull through. You should have two loops on your hook. Do not slip stitch or chain. Simply yarn over and pull through to complete a sc (this is actually called a standing sc, because it started the row without a starting ch).
Sc around the top of the bag, working into each stitch ch space, until you reach your first handle gap. We are going to create a handle of chains to bridge the gap between these two sides.
Ch 35 to form the handle. Attach to the other side with a standing sc into the first stitch on the other side.
NOTE: If you work into what was a ch 2 from the previous TOP SIDES pattern, take care to not miss the stitch next to it. If you only count 3 sc after a handle, you’ll know you’ve missed it. Make sure you work 4 sc in each cluster and 1 sc into each ch space.
When you make it back around to the first sc, slip stitch to it.
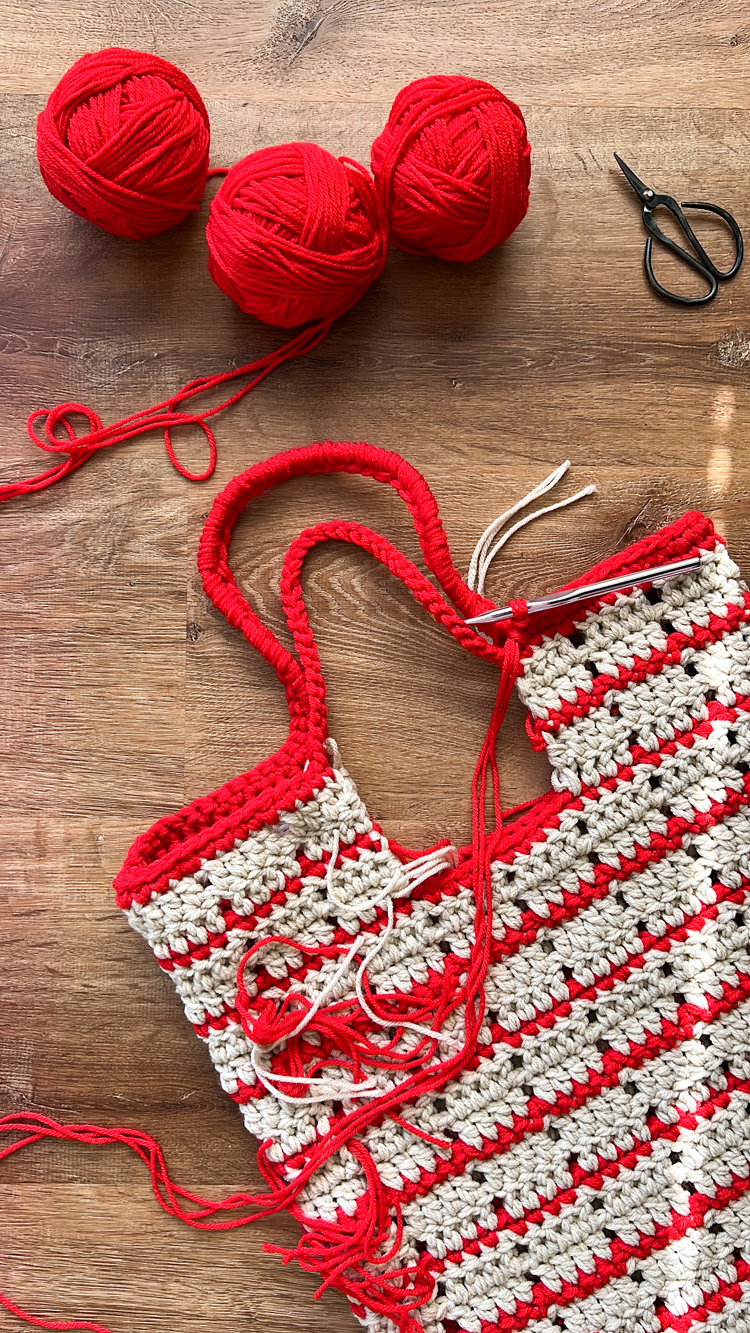
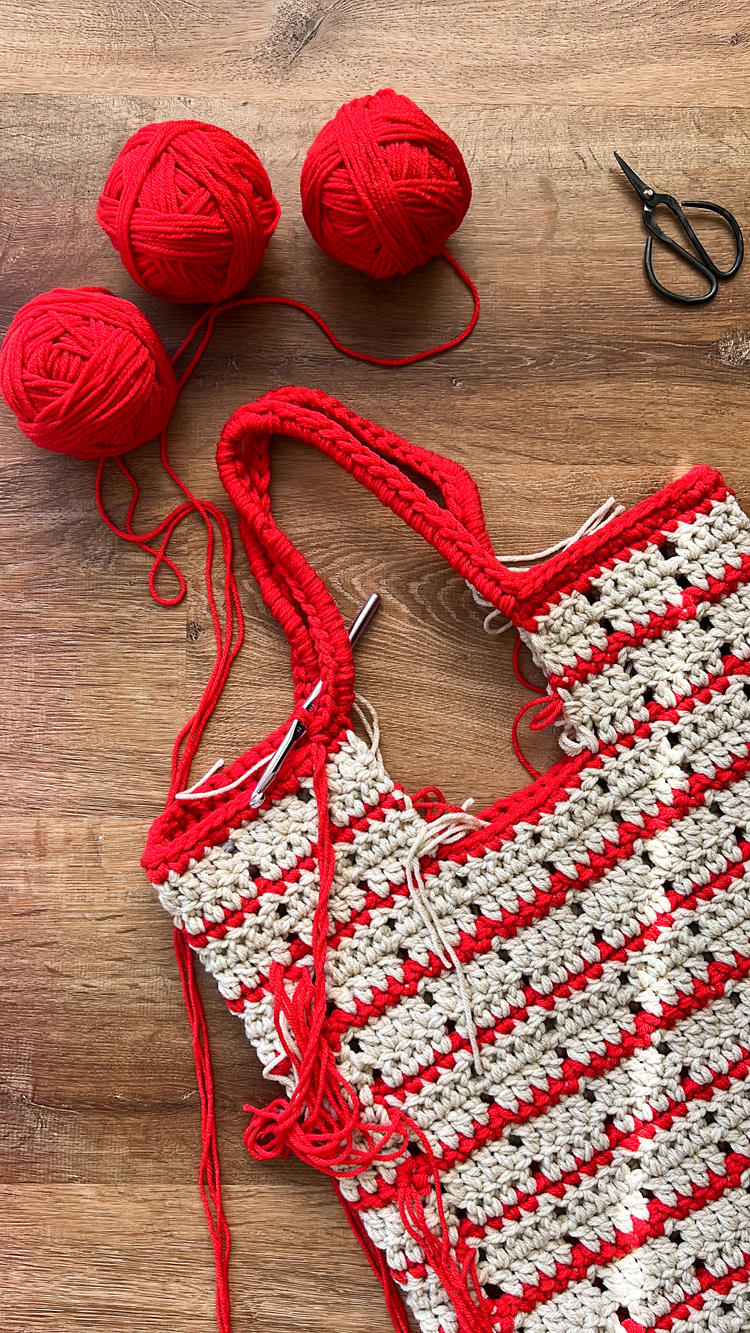
ROUND 2: Ch 1 (which counts as a stitch this time), sc into into stitch. When you get to a chained handle, sc around the chain 35 times. Slide the sc over the chained handle to make sure they are evenly distributed, then sc into the next stitch. Continue sc around the top of the bag to the other handle and repeat the process. When you get to the ch 1 from the beginning of the round, slip stitch to it, and tie off the end, leaving a 3 inch tail.
SURFACE CROCHET LINES
We will be working lines of slip stitches into the all the ch spaces you created while forming your bag.
IMPORTANT: Give yourself plenty of slack and keep your tension LOOSE. If at any time, your slip stitches get too tight and cause puckering, simply pull them out and try again.
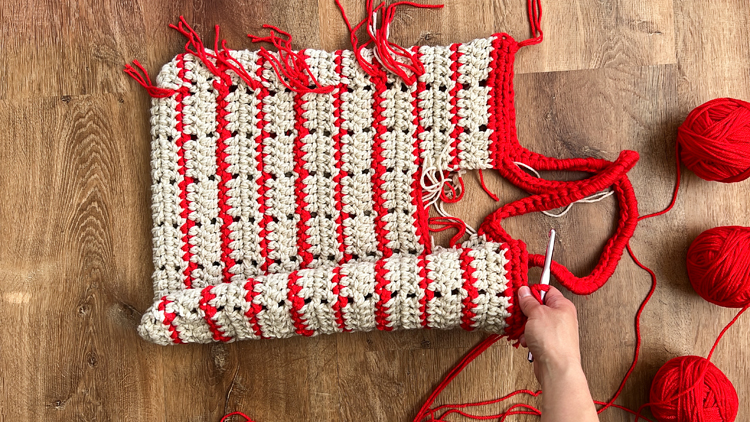
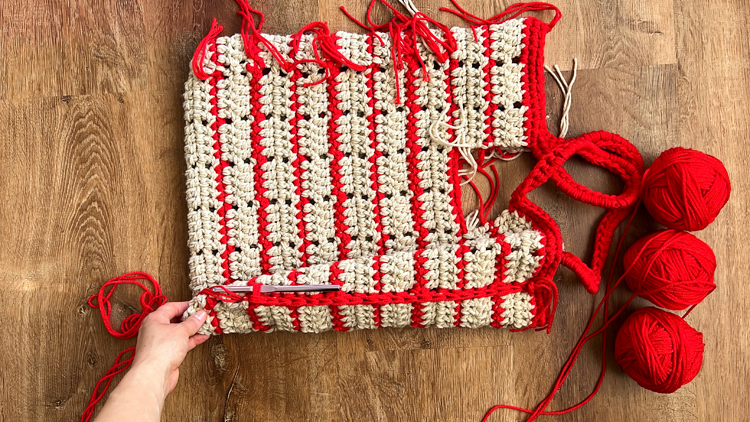
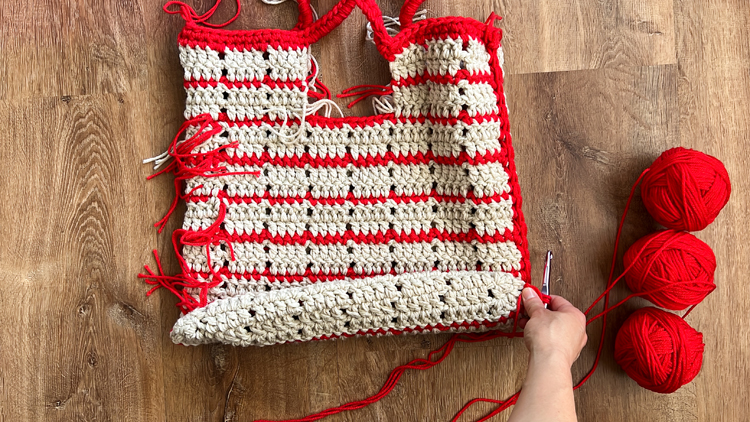
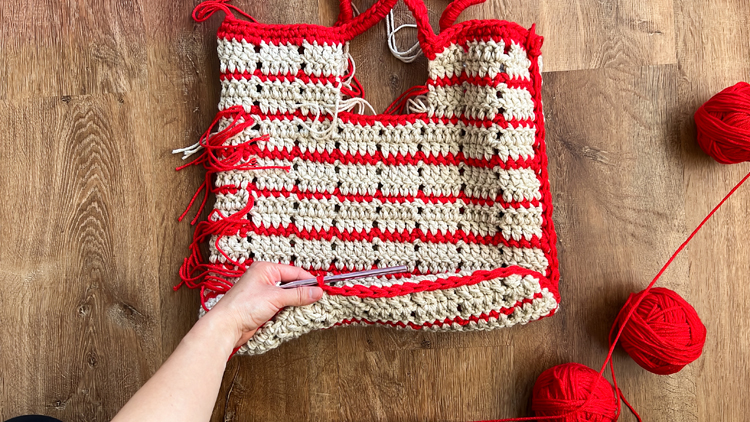
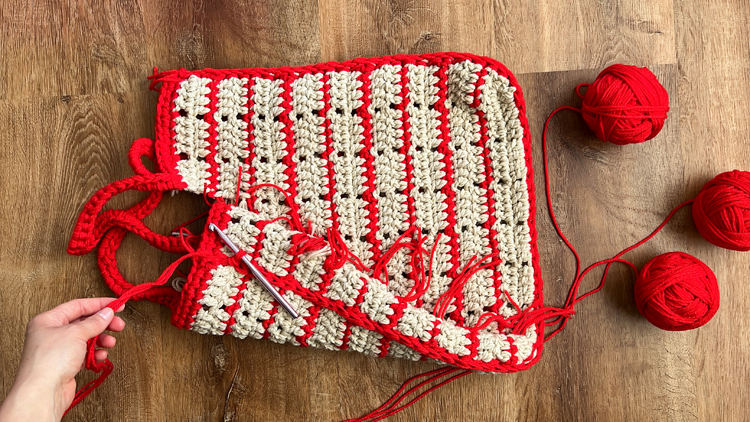
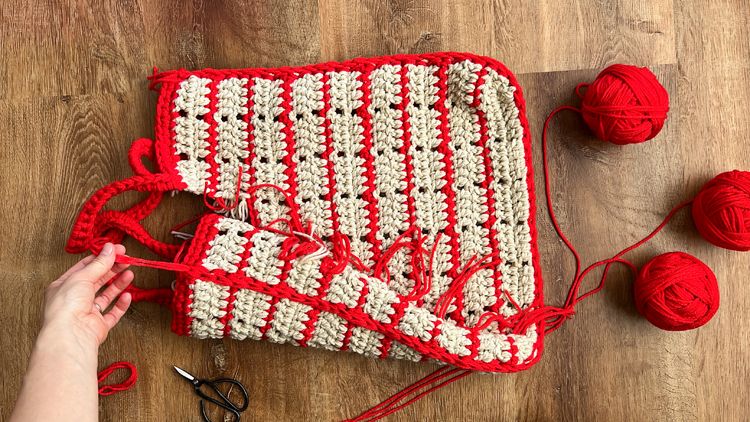
1. Starting at one side of the bag above one of the ch space lines, tie a slip knot with the accent color yarn. Insert your hook into the first row of the accent color at the top of the bag and secure with a slip stitch.
Keeping your working yarn above the hook, insert your hook under the next ch space, yarn over, pull through and then pull through the loop on your hook to complete a slip stitch. Repeat until to reach the bottom of the bag, taking care to work every ch space, no matter how far or close they are together.
NOTE: If you keep the slip stitches loose and consistent, even when connecting ch spaces that seem too close or too far, it will look even in the end.
2. When you reach the bottom of the bag and you run out of ch spaces, turn the bag bottom toward you and continue working slip stitches across the bottom of the bag. There will be ch spaces in there for the other perpendicular lines. Do not use them. Instead, do your best to find a path between the stitches that is consistent and as straight through the bottom as you can make it. Eventually you make it to the other side where the chain spaces show back up.
3. Slip stitch up the other side of the bag until you hit the accent color at the top. Tie off your end and cut a 3 inch tail.
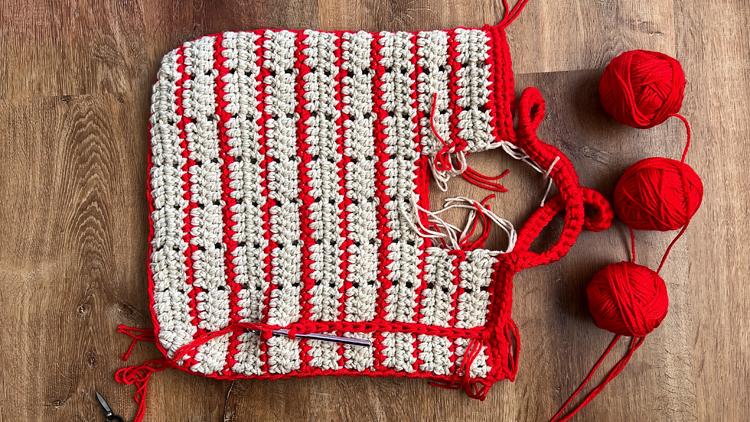
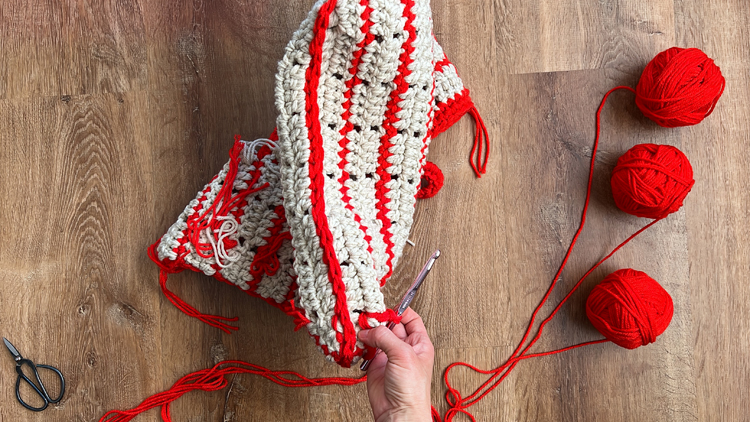
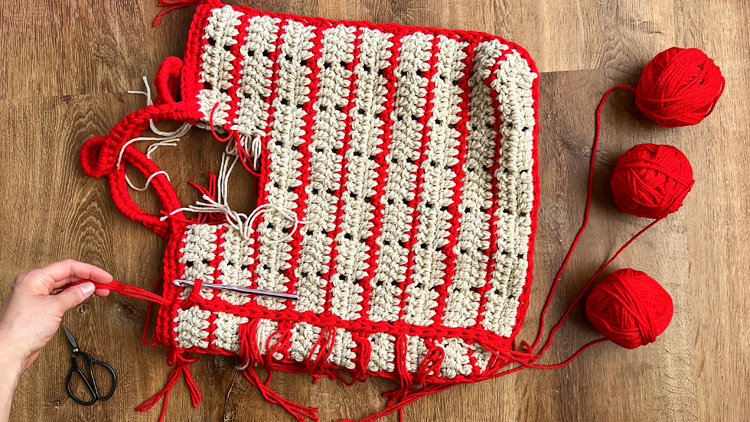
Work lines of surface crochet from the top of the bag, through the bottom and up to the other side for all vertical ch space lines.
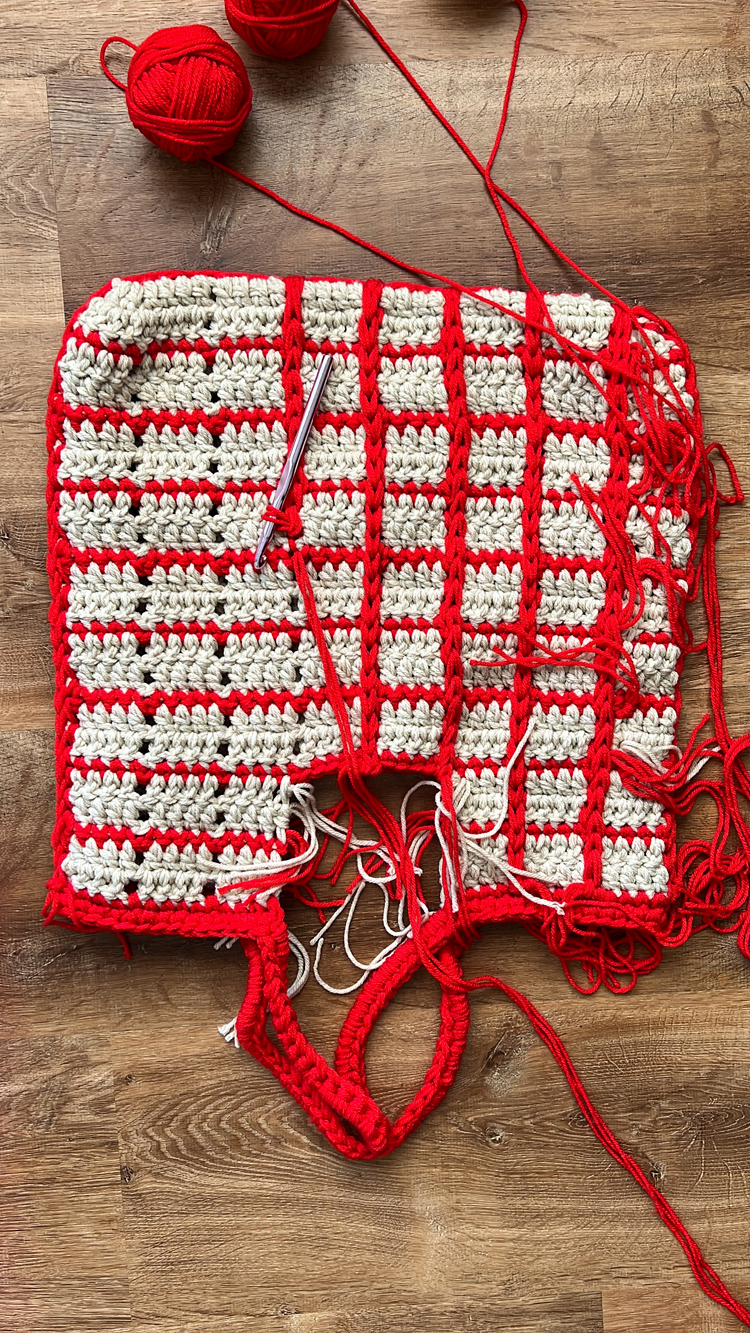
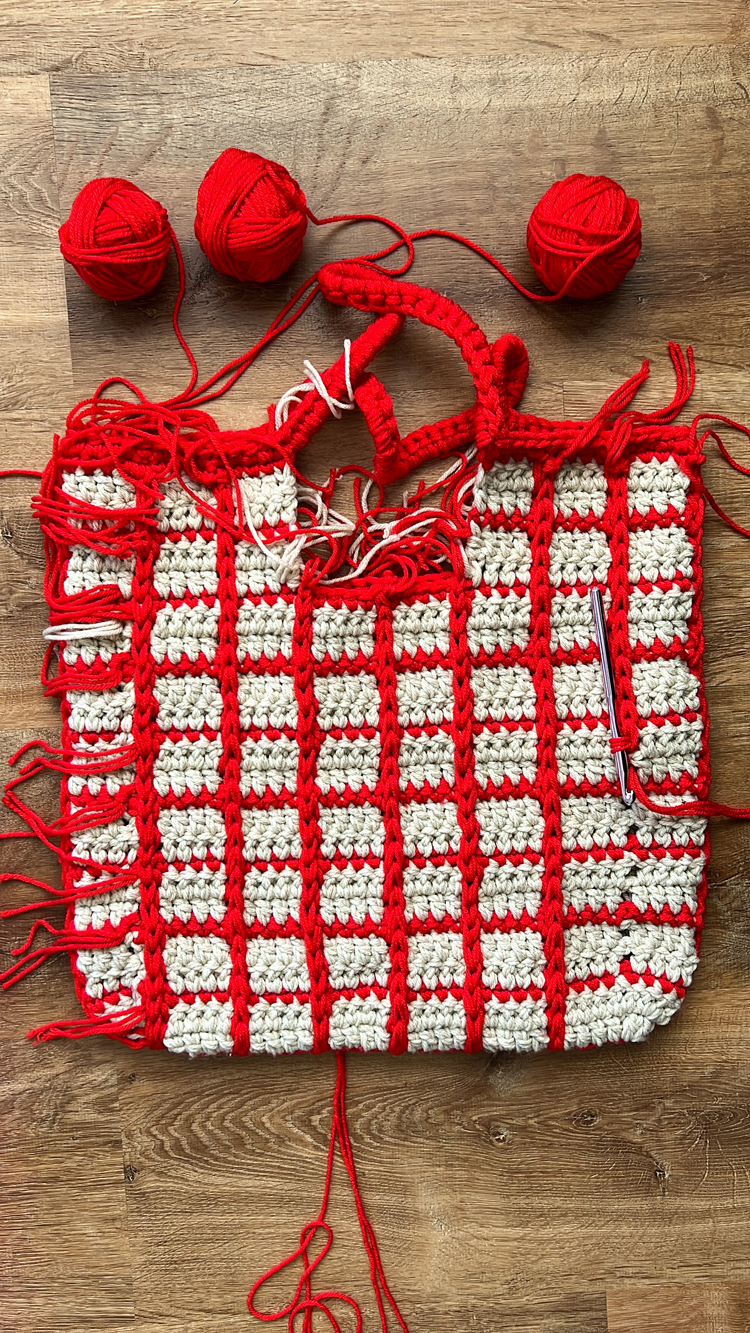
You can work them all in the same direction from the same side, or alternate which side you start with between each line. This is what I did. The end of the video gives a better visual of what I mean, if you need clarification.
After you fill all the ch space lines, you’re in the home stretch!
WEAVE IN ENDS
I gave this step its own section because with all the color changes, there are A LOT of ends to weave in.
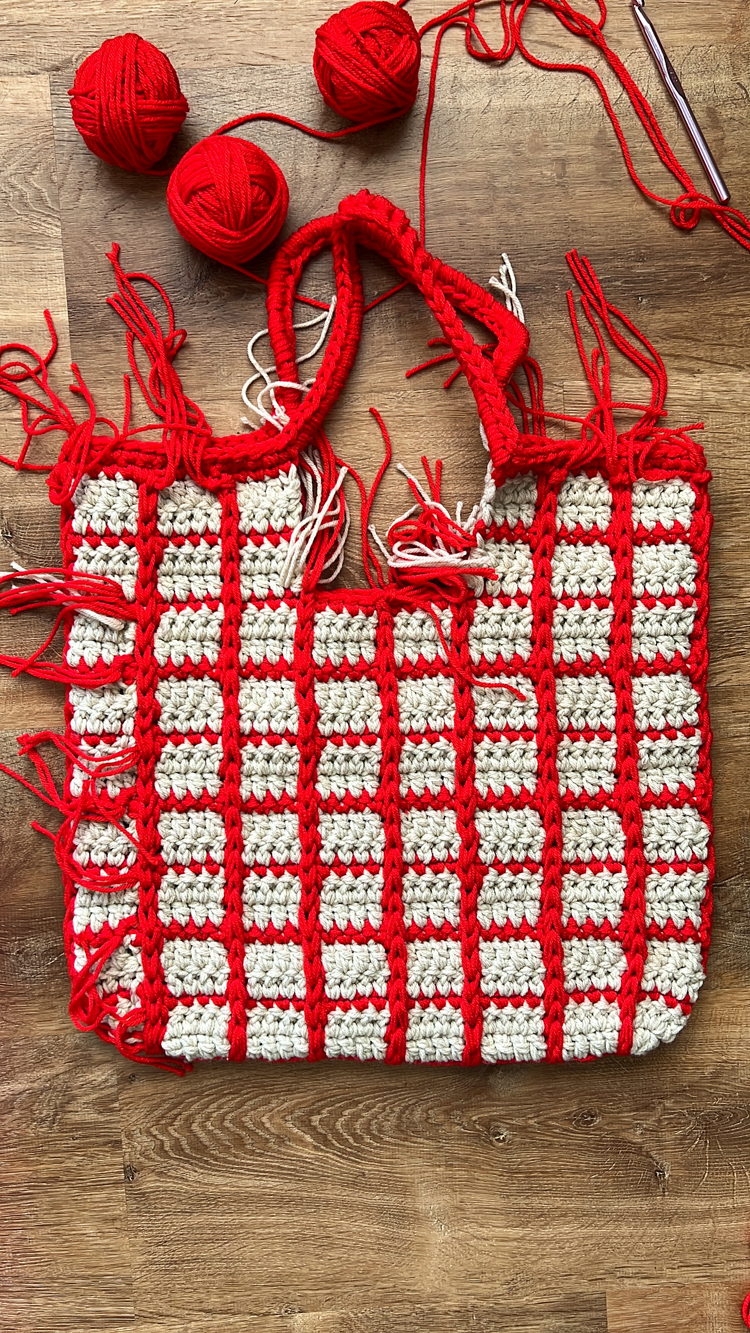
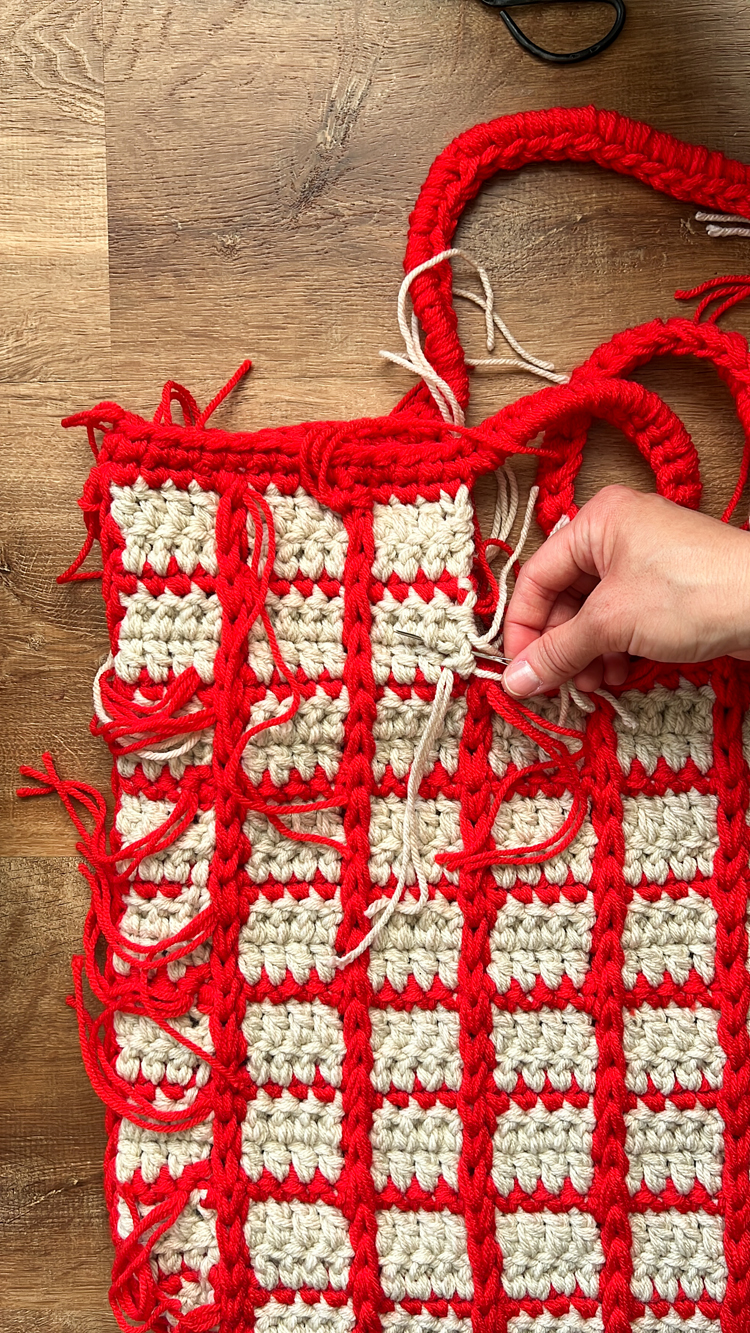
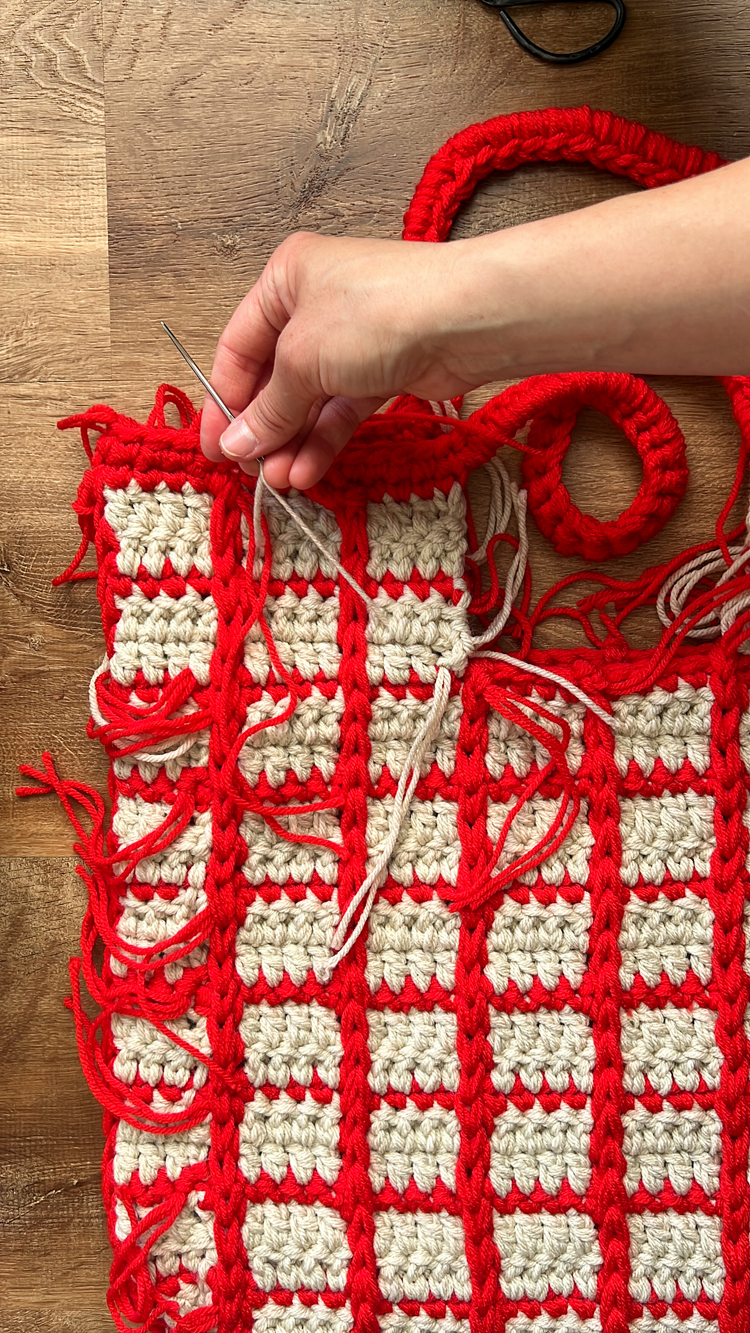
I tried to minimize the number of ends, but there was just no clean way to carry the accent yarn through the main color rows without it looking messy. The one plus side to weaving in ends, is that you can use them to strengthen any seams, tighten up loose stitches, and clean up the accent row lines as needed.
Take each strand, thread it onto a yarn needle and weave it into it’s matching color for a couple of inches. Make sure it looks good on both sides, then cut off the excess. Repeat for all the ends.
Done!
Now, you have a choice…
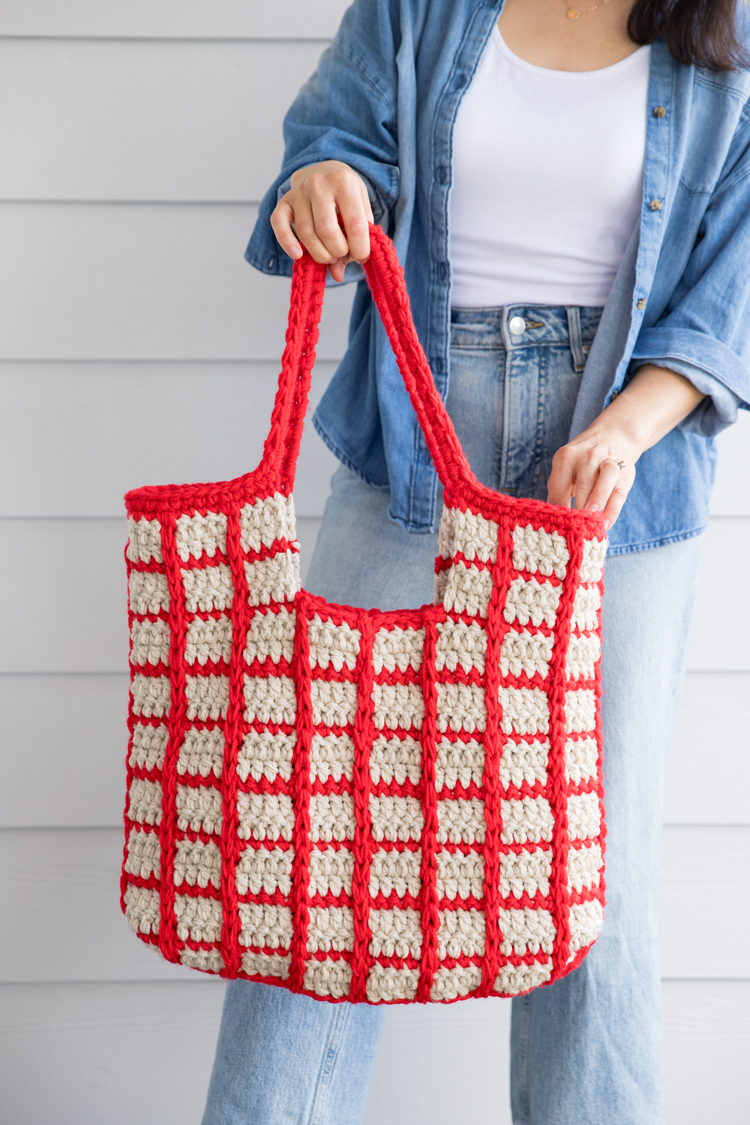
You can leave the surface crochet on the outside of the bag which has a bolder look and texture, or you can turn it inside out.
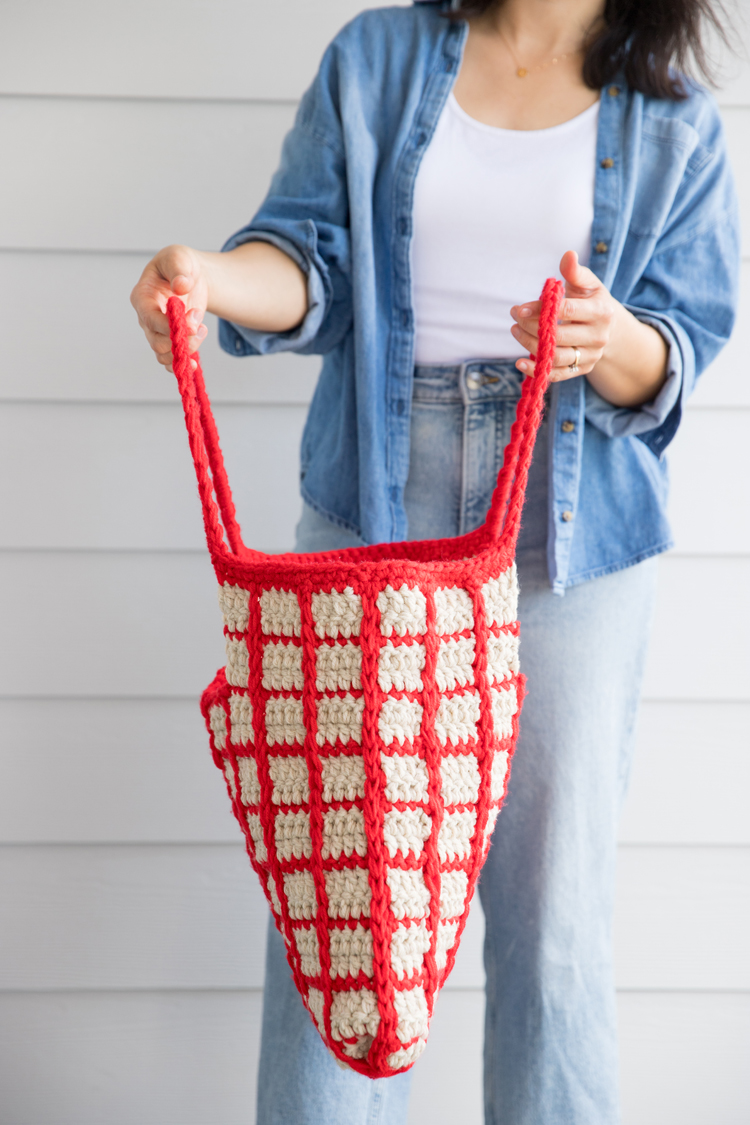
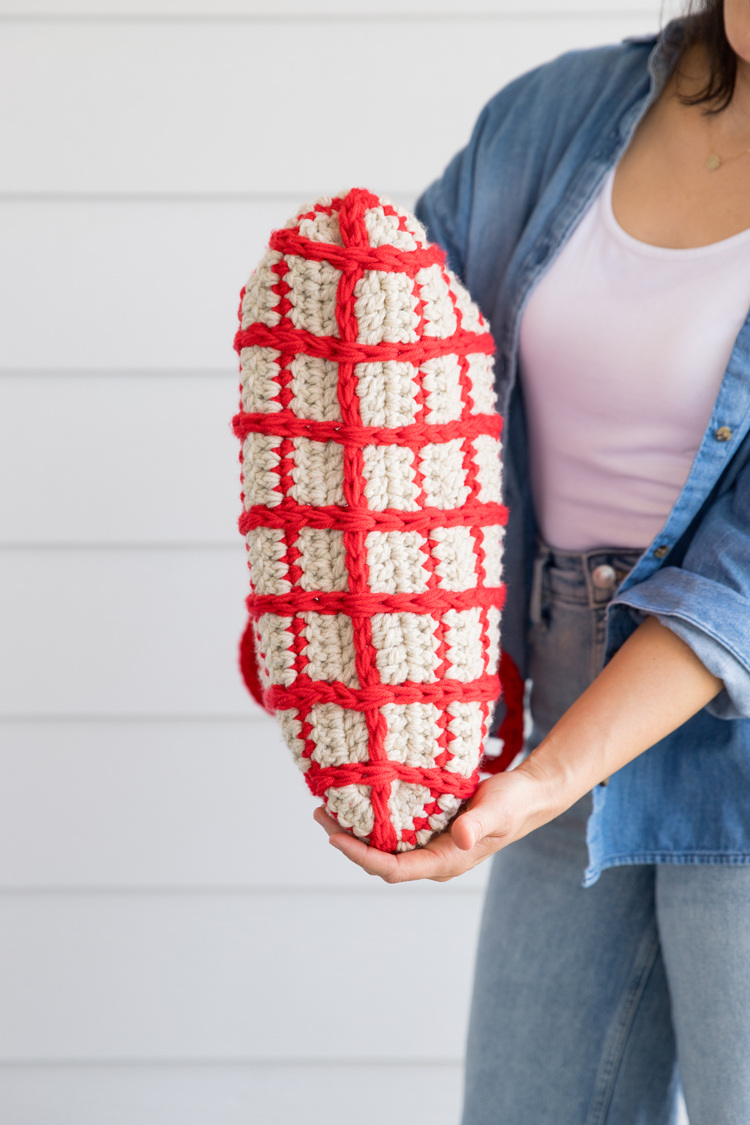
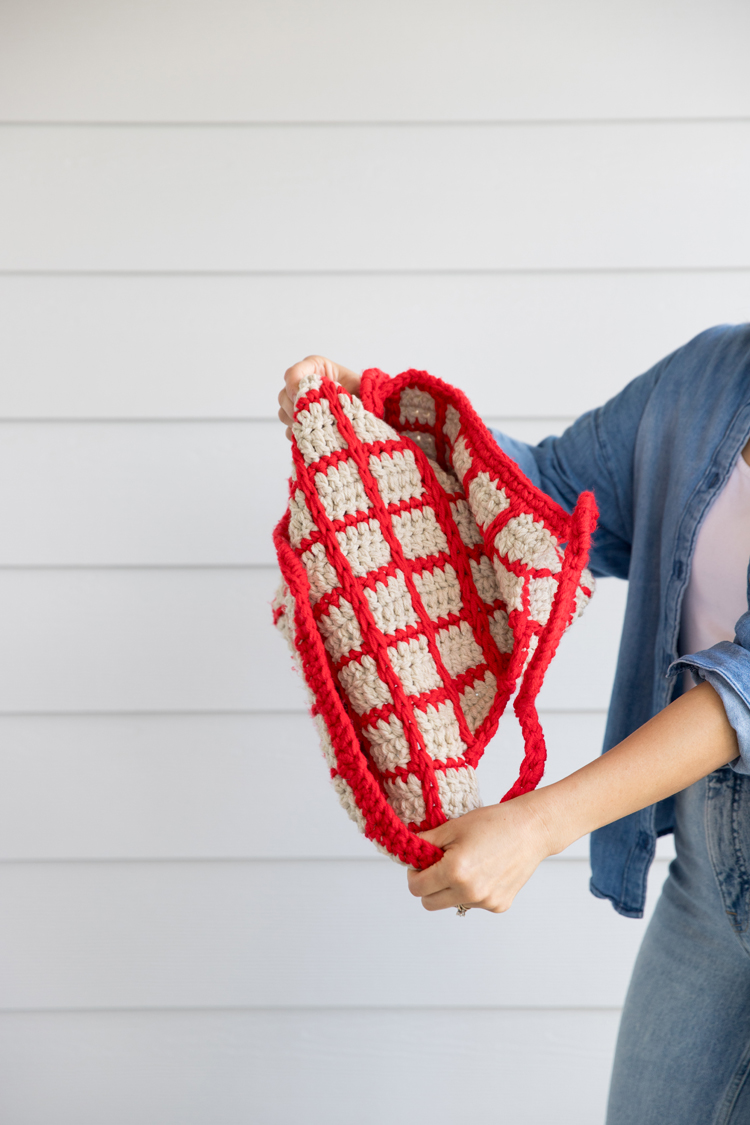
The other side gives a more seamless, smoother look.
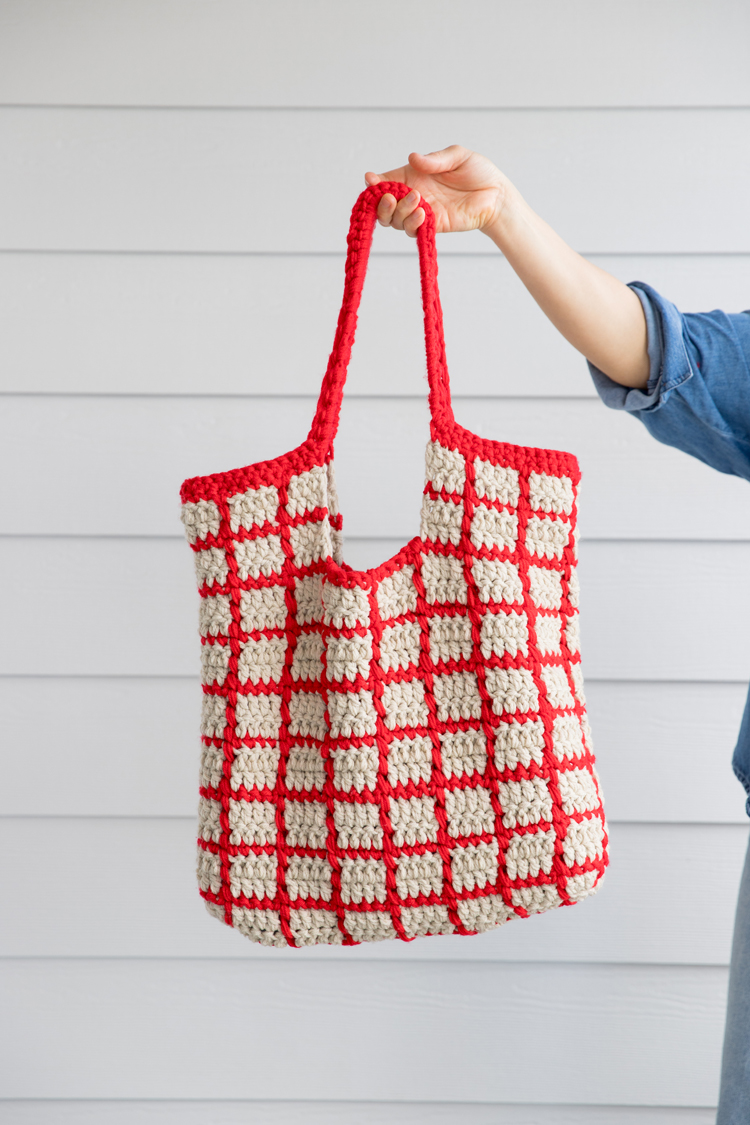
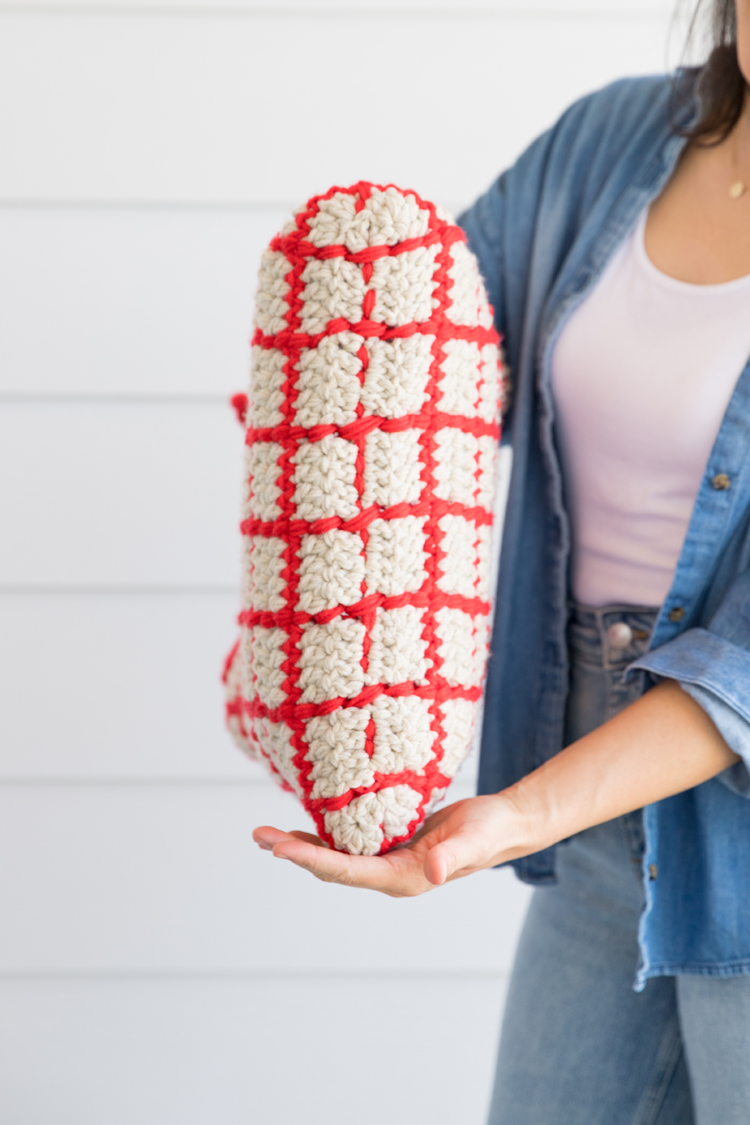
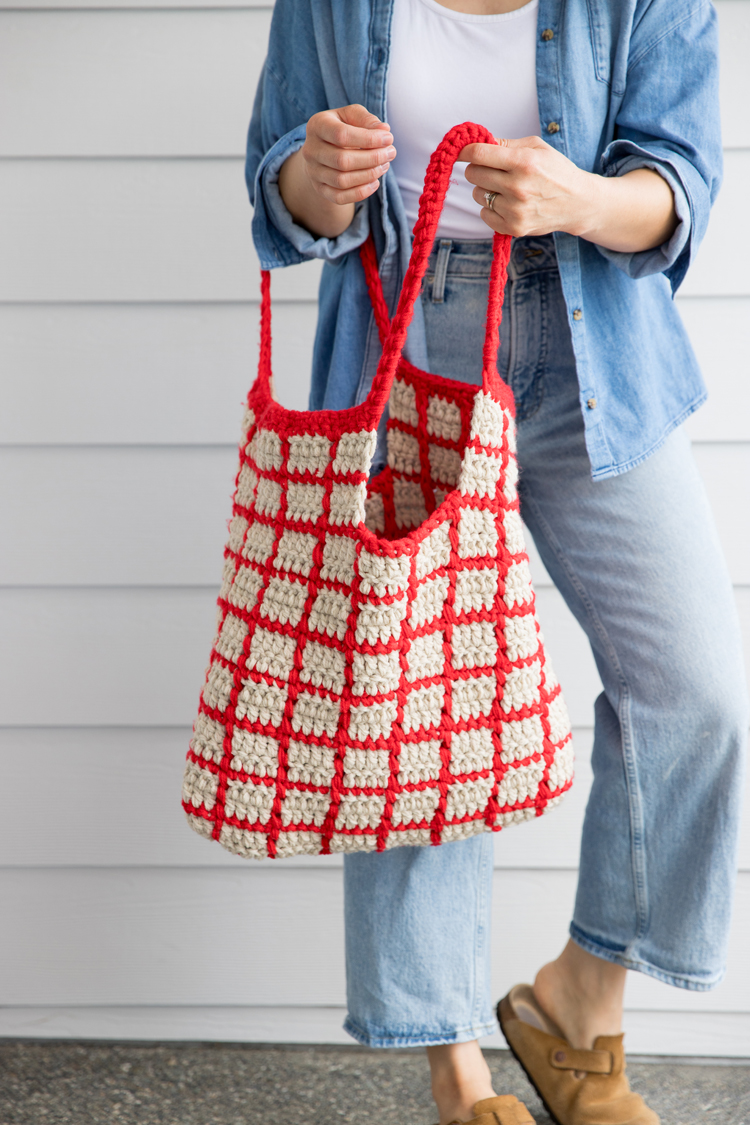
I thought for sure I preferred the smoother, more muted look, but when I look at the pictures, the bold lines sure are fun. Either way, it’s reversible!
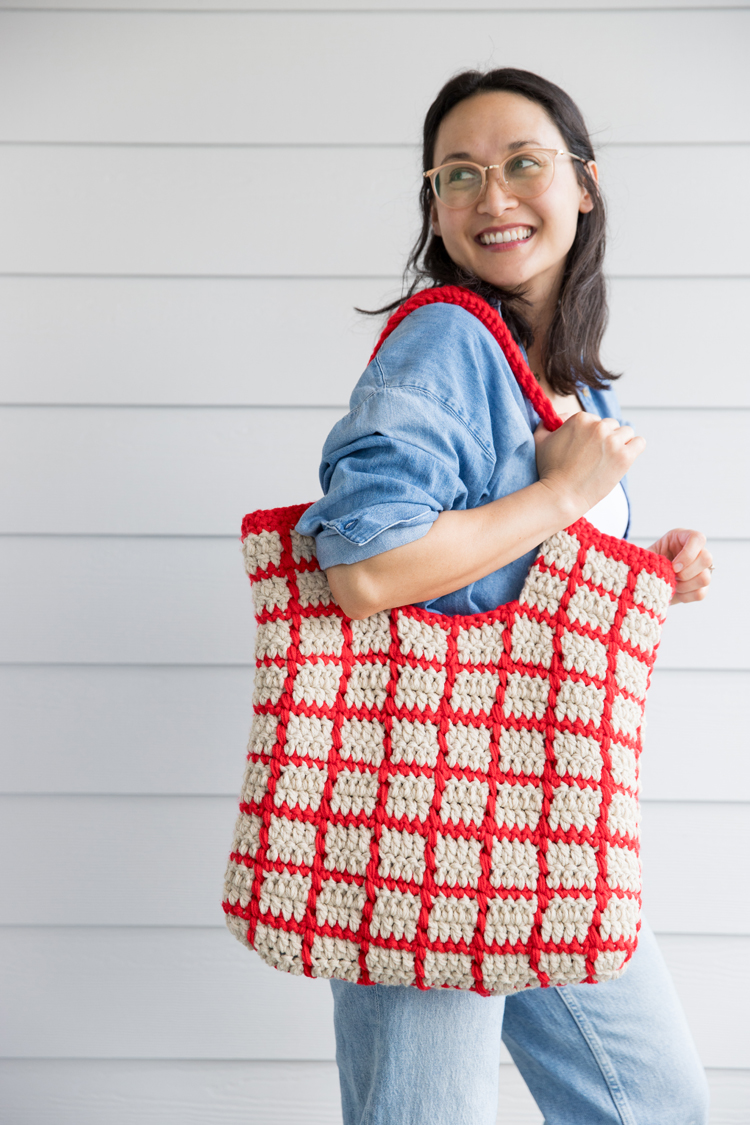
This post is sponsored by Hobby Lobby. All reviews and opinions shared here are sincere.


I’m excited to make this bag.can you tell me when you weigh the yarn, what setting on the scale do you use and how much weight is the 220 and 150? Thank you
Sure! I use grams because that is usually what is listed on most yarns. Makes the math easier.
Hi is there a printable version of this pattern available?
I’m sorry, but there isn’t. Please feel free to copy and paste the pattern into a word document for your own personal use.
Hi! Can you please upload the video on YouTube? The one of the website is grainy and hard to follow because I can’t pause and replay it without getting cut off and it starting over.
Oh dear. I am so sorry that you are having issues with the video quality. I will pass this onto my ad agency which hosts the video. I do have plans to start posting my videos to YouTube. It will take me some time before that happens though. I apologize for the delay. Until then, I would try clicking on the settings gear icon and ensuring it is set at the highest setting. Depending on the length of the video, sometimes the quality is set lower so that the uploading speed doesn’t bog down my site and ruin the user experience. That is the case with this video. It takes about a minute, but the graininess goes away and is clear when viewed on my 15 inch laptop screen. Anything larger than that and the quality will probably not be that good. Hopefully I can upload bigger files to YouTube.
The video quality should be totally clear on a phone or tablet though.
Does that help at all?
I love this crochet tote pattern. The windowpane design is so pretty and the colors you chose look great. I can’t wait to make my own windowpane crochet bag. Thanks!
Can you please help
Me with the surface crochet part? I’m almost done but unclear on how to do this part? Am I going into the red skipped spaces as well as the chain one spaces with the primary color? Or just into the chain one spaces made by the white color only? Thanks
Hi Melissa,
I am SO sorry that I just saw this. You will go into the red spaces and the white spaces when surface crocheting. If have more questions and you want a faster response from me, dm me on instagram. I’m @deliacreates over there.
Thank you for this pattern . Can you enlarge the video? It’s hard for me to see.
Sure! If you look on the bottom right hand corner of the video, there are two arrows pointing away from each other. Click on that to enlarge it to full screen. It may take a minute for the video to clear up depending on your internet speed. You can pause it for a bit while it does that.
If that doesn’t work. I also have it on youtube: https://www.youtube.com/watch?v=e-NuRepNWvM&t=7s
I hope that helps. If you have any more questions, the fastest way to get ahold of me is via direct message on instagram, I’m @deliacreates or through email: [email protected]
Excellent pattern made one for my wife; using all one color red, smooth side out, she loved it. Got to find a pattern for a purse for her now. Thank you.
Sounds lovely! What a lucky wife. I am so glad you liked the pattern.